Zenyo Workforce simplifies HR management by allowing you to easily configure Access Management settings such as managing Roles, Module Security, and User Management.
Role
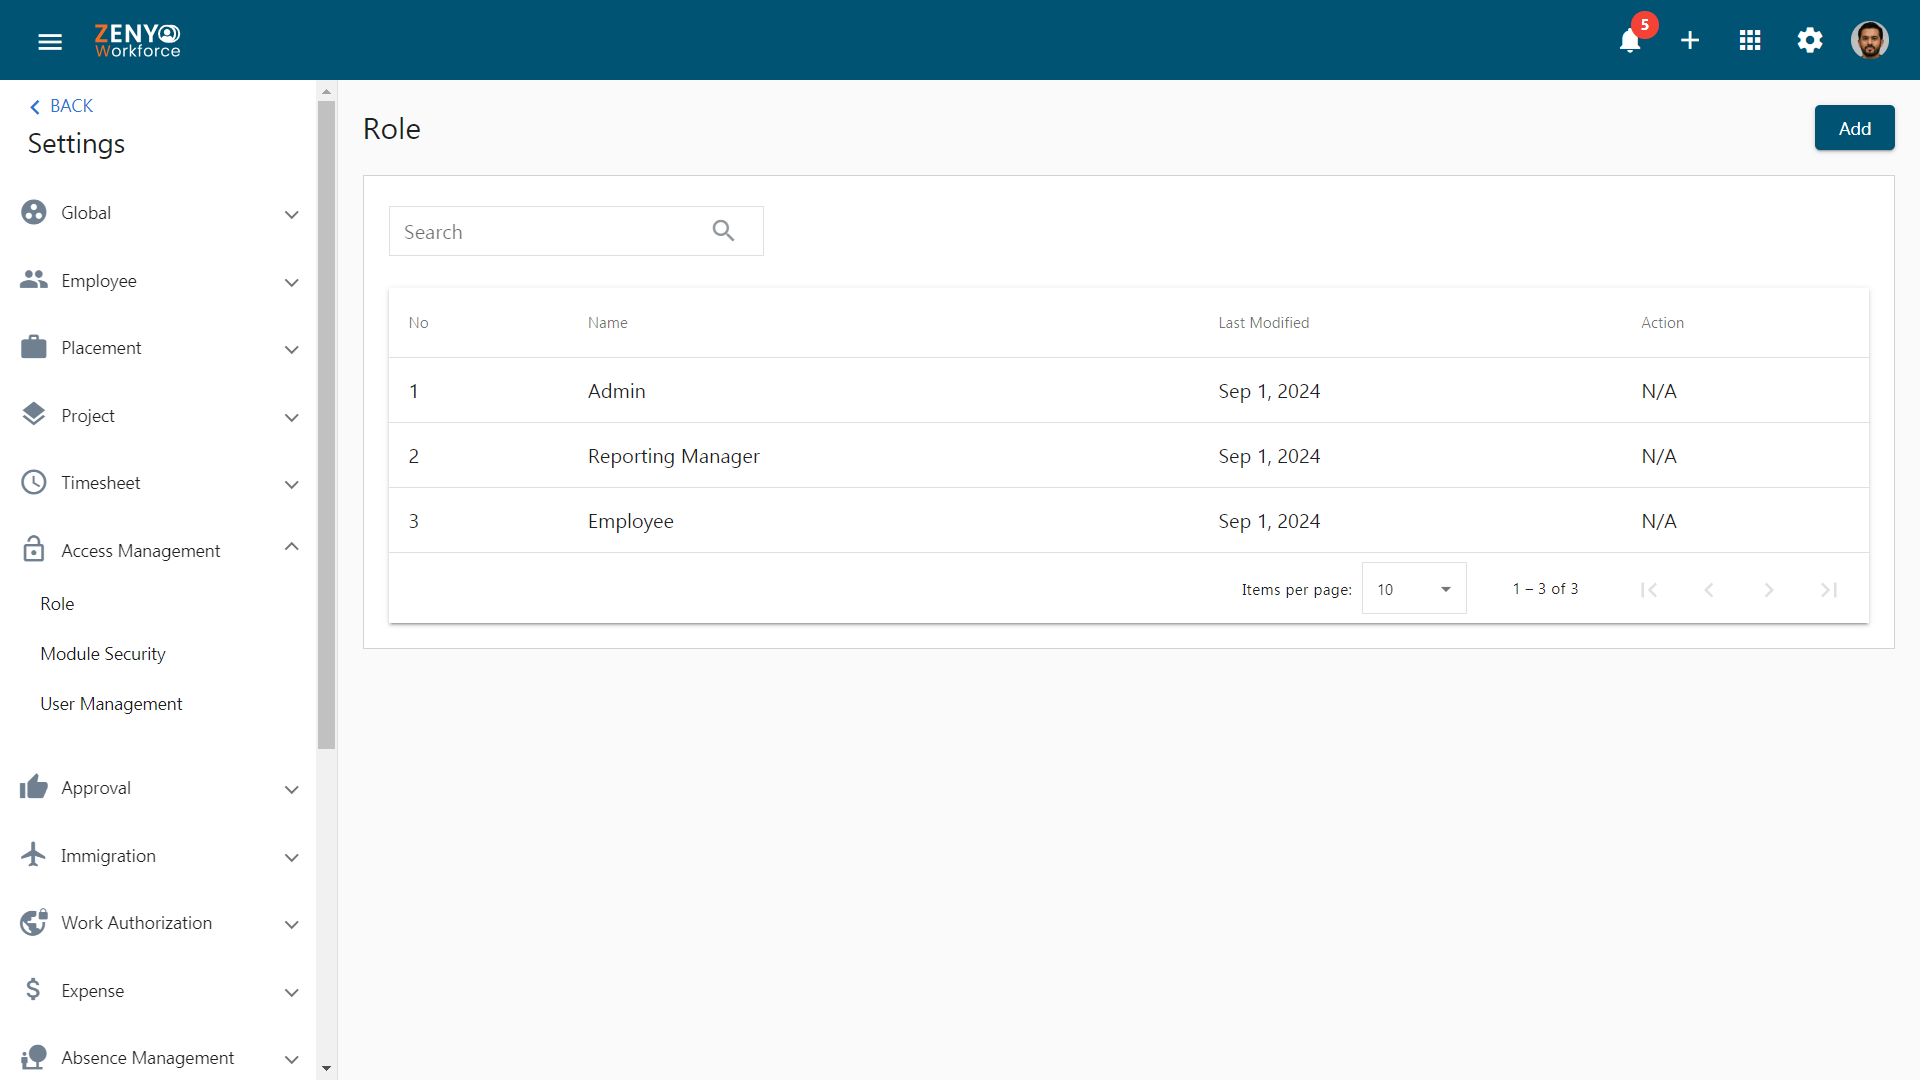
- In the Access Management settings menu, navigate to the Role sub-menu.
- By default, you can view the list of available roles, which cannot be edited or deleted.
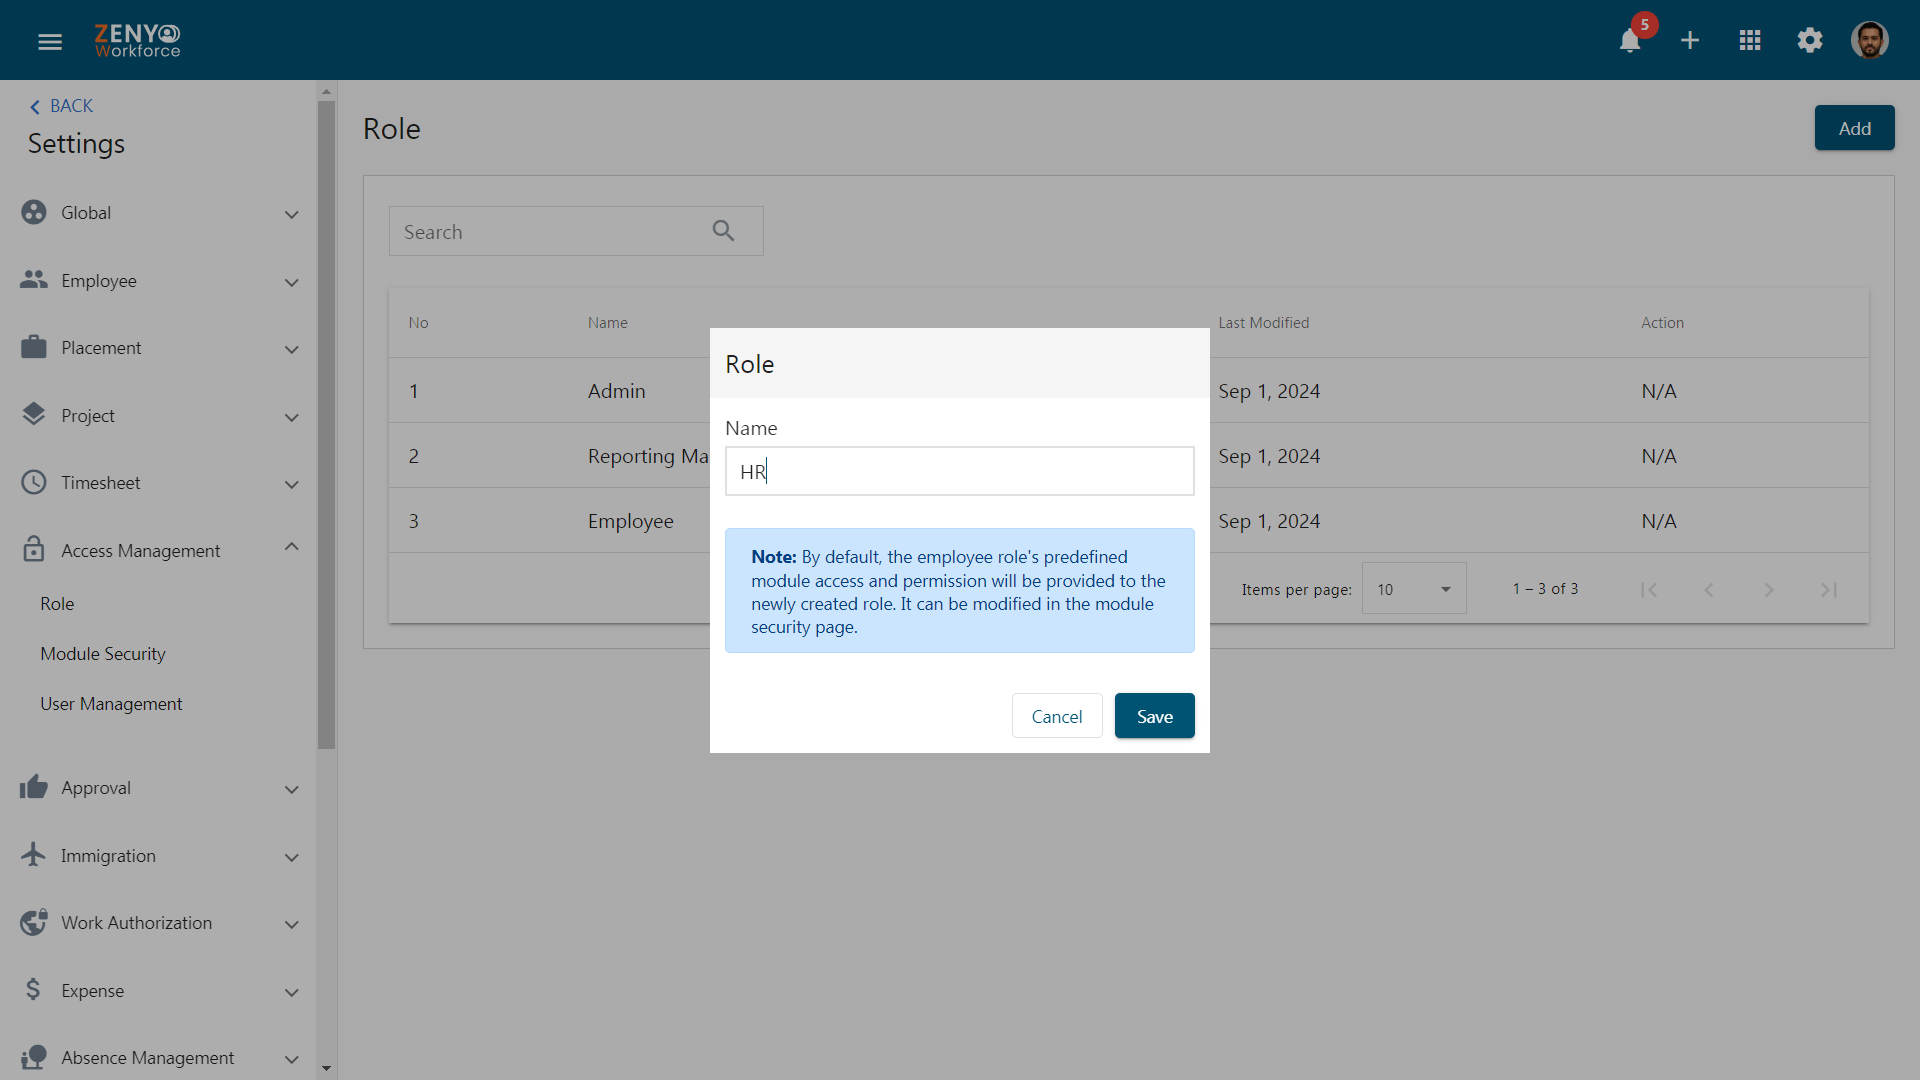
- Use the Search Bar to search for a specific role. To add an extra role, click on the ‘Add’ button.
- Specify the Role Name and click on Save. The role gets added to the list.
- If you want to edit the role name, click on the edit icon. If you want to delete the role name, click on the delete icon.
Note: You cannot delete a role that is already in use
Module Security
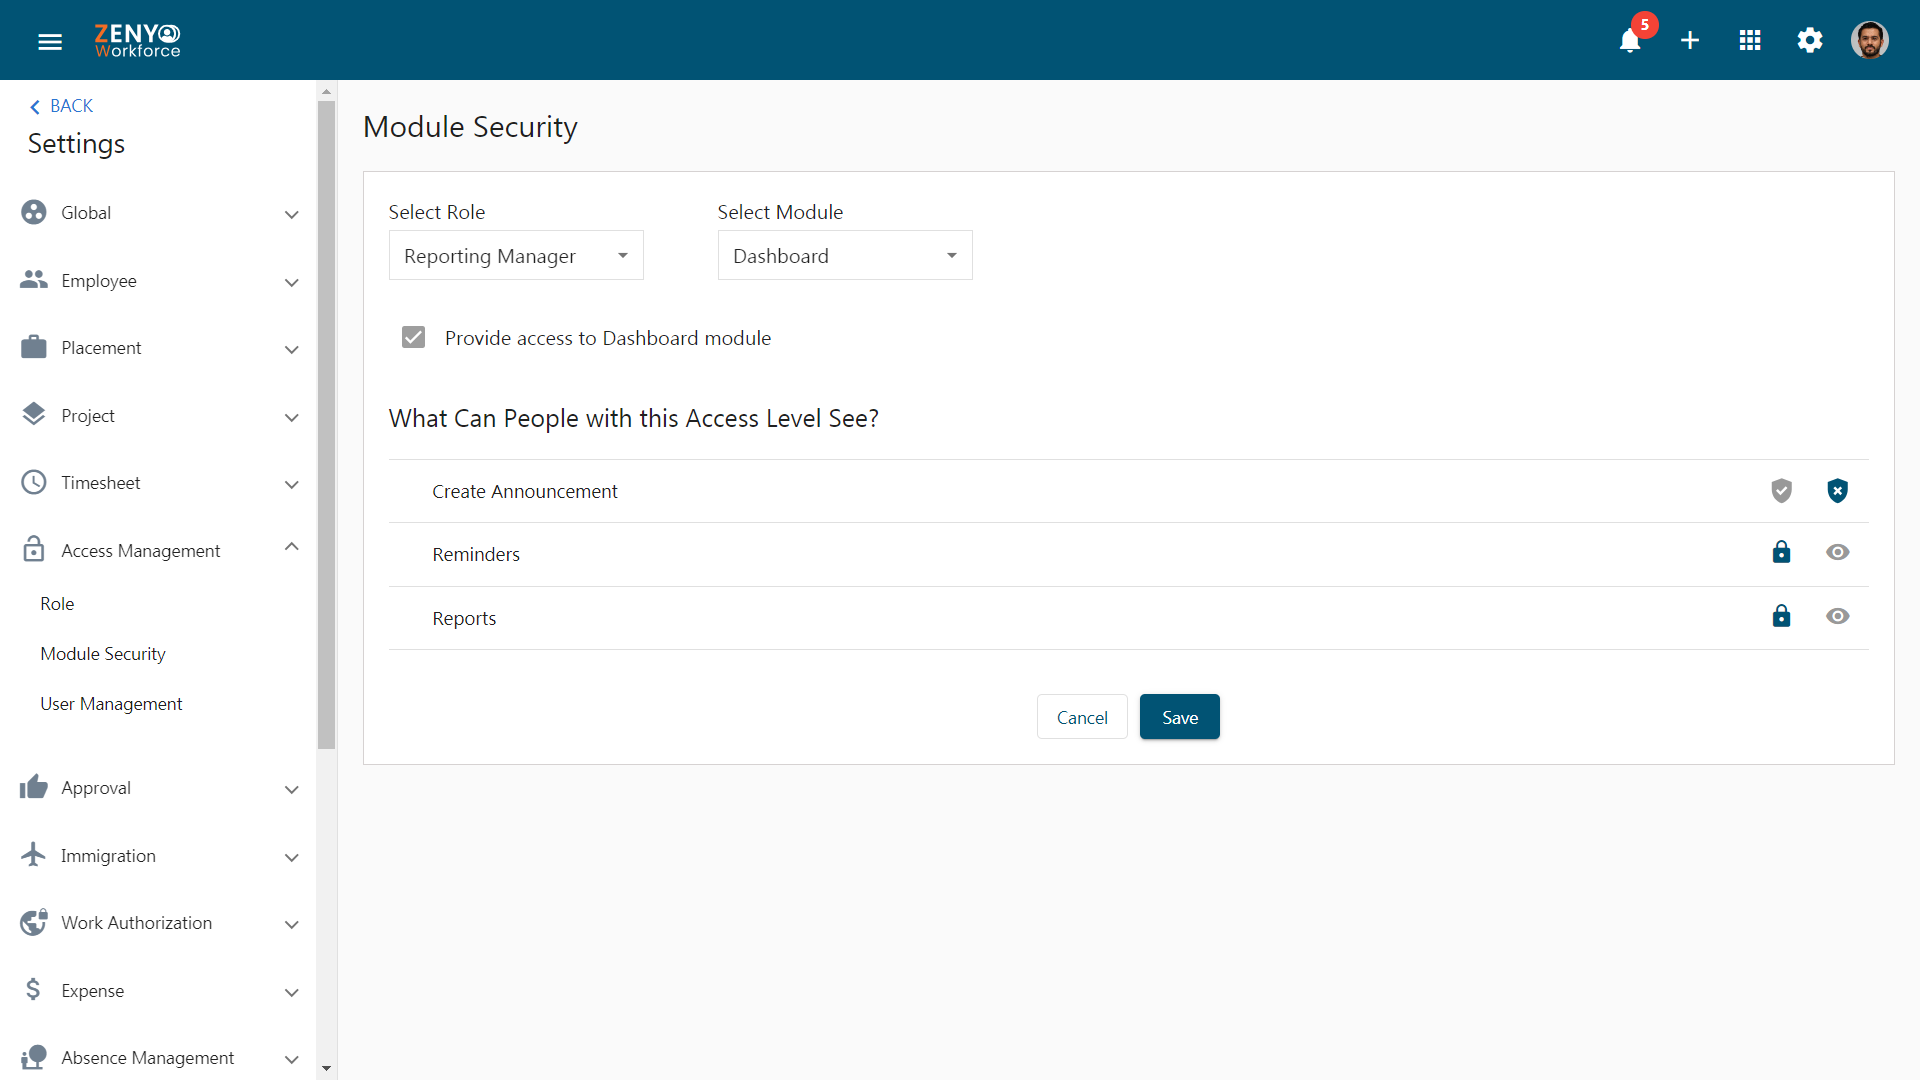
- In the Module Security sub-menu, you can set permissions for specific roles within a module, controlling what actions they can perform within those modules.
- Choose a role from the drop-down menu, then select a module. For example, select the HR role and choose the Dashboard module to define permissions.
- Access to some modules, like Dashboard, is enabled by default. Certain modules, such as “My Info,” “Timesheet,” and “Expenses,” always have default access regardless of the role and cannot be disabled.
- In the “What Can People with Access Level See?” section, you can specify the actions the selected role can perform within the chosen module.
- For example, select “Employee” from the “Select Module” dropdown to define access levels for viewing employee details.
- On checking the checkbox, you can determine the level of information that role within the organization. These are the options:
- The first access level is All Employees. Choosing the level grants access to view details of all employees in the module.
- Choosing Direct Reports allows access to view details of employees who are immediate subordinates.
- Direct and Indirect Reports access level enables access to view details of both their immediate subordinates and those who report to those subordinates.
- The Self-level enables employees to view only their details in the employee module.
- Finally, there’s the Only Some Employees access level. This level allows granular control enabling access to employee details based on role, department, office location, or employee type.
- For this example, select “All Employees”.
- In the “What Can People with this Access Level See?” section, you will see various icons indicate the actions the selected role can perform:
- For example, for Add New Employee, you will see two icons: “Allow” to grant permission to add new employees or “Restrict” to deny it.
- In the General section, you will see a different combination of icons. The No Access icon, when clicked, means the selected role can no longer view the general details of the employee. Clicking the View Only icon allows the user to view the employee details without editing them. Finally, the Edit icon enables the selected role to edit or delete the general details of all employees.
- Another combination in the My Jobs Section: is the No Access and View Only icons. Clicking No Access means the selected role can’t view the My Jobs section of any employees. Clicking the View Only icon means these details can only be viewed, not edited.
By setting these permissions, you can determine what actions the selected role can access and Perform.
User Management
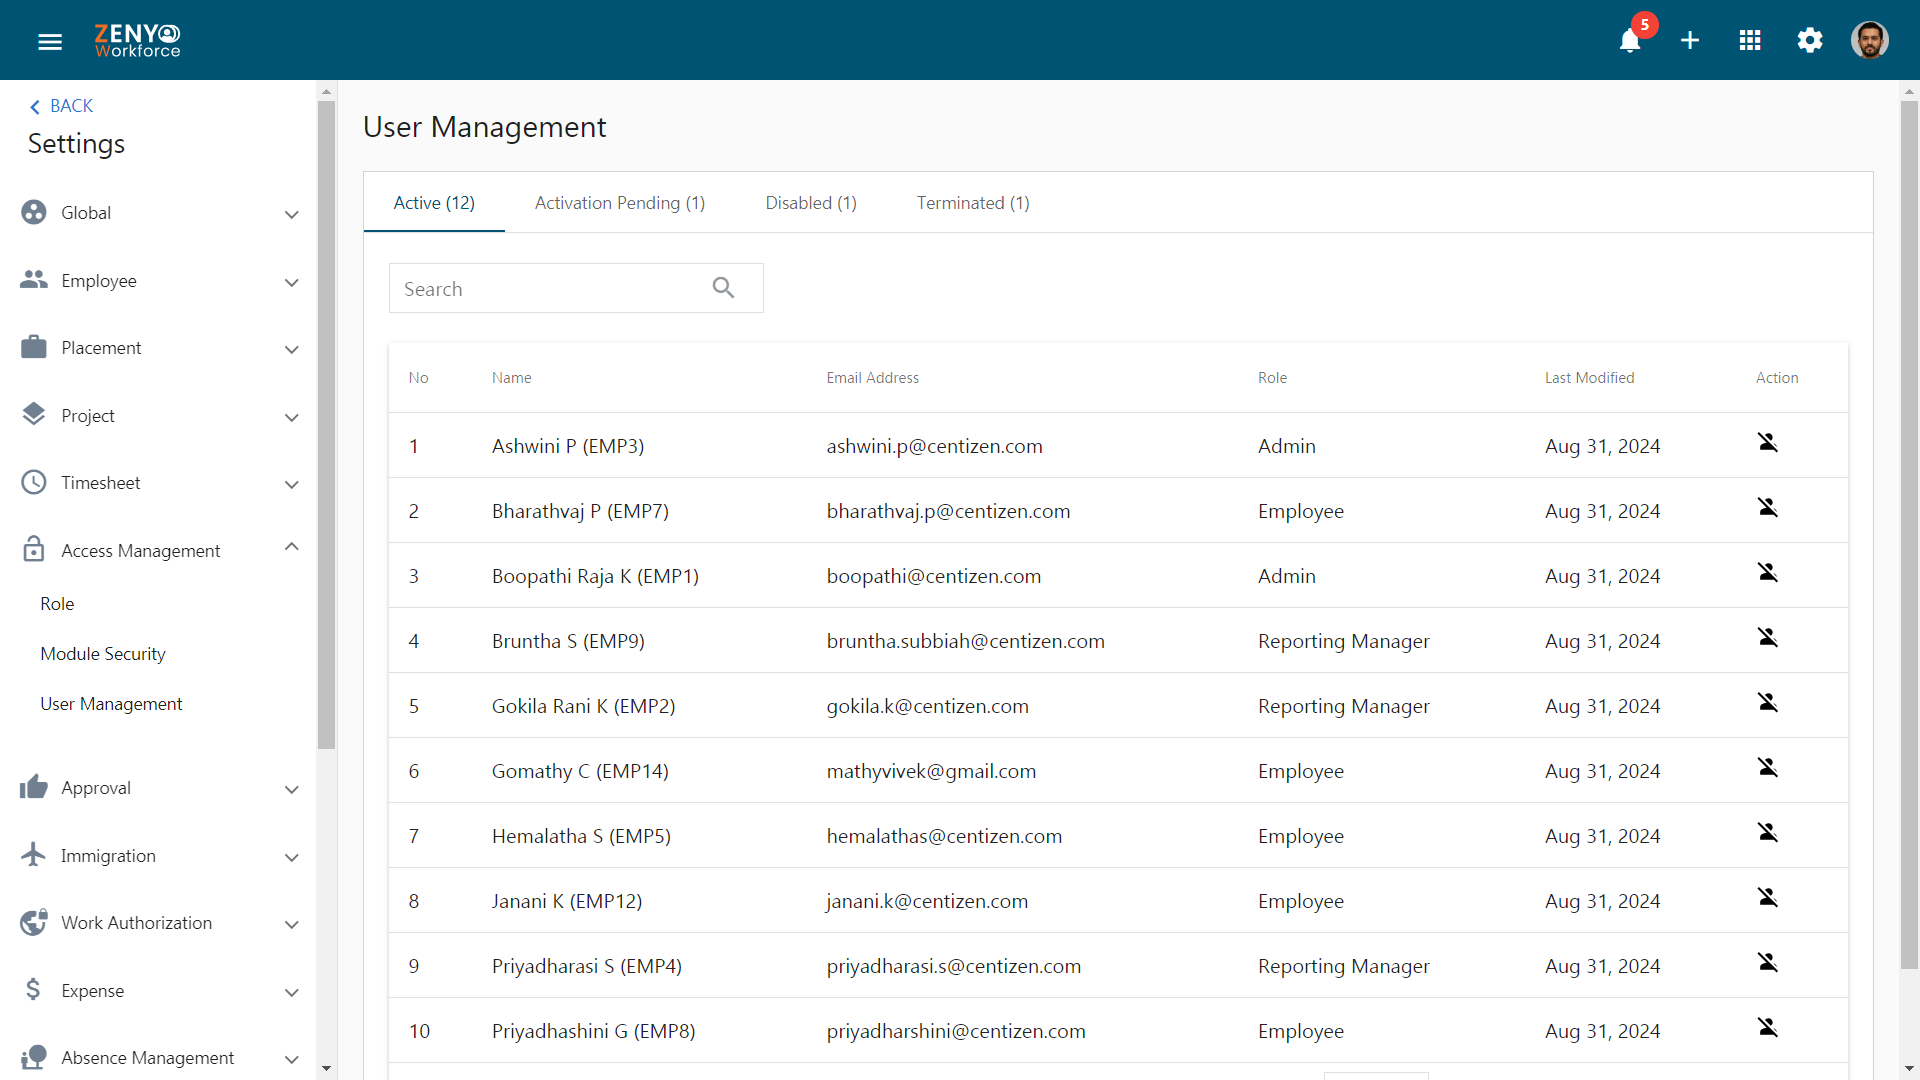
Active Tab
- In the User Management submenu, under the Active tab, you can view a list of active user accounts.
- You have the option to disable a user account by clicking on the Disable icon and then confirming by clicking the Yes button in the pop-up window. Note that users in admin roles cannot be disabled.
Activation Pending Tab
- Under the Activation Pending tab, you can view a list of accounts for which activation is still pending.
- You can send an activation link to the user by clicking on the Send Activation Link icon. In the pop-up window, you may edit the email address. Updating the email address in this section will automatically change the employee’s email address in the system. If you wish to keep it as it is, you can leave it unchanged. Once you have verified and made the necessary changes, click the Continue button to proceed.

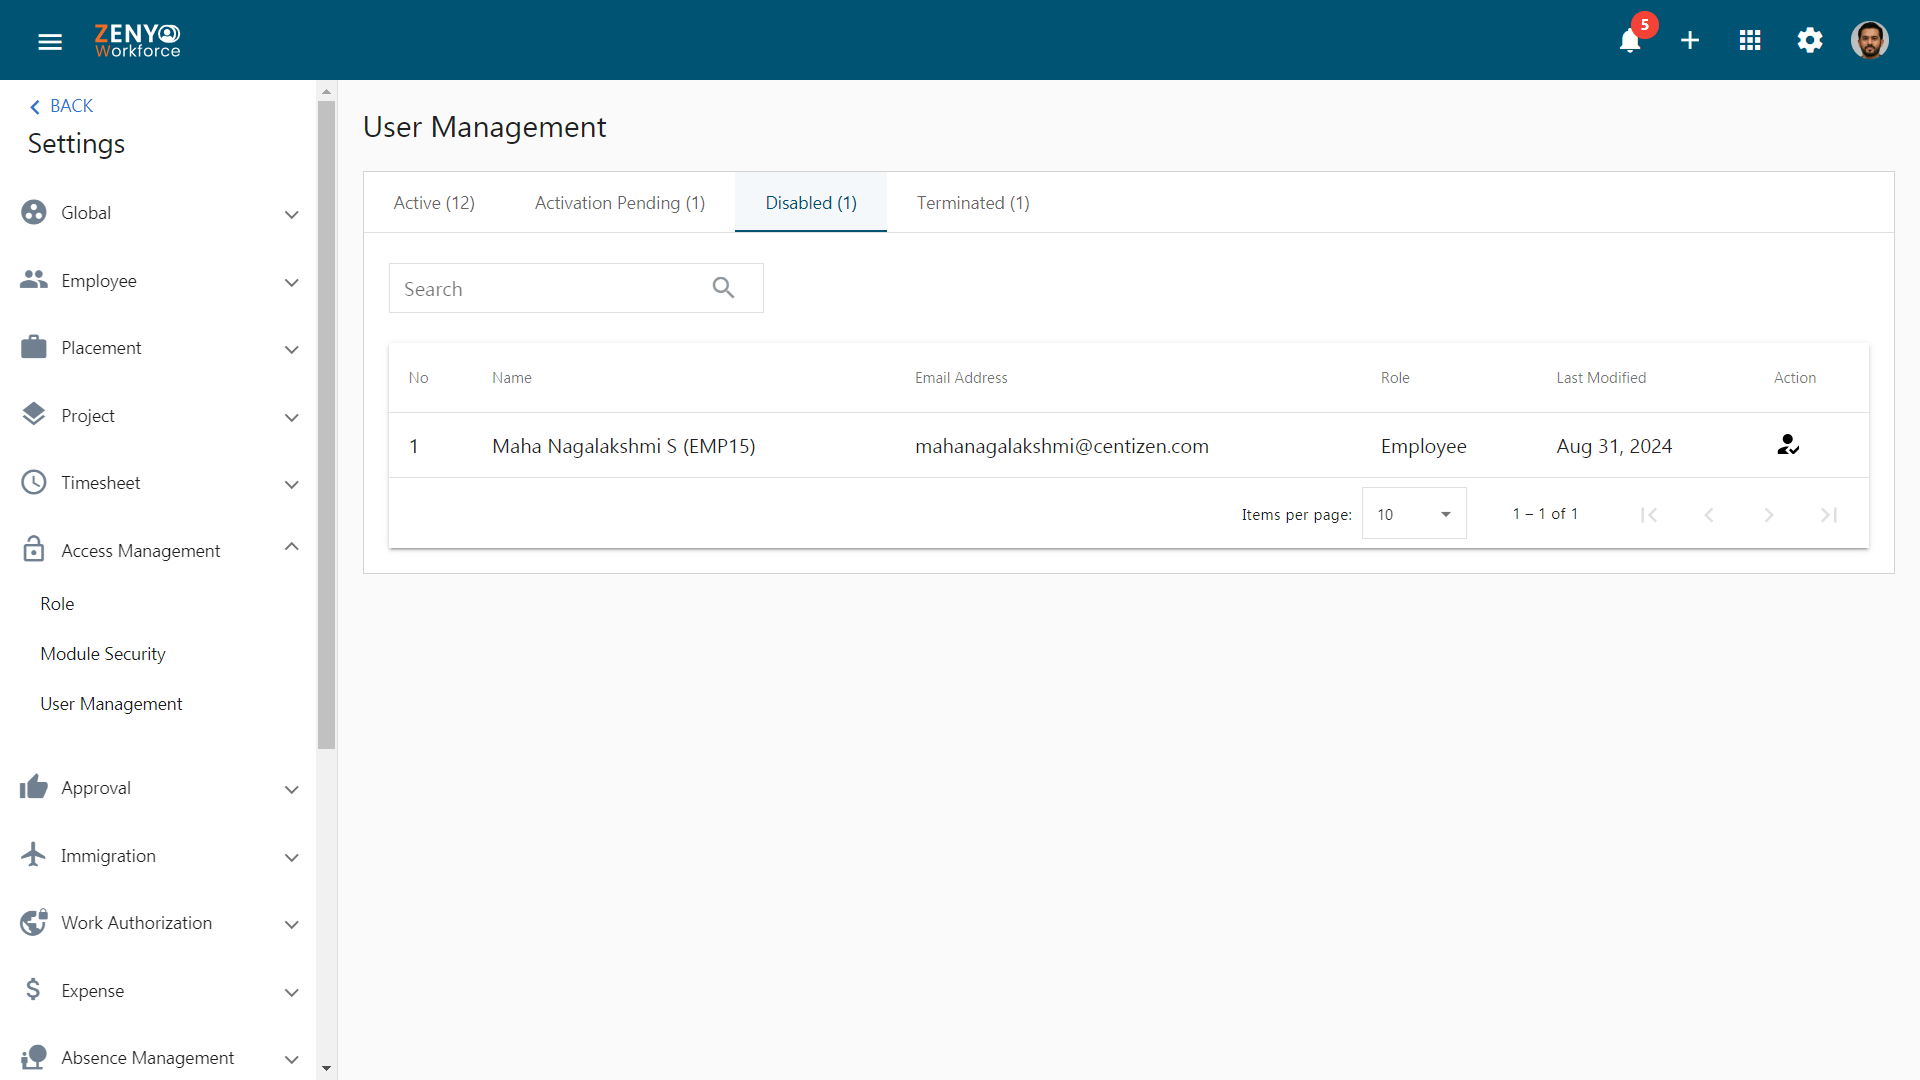
Disabled Tab
Under the Disabled tab, you can view a list of disabled user accounts. From here, you can reactivate any disabled accounts by clicking on the Activate icon and confirming by clicking the Yes button.
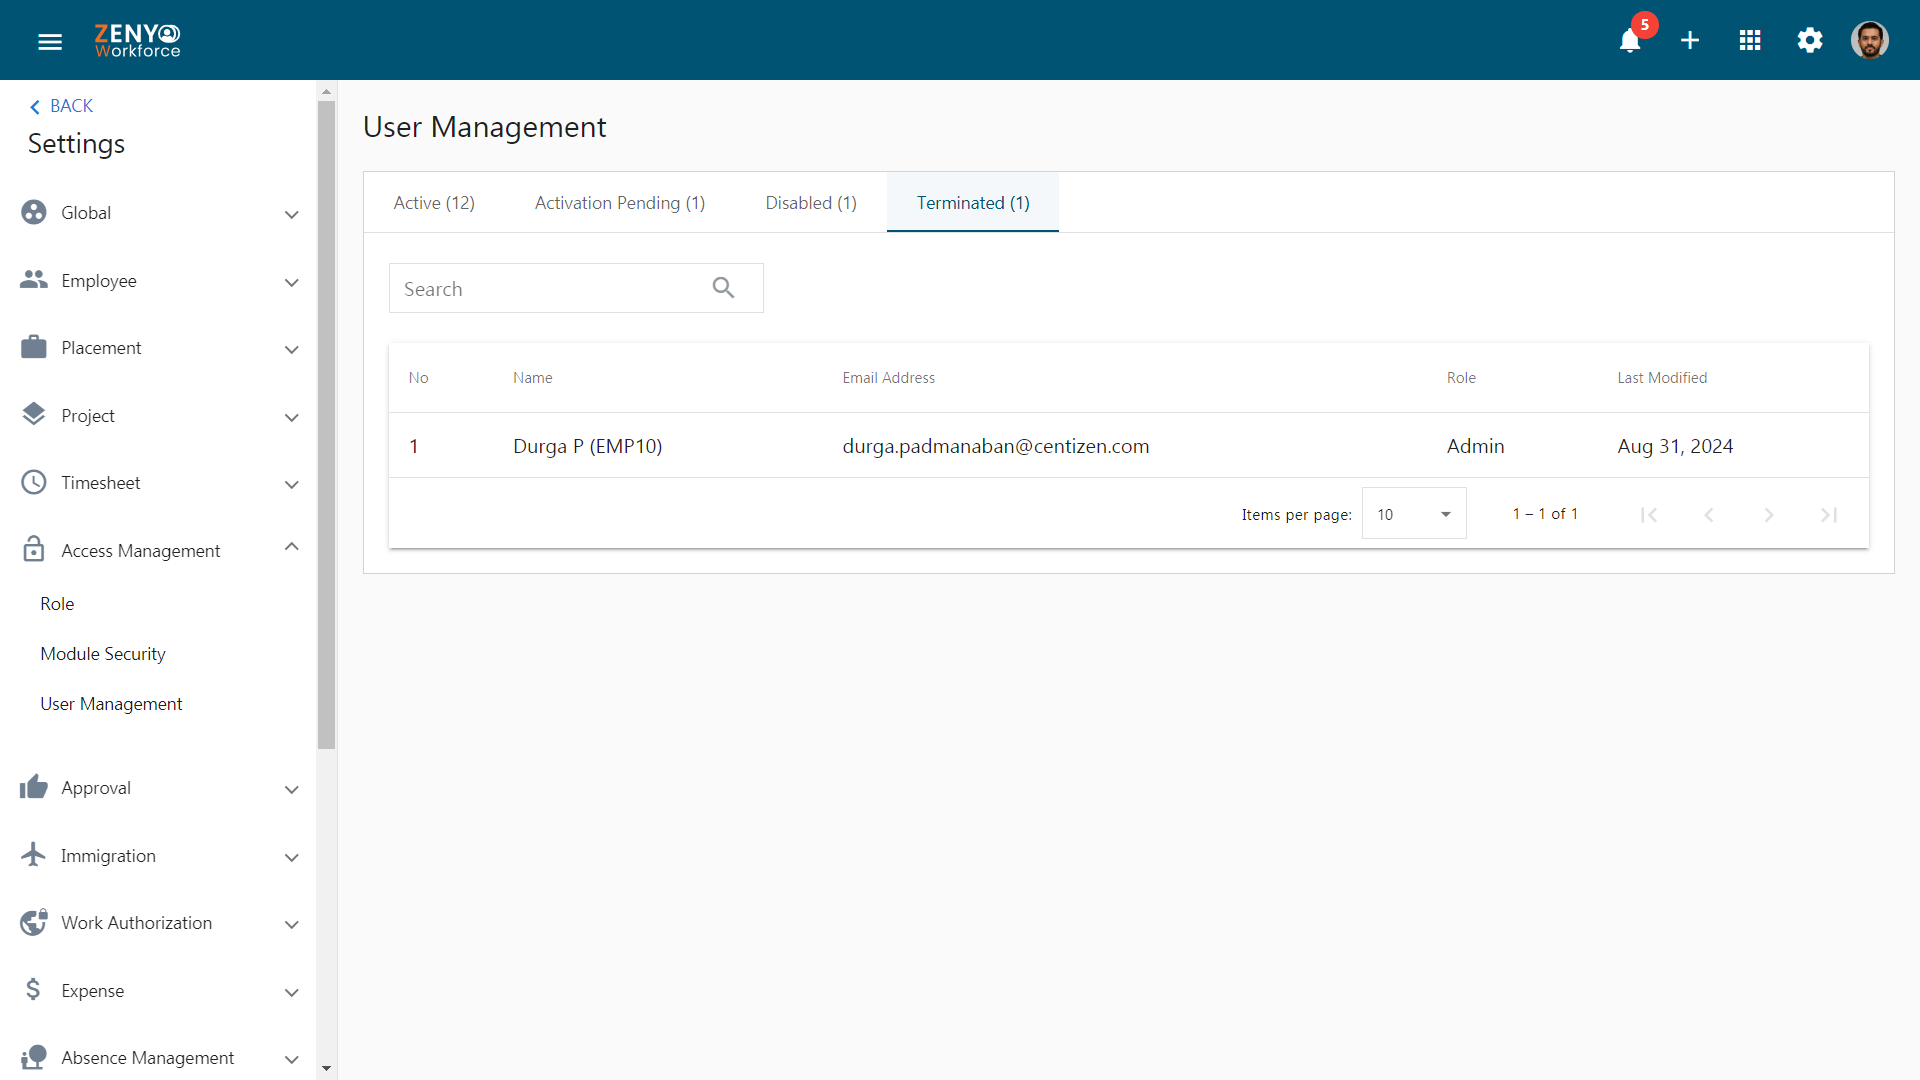
Terminated Tab
Under the Terminated tab, you can view a list of users who have been terminated.