Accounts payable are crucial for managing a company’s financial obligations, maintaining strong vendor relationships, and ensuring smooth business operations.
Creating a Bill
- Click on the Accounts Payable menu to navigate to the Accounts Payable page. To create a bill, click the Add icon.

- Select the Vendor and Payment Method from the specific dropdown menus.
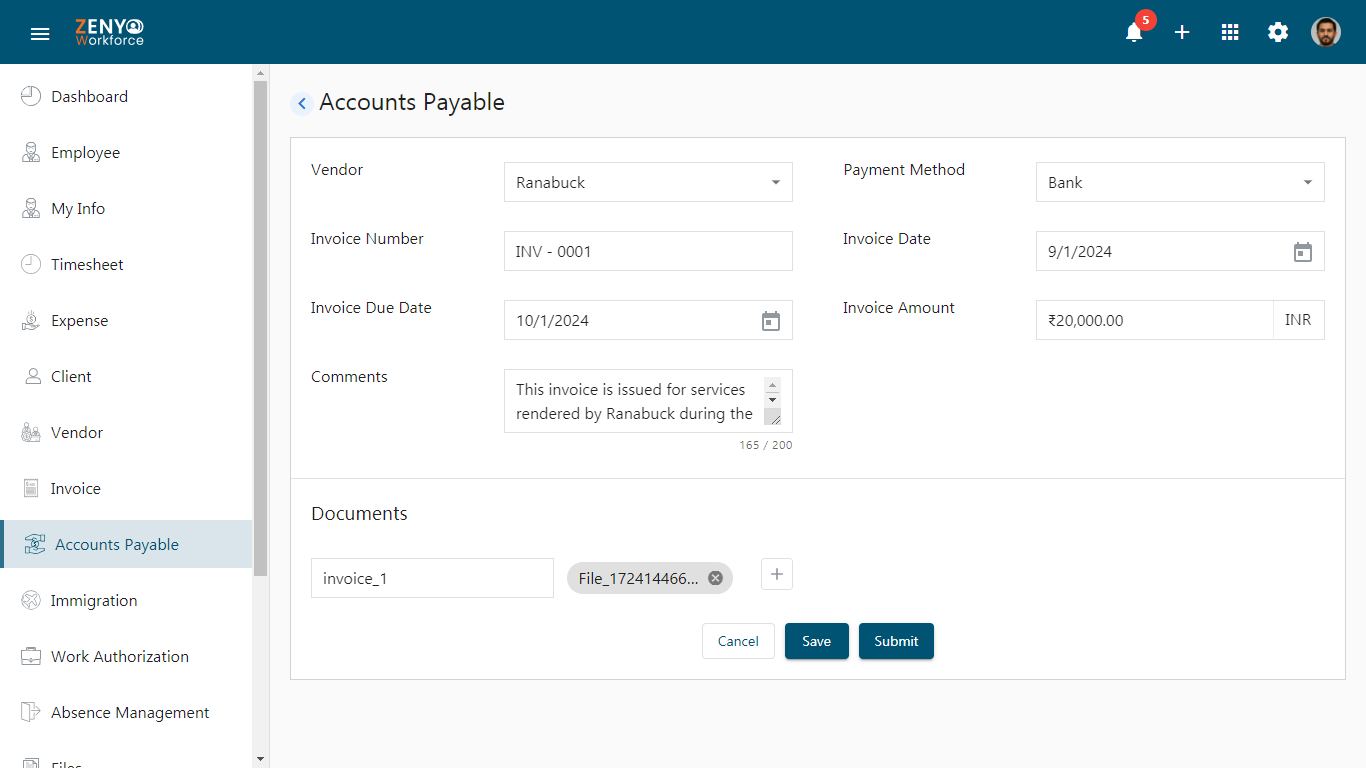
- Enter the Invoice Number, select the Invoice Date and Invoice Due Date, specify the Invoice Amount along with the currency, and add a comment if needed.
- In the Documents section, enter the Document Title and click Choose File to attach the document. If you need to add another document, click the Add icon. To remove the additional document, click the Remove icon. Once you’ve attached all necessary documents, you can either click Save to save the bill as a draft or click Submit to send the bill for approval.
- An email will be sent to the approver when the bill request is submitted.
Note: The accounts payable approval process follows the predefined approval flow set in the settings. An accounts payable will be fully approved only after the final approver in the sequence grants their approval.
Draft
- Clicking Save will display the bill in the Draft tab on the Accounts Payable page.
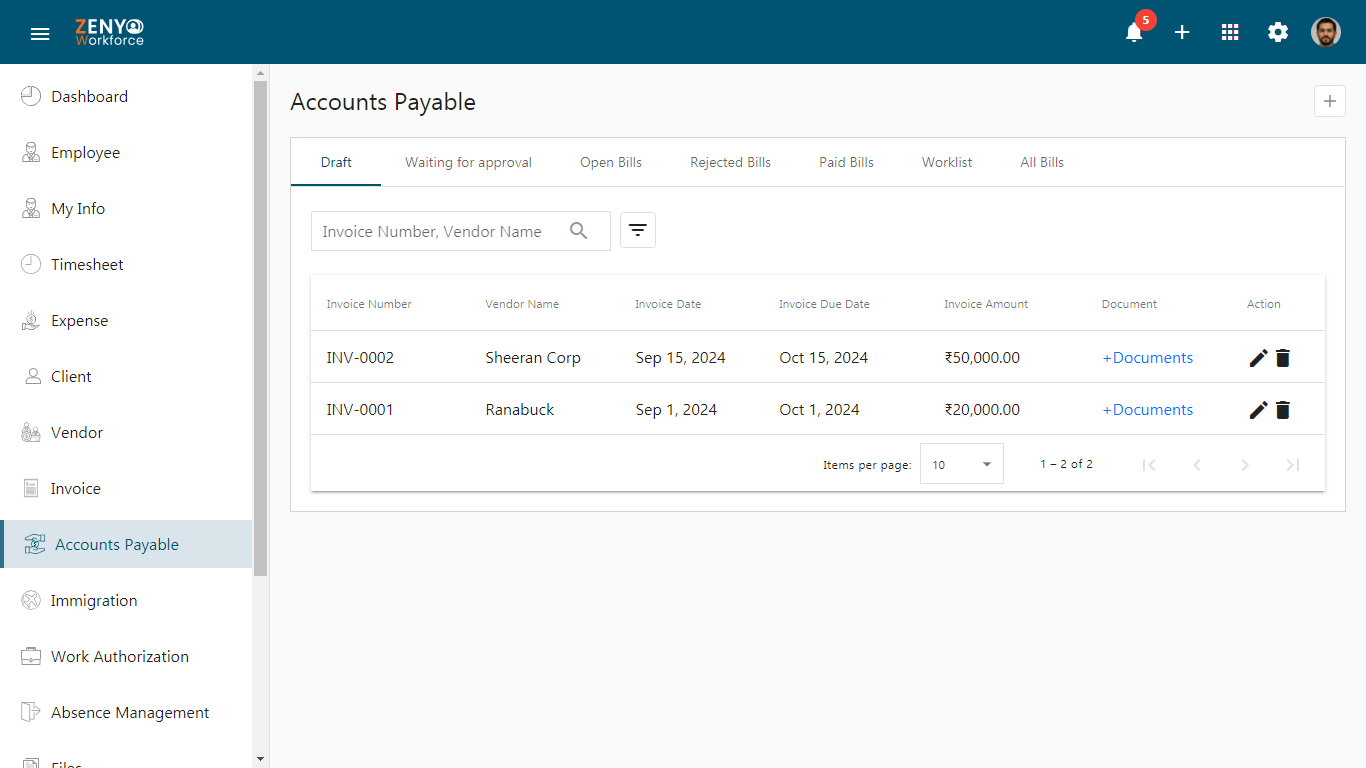
- Edit the bill by clicking the Edit icon. To delete it from the Accounts Payable page, click the Delete icon.
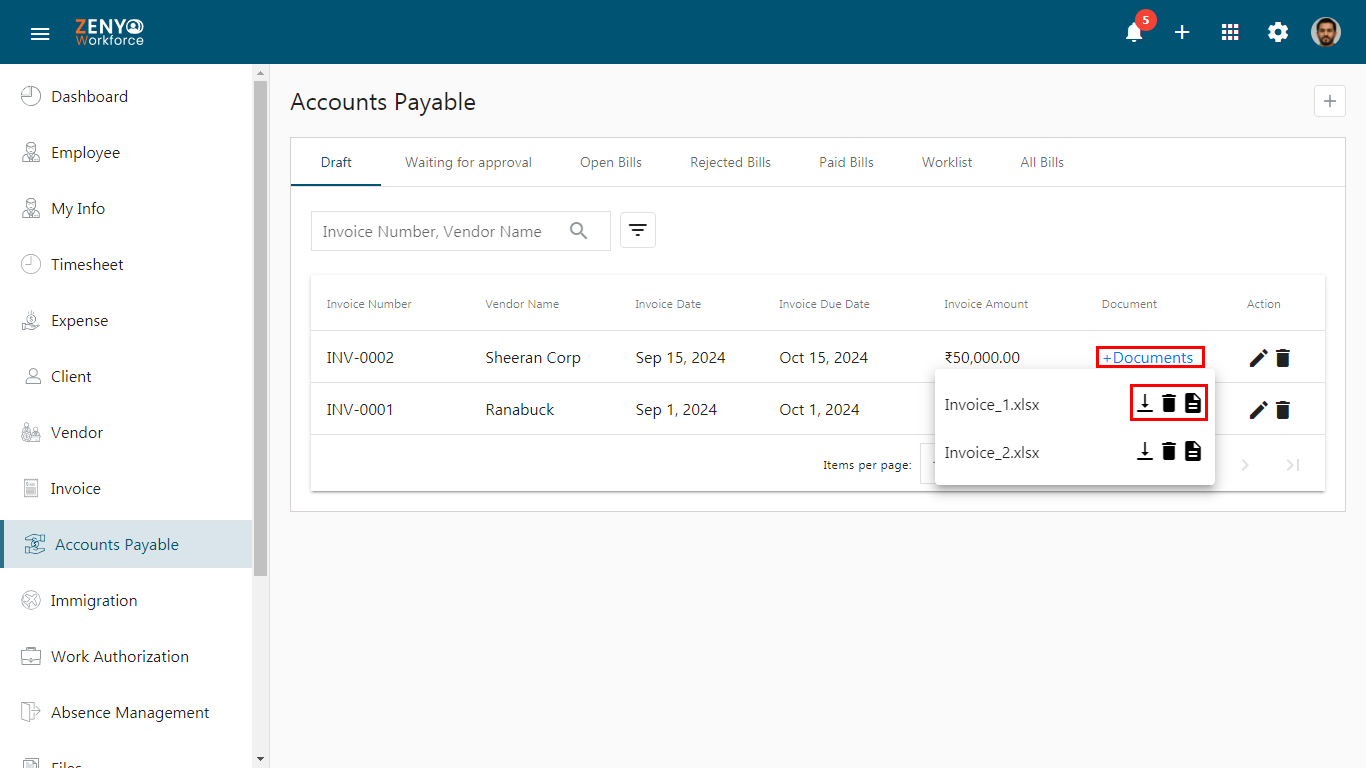
- Click on Documents to view the attached document files. You can download, view, or delete the files as needed.
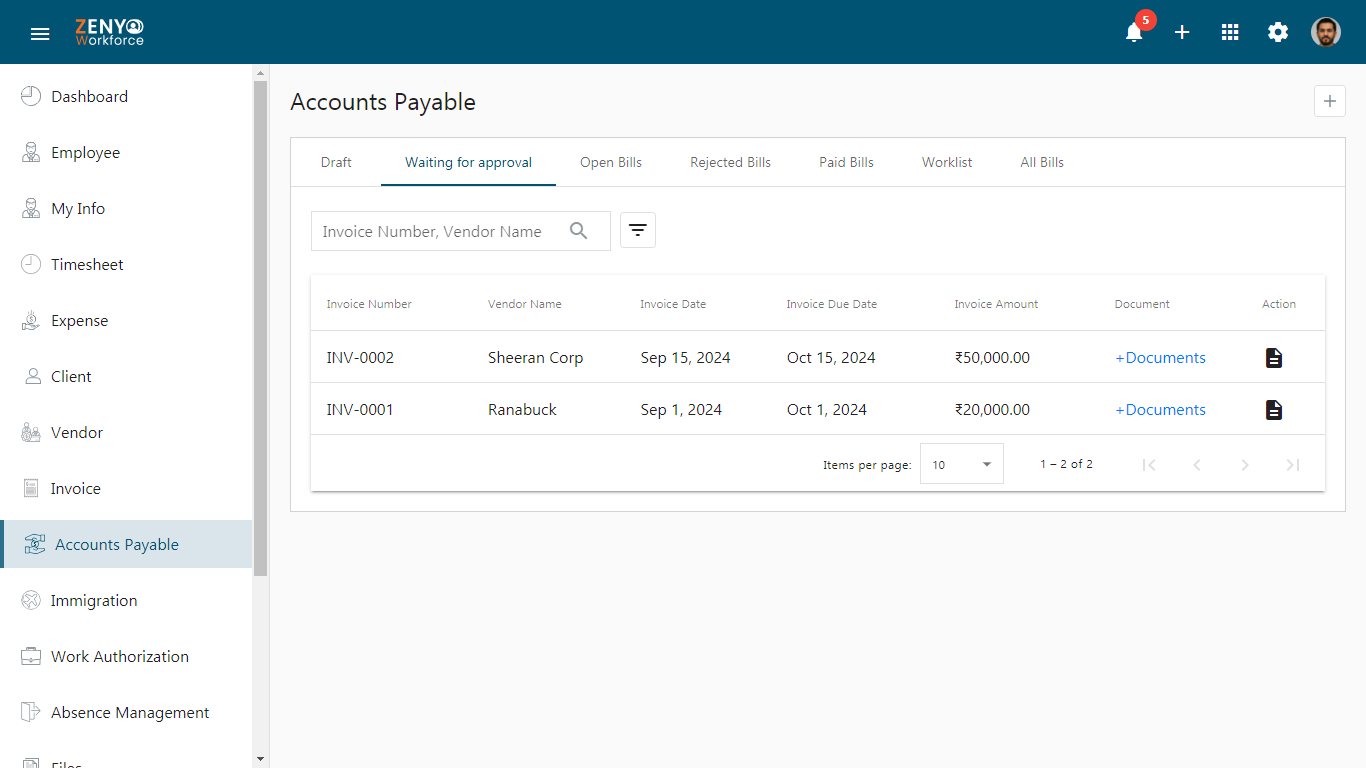
Waiting for approval
- In the Waiting for Approval tab, the submitted bills that are awaiting approval will be listed.
- Click on the View icon under the Action section to view the details of the bill.
Worklist
- In the Worklist tab, if you are designated as an approver, submitted bills awaiting your approval will be displayed.
- In the Pending tab, you can see the submitted bills. You can either approve or reject the bill.
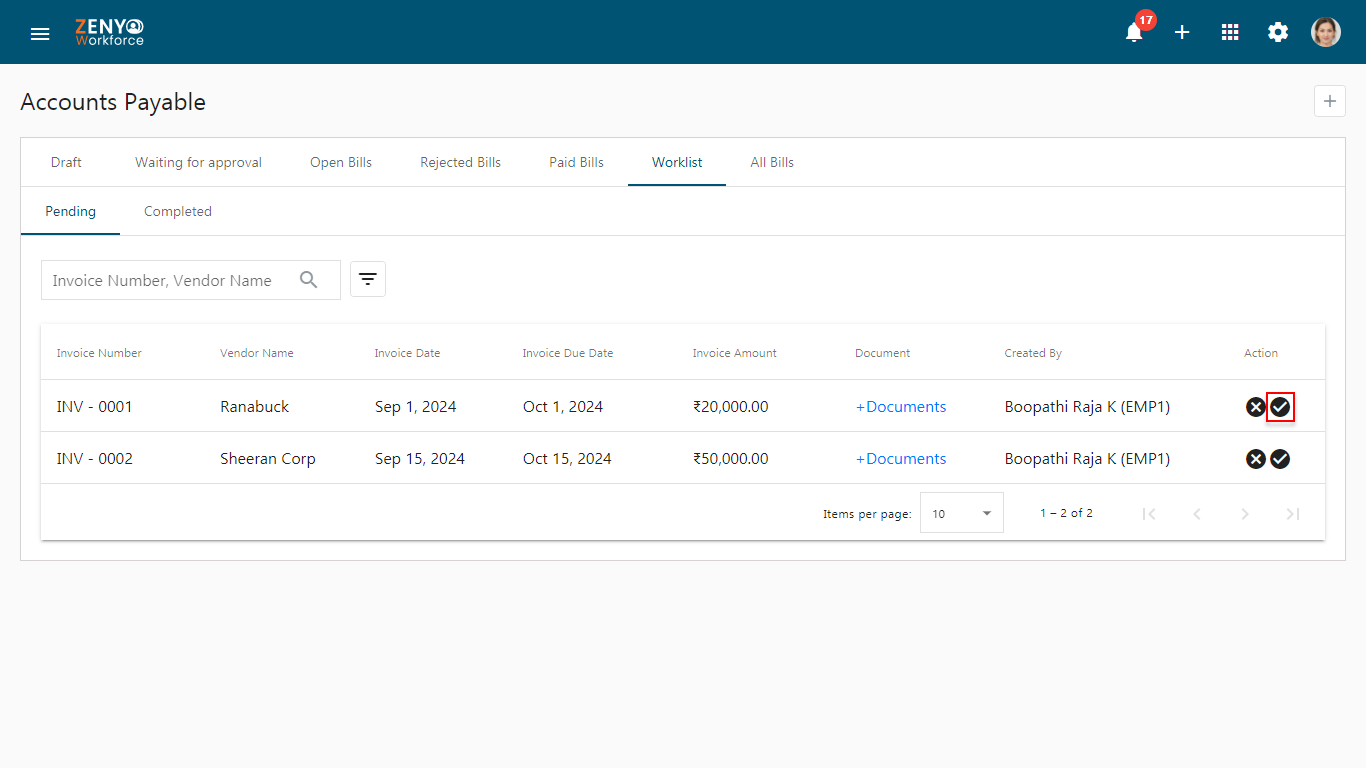
- If you click the Approve icon, you’ll be given two options: Review Details or Proceed without reviewing.
- On clicking Review Details, you will be redirected to the Bill Details page. Here, you can view and verify bill details such as the invoice number, invoice date, vendor name, payment method, invoice due date, and any comments. After verifying the details, you have the option to either reject or approve the bill.
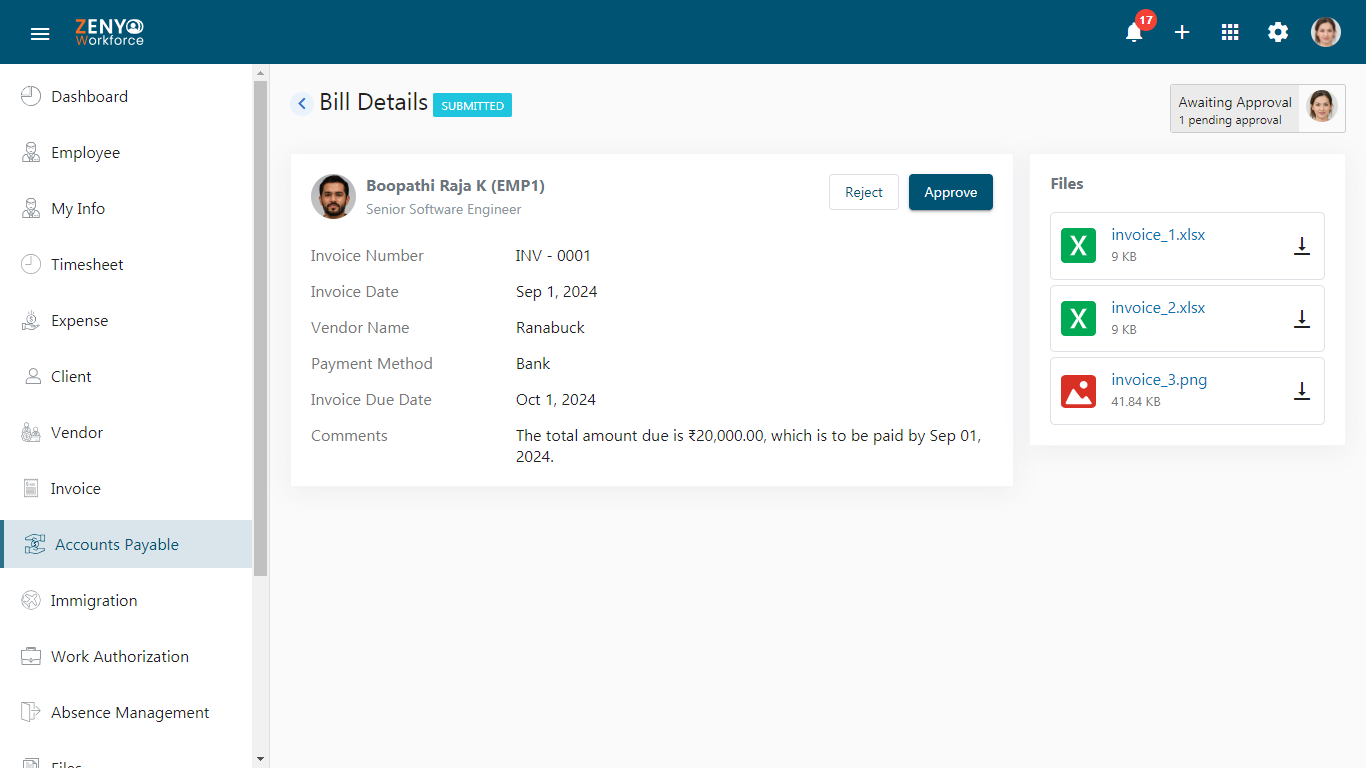
- If you click the Reject icon, please provide a reason for rejection in the text box provided.
- Once the approval is completed, it will be moved to the Completed tab under the Worklist tab.
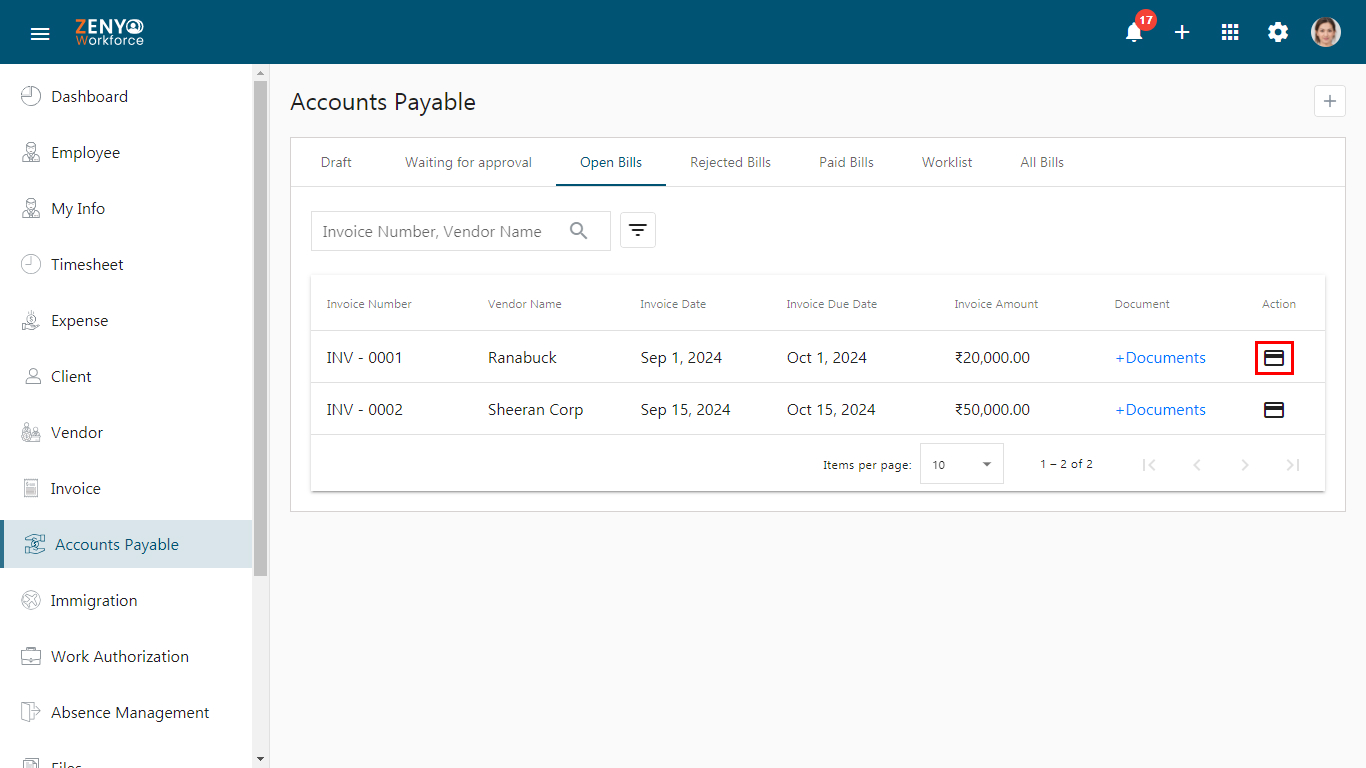
Open Bills
- Once the bill is approved, it will be moved to the Open Bills tab.
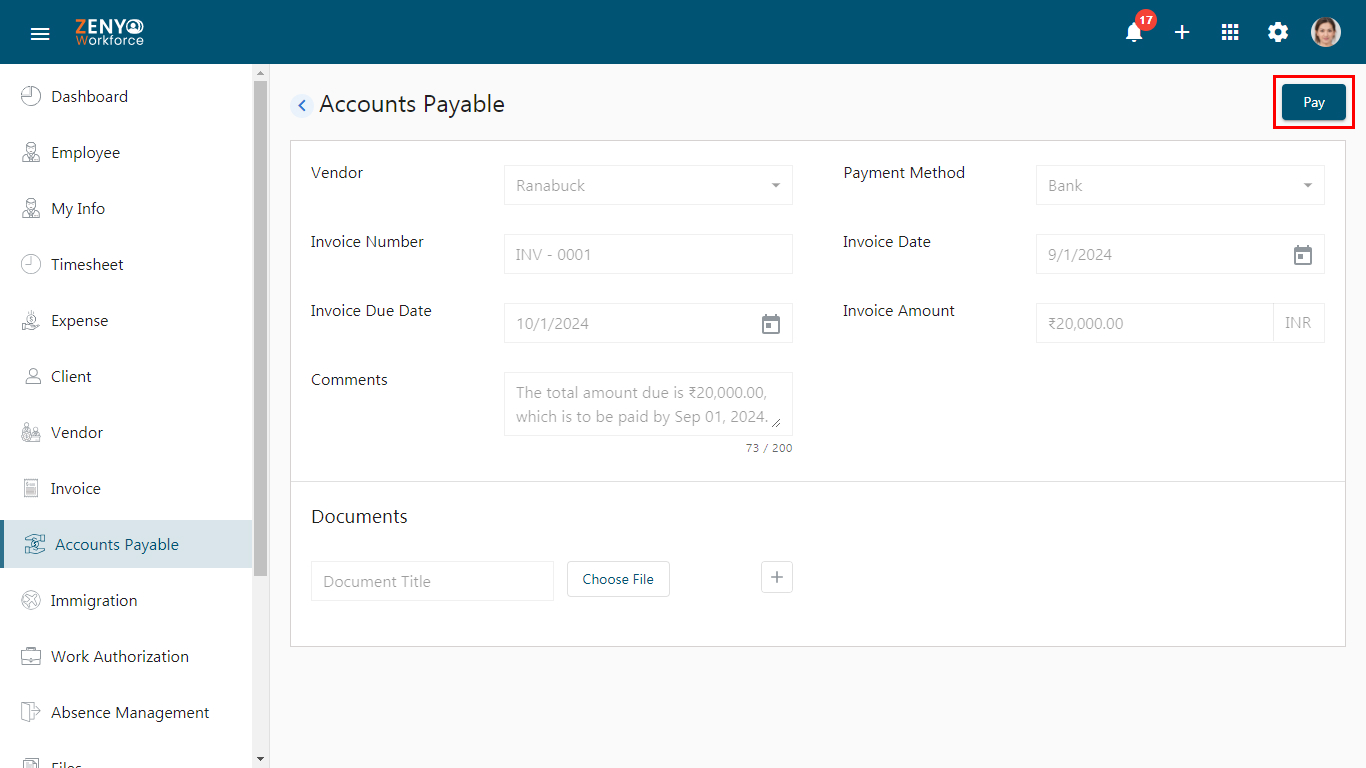
- Click on the Create Payment icon under Action.
- You will be redirected to the Account Payable bill details. Once the payment is done, click the Pay button.
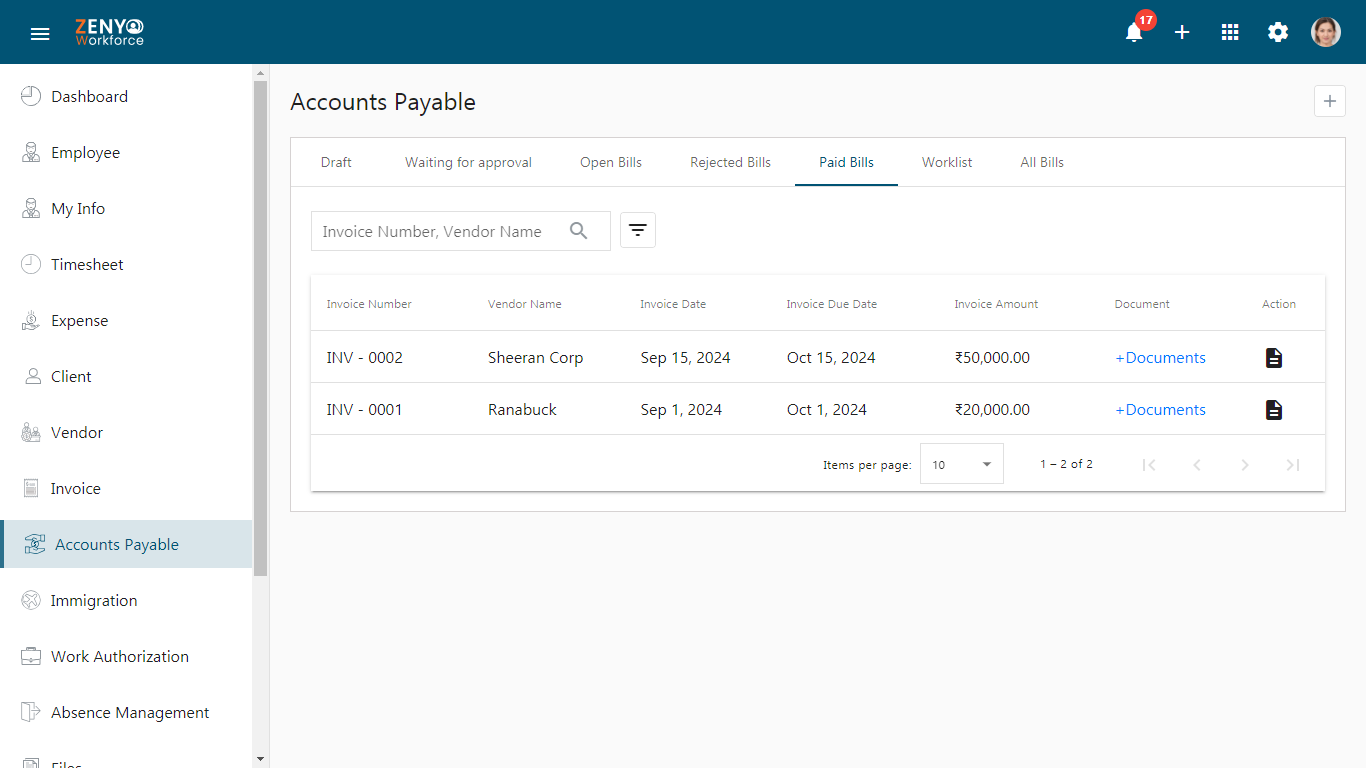
Paid Bills
After you click on the Pay button, the bill will be listed in the Paid Bills tab. By clicking on the View Payment icon, you can view the bill details.
Rejected Bills
- In the Rejected Bills tab, you can view the bills that have been rejected.
- Under the Action section, click on the Resubmit icon to resubmit the rejected bill. Then, click the Submit button to proceed.
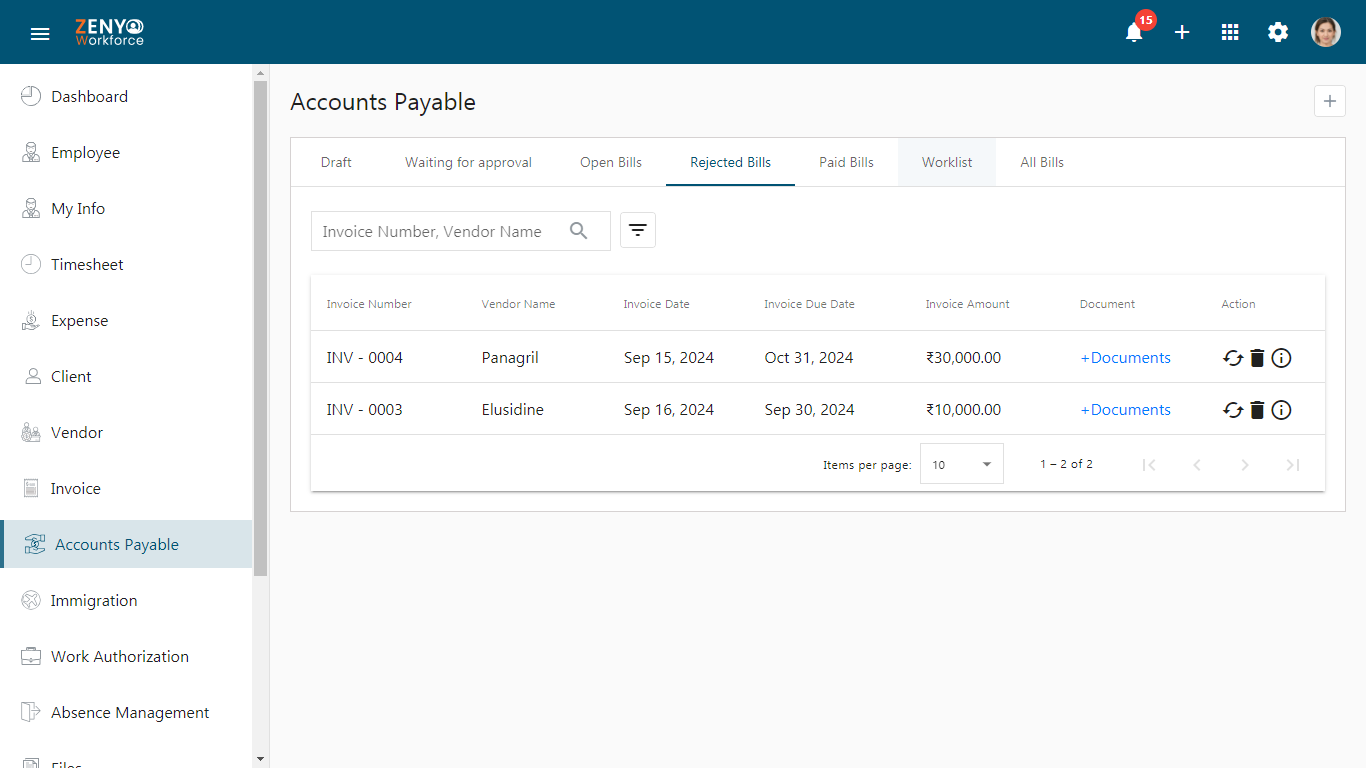
- Alternatively, click on the Delete icon to remove the bill.
- To view the reason for rejection, click on the Rejection Reason icon.
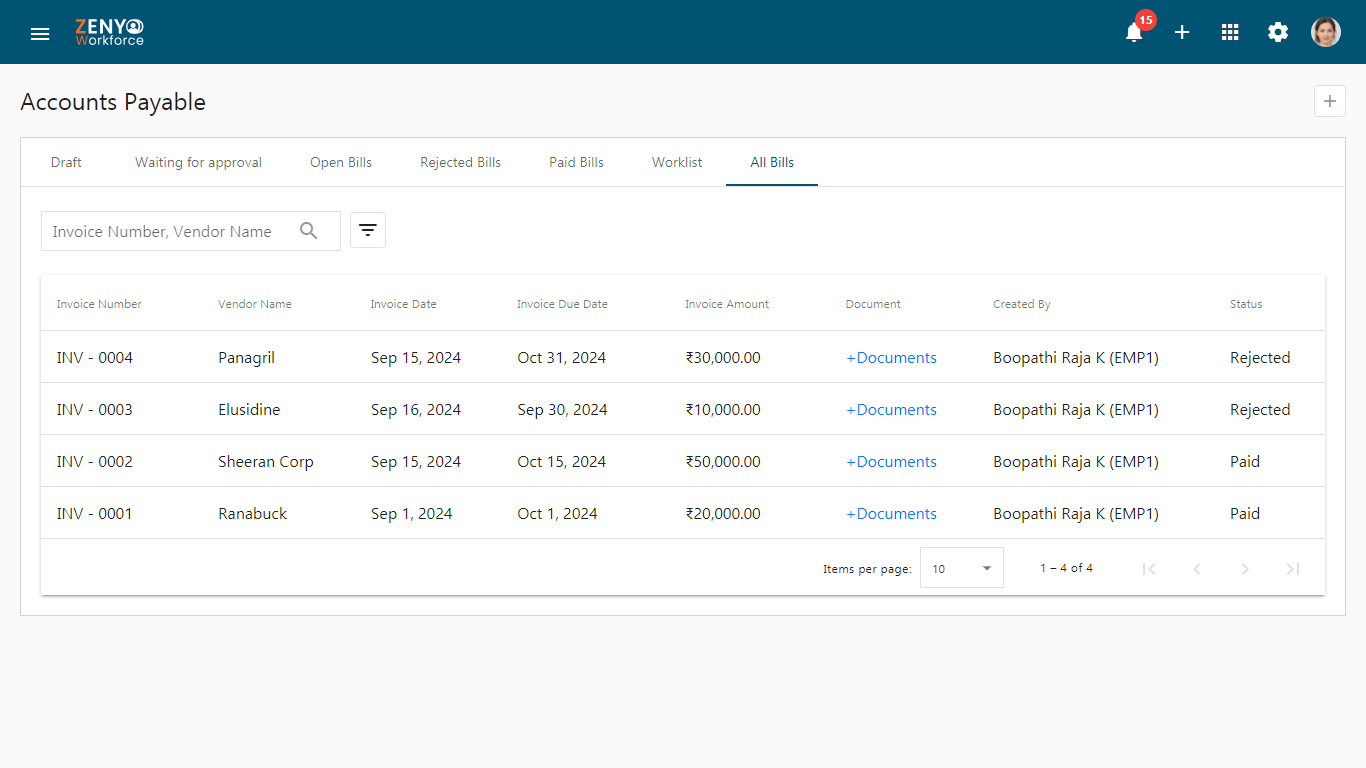
All Bills
In the All Bills tab, you can view all the bills along with their statuses: Submitted, Paid, Approved, or Rejected.