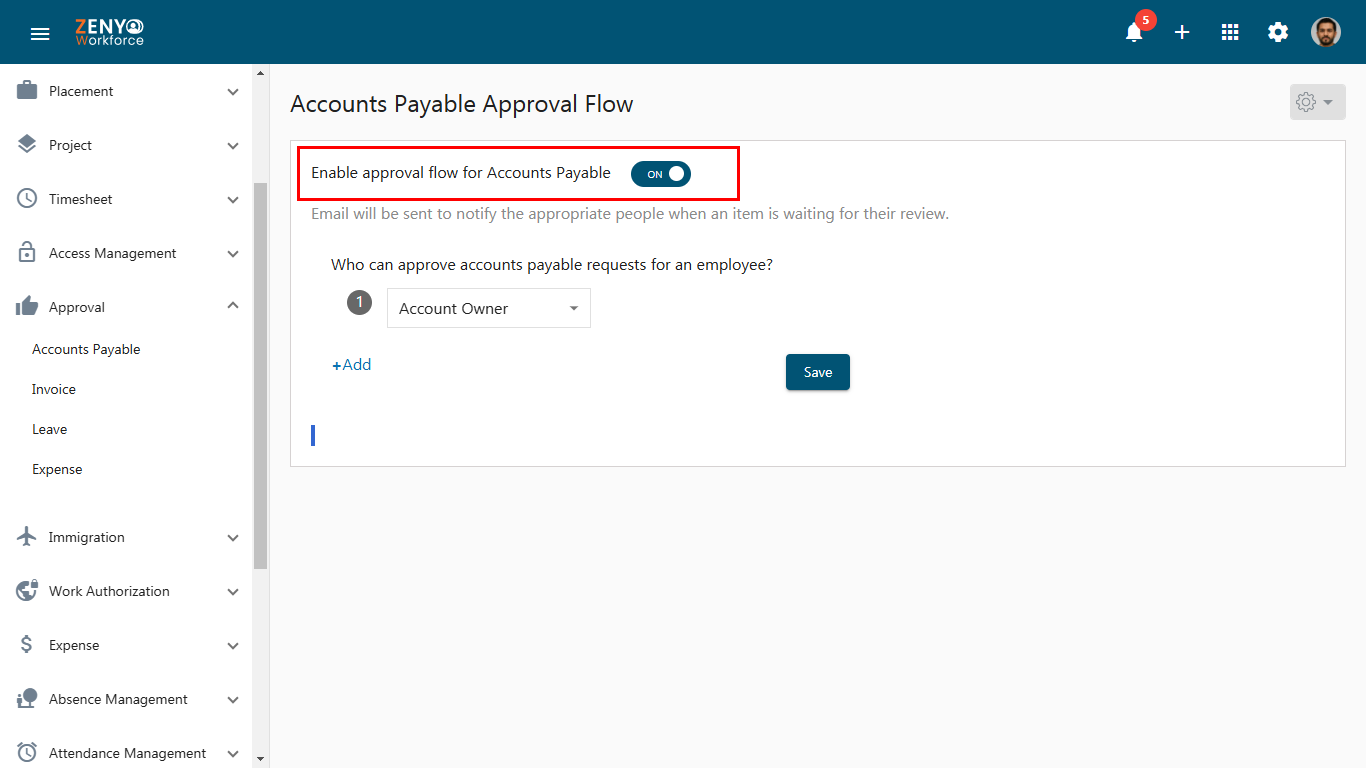
In the Approval Settings module, we can configure settings for 4 modules namely Accounts Payable, Invoice, Leave & Expense. The configuration process is similar for all four. For Accounts Payable and Invoice, you can set advanced approvals if you enable the toggle Enable approval flow for Accounts Payable/ Invoice.
How to Set Advanced Approvals?
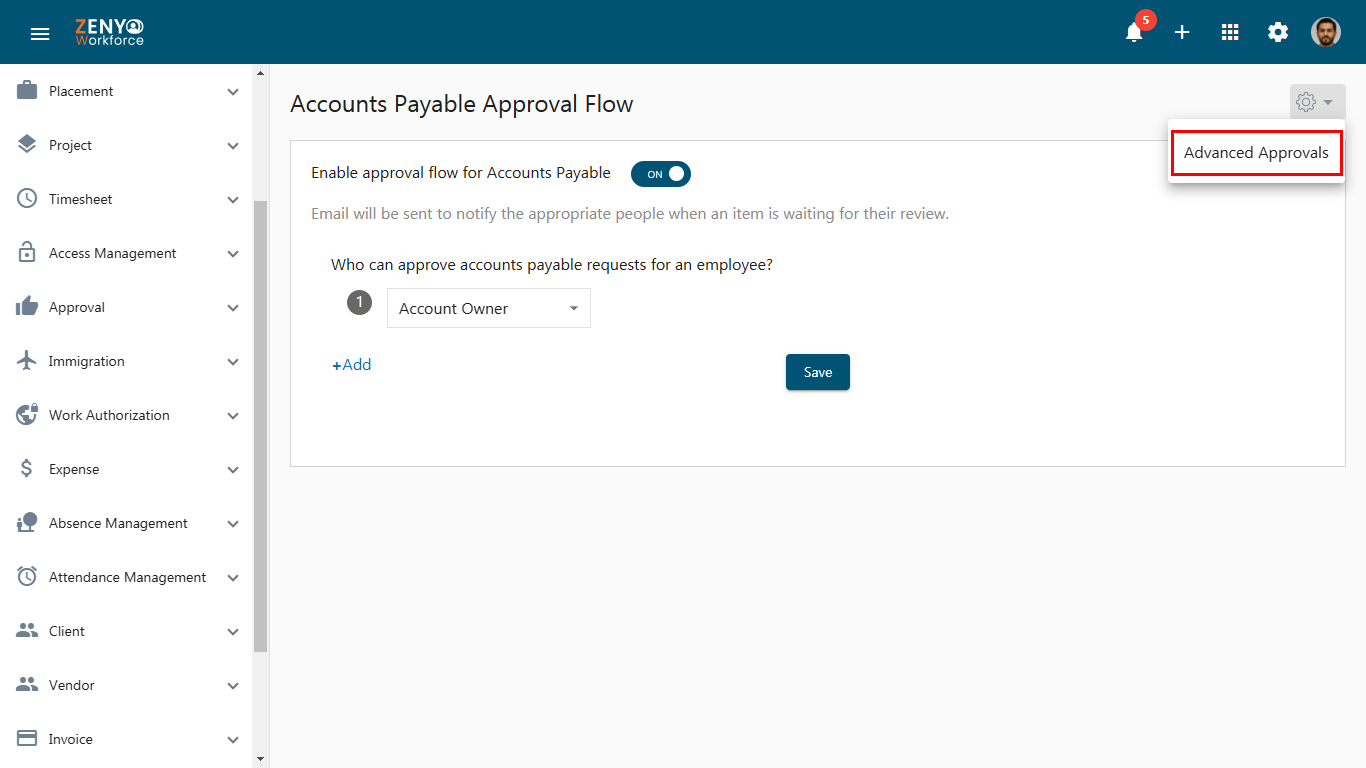
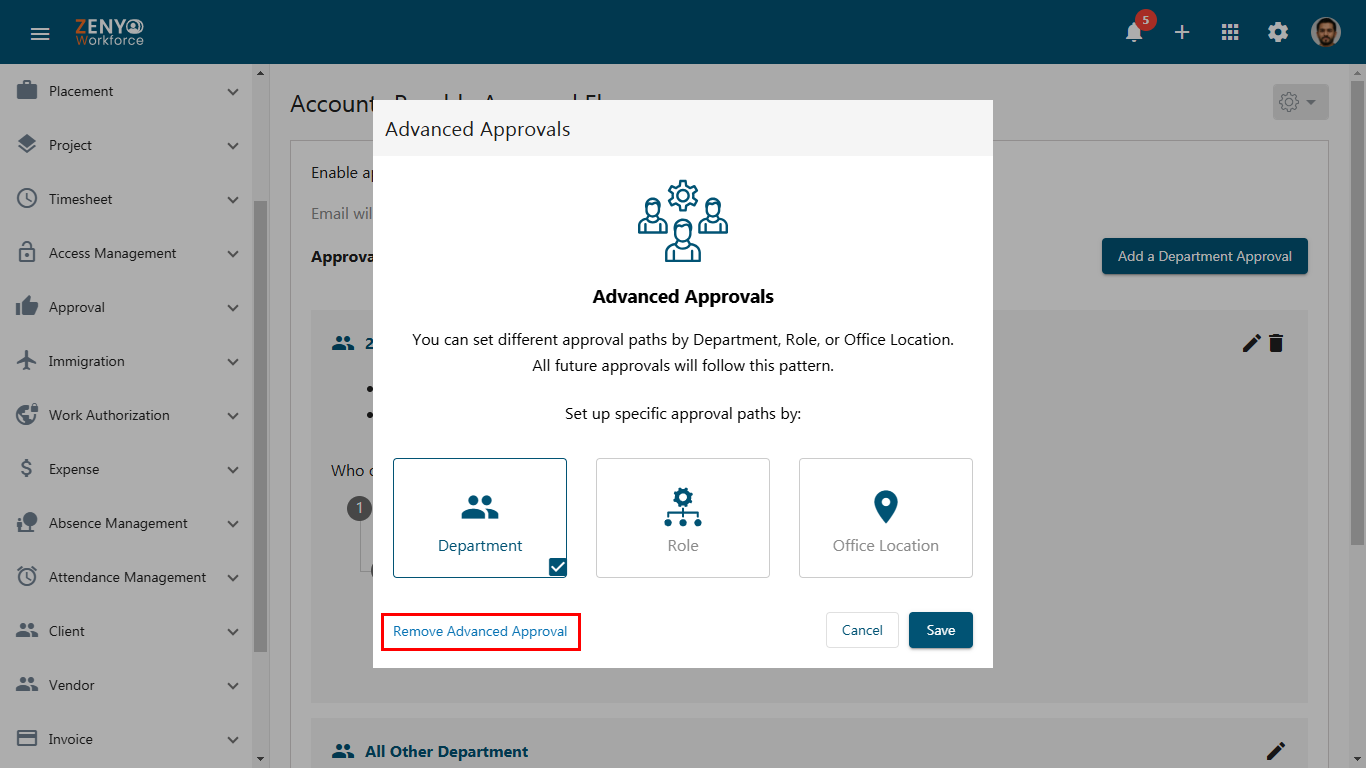
- Click on the Settings icon in the top right corner of approval page and select Advanced Approvals.
- Here, you can create separate approvers for each Department, Role, and Office Location.

Advanced Approval Setting(Based on Department)
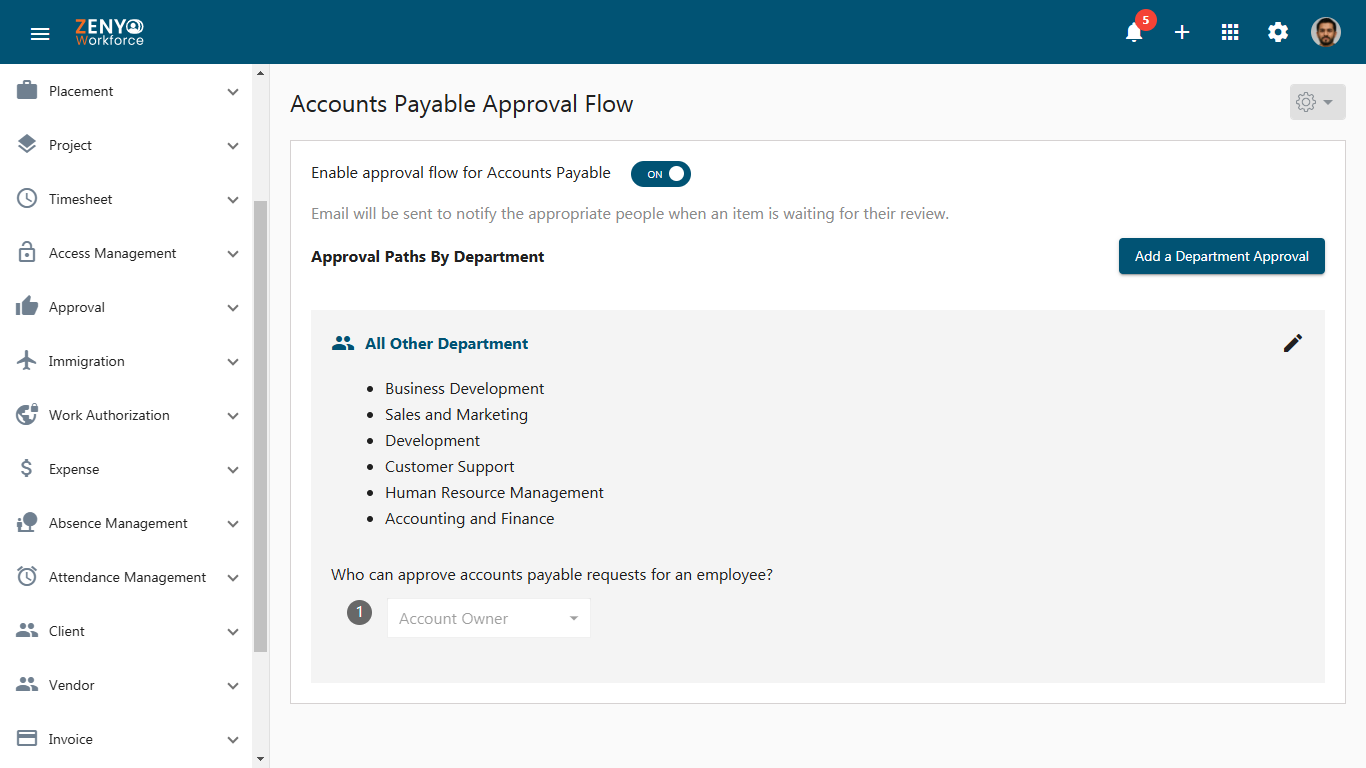
- To set approvers for each department, select Department and click on Save.
- Click on the Add a Department Approval button to set up the approval flow.
- Under New Department Approval, choose the department for which you need to assign an approver from the dropdown.
- You can select multiple departments from the list of options by clicking on the checkboxes.
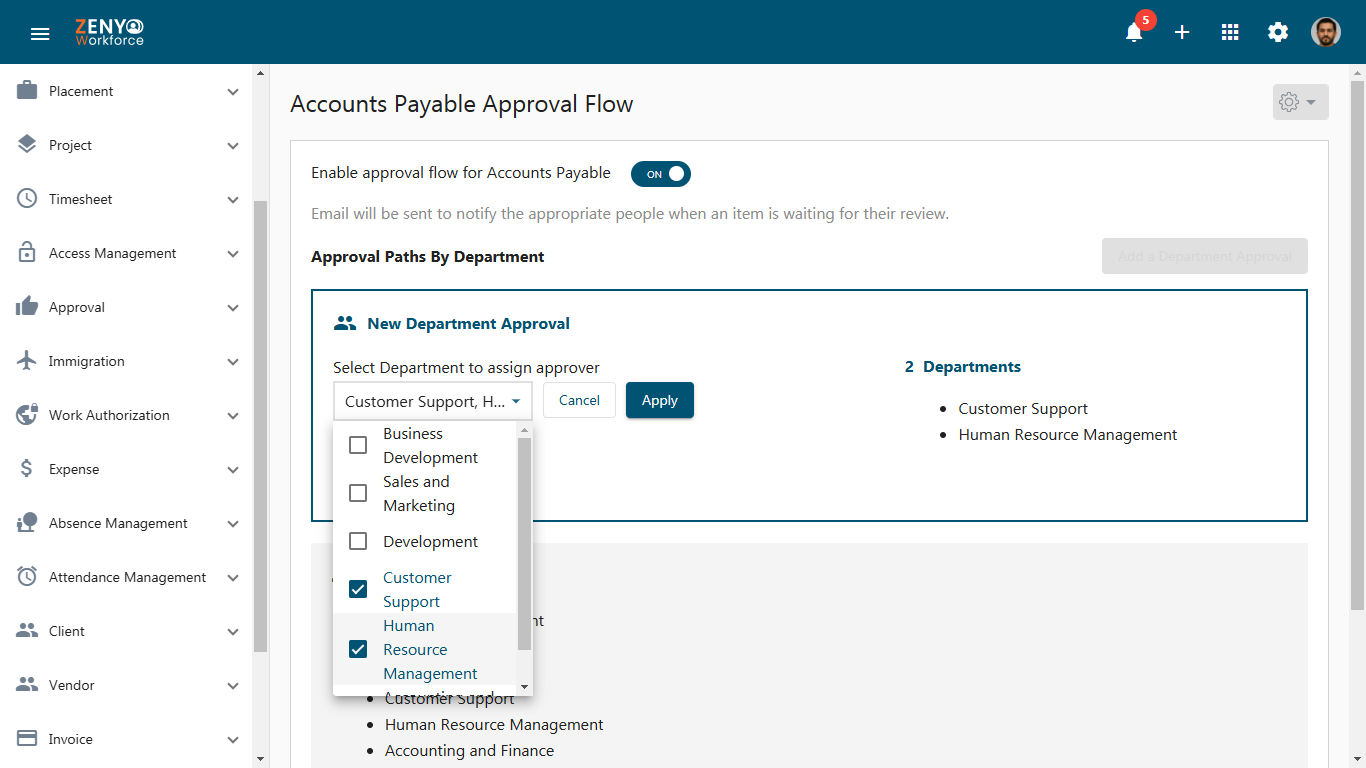
- Once you’ve selected, click Apply to confirm your selection.
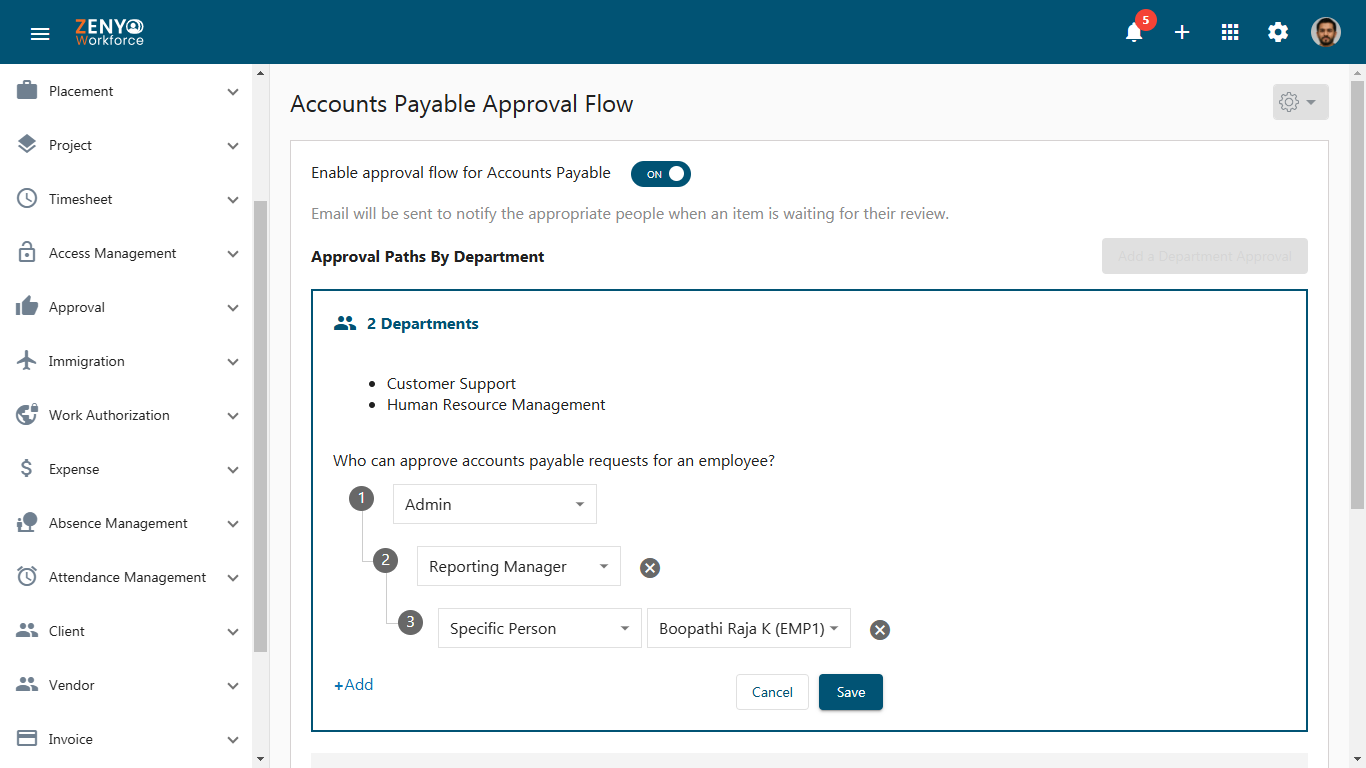
- You can now assign specific approvers for the selected departments by choosing from the dropdown menu.
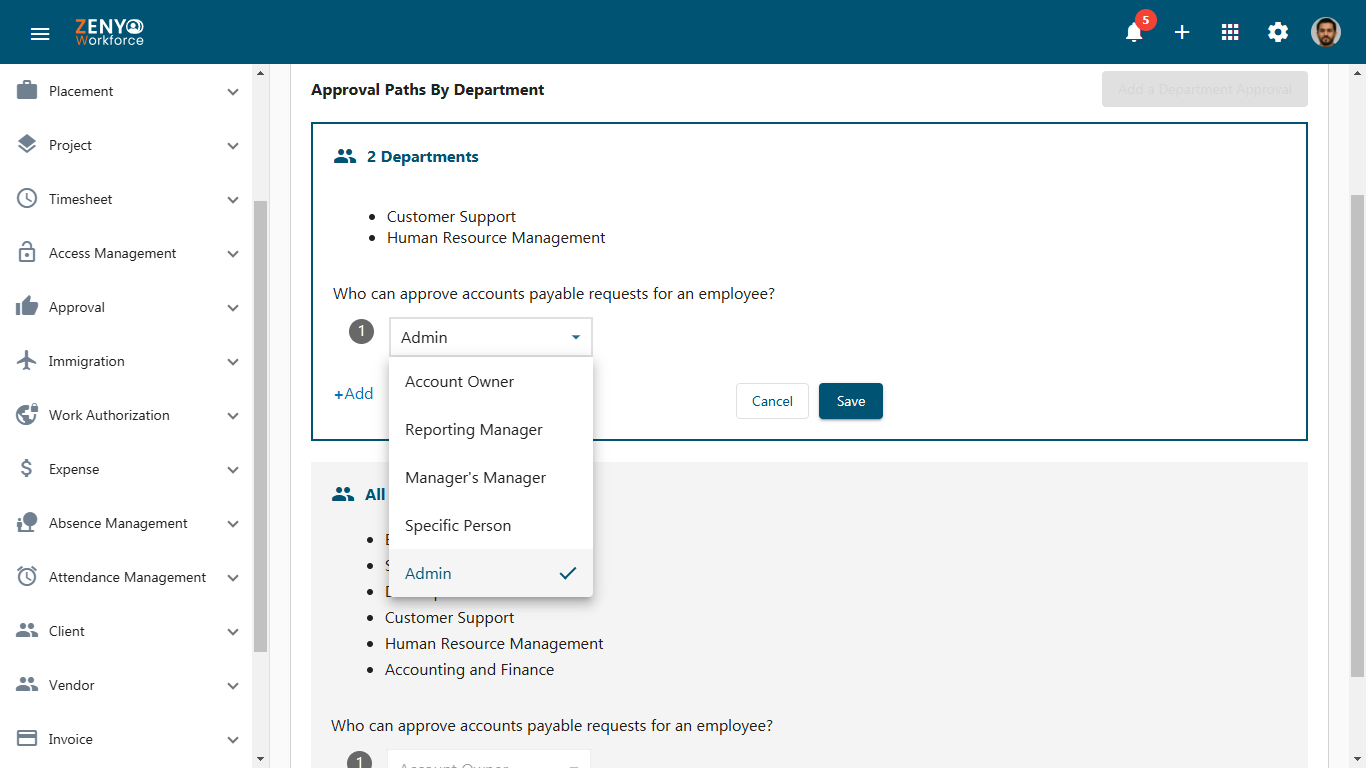
- You can add multiple levels of approvers by clicking Add. After making your selections, click the Save button.
- You can edit these settings anytime by clicking the corresponding Edit icon.
- To delete these approval settings, click on the Delete icon. A confirmation popup will appear—click Yes to confirm.

- Similarly, you can set approvers for the remaining departments under All Other Department by following the same process.
- To remove the entire approval path based on department, click on Settings in the top right corner and select Advanced Approvals.
- Now click on Remove Advanced Approval and confirm by clicking Yes.
Advanced Approval Setting(Based on Roles)
- Similar to advanced approval for departments, you can assign approvers based on Roles in Advanced Approvals.
- Click on Settings in the top right corner and select Advanced Approvals.
- In the dialog box, click on Role and save.
- Click on the button labeled Add a Role Approval to get started.
Under New Role Approval, a dropdown menu will appear, just like when assigning approvers by department. This time, the list will include all the different roles within your company.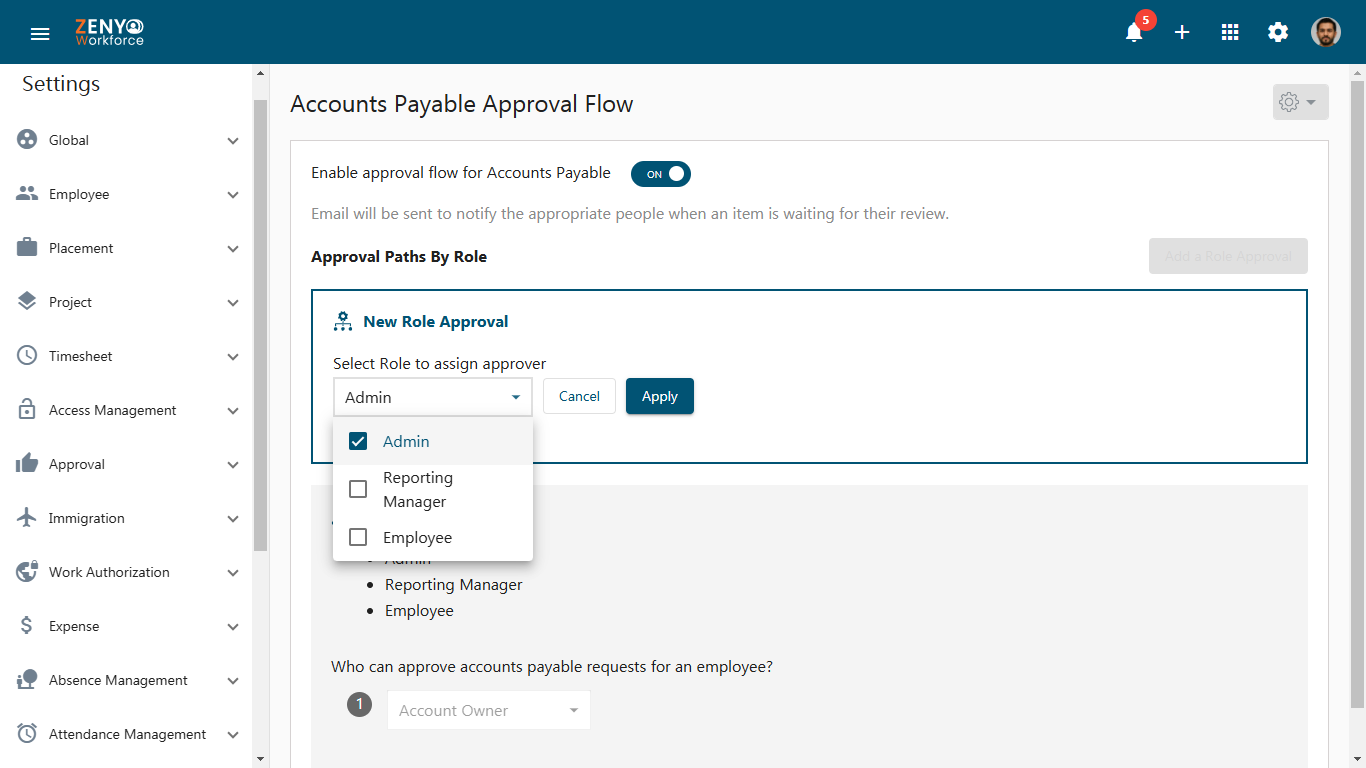
- Select the desired roles by checking the appropriate boxes from the list. Once you’ve made your selections, click Apply to confirm. Then, assign an approver for the selected role/roles. You can assign multiple approvers here.
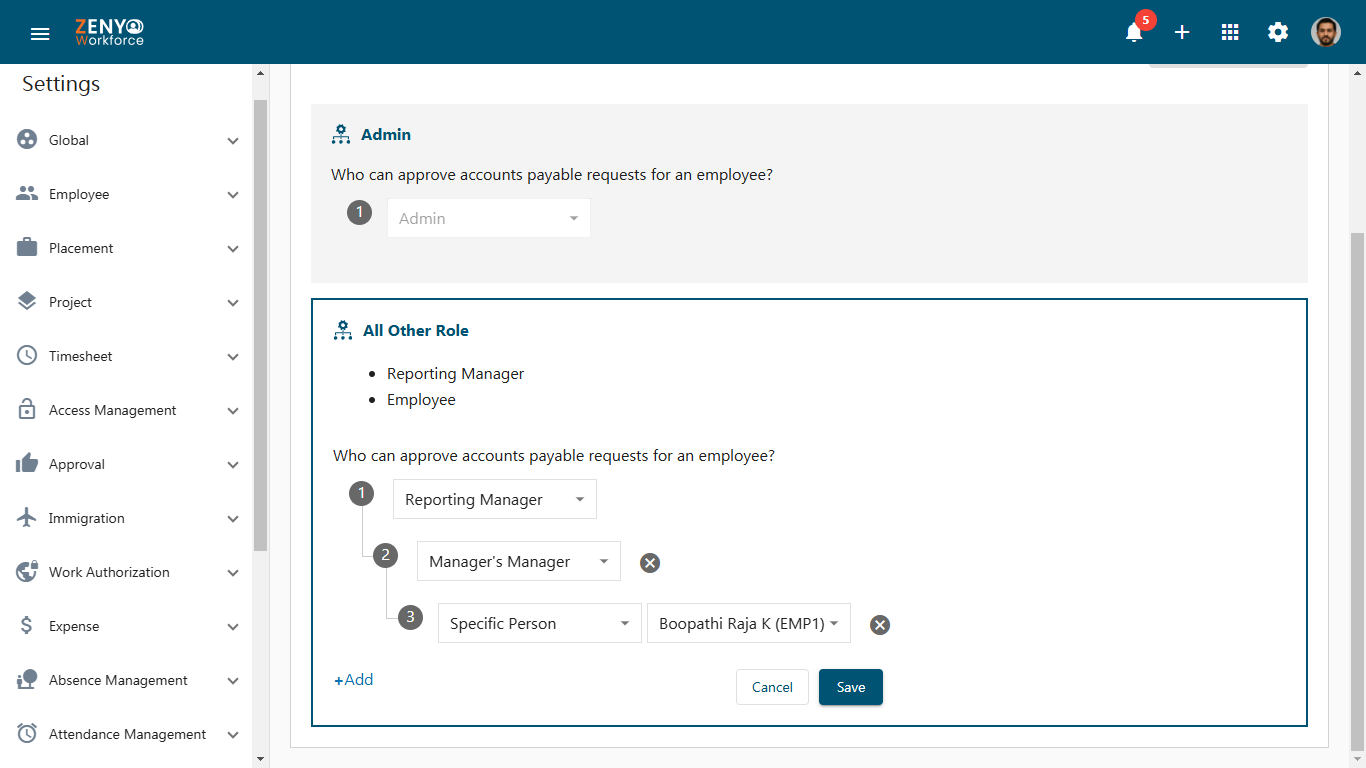
- You can repeat this process for the remaining roles that require an approval workflow.
Advanced Approval Setting(Based on Location)
- If you wish to assign approvers based on office locations, click on Settings in the top right corner and select Advanced Approvals.
- In the Advanced Approval pop-up box, click on Office Location, and click Save.
- Click on the Add an Office Location Approval button to initiate the process.
- Now under New Office Location Approval, a drop-down menu will appear, listing all your company’s office locations.
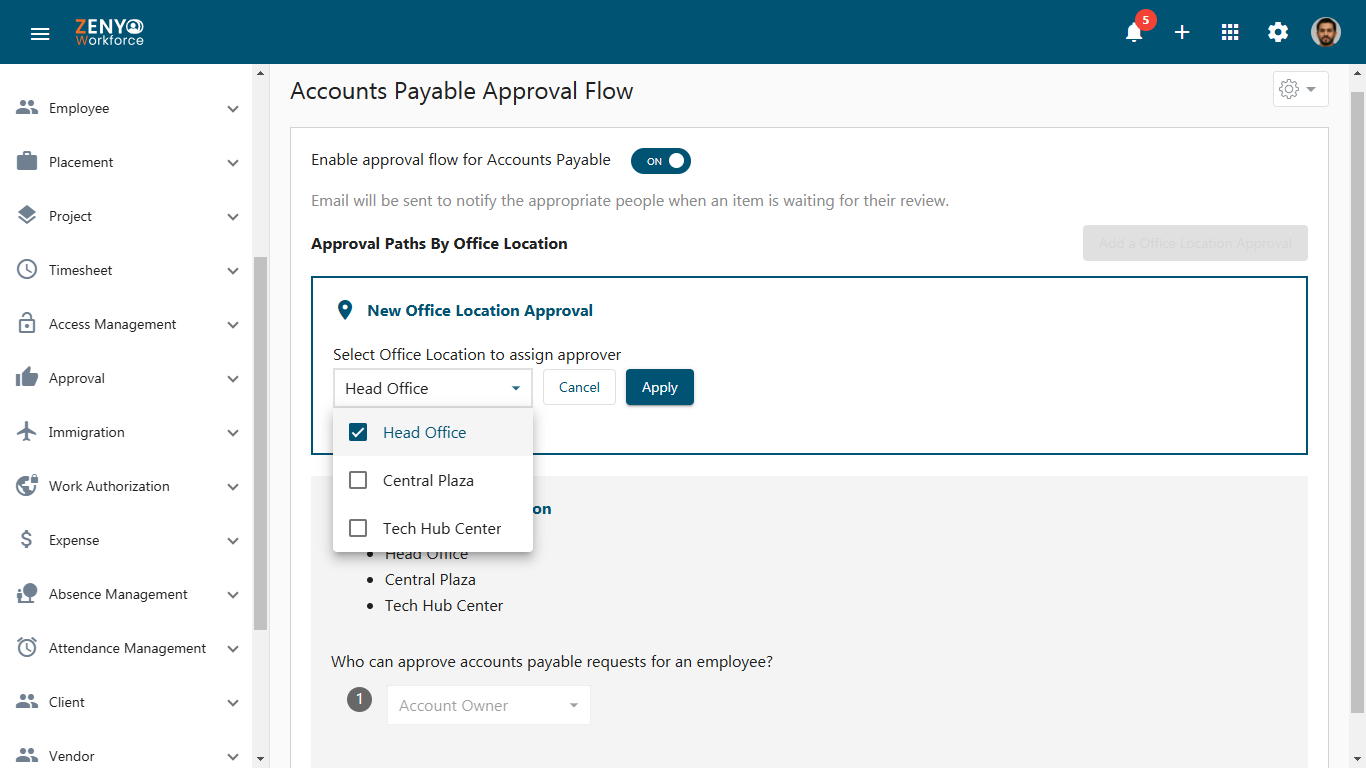
- Choose the specific location/locations where you want to set up an approval workflow. Once you’ve selected the location, click Apply to confirm your choice.
- You can add single or multiple approvers for a single location.
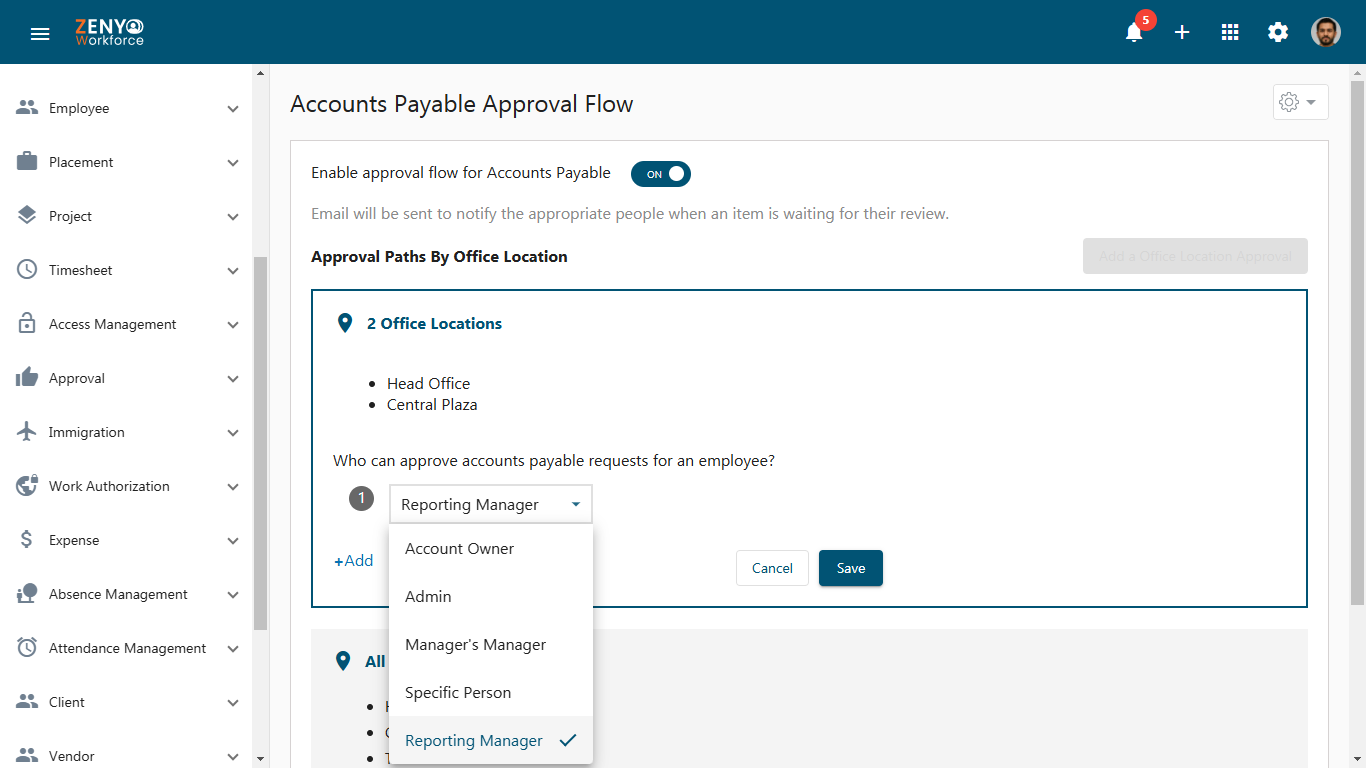
- You can repeat this process for all your remaining office locations.
Note: An email will be sent to notify the assigned approvers when a request is awaiting their review.
