Zenyo Workforce’s Attendance Management feature enables systematic tracking and monitoring of employee attendance, including clock-in and clock-out times. It provides processes and tools to ensure accurate attendance recording, compliance with company policies, and efficient utilization of workforce resources.
Attendance Settings
- Click on the Settings icon at the top right corner of the navigation bar.
- Click on the Attendance Management menu and select the Attendance Settings sub-menu.
- Under Approvals, you can choose who will approve Regularization requests for an employee if they miss the clock-in or clock-out.
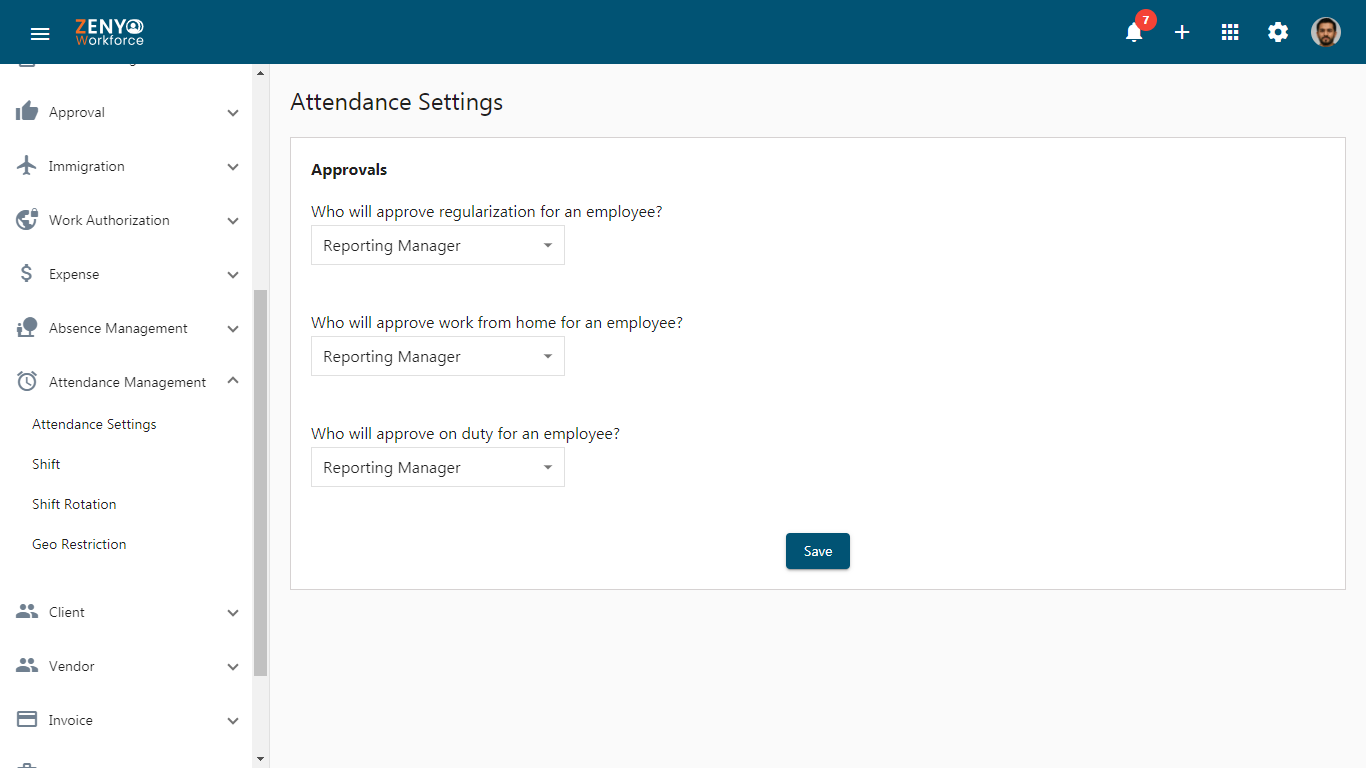
- If you select the Reporting Manager, the reporting manager will approve the regularization for the employee.
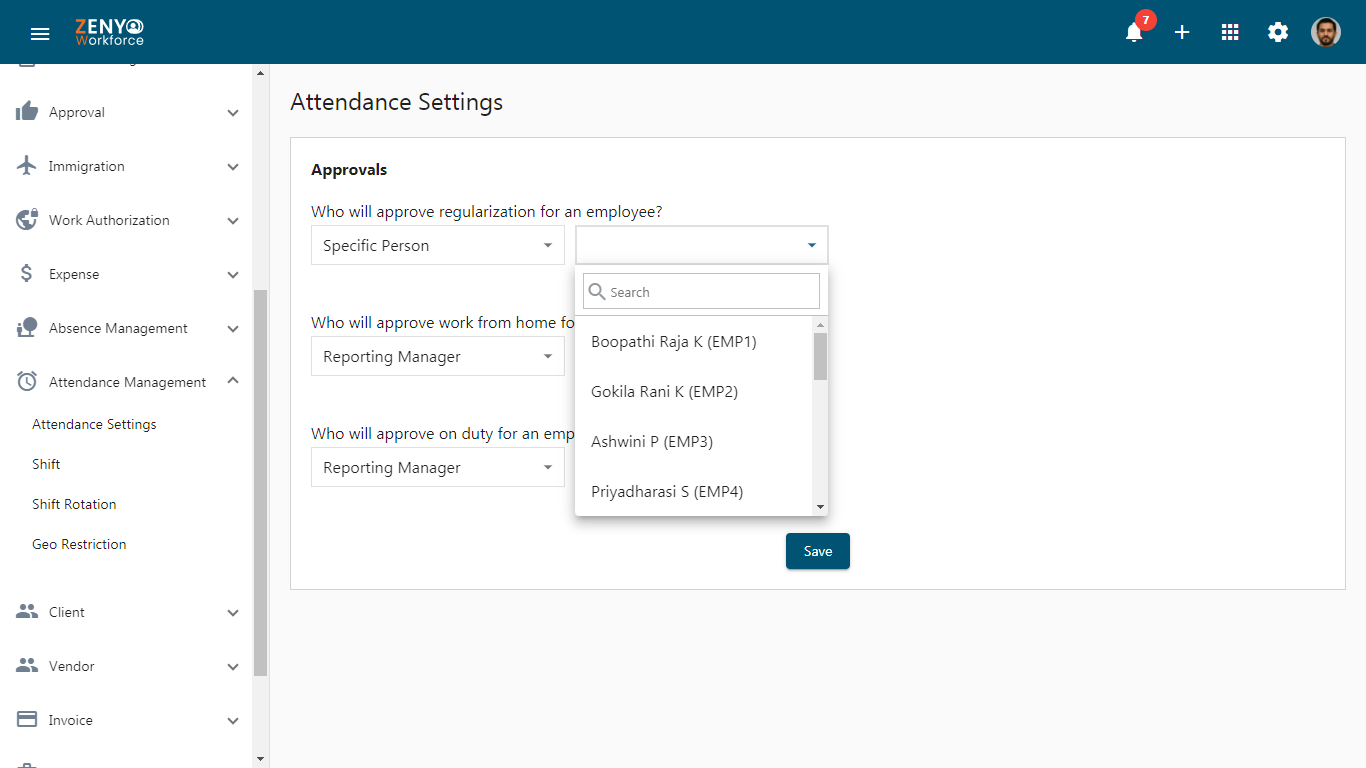
- If you choose a Specific Person, the selected employee will approve the regularization for the employee. Select the employee from the list of options.
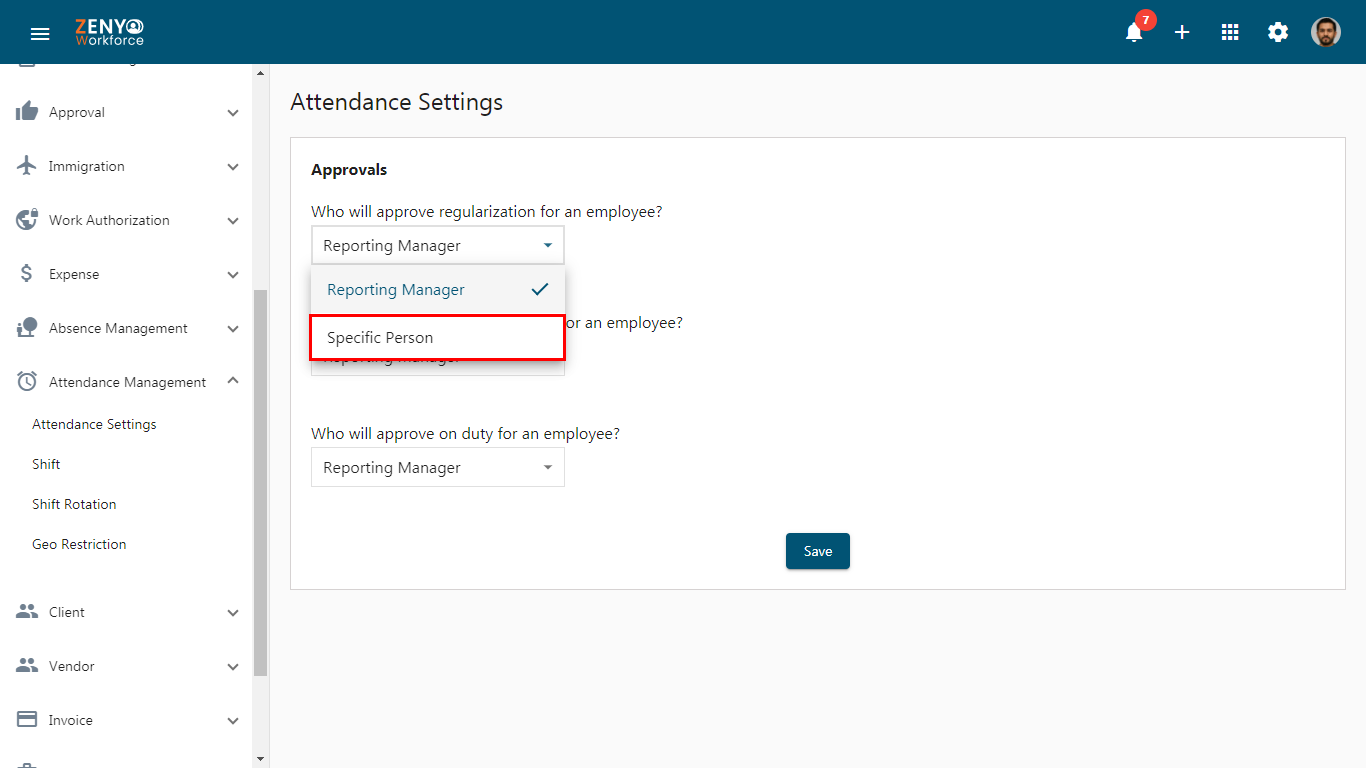
- Similarly, set Approvals for who will approve work-from-home requests and on-duty requests for an employee and click the Save button to save the attendance settings approvals.
Adding Shift
- Click on the Attendance Management menu and select the Shift submenu.
- Click the Add button in the top right corner to add the shift.
- Under the General section, enter the name of the shift, start and end time, and a description if necessary.
- In the Grace Period section, there are three options. If you choose None, restrictions will apply to the employee’s clock-in and clock-out times after the shift starts. For example, if the shift starts at 9:00 a.m., and the employee clocks in at 9:01 a.m., even one minute will be considered a late arrival.
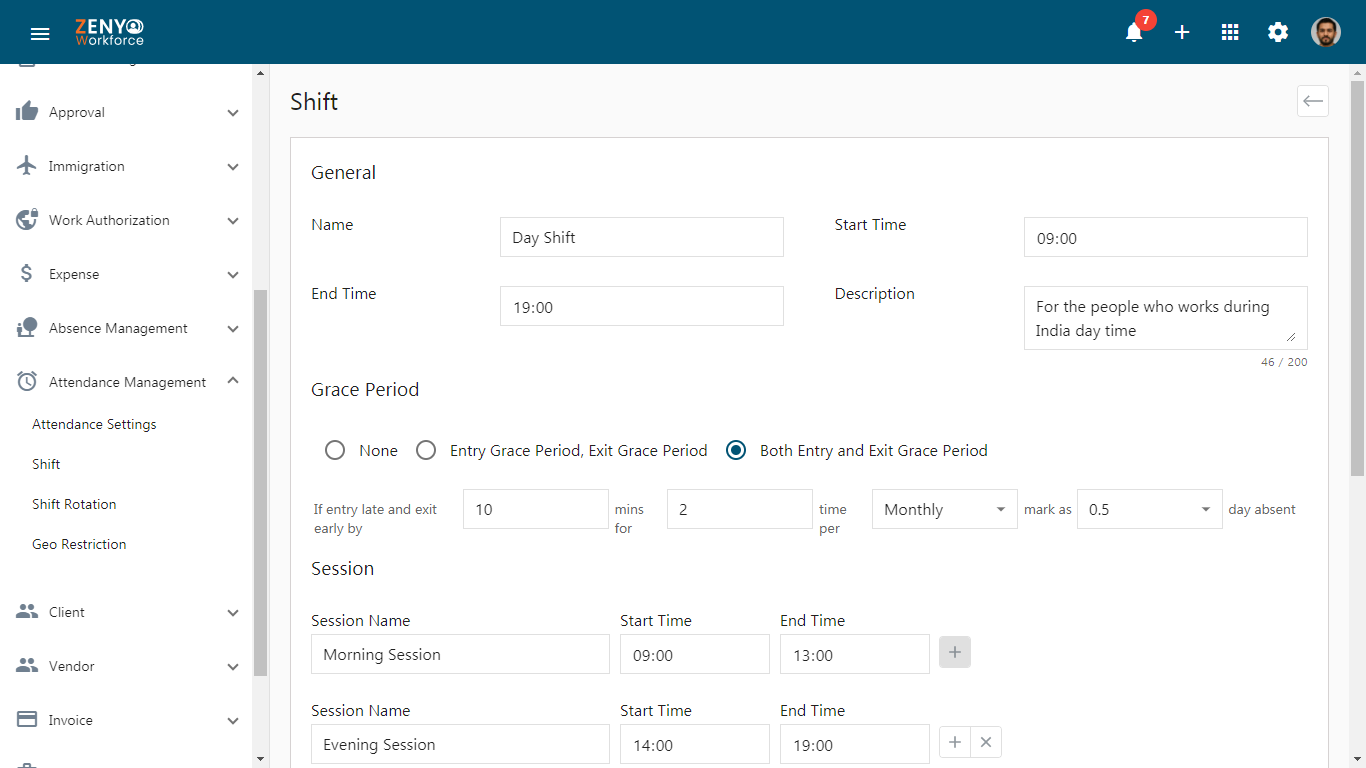
- If you select Entry Grace period, Exit Grace Period, to specify the allowed minutes for an employee’s late arrival and the number of times this late arrival is permitted within a weekly or monthly period. Additionally, define whether exceeding this limit will result in a full-day or half-day leave.
- Set for early exit in the same way.
- If you choose Both the Entry and Exit Grace Period, the grace period you define applies to both late arrivals and early exits, eliminating the need to set separate times for each.
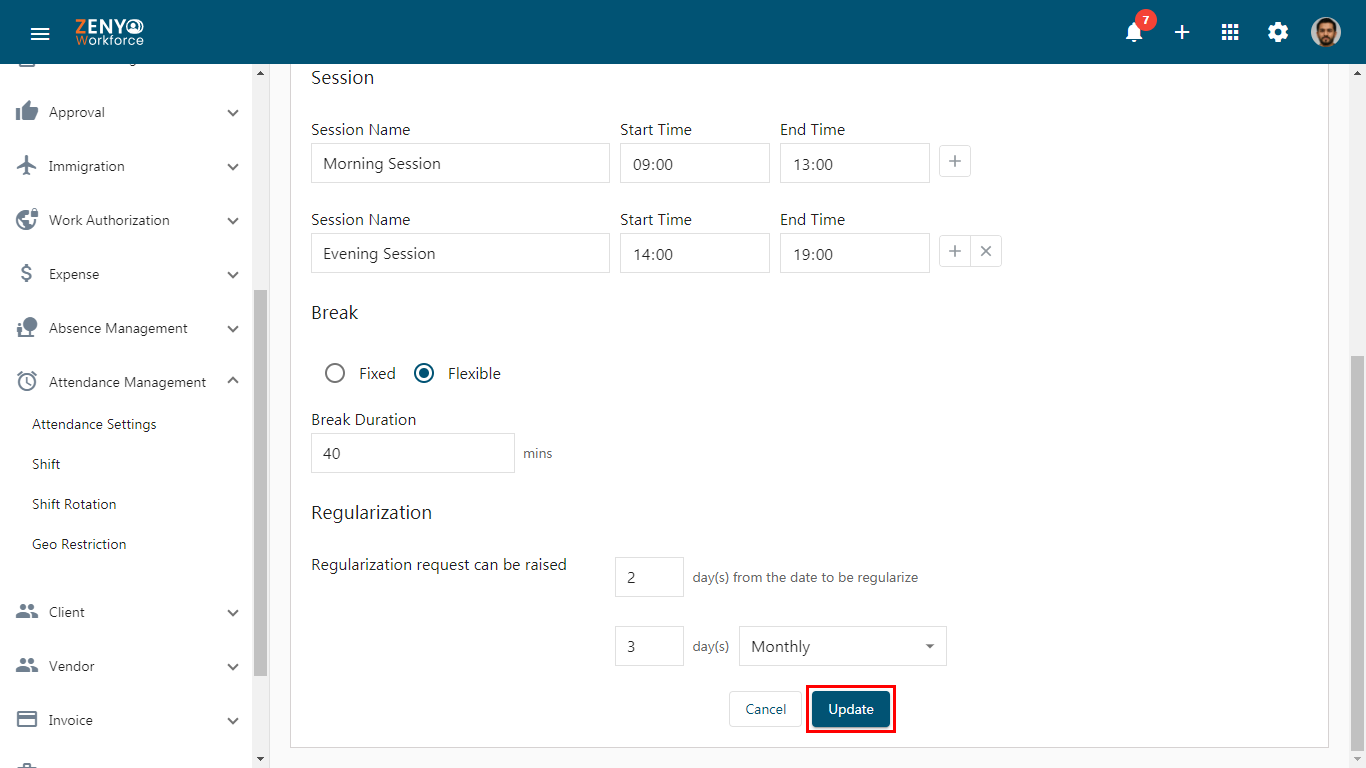
- In the Session section, enter the session name, start time, and end time. To add more sessions, click on the Add icon. If you want to remove the added session, click the Remove icon.
- In the Break, there are two options:
- If you choose Fixed, then you have to set fixed timings for breaks. Enter the break name, start time, end time, and select icons. Click on the Add icon to add more breaks. If you want to remove the added break, click the Remove icon.
- If you choose Flexible, then just enter the break duration in minutes.
- Within the Regularization section, define the time limit for employees to request approval for missed clock-ins and clock-outs. Specify how many times they can request it per week or month.
-
Click on the Save button.
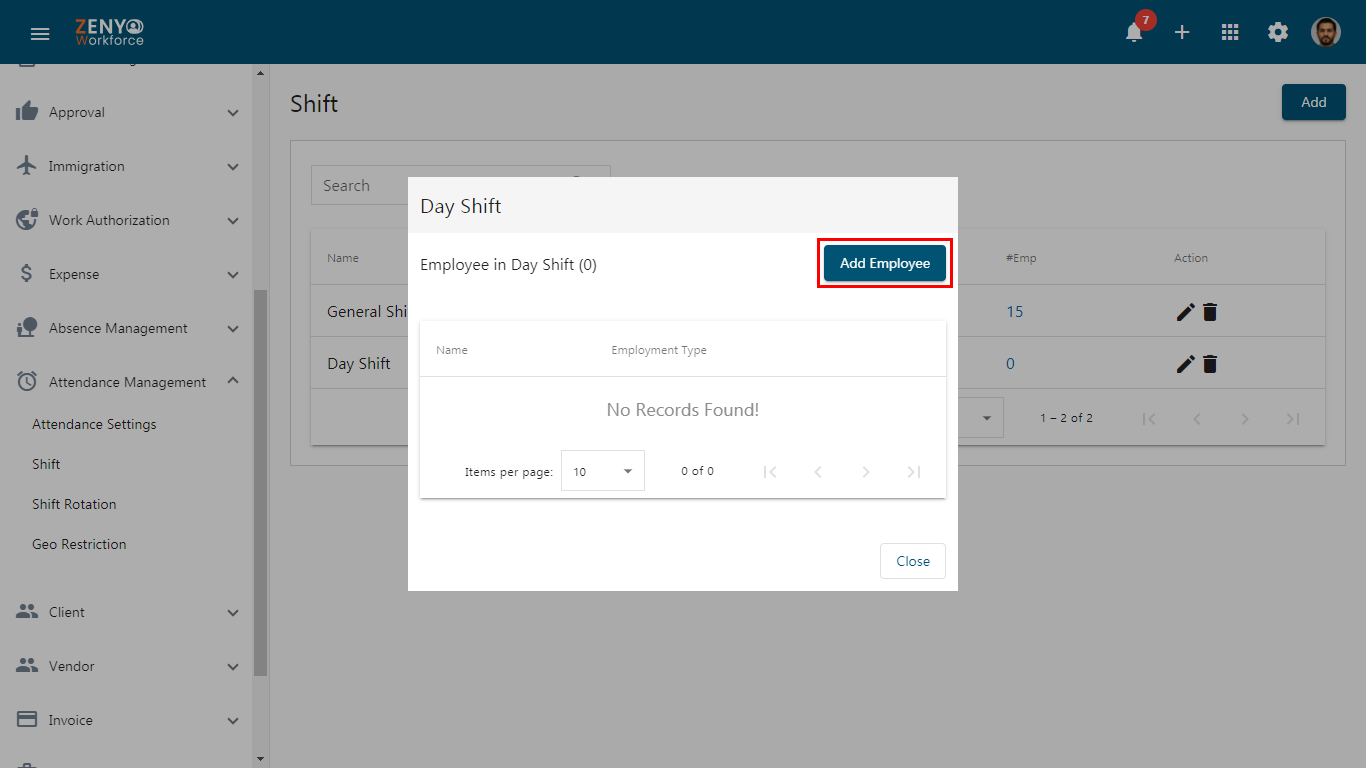
Mapping Employees to Shifts
- After saving the shift, map employees to that shift by clicking on number count in the #Emp column.
- To add employees to the shift, click the Add Employee button. A popup will appear; use the dropdown arrow next to All Employees to either add everyone to the shift or filter employees by office location, department, role, or employment type. If you need to select a specific employee, you can use the search bar.
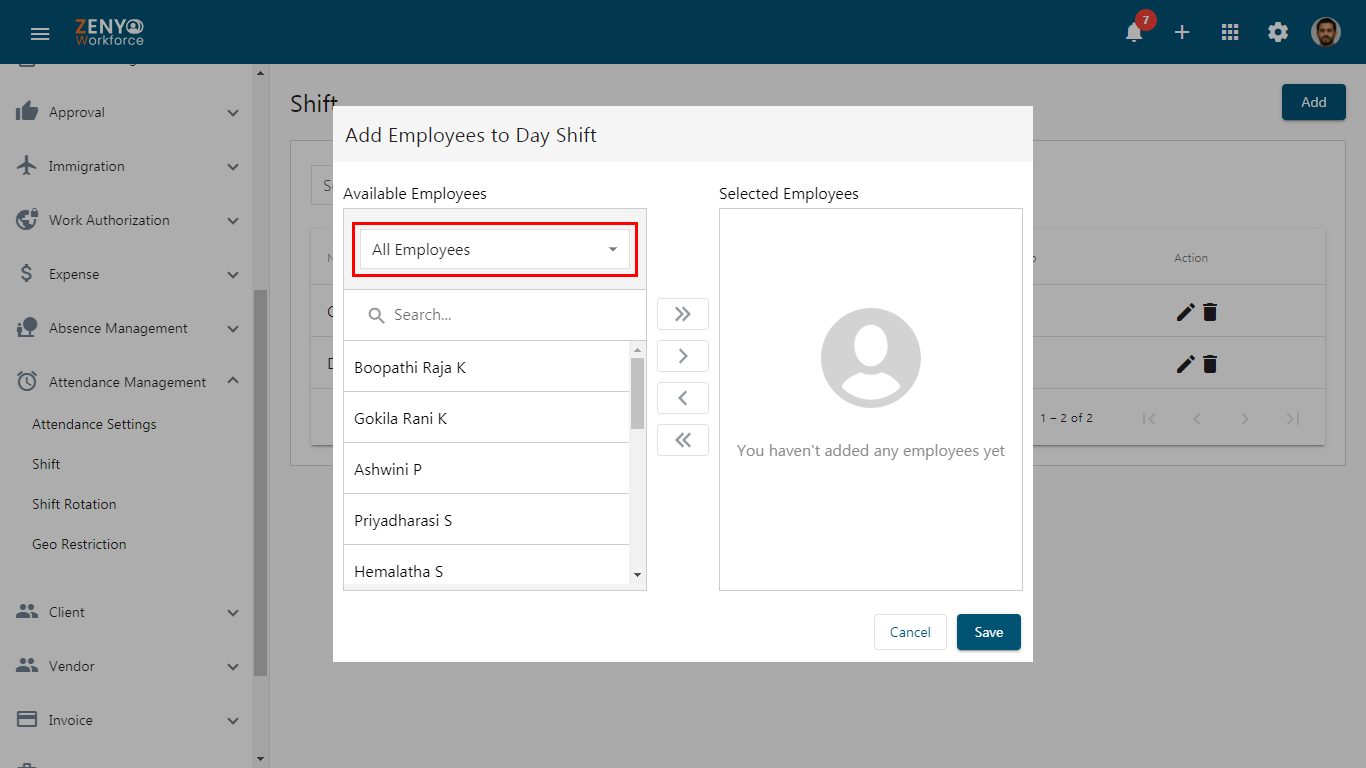
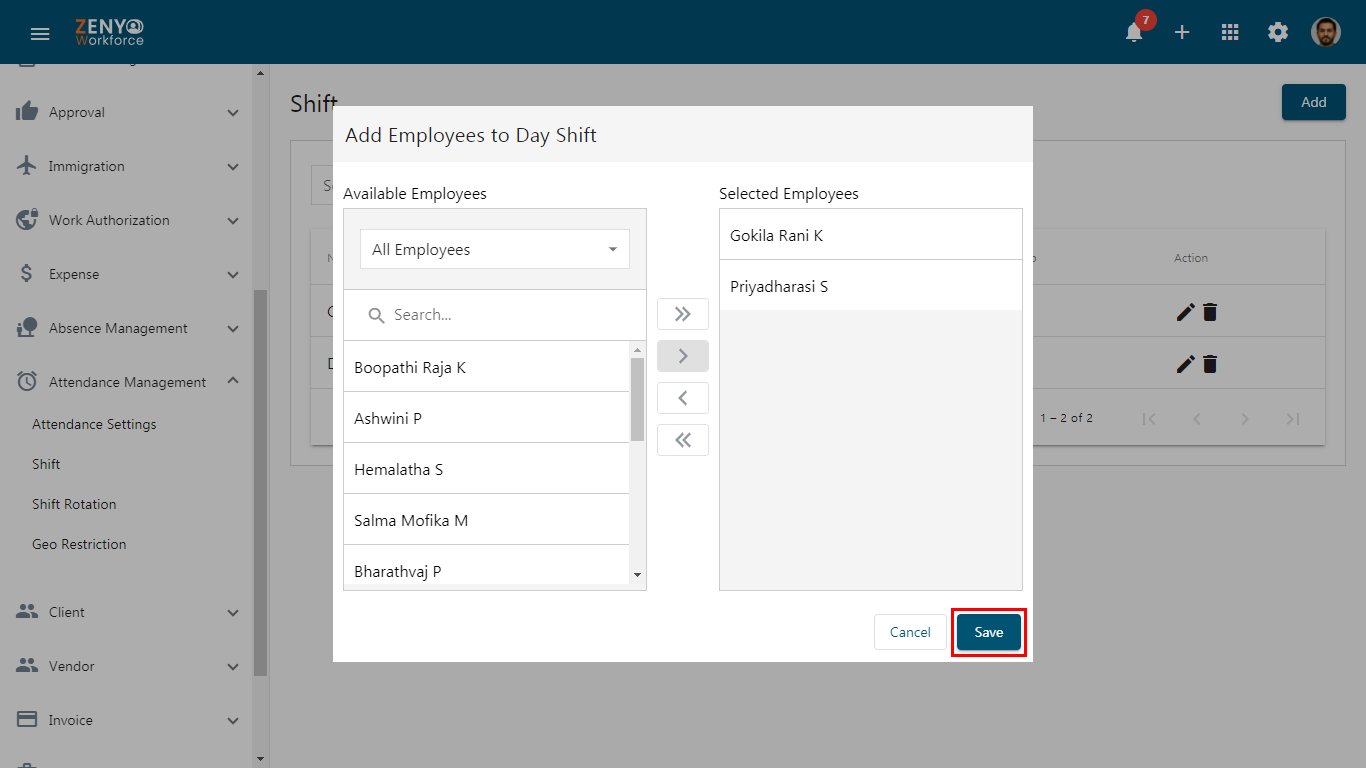
- If you need to choose a single employee, select the employee from the list and click the single right arrow. Your selected employee will then appear in the Selected Employees box.
- If you need to undo the selection you’ve made, simply choose the employee’s name within the Selected Employees box and click the single left arrow to remove it.
- For a bulk selection of employees, use the drop-down menu to make your choices, then the double-left arrow to add them all at once. To undo a bulk selection, simply click the double-left arrow.
- After making the selection, click the Save button.
- You can further edit the shift information by clicking on the Edit icon and clicking the Update button to apply any changes.
- Similarly, if there are no employees assigned to the shift, you can click on the Delete icon to remove the shift entirely.
Adding Shift Rotation
- Click on the Attendance Management menu and select the Shift Rotation submenu.
- Click on the Add button in the top right corner to add the shift rotation for the employees.
- In the Schedule Details section, enter the schedule name and select the schedule frequency, if the schedule repeats weekly, choose Weekly from the options, then select the specific day of the week from the dropdown menu. The schedule will then repeat on that chosen day each week. For the Monthly option, select the specific date of the month.
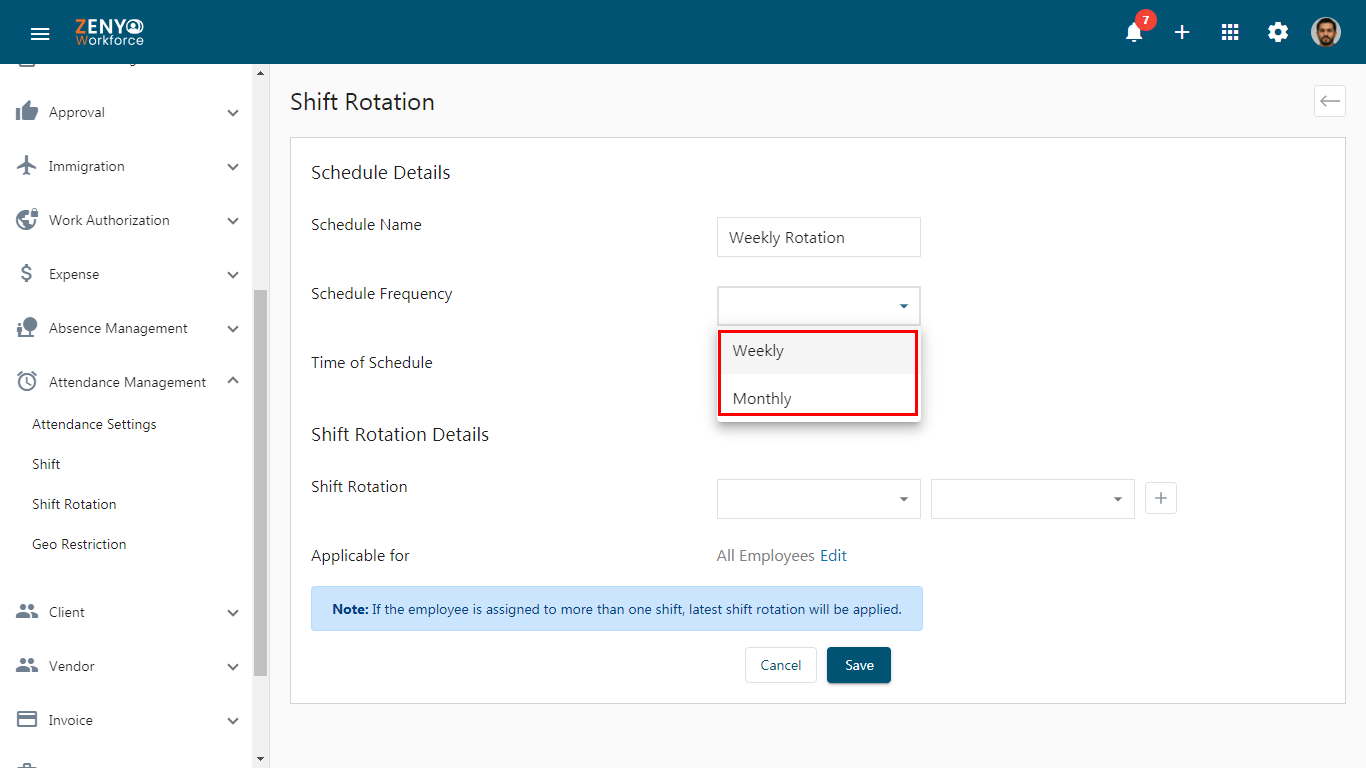
- Set the Time of Schedule to define the specific time the shift rotation will begin on that chosen day.
- In the Shift Rotation Details section, Set up employee shift rotations by selecting the shift from which employees will rotate and the shift to which they will rotate. Click the Add icon to add additional shift rotations if required.
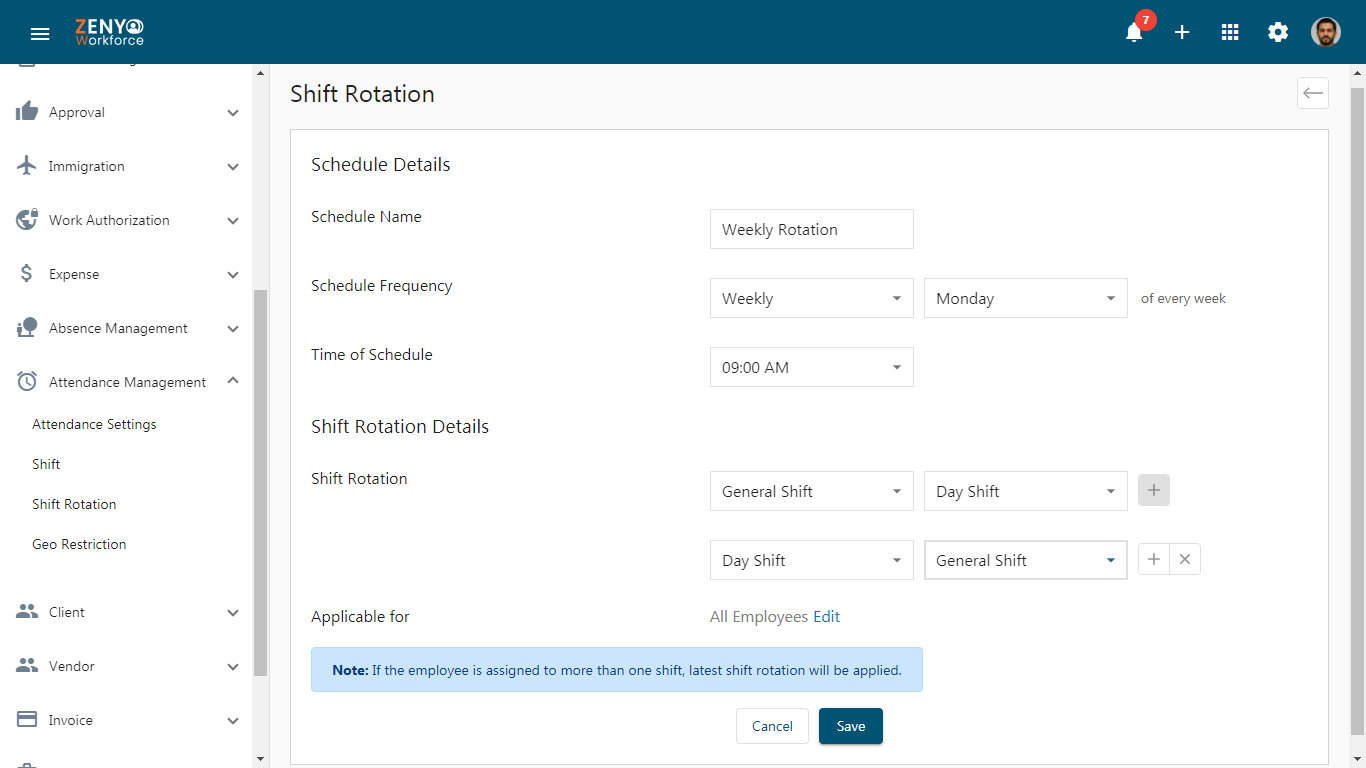
- After setting up the shift rotation pattern, select the employees it applies to. In the Applicable For section, click the edit icon to add employees. Choose either All Employees or Only Some Employees to specify by Role, Department, Office Location, or Employment Type. Click the Save button to confirm.
Note: If an employee is assigned to more than one shift, the latest shift rotation will be applied.
- After making your selections, click on the Save button.
- If you need to make changes, click on the Edit icon, modify the details, and click the Update button to save the edited information.
- Click on the Delete icon to remove a shift rotation entirely.
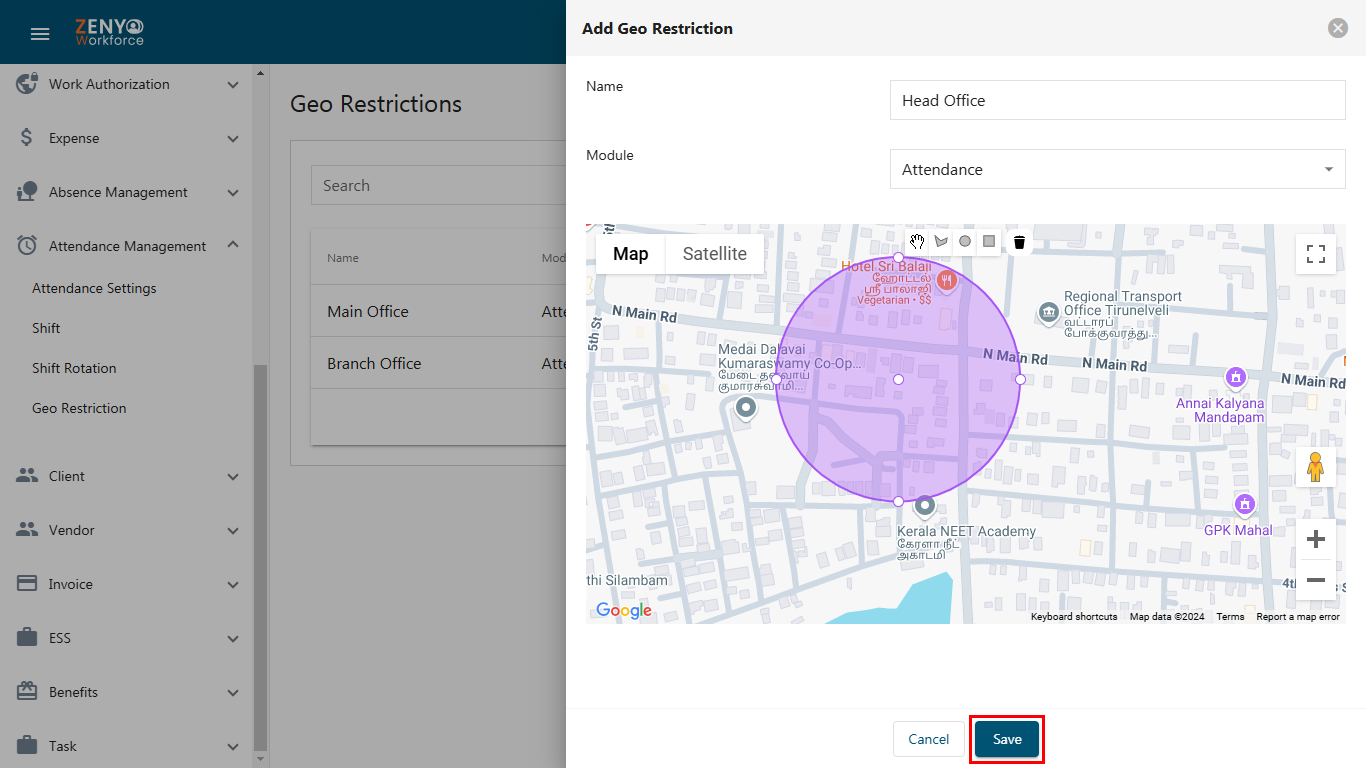
Add Geo Restrictions
- Click on the Attendance Management menu and select the Geo Restriction sub-menu.
- Click on the Add button in the top right corner to add the geo-restriction for the employees.
- In the Add Geo Restriction, enter a relevant name and select the module by clicking the drop-down arrow.
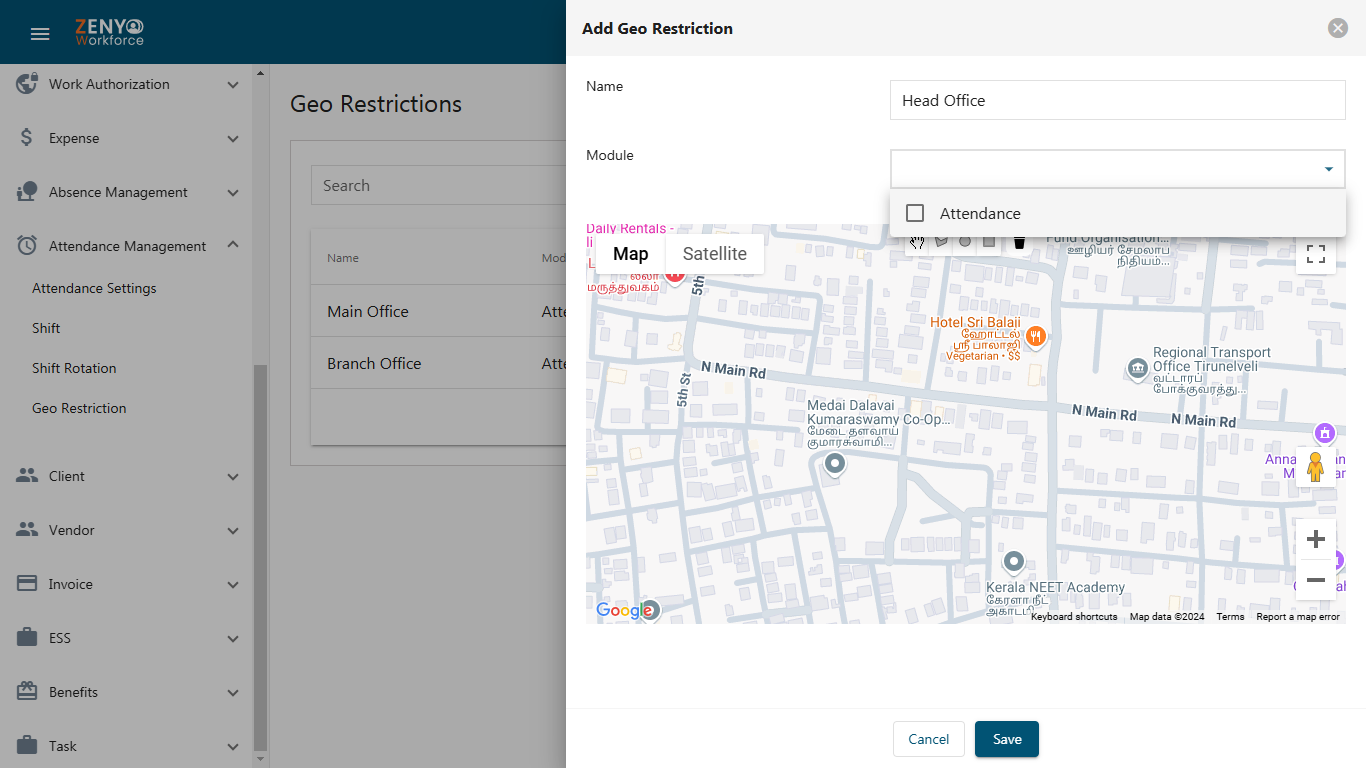 Note: For the map feature to display your location accurately, please ensure geolocation is enabled in the browser.
 - In this section, you can draw the specific area where employee clock-in and clock-out will be allowed.
- Use your cursor to outline the desired boundaries on the map. This will be the designated zone for employee attendance tracking.
- Once you’ve defined the restriction area, click on the Save button to save the geo-restriction.
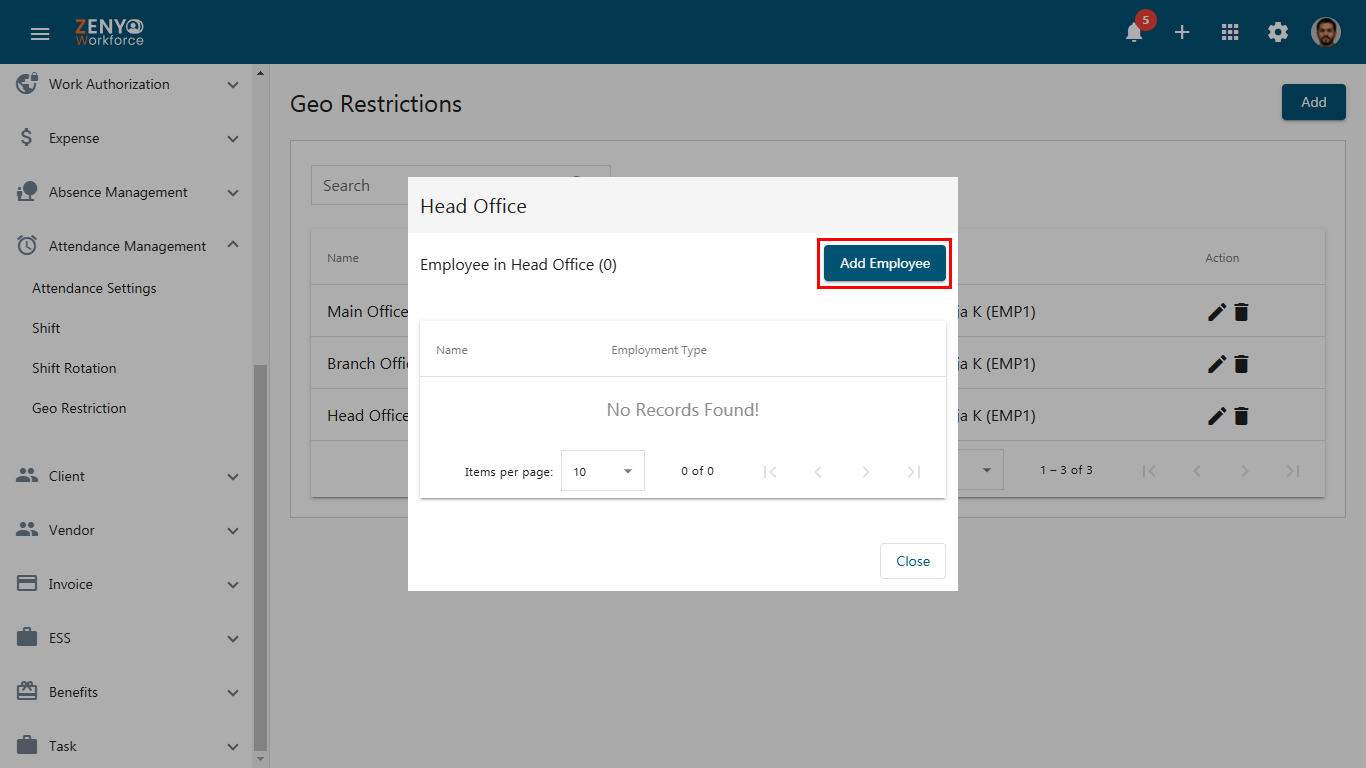
- After adding the geo-restriction, you’ll need to map employees to that restriction area. Click on the number count in the #Emp column for the geo-restriction you just created.
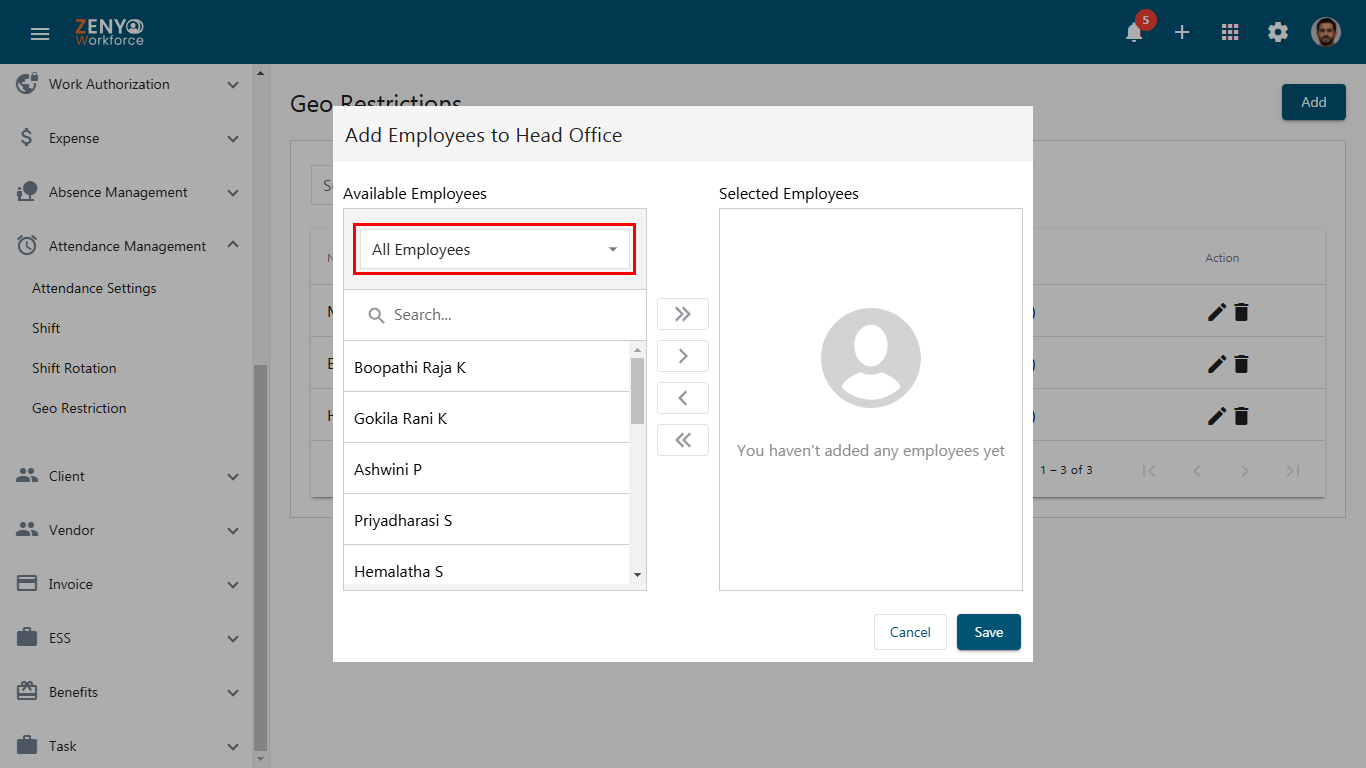
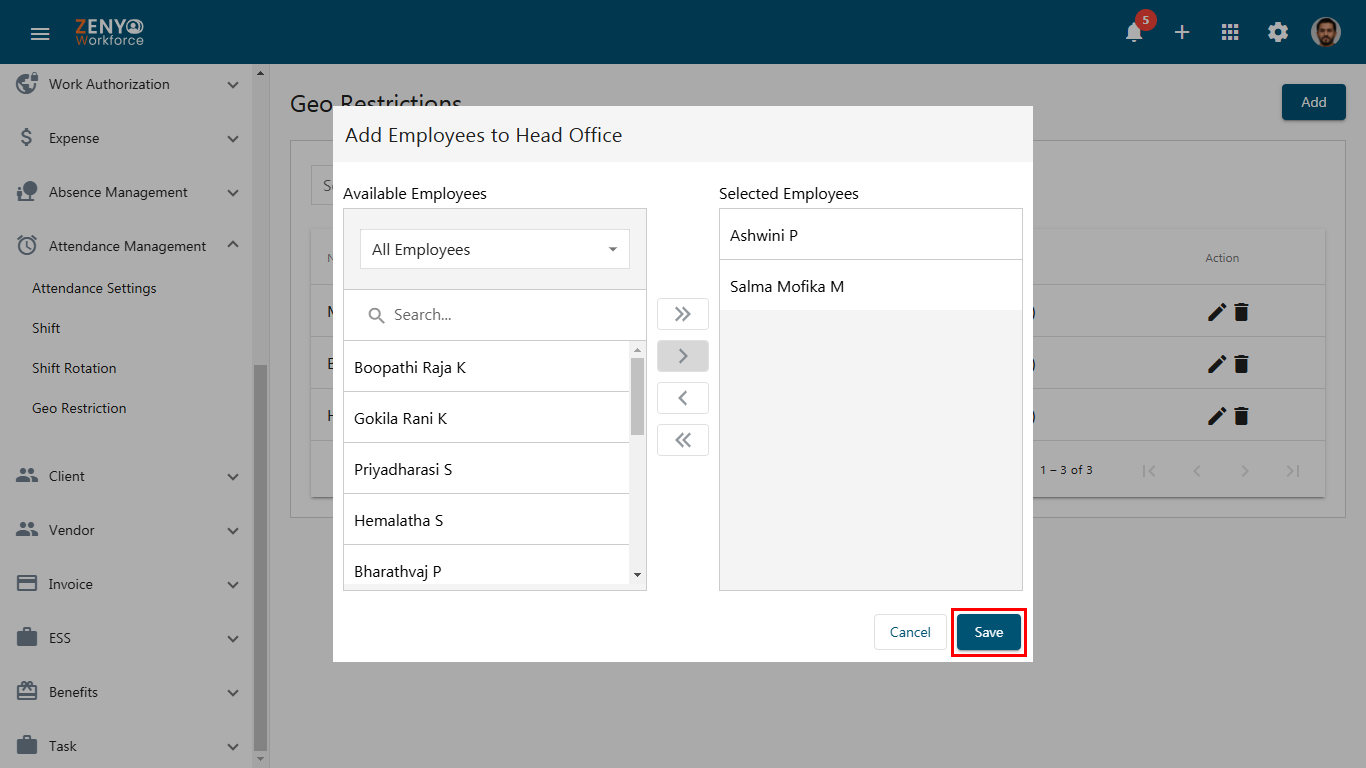
- A popup will appear. Click on the Add Employee button, select All employees, or filter employees based on other criteria like Office location, Department, Role, and Employment Type. Add employees or remove them from the selected employees’ list using the left and right arrows. Click the Save button.
- If you need to update the restriction area, click on the Edit icon, modify the boundaries on the map, and click the Update button to save the edited restriction area.
- Additionally, you can click on the Delete icon to remove a geo-restriction. However, remember that a geo-restriction can only be deleted if no employees are currently added to it.
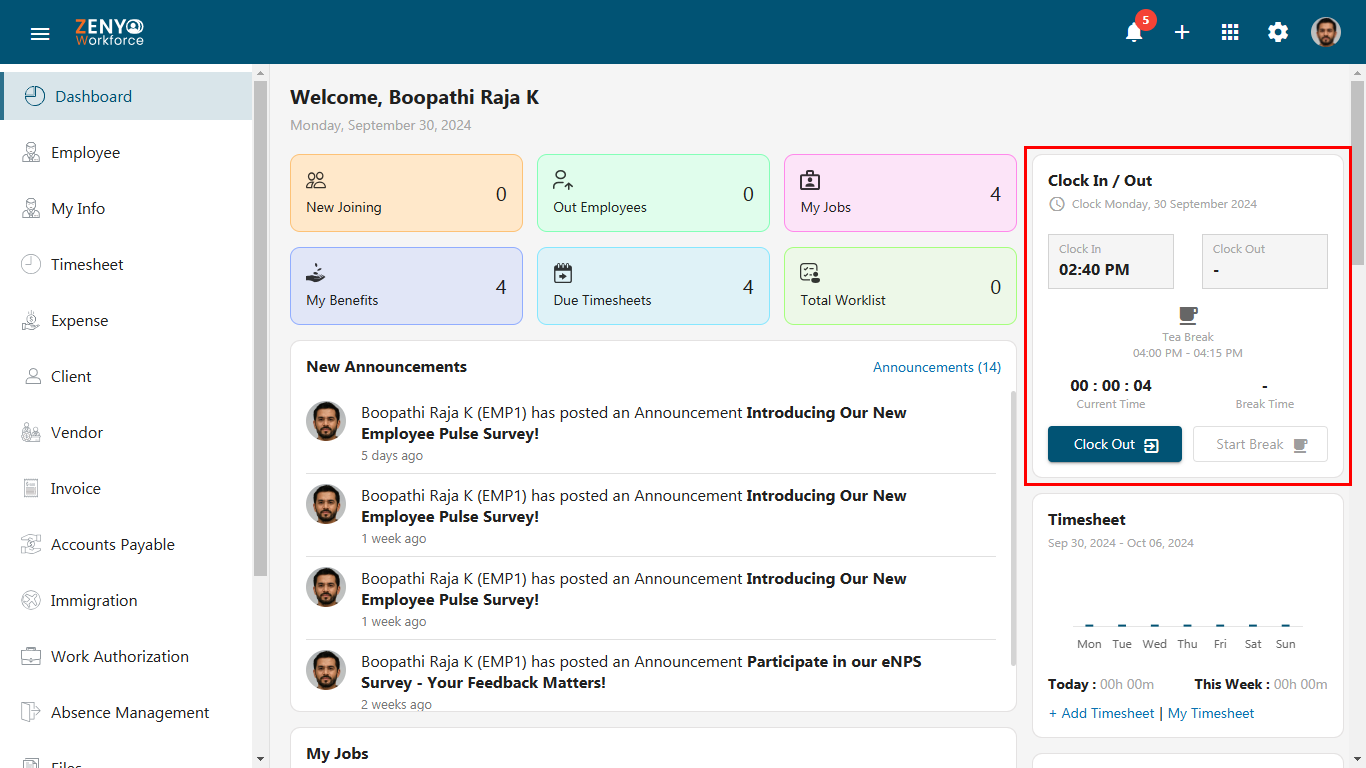
Employee Clock-in/Clock-out
- Navigate to the Dashboard to access the Clock In/Clock Out functionality.
- Click the Employee’s Profile Picture. When the Work Location toggle is enabled, the employee’s clock-in will be based on geo-restrictions, which primarily apply to employees working from the office.
- If the employee is working from home, the Work Location toggle should be off, and their clock-in won’t be tied to any geo-restrictions; they can clock in and clock out from anywhere.
- Employees can Clock In to start the workday, with the system automatically recording the clock-in time and starting a work timer.
- Break times are displayed based on the employee’s shift; employees can Clock Out to stop the work timer and enable the Start Break button, activating a break timer.
- Employees can End Break to stop the break timer and re-enable the Clock In button to resume work hours.
- After completing their scheduled work hours, employees should Clock Out before leaving to accurately record attendance.