A Benefit Group is a collection of benefit plans organized for easier management and assignment. It enables the bundling of specific plans, such as medical, dental, vision, or life insurance, based on eligibility or organizational needs. Once established, the group can be assigned to employees for plan enrollment.
- Click the Settings icon in the top right corner of the navigation bar.
- Select the Benefits menu and then choose the Groups sub-menu.
Add Benefit Group
Click on the Add Benefit Group button in the top right corner. The process of adding a Benefit Group has three steps:
- Group Details
- Select Employees
- Select Plans

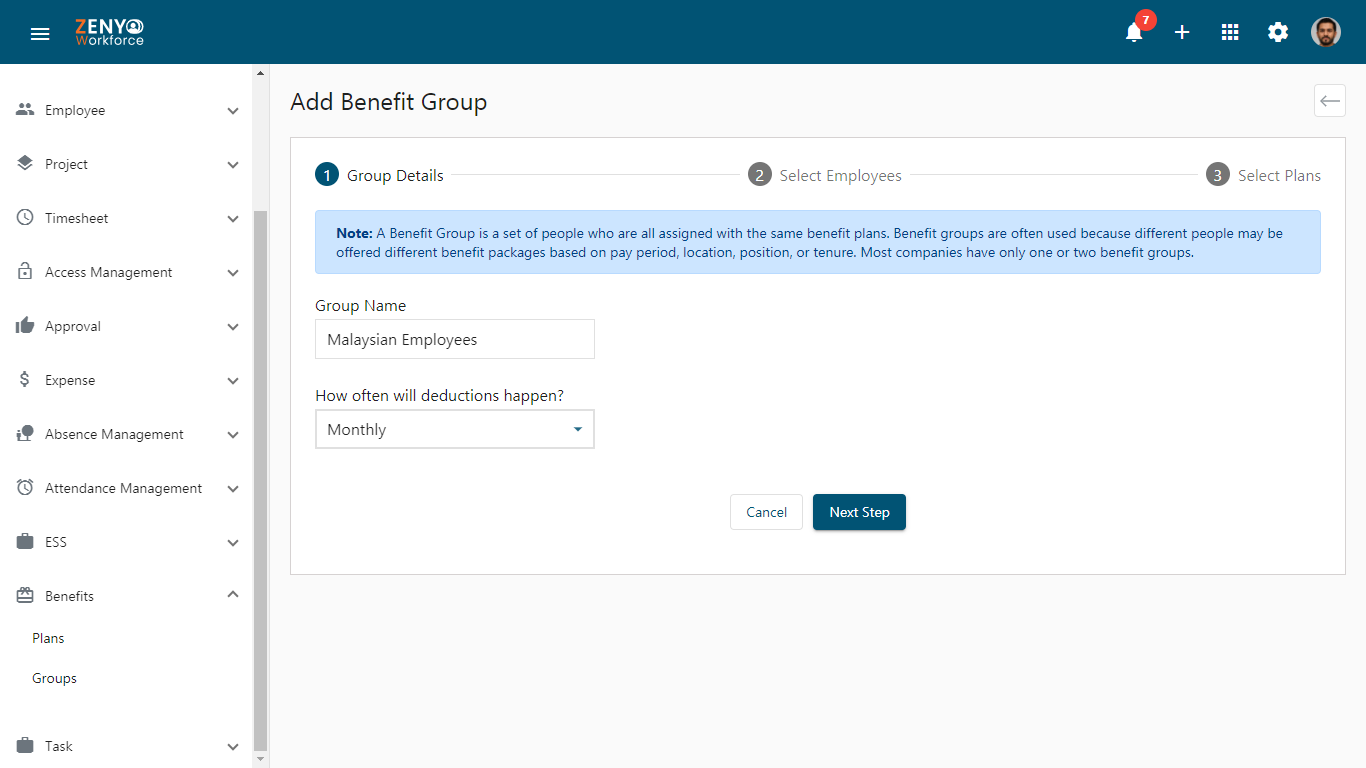
Group Details
- Enter the Group Name.
- Select the deduction frequency using the dropdown in the How often will deductions happen? field.
- Click the Next Step button to proceed to employee selection.
Select Employees
Choose the employees to add to this group. Remember that employees can only belong to one group at a time. If you move them from another group, they will lose the benefits associated with their previous group.
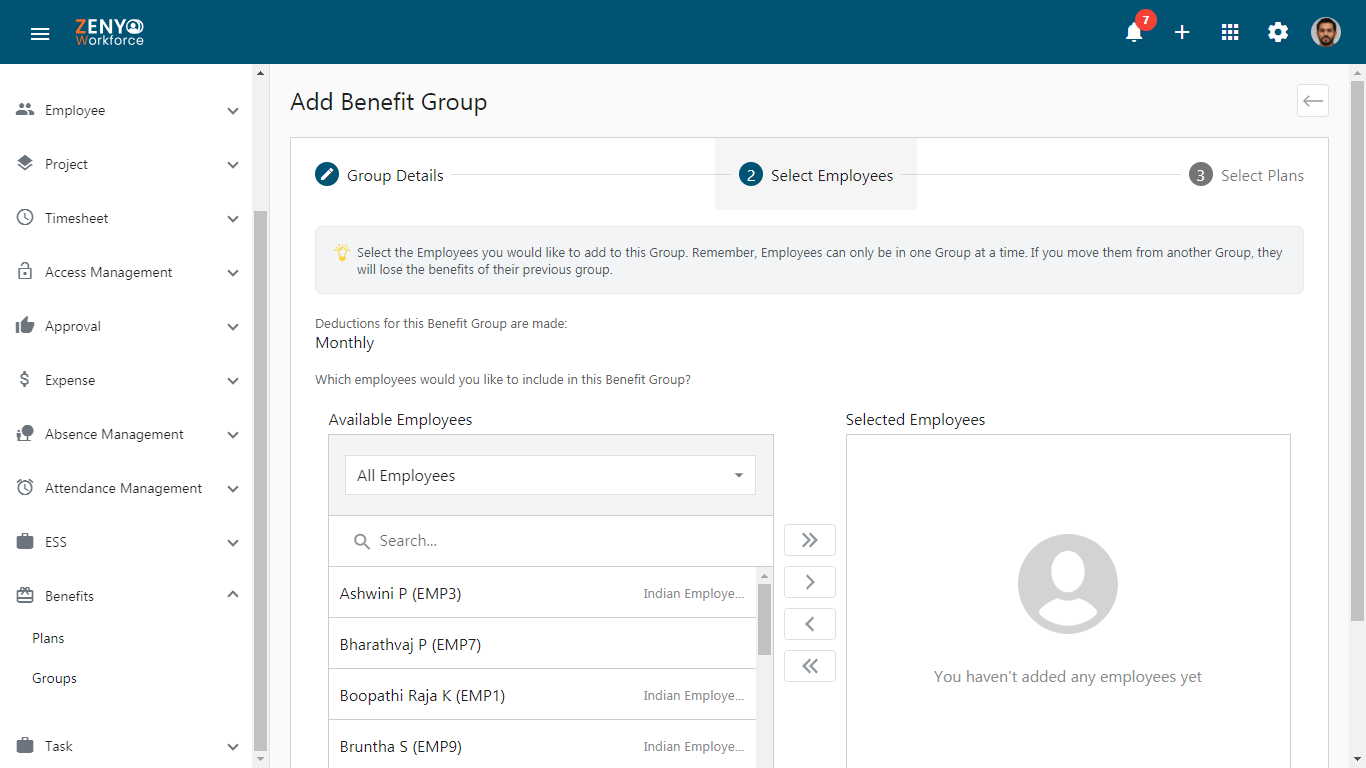
- To select a single employee, choose the employee from the list and click the single right arrow. The selected employee will appear in the Selected Employees box. To undo a selection, click the employee’s name in the Selected Employees box and then click the single left arrow to remove them.
- For bulk employee selection, use the drop-down menu to make your choices, then click the double-right arrow to add them all at once. To undo a bulk selection, click the double-left arrow.
- By clicking the dropdown under All Employees, you can filter employees by office location, department, or role.
- After finalizing your selection, click the Next Step button to select plans.
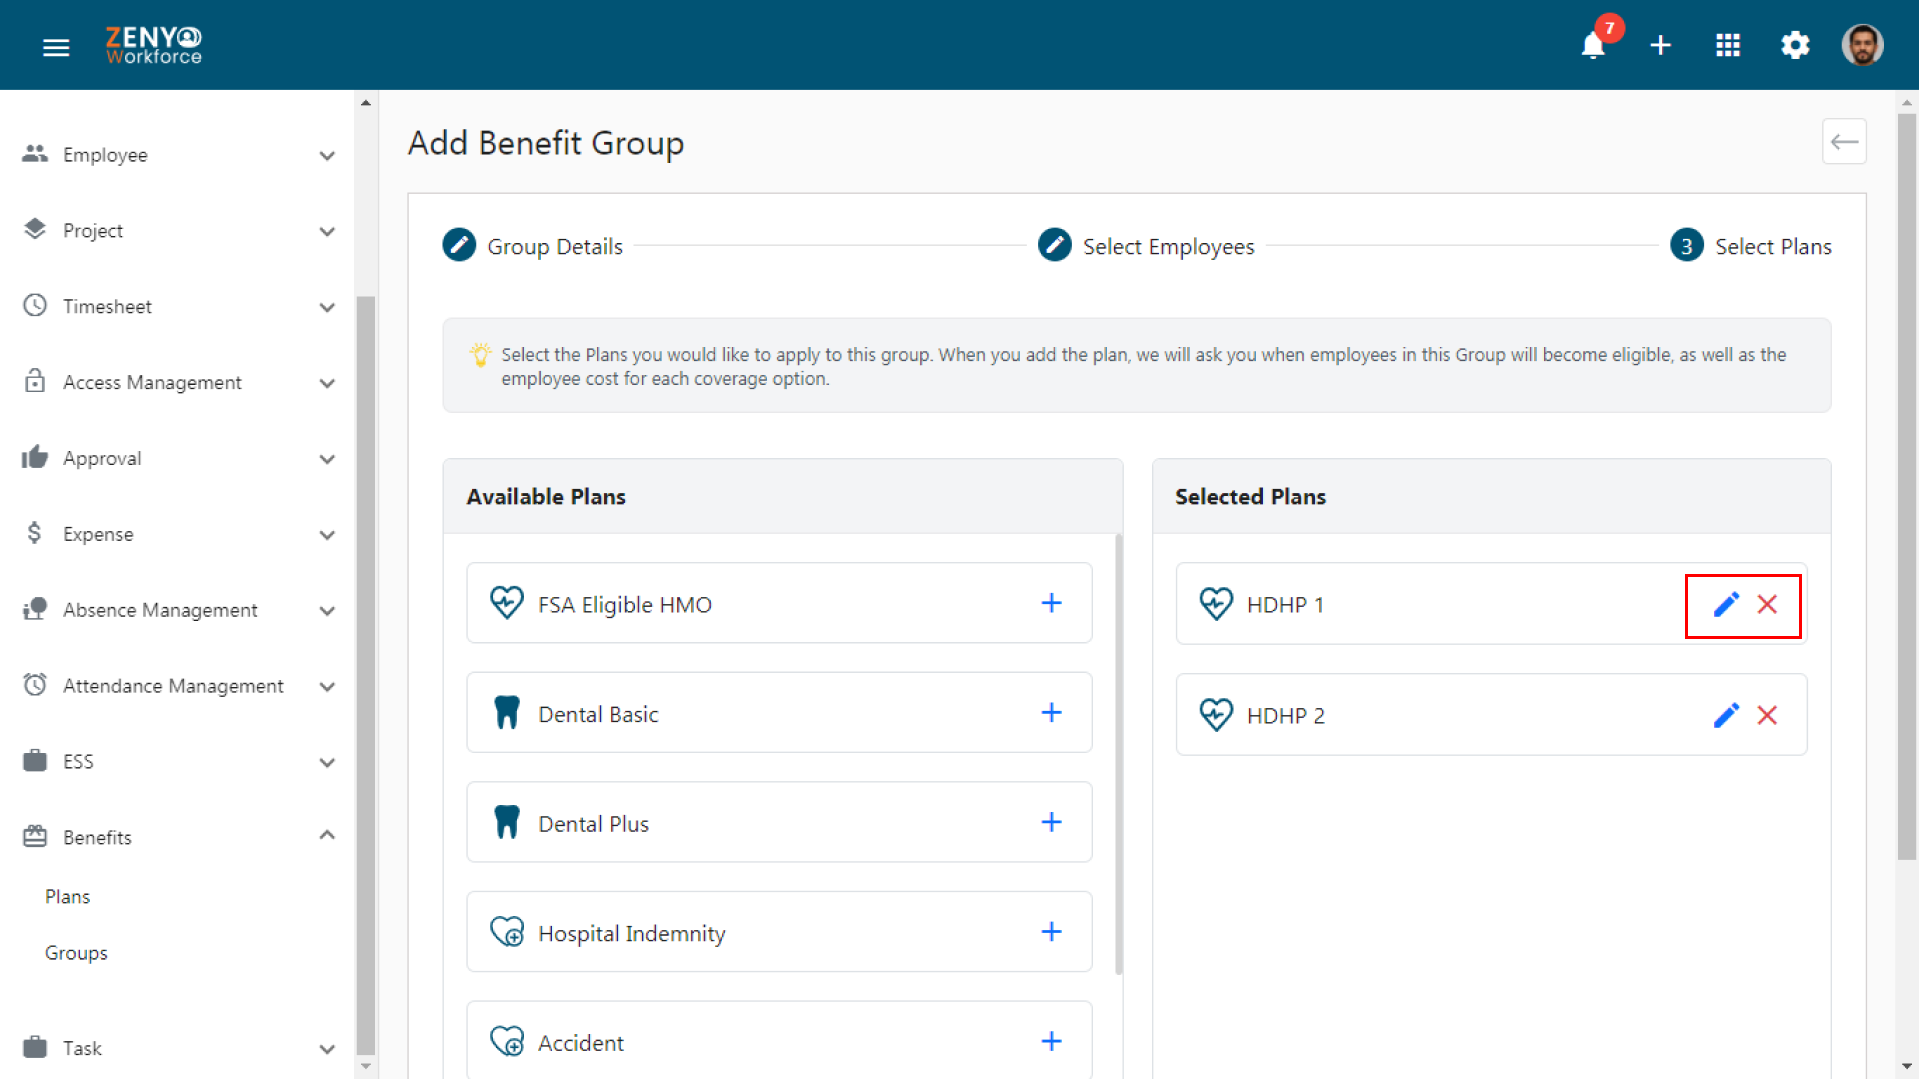
Select Plans
Choose the plans you want to assign to this group. After selecting a plan, you will be prompted to enter the eligibility date for employees in this group and the associated costs for each coverage option.
In the Select Plans section, there are two parts:
- Available Plans: A list of the active plans created in the Plans sub-menu.
- Selected Plans: Shows the plans chosen for the group. Once selected, the plans appear here.
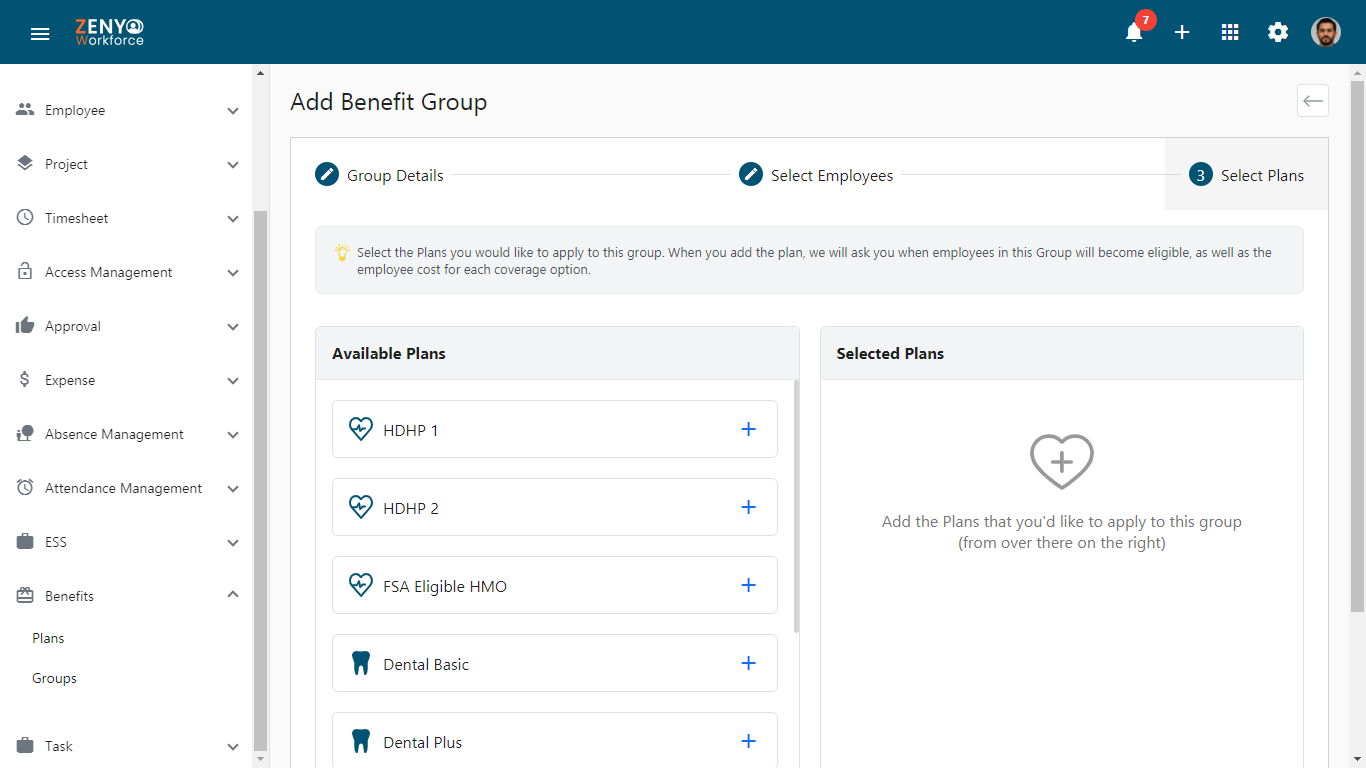
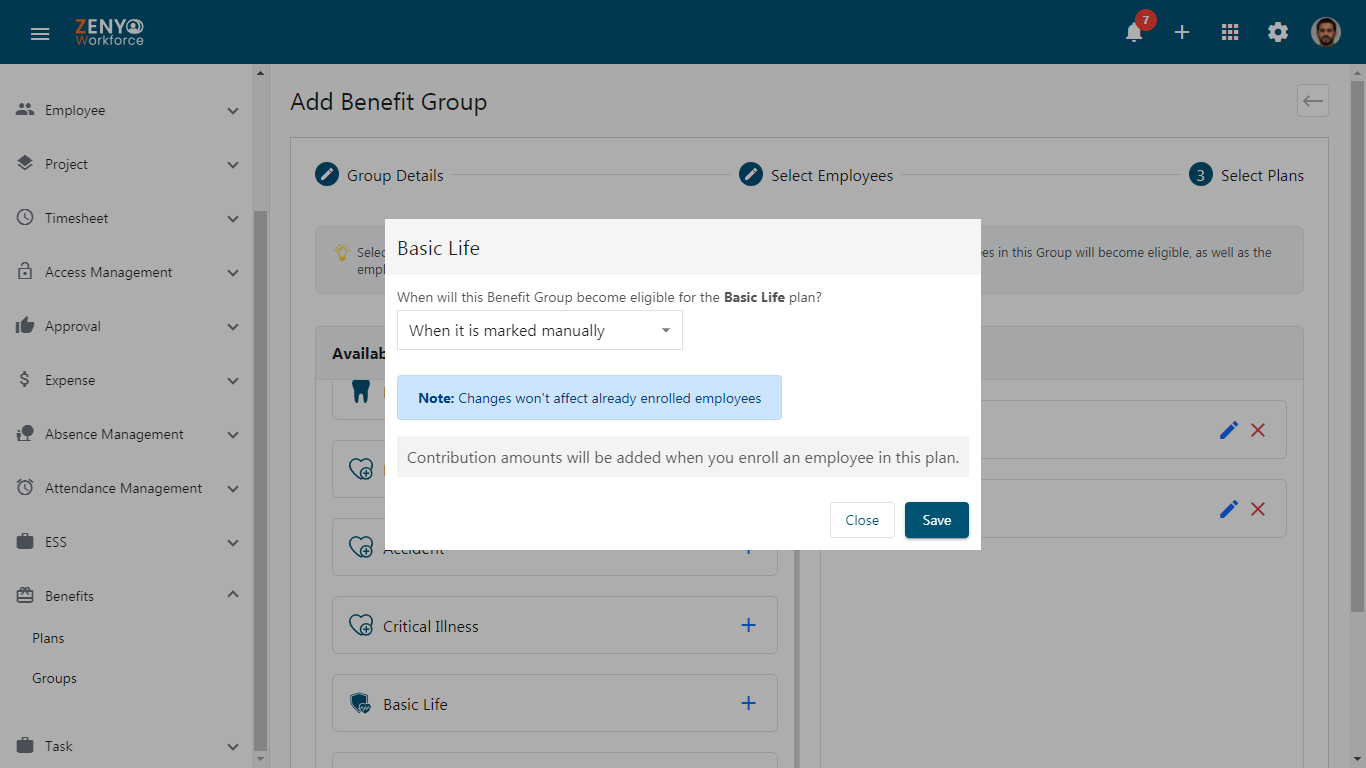
- To select a desired plan from the Available Plans section, click the Add icon. You can choose the criteria for when employees become eligible for this plan in the benefits group by clicking on the drop-down menu. There are four criteria:
- When it is marked manually: Employees become eligible when the company manually enrolls them in the plan based on specific criteria
- Immediately upon hire: Eligible employees are automatically enrolled in the plan as soon as hired, with no waiting period.
- After a waiting period: Eligible employees must complete a designated waiting period before enrolling in the benefits plan. Once the waiting period ends, employees are automatically enrolled, ensuring coverage begins after the specified duration.
- First of the month following a waiting period: Employees are enrolled in the benefits plan starting on the first day of the month after completing a specified waiting period. If the waiting period ends in the middle of the month, coverage begins on the first day of the next month.
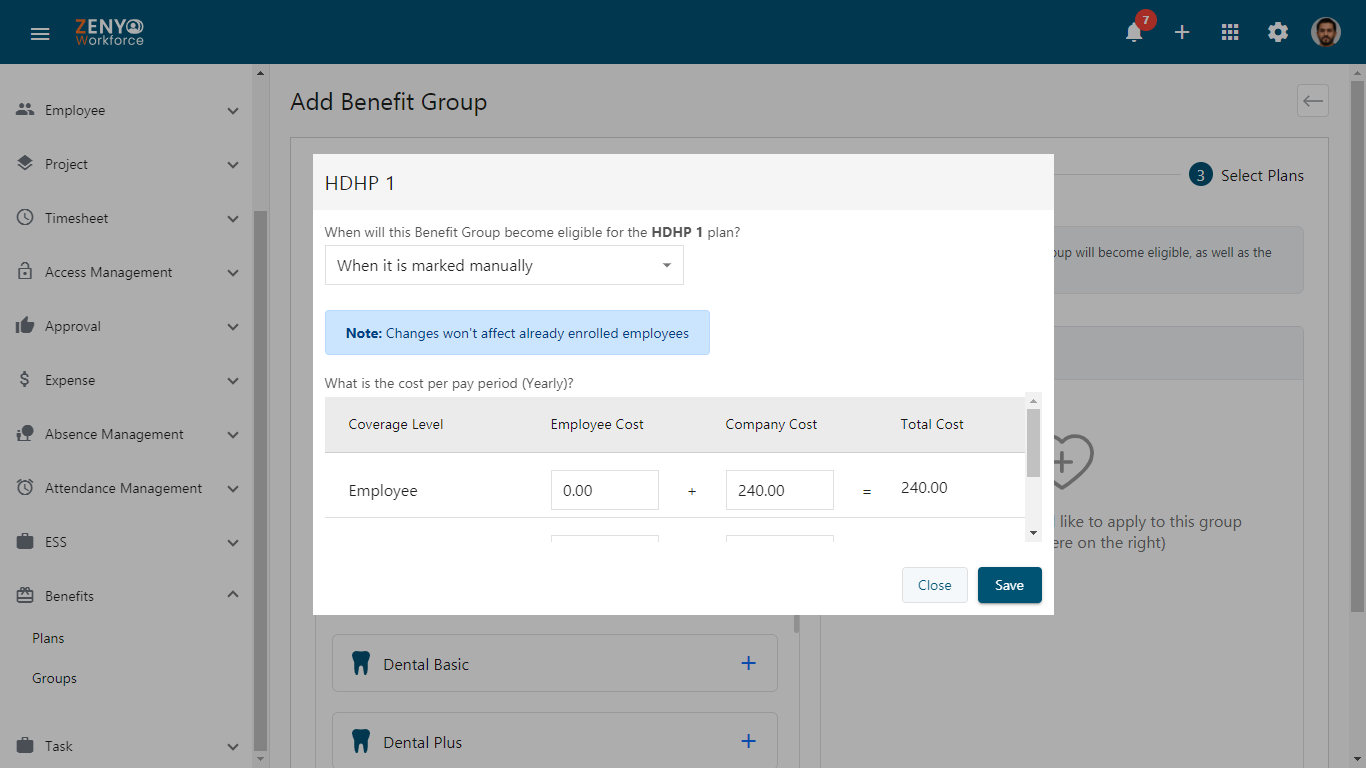
- In the What is the cost per pay period? section, the company’s cost will vary based on the chosen deduction frequency.
- If monthly deductions are selected, the total amount will be displayed in the Plan Coverage section.
- For other deduction options, the amount will be adjusted accordingly.
- Enter the employee cost for each coverage level to match the total cost, adjusting as needed. Click the Save button to finalize your changes.
- After saving, the selected plans will appear in the Selected Plans part.
- For other plans, choose the eligibility criteria for the Benefits Group (e.g., When it is marked manually). Click Save and enter the contribution amount for enrolling employees in this plan.
- To edit or remove an added plan, click the Edit icon. A popup will appear, allowing you to adjust the coverage cost and eligible category.
- To delete a plan, click the Remove icon. The plan will be removed from the selected plans
- Click the Save and Finish button. Now the benefits group is successfully created.

Edit, Clone, or Delete a Benefit Group
- To edit, clone, or delete a benefit group, click on the More icon of the group you want to modify:
- Edit: Add or remove employees from the group.
- Delete: Remove the benefit group entirely.
- Clone: Create a duplicate copy of the benefit group.
- To add the plan to the group or to edit/remove an existing plan, click the Plans link under the benefit group.
- In the Benefit Plan section, click the Add Existing Plan link. A popup will appear, Select the plan from the dropdown menu and click Save to add the new plans to the group.
- To edit plan details, click the Edit icon next to the plan. To remove the plan from the group, click the **Remove icon.

