A timesheet in workforce management is used to track the total time an employee spends on various tasks or projects within a specific period, typically a week or a month.
This is incredibly beneficial for various tasks, such as tracking time, simplifying payroll, generating invoices, and managing projects.
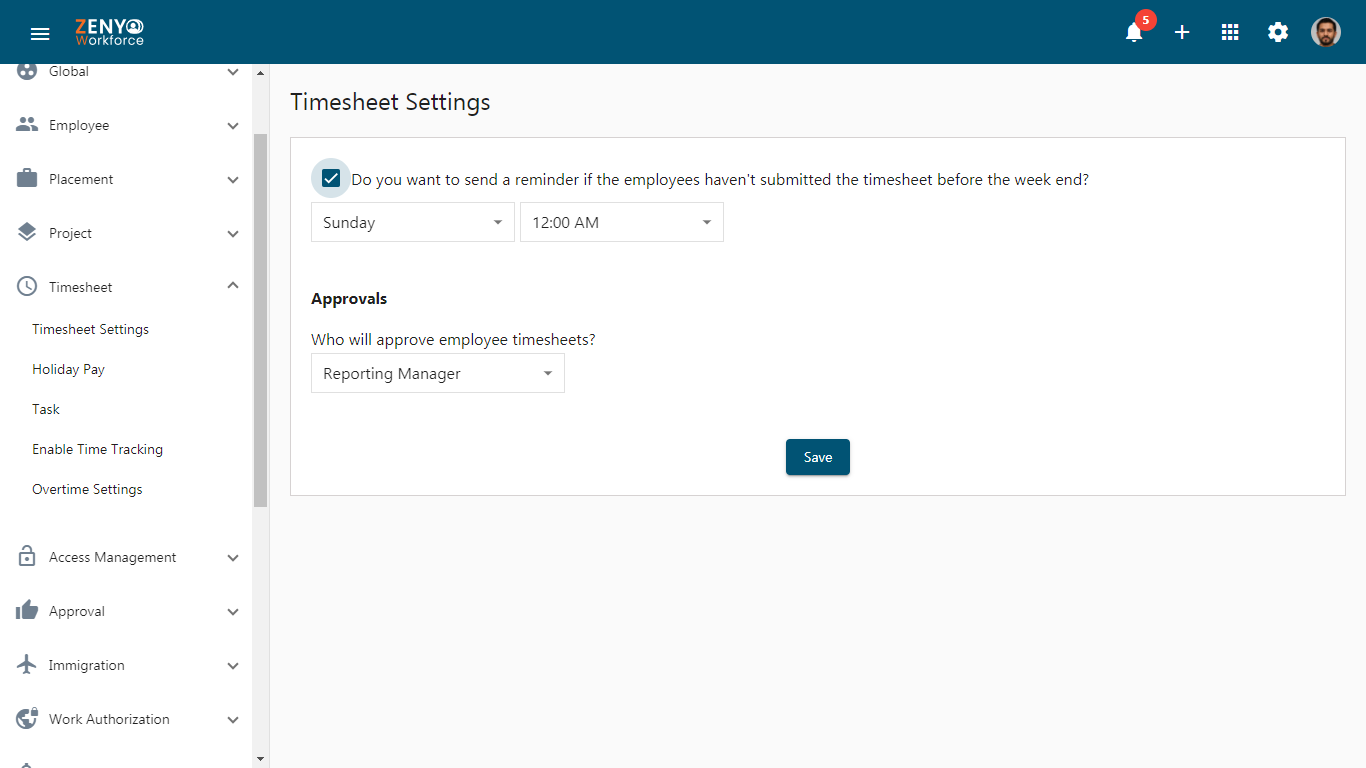
Timesheet Settings
- Start by clicking on the Settings icon.
- In the Timesheet main menu, click on Timesheet Settings.
- To send reminders to employees for unsubmitted timesheets, check the checkbox.
- Select the Week Start Day for the timesheet cycle.
- Set the Reminder Time for when notifications will be sent regarding unsubmitted timesheets.
- From the dropdown menu under Approvals, you can either select the Reporting Manager as the approver or choose Specific Person to assign any specific employee as the approver.
- Once you have configured the timesheet settings, click Save to apply the changes.
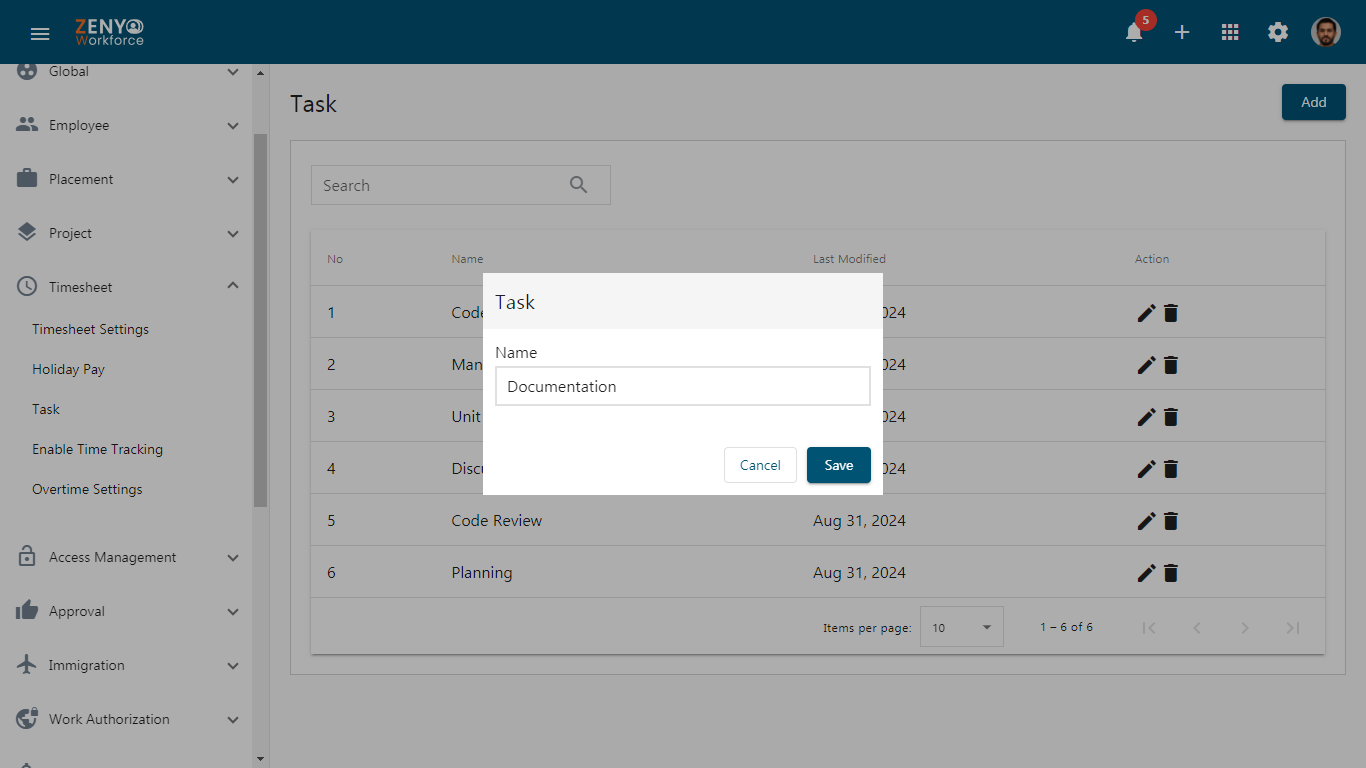
Task
- Next, click on Task from the main menu.
- Click the Add button to create a new task.
- Enter the task Name and click Save.
- Your task will now be saved along with the task name, last modified date, and available actions.
- If you need to find a task quickly, use the Search Bar located at the top.
- To edit a task, click on the Edit icon, make your changes, and click Update.
- To delete a task, click on the Delete icon next to the task you want to remove.
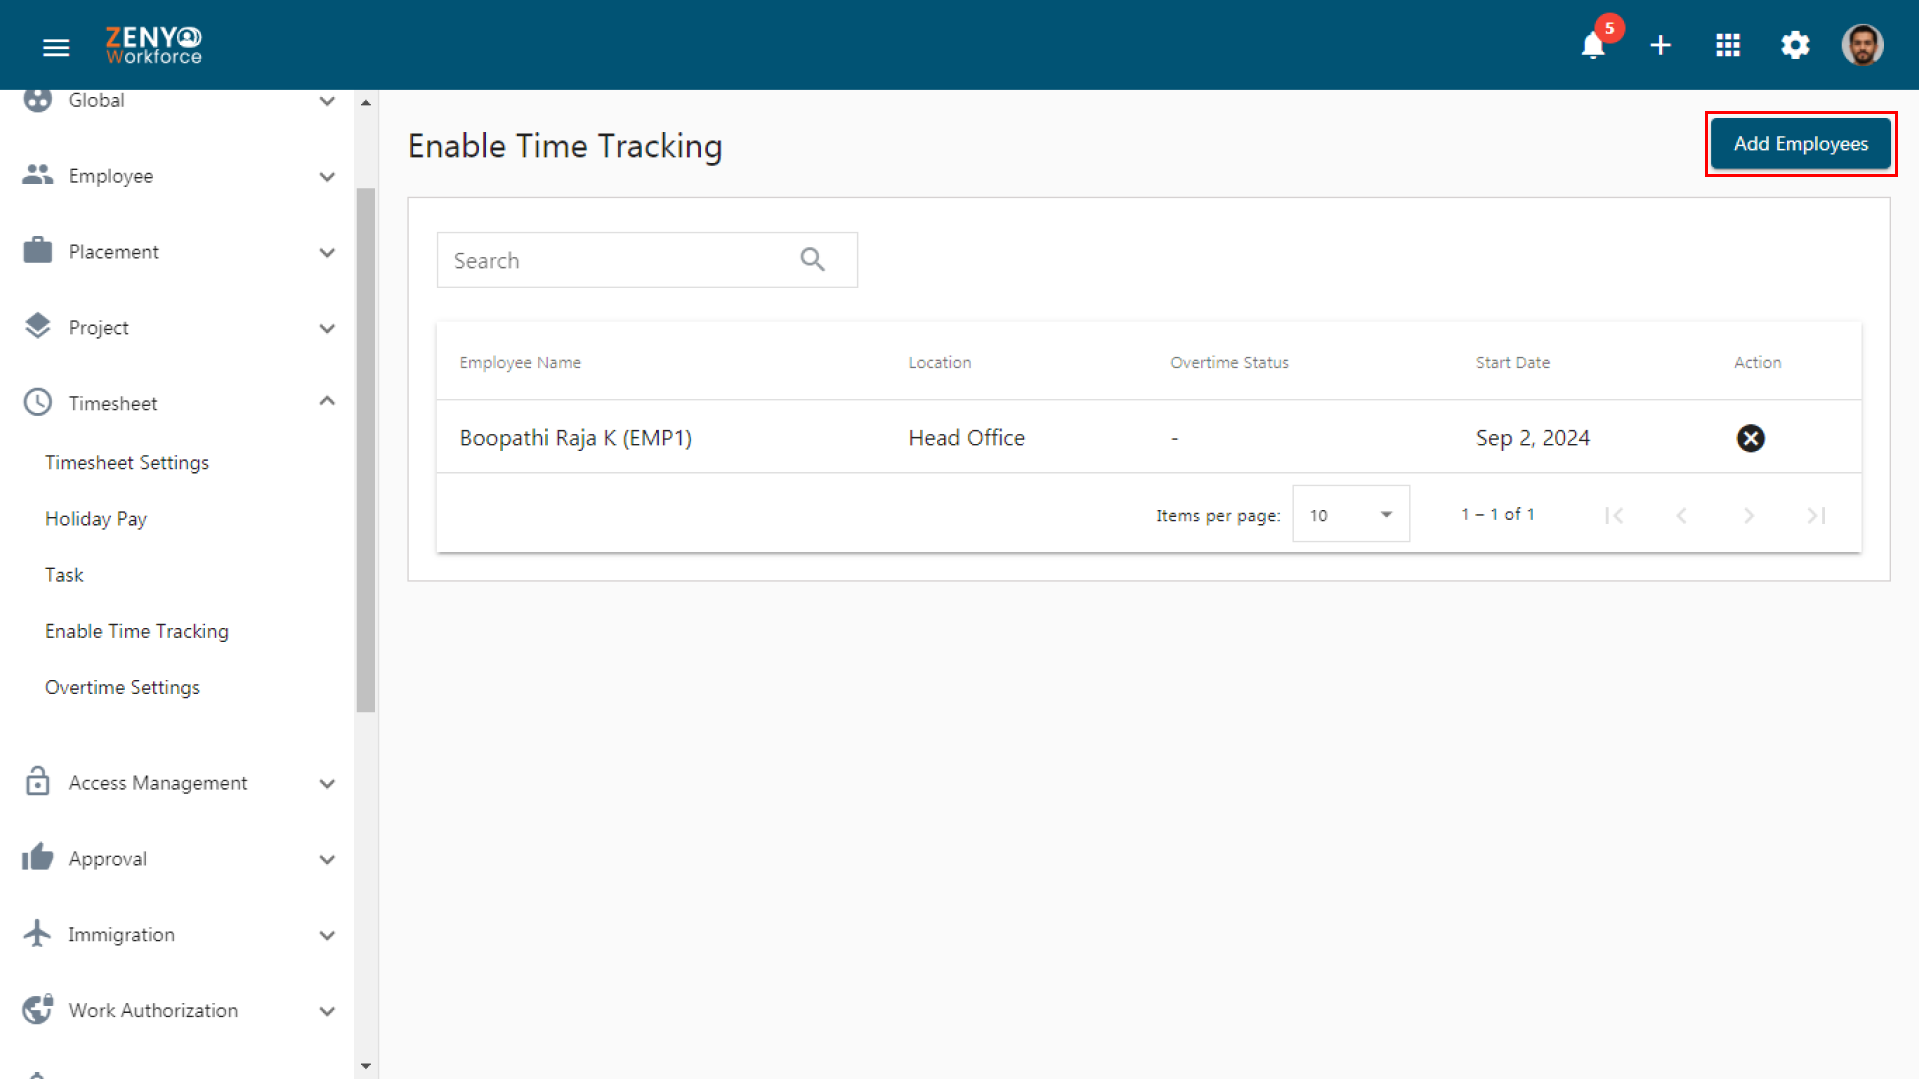
Enable Time Tracking
- Select the Enable Time Tracking option.
- Click the Add Employee button to enable timesheet entries for your employees, allowing them to track their work hours.
- A pop-up box will appear where you can select the employees to enable time tracking.
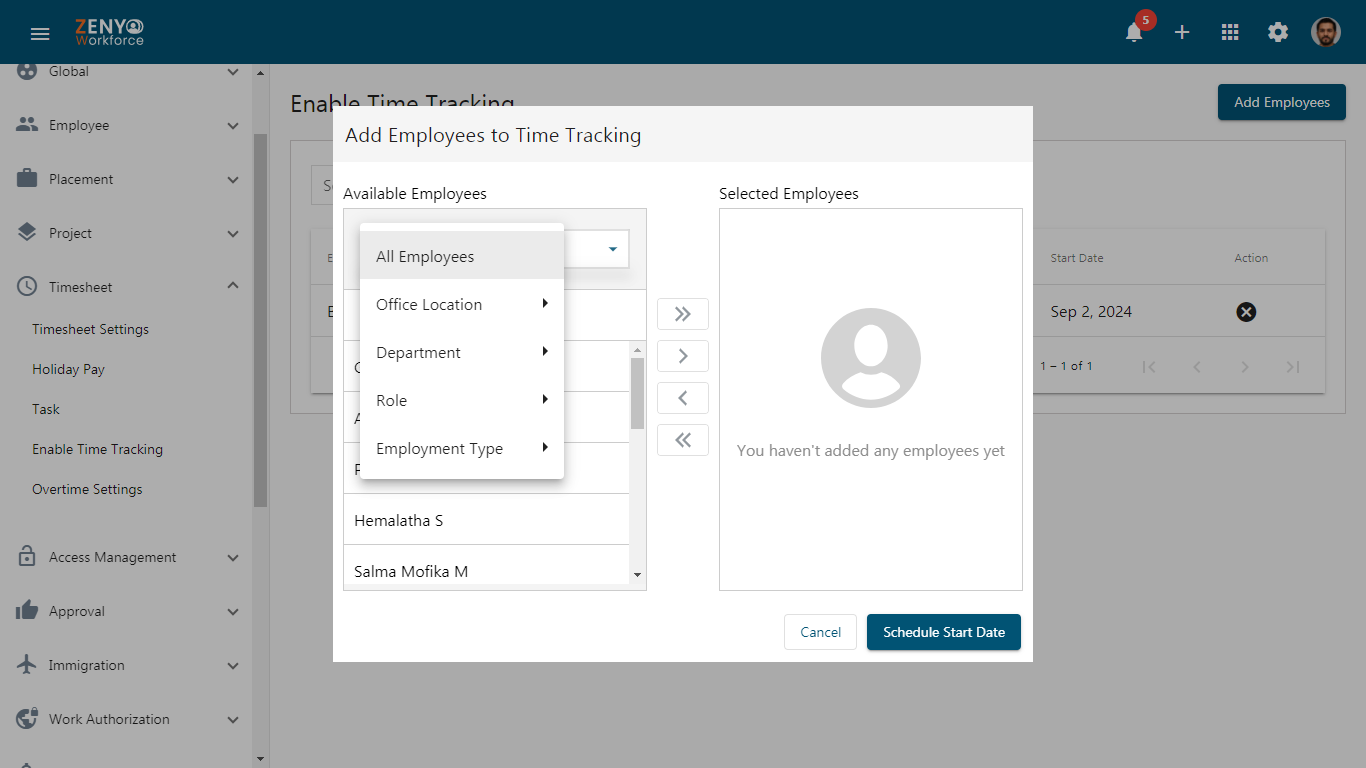
- You can choose All Employees or filter by office location, department, role, or employment type.
- Once you’ve selected your employees, click the Single Right Arrow to move them to the Selected Employees box.
- To remove an employee from the Selected Employees box, select their name and click the Single Left Arrow.
- For bulk selections, use the drop-down menu, then click the Double Right Arrow to add them all at once.
- To undo a bulk selection, click the Double Left Arrow.
- You can use the Search Bar to quickly find a particular employee. Once found, select the employee and click the Single Right Arrow to add them.
- Click the Schedule Start Date button to set the date for time tracking to begin.
- In the pop-up box, choose a date that corresponds to the week start date set during the Organization Setup.
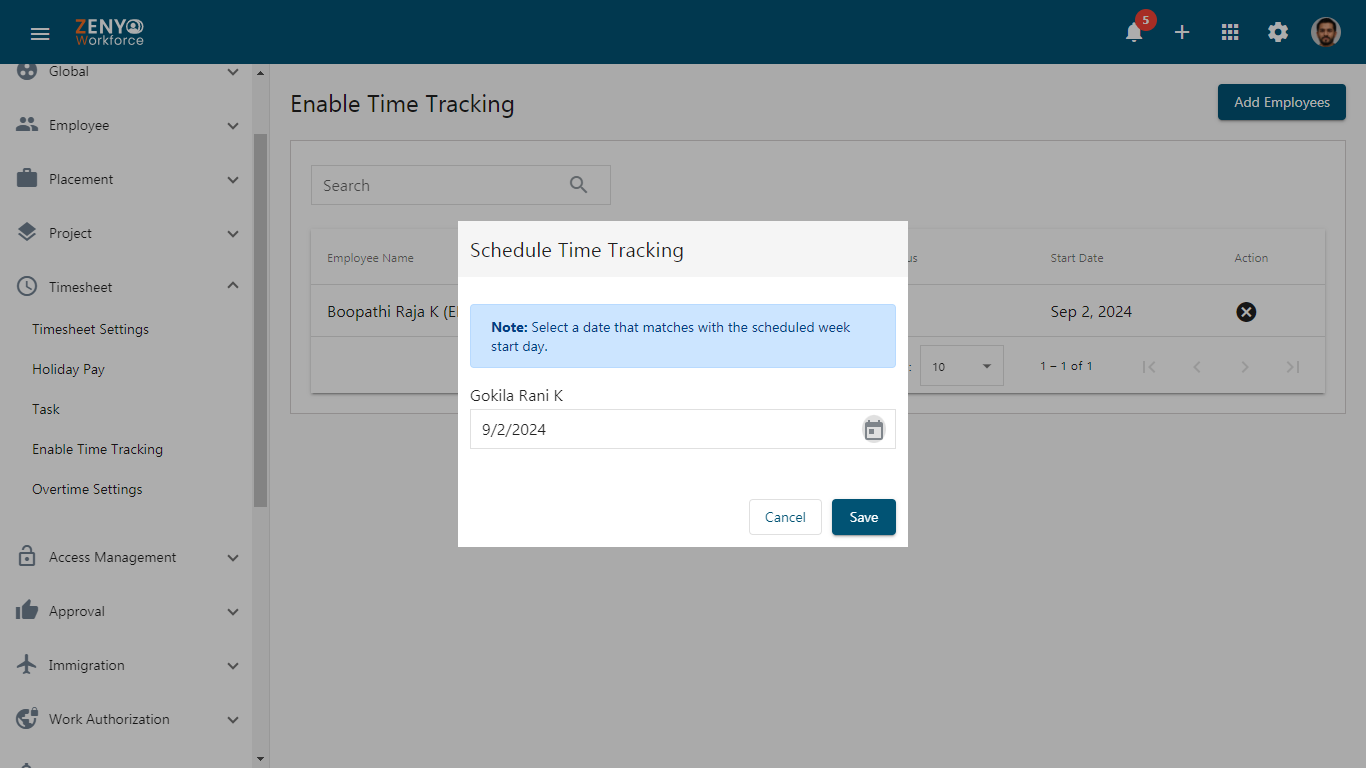
- The employee will now appear in the Enable Time Tracking list.
- You can remove time-tracking entries for future dates by clicking the Remove icon. However, entries with past enabled dates cannot be deleted.
Assign an Employee to a Specific Project
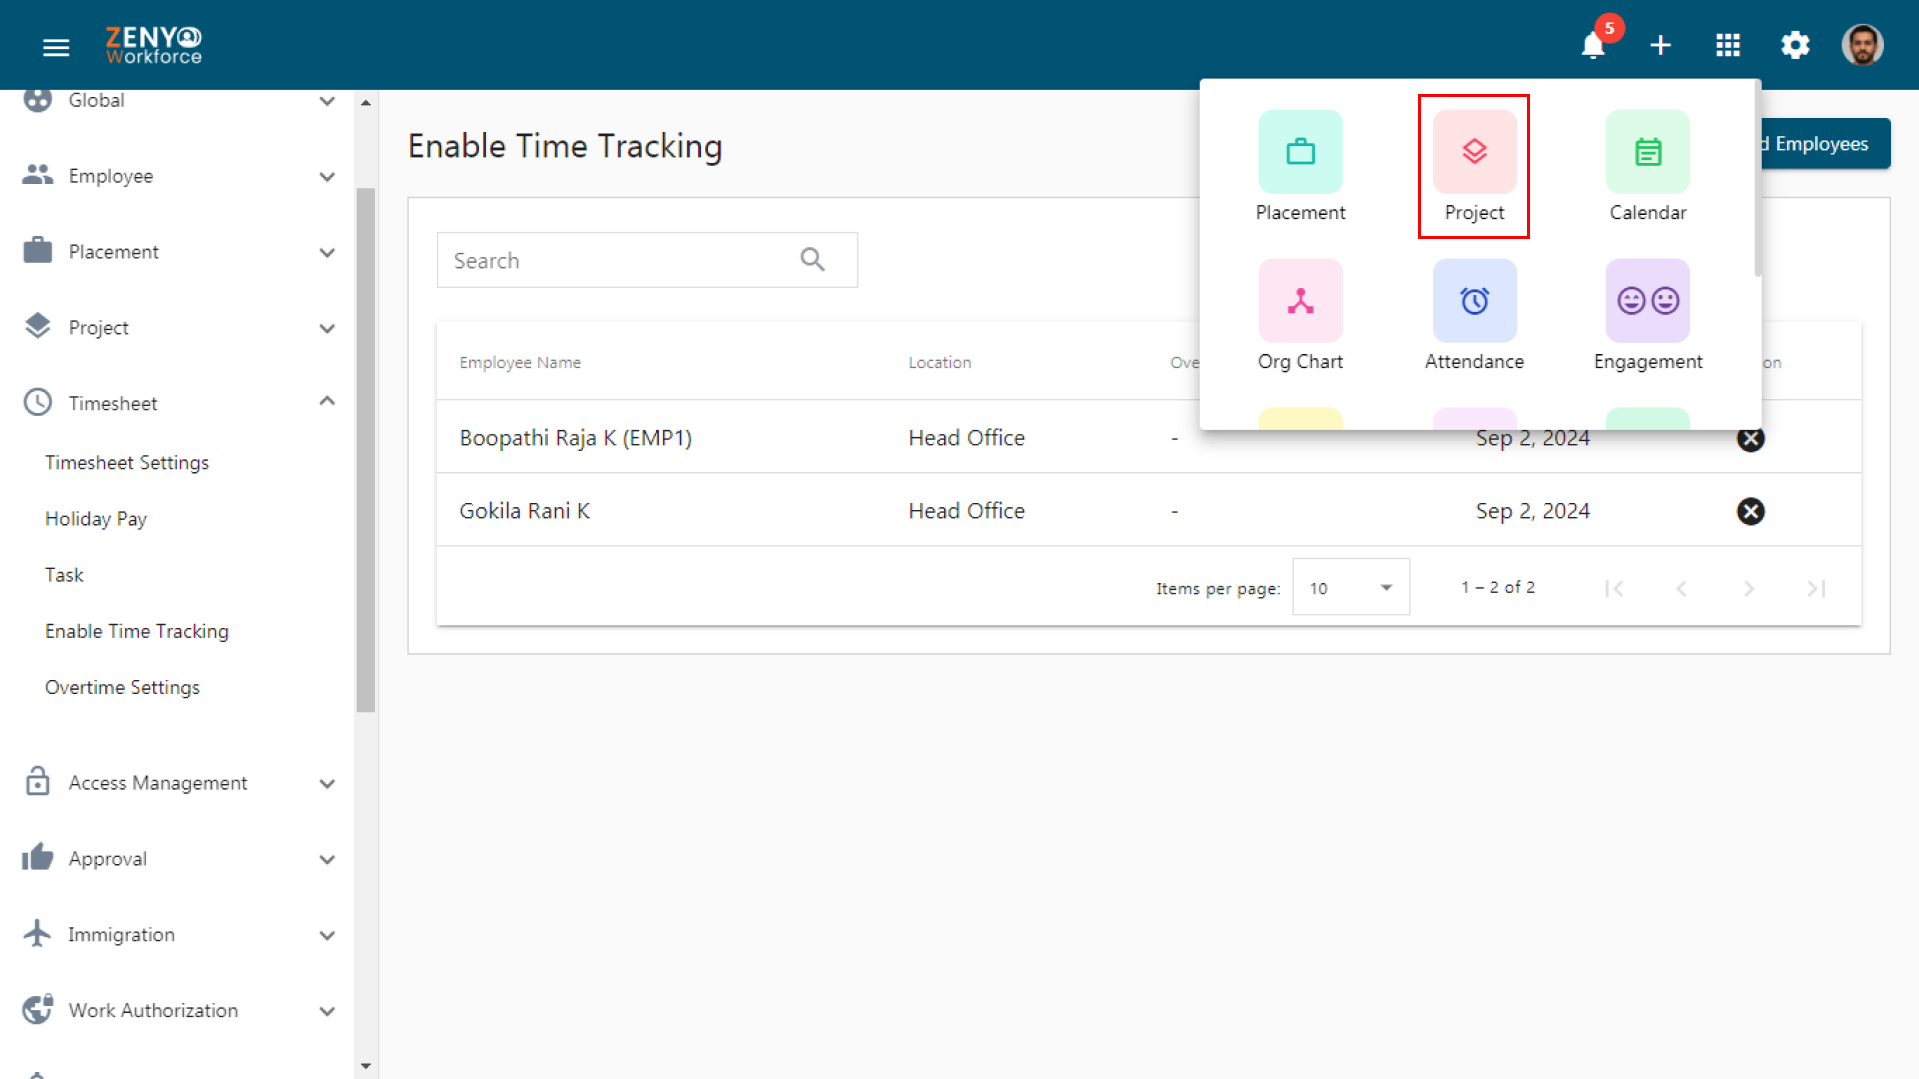
- Click on the App icon at the top and select Project. Employees can be assigned to one of three types of projects: Client, Vendor, or Internal.
- To add the employee to a client project, click on the Client tab.
- Select the specific project from the project list.
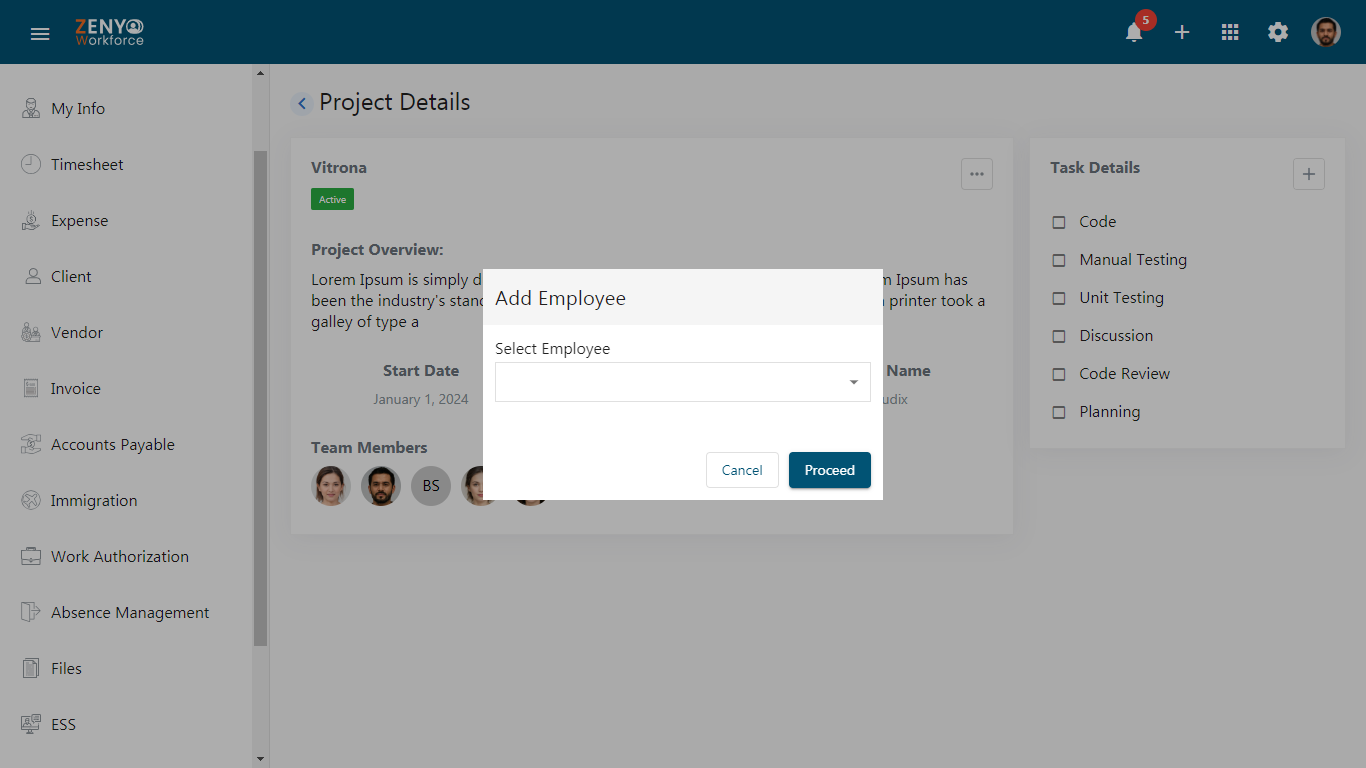
- On the project details page, click on the More Options button and choose Add Employee.
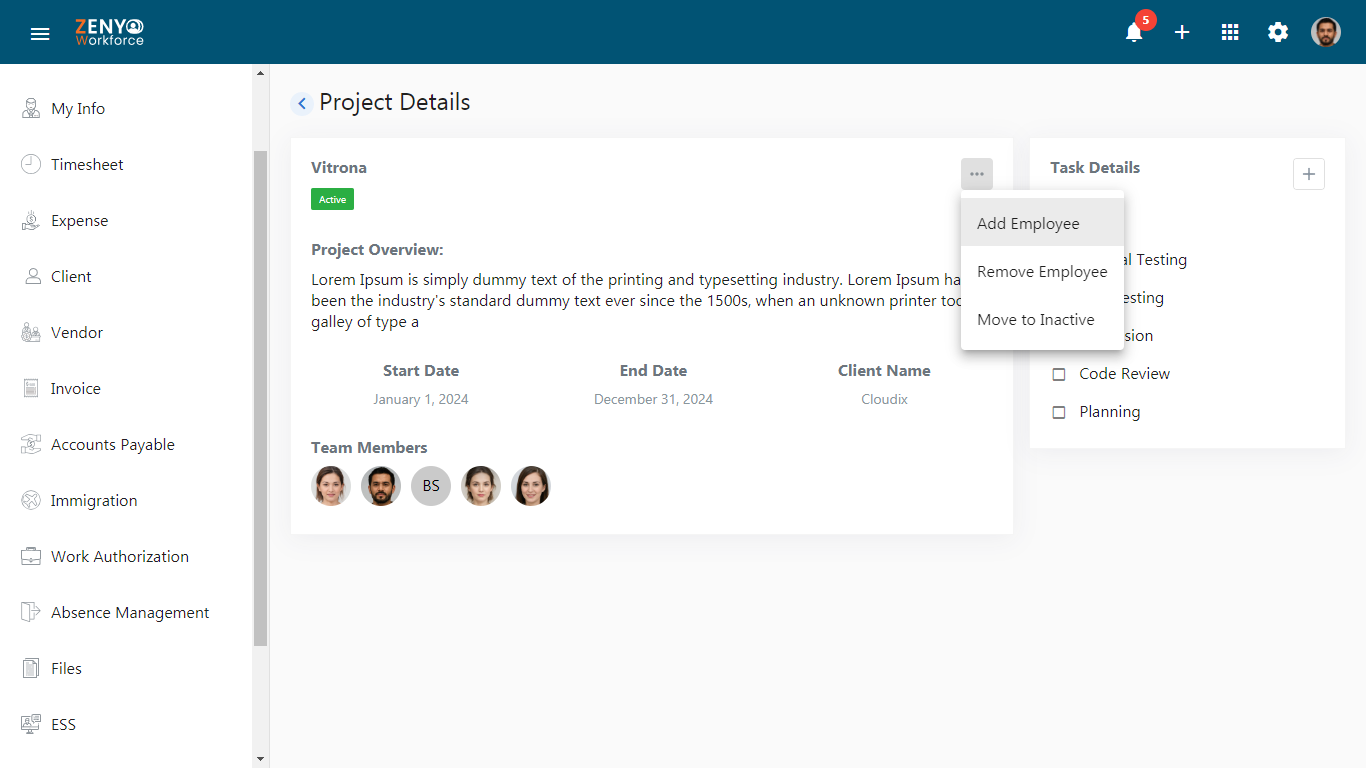
- In the pop-up window, select the employee and click Proceed to confirm.
- If you need to assign an employee to a Vendor or Internal project instead of a Client project, simply click on the respective tab and follow the same steps outlined above.
How an Employee Enters Timesheets
- Once timesheets are enabled for an employee, they can begin submitting their entries.
- Here’s how employees can log their timesheets from their profiles.
- From the home page of the employee profile, navigate to Timesheet in the main menu.
- On the Timesheet page, click the Add icon to open the Timesheet entry page.
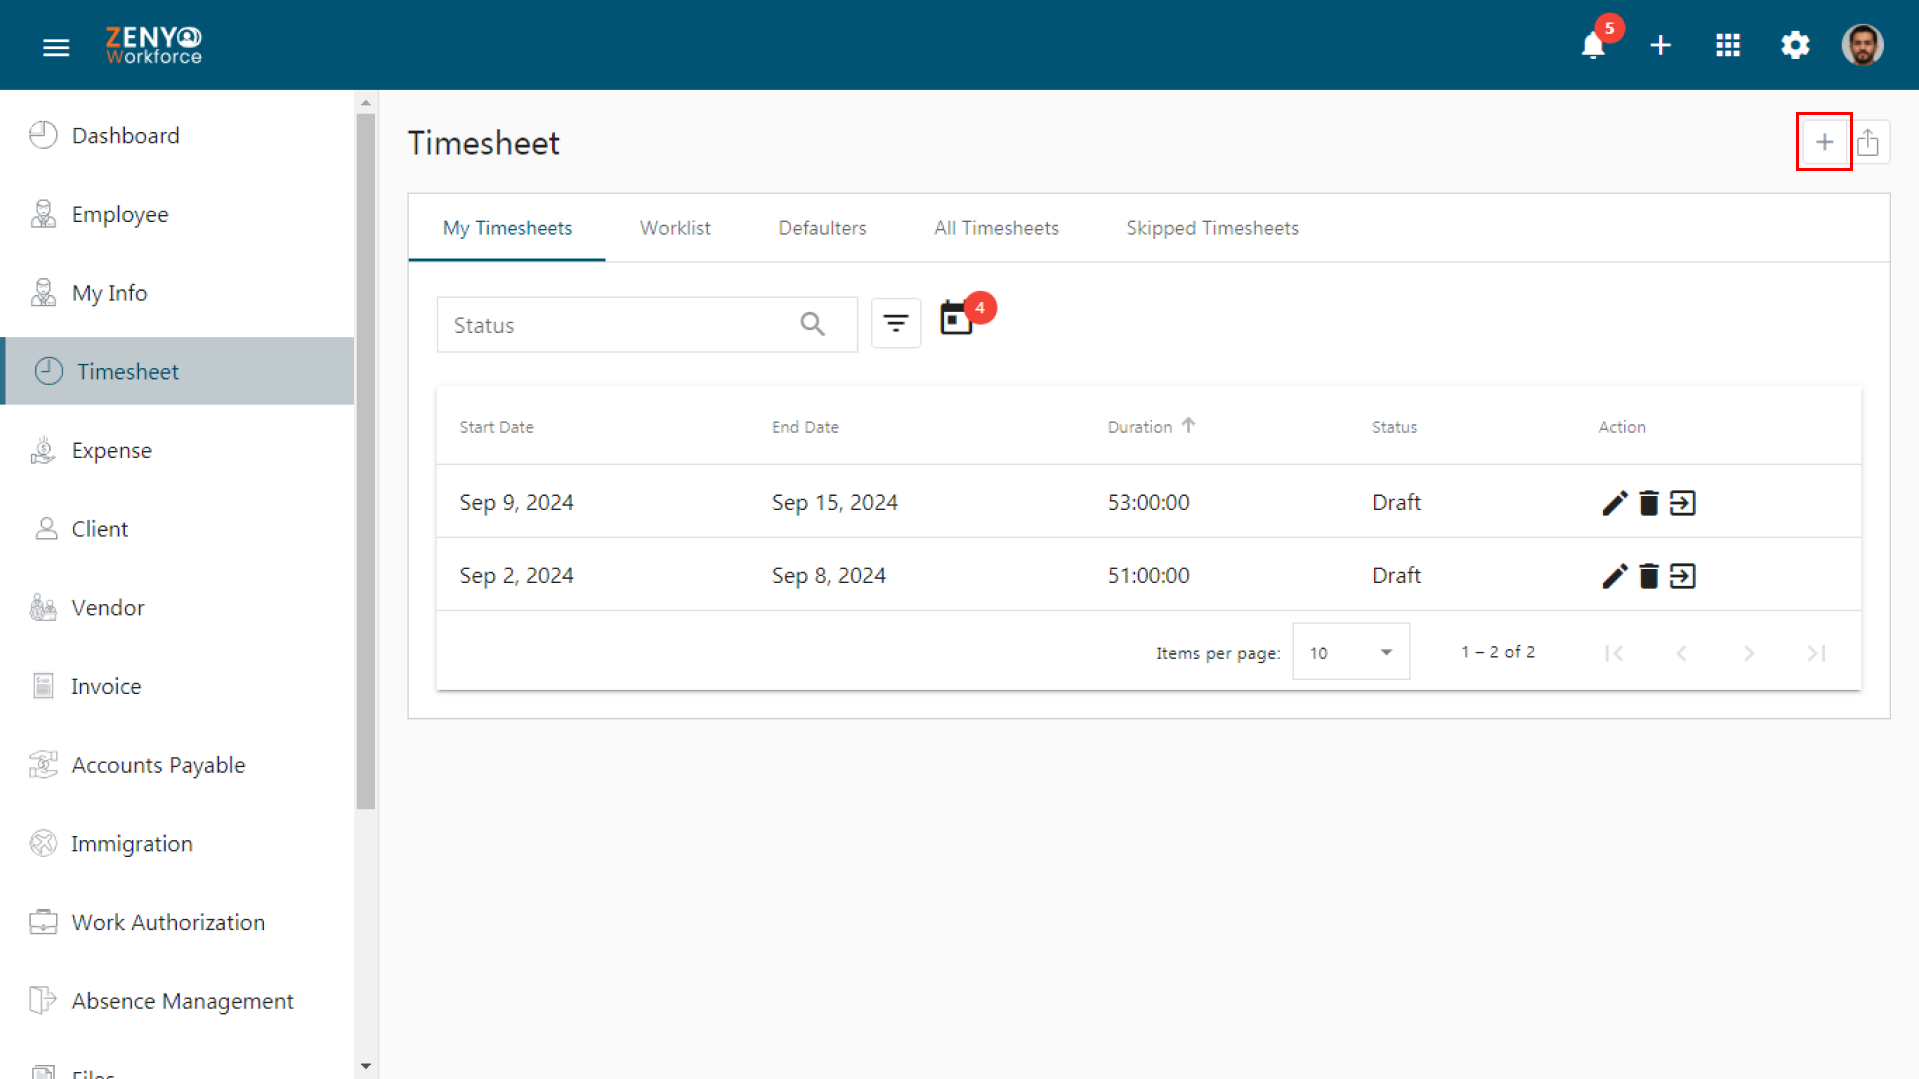
- Click on the +Add Time Entry link for the desired day.
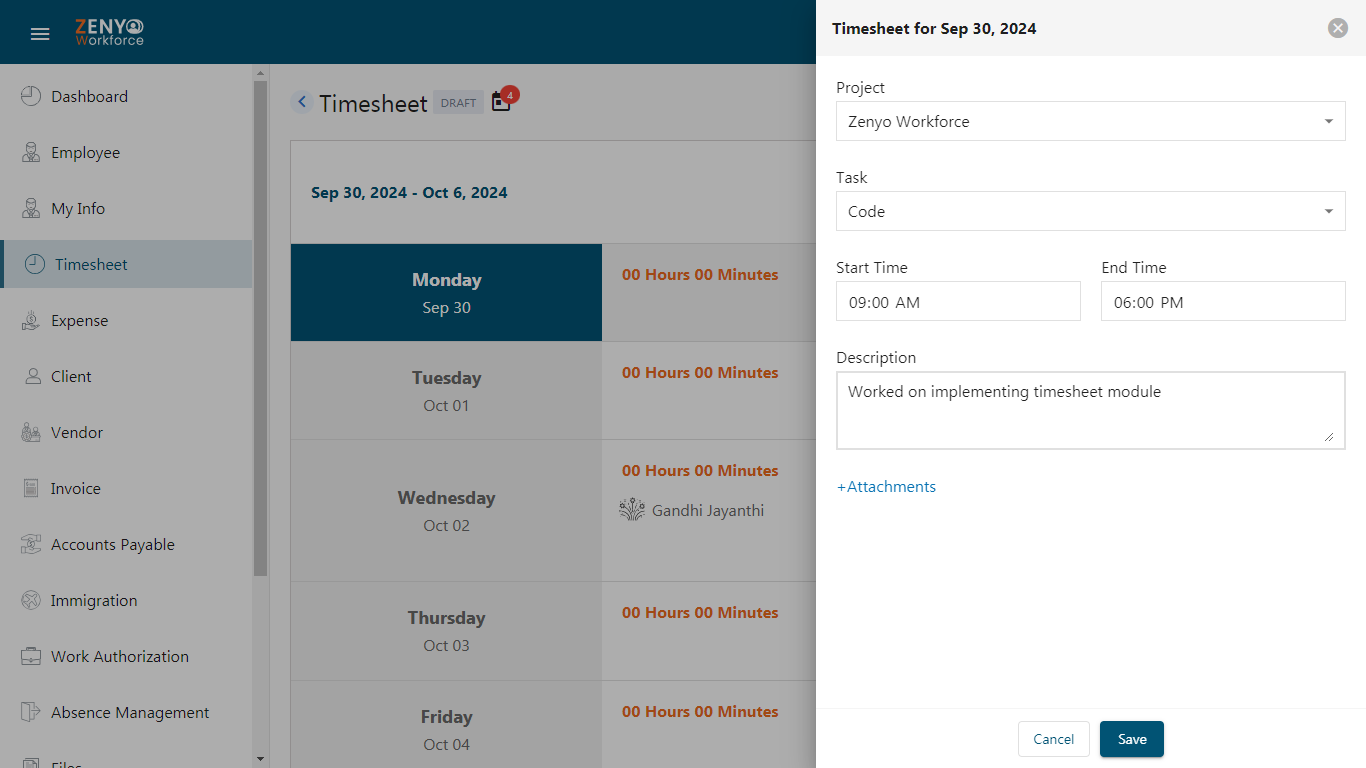
- A pop-up box will appear where they can enter details for the time entry.
- Choose the relevant project from the dropdown list.
Note: Projects will only appear if the employee has been assigned to a project.
- Select the specific task associated with that project.
- Specify the Start Time and End Time for the task.
- Provide a detailed description of the work completed.
- If needed, attach files to give further context to the entry. Once all details are complete, click Save to log the entry.
- Employees can add entries for multiple tasks on the same day, ensuring that the times for each task do not overlap.
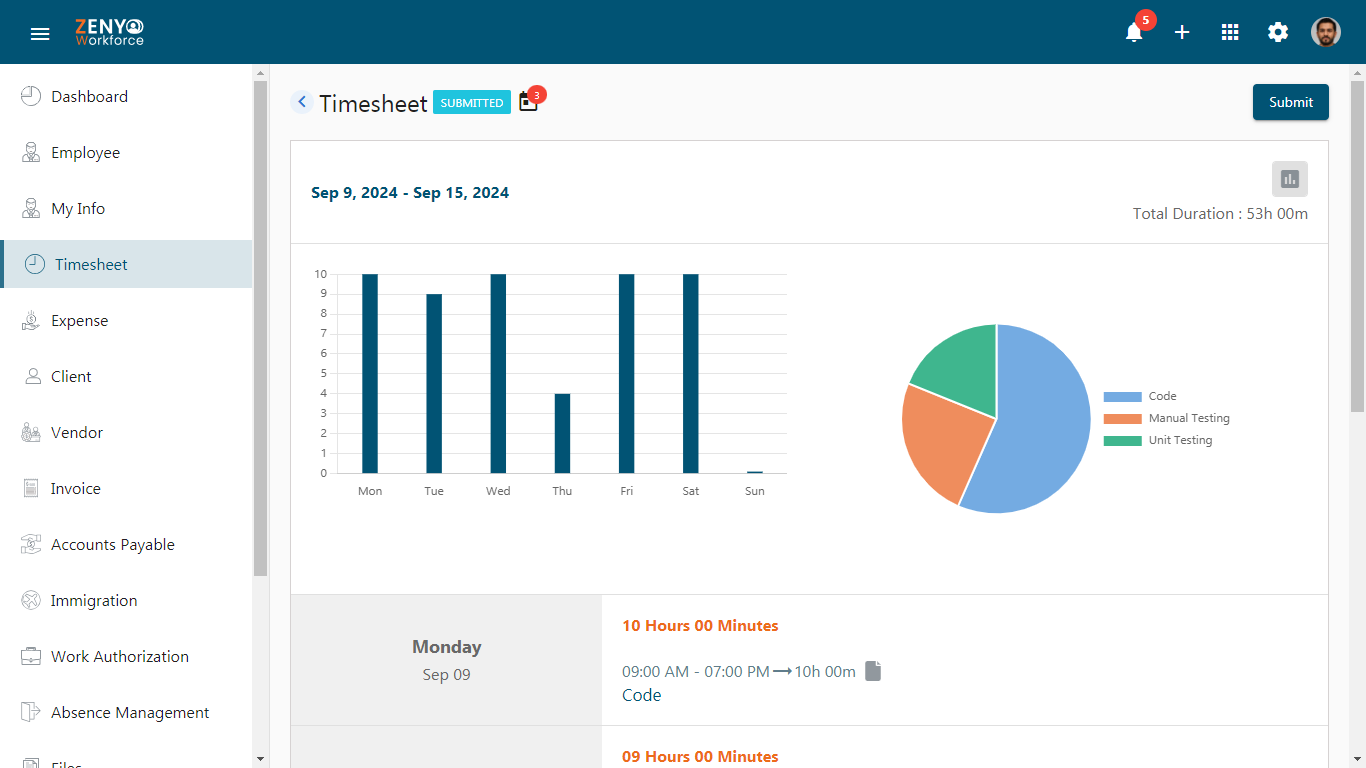
- Click the Chart icon to display a bar graph showing day-wise timesheet entries.
- A Pie Chart is also available, illustrating the distribution of tasks entered for the selected period.
- Click the Due Timesheet icon to view timesheets pending submission for any given week.
- Select the desired week from the list.
- Once all entries for the selected week are completed, employees can submit their timesheets for approval by clicking the Submit button.
How To Approve the Submitted Timesheets[Worklist Tab]
- Timesheet approvals can only be processed by accounts assigned as Timesheet Approvers.
Note: No individual, including approvers, can approve their own timesheets.
- From an approver account, click Timesheet in the main menu to go to the Timesheet page.
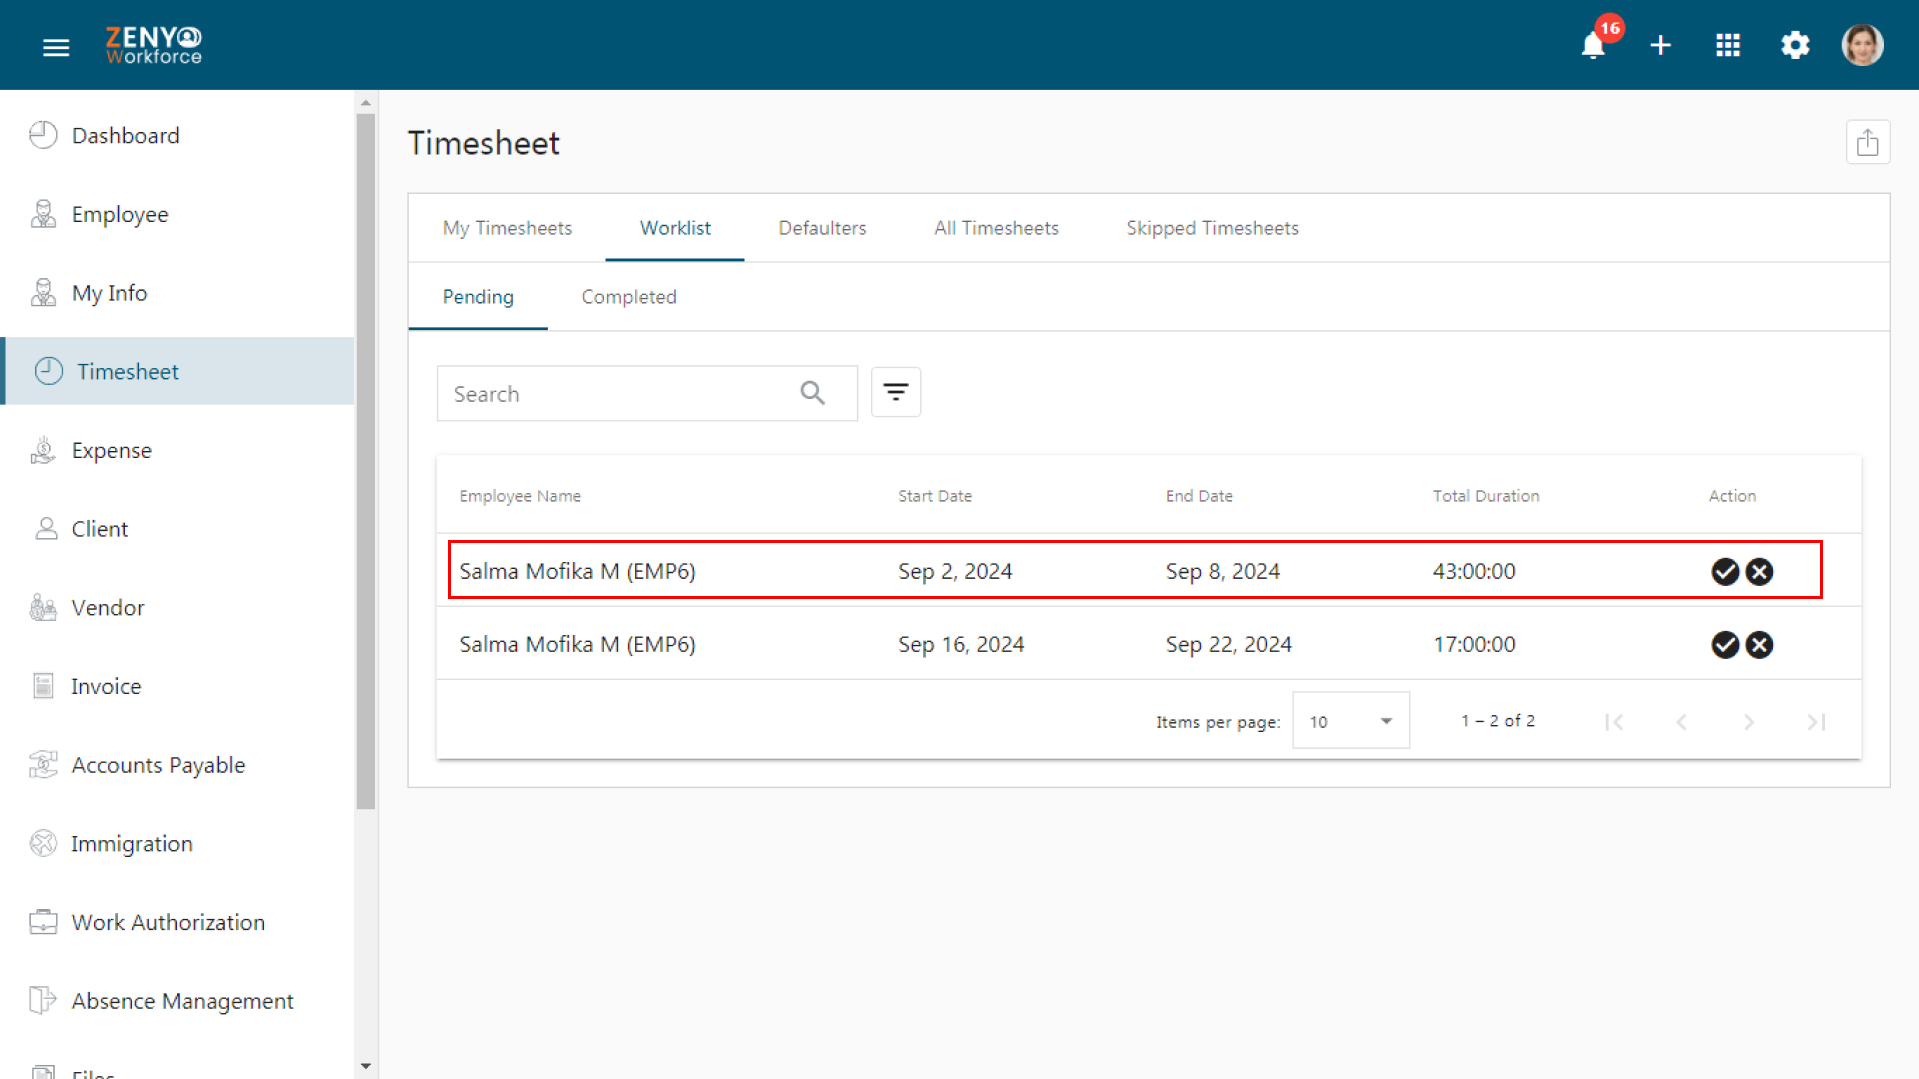
- Select the Worklist tab.
- Under the Pending tab, you will see a list of submitted timesheets awaiting approval.
- To approve a specific timesheet, click the Approve icon.
- To reject a submission, click the Reject icon.
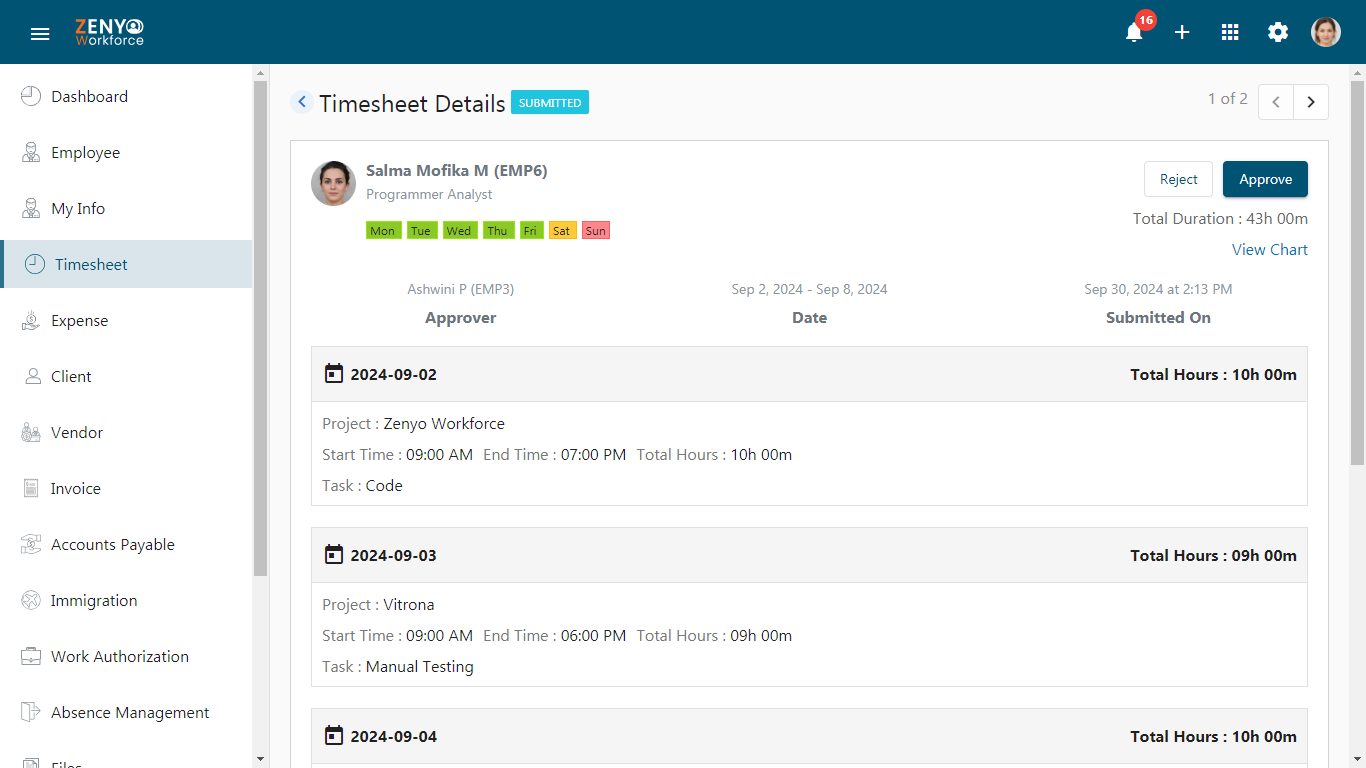
- When you click Approve, a pop-up will appear with two options: Review Details or Proceed.
- Click Proceed to approve the timesheet instantly.
- If you want to review the details before approving, click Review Details. You will be redirected to the timesheet details page, where you can approve or reject the timesheet. Click Approve on this page to finalize the approval.
- Under the Completed tab, you’ll find approved or rejected timesheets along with their status.
- In both tabs, you can search for a specific timesheet or utilize the filter options to refine your search.
Timesheet Page Tabs
Let’s see the rest of the Timesheet page.
My Timesheet Tab
- Go to the My Timesheet tab to see a list of all your timesheet entries.
- Each entry will display details such as start and end dates, work duration, status, and available actions.
- The approved timesheets can only be viewed. You may withdraw or view the timesheets that are submitted but yet to be approved. Timesheets in draft status can be edited, deleted, or submitted.
- Use the Search Bar to find timesheets by status.
- For more refined searches, use the Advanced Filter to sort timesheets based on specific criteria.
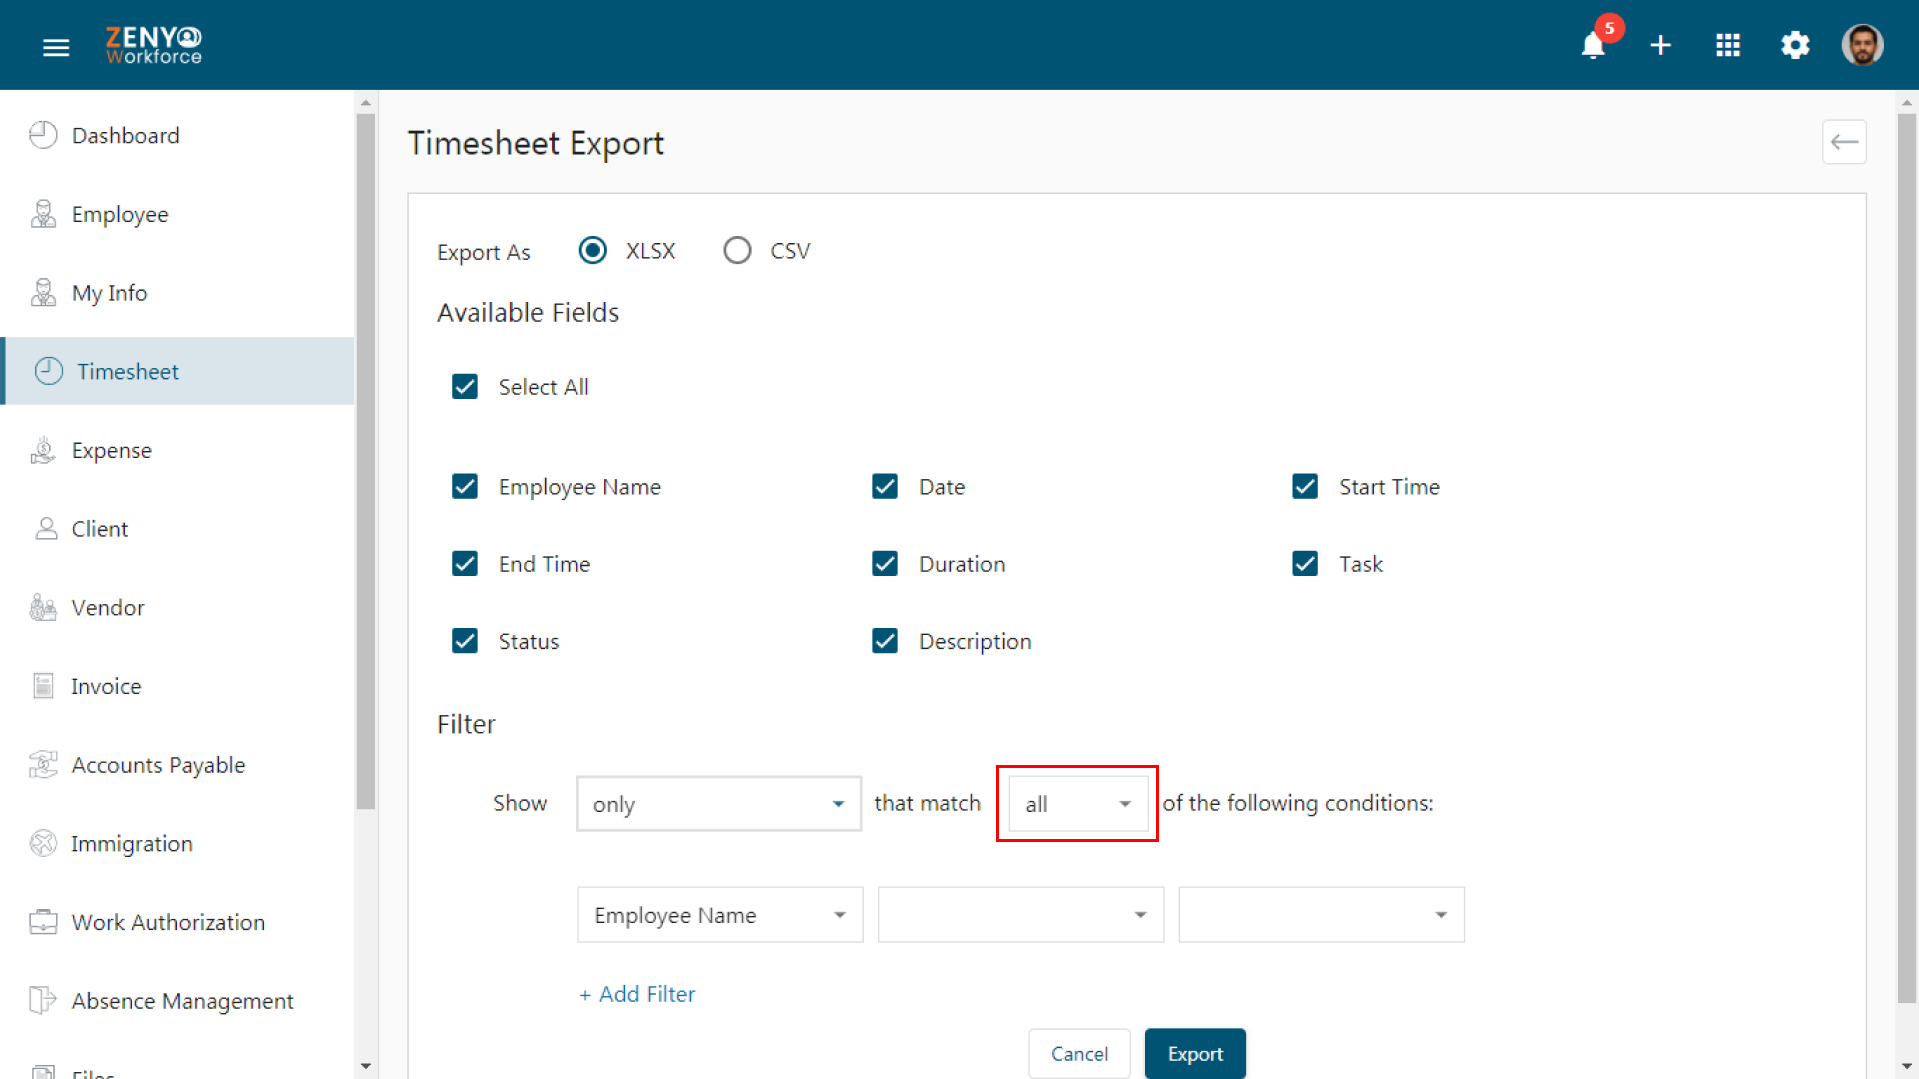
- Click the Export icon to export the timesheet.
- Choose between XLSX or CSV format.
- Select the fields you want to include in the report. Use the filter to choose specific fields or select All to export everything.
Defaulters Tab
- Go to the Defaulters tab to view a list of employees who missed timesheet deadlines.
- The tab highlights the specific weeks employees failed to submit their timesheets.
- You can remind them by sending an email to the employee, prompting them to submit their timesheets.
- If an employee is on leave for the entire week and does not need to submit a timesheet, you can choose to skip them for that period.
- Click the Export icon to export the timesheet.
- Choose between XLSX or CSV format.
- Select the fields you want to include in the report. Use the filter to choose specific fields or select All to export everything.
All Timesheets Tab
- In the All Timesheets tab, you’ll find a comprehensive list of timesheets from all employees in the organization.
- You can search for a specific timesheet by employee name or utilize the filter for more refined search options.
- Click the Export icon to export the timesheet.
- Choose between XLSX or CSV format.
- Select the fields you want to include in the report. Use the filter to choose specific fields or select All to export everything.
Skipped Timesheets Tab
- Go to the Skipped Timesheets tab to view a list of employees who were on extended leave (for an entire week or longer) and were excluded from the Defaulters list.
- To transfer an employee from the Skipped Timesheets list to the Defaulters list, you can remove them from this tab.
- Use the search function to easily find an employee by name from the list.
- Click the Export icon to export the timesheet.
- Choose between XLSX or CSV format.
- Select the fields you want to include in the report. Use the filter to choose specific fields or select All to export everything.