Custom emails in Zenyo Workforce are personalized messages created for specific actions. This feature helps organizations communicate important information effectively, ensuring that the right recipients receive tailored notifications related to employee activities, schedules, or updates.
How to manage custom email settings?
- Click the Settings icon in the top right corner of the navigation bar.
- Select the Custom Emails menu. The Custom Emails Settings section contains two sub-menus:
- Notification
- Reminder
Notification
A notification is an automated alert triggered by specific actions or events within the system. It sends a customized email to designated recipients, allowing users to create and manage personalized messages for different scenarios, ensuring timely communication based on predefined actions.
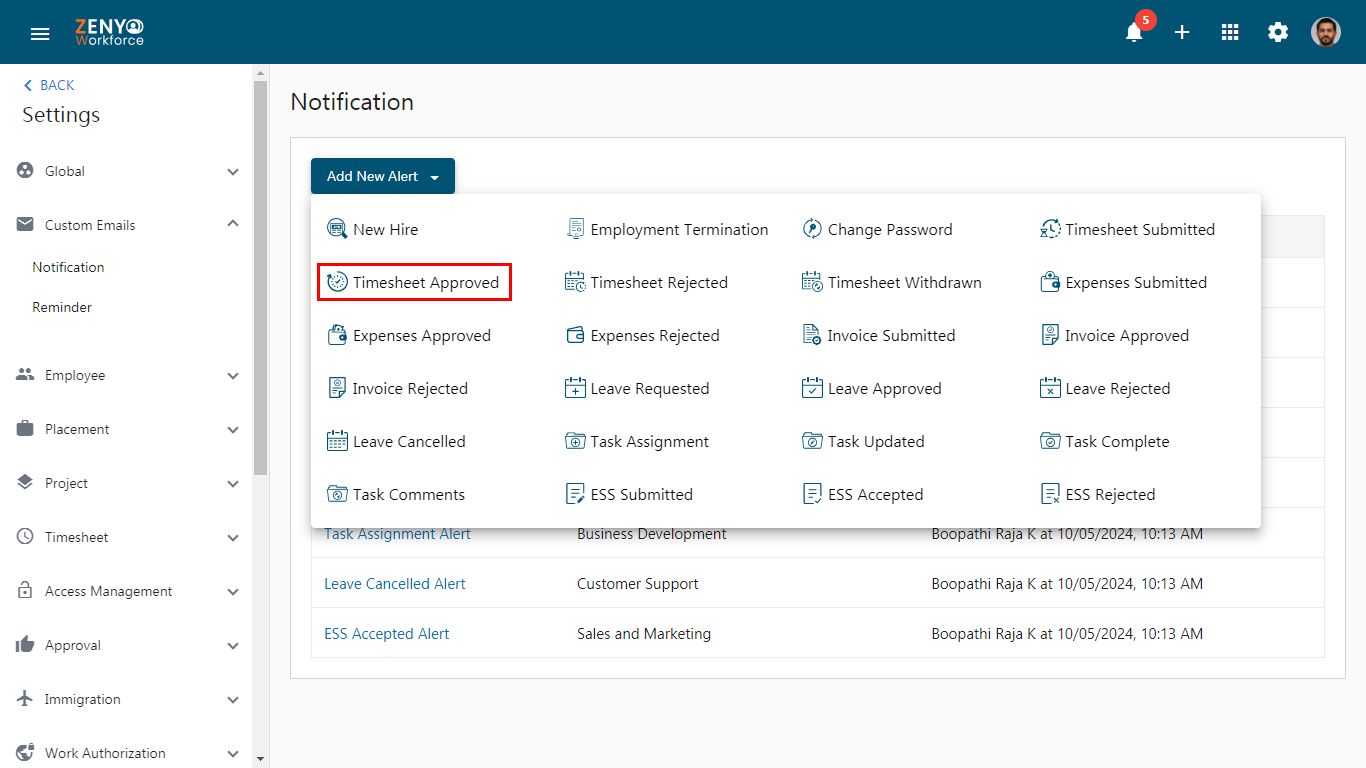
- In the Notification tab, click on Add New Alert. The predefined email notifications will appear. For instance, click on Timesheet Approved.
- In the Add Timesheet Approved Alert section, enter the email title and the recipients’ details, such as name, role, department, or location, along with the subject.
- If you choose a Name, the email will be sent to that specific employee.
- If you select a Role, Department, or Location, the email will be sent to all employees associated with that specific role, department, or location. You can edit the email information.
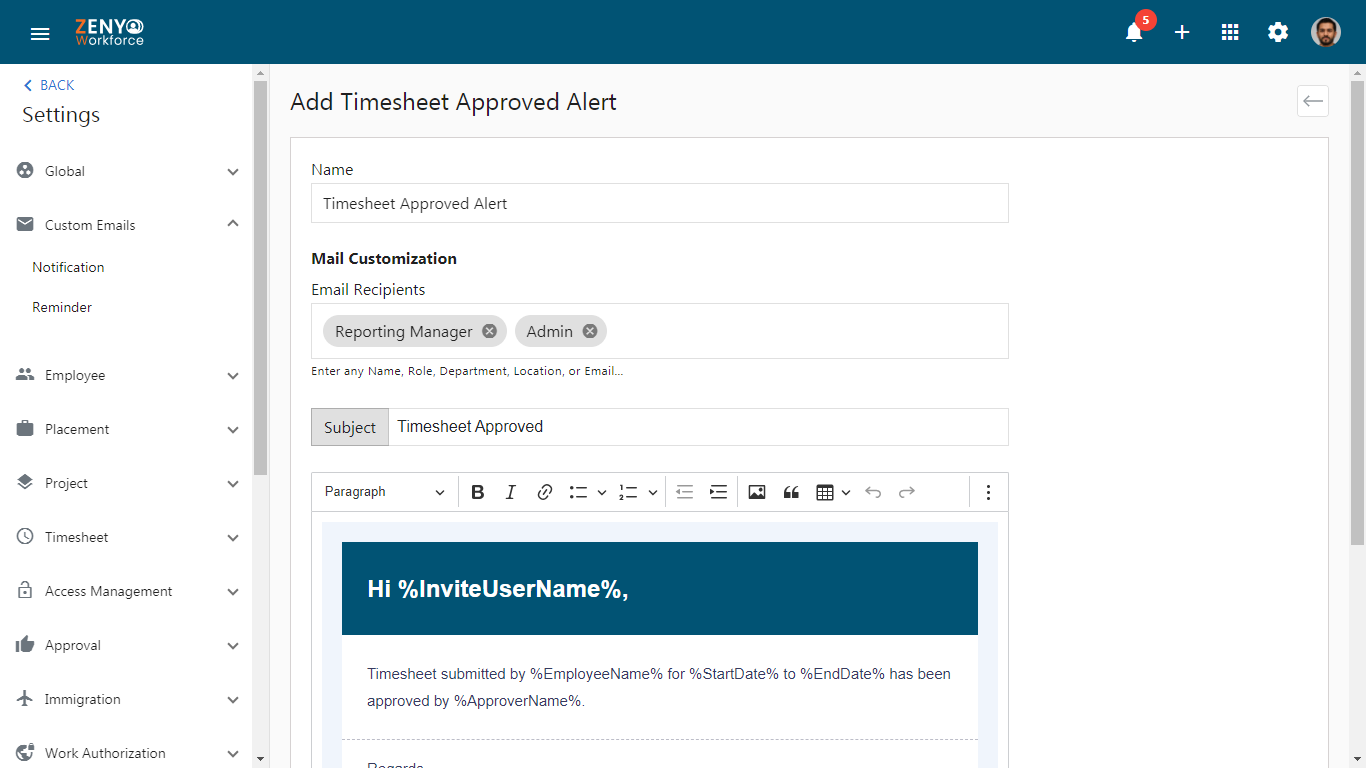
- In the This Alert For section, use the Filter option to select either all employees or only specific employees to send this email.
- Finally, Click on the Save.
Note: This same process applies to all notification alerts.
Reminder
A reminder is an automated notification that is scheduled to be sent when a specified date is reached in a particular scenario. It allows users to create customized emails for designated recipients, ensuring that important events or deadlines are communicated on time.
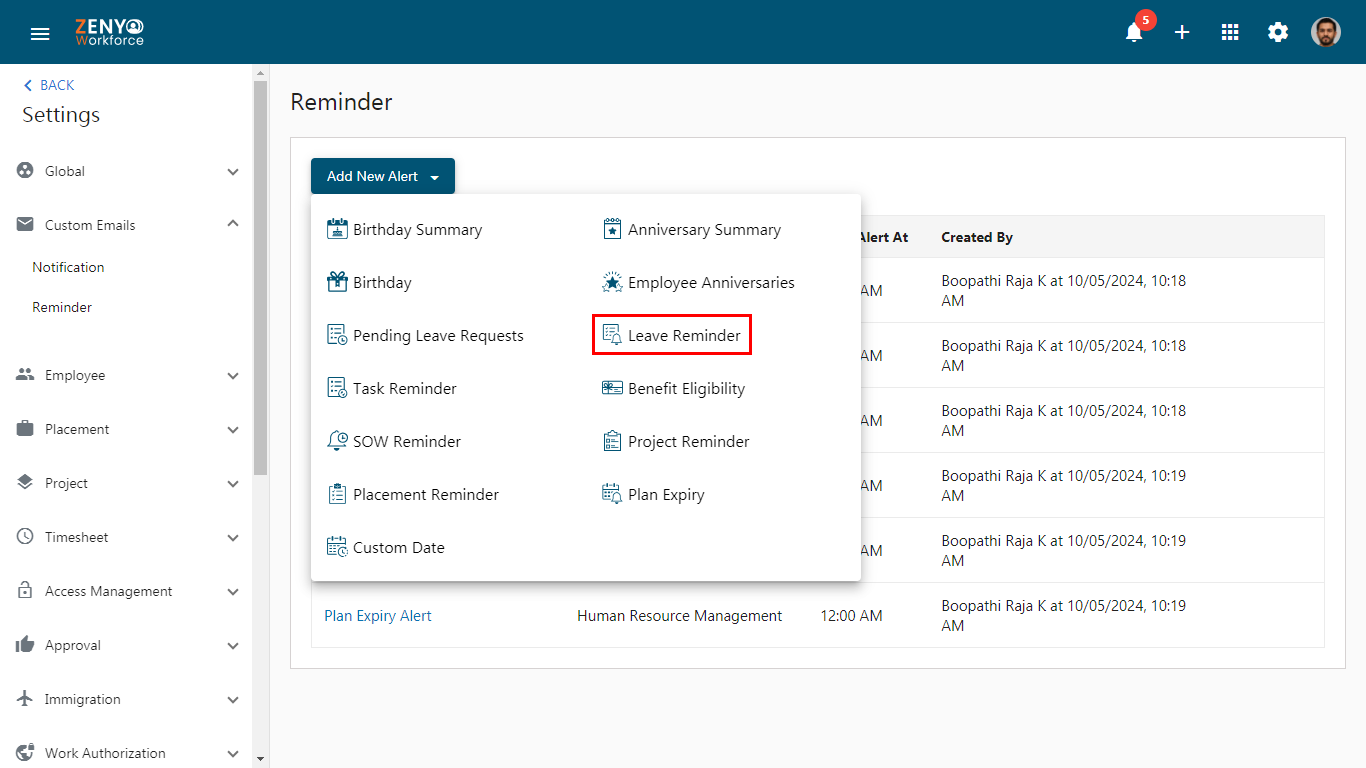
- In the Reminders tab, click on Add New Alert. The predefined email reminders will appear. For instance, click on Leave Reminder Alert.
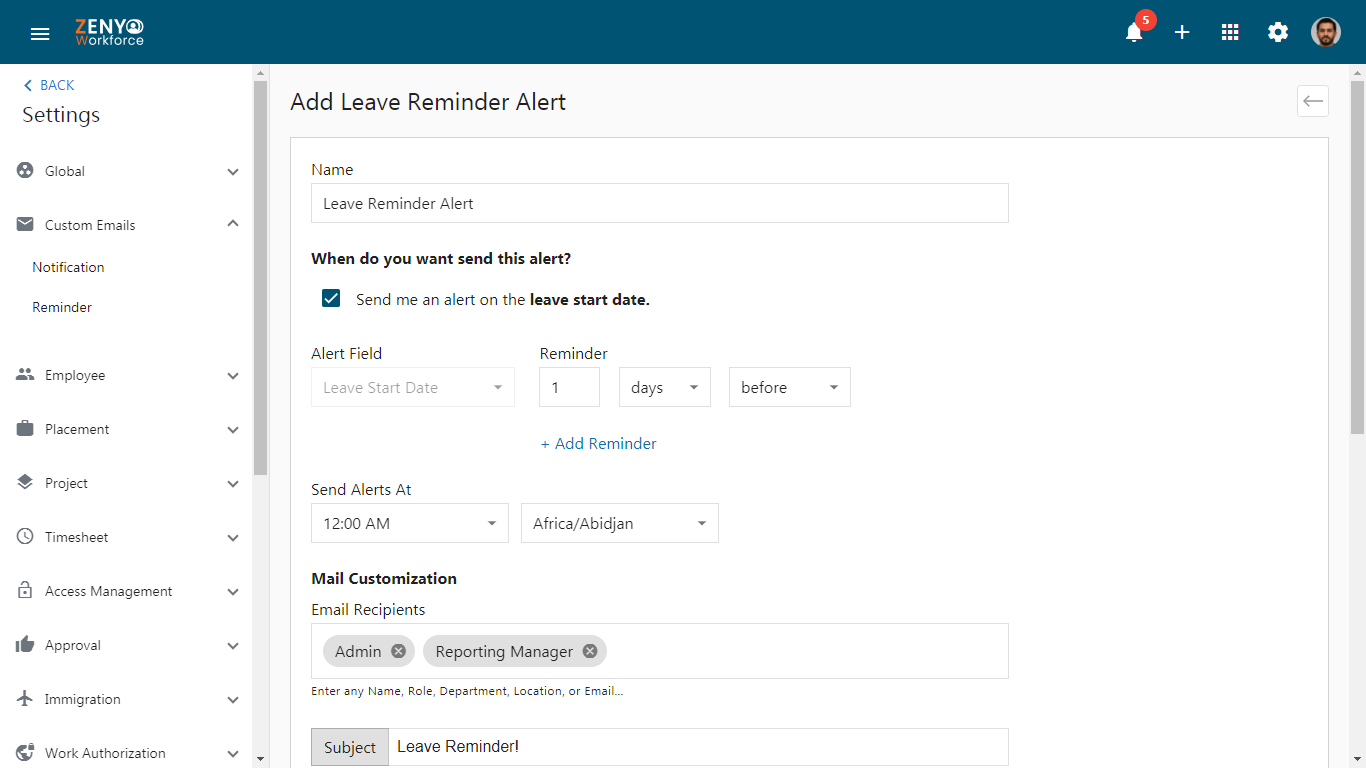
- In the Add Leave Reminder Alert, enter the name of the alert.
- In the When to Send Alert section, check the box to receive an alert on the day when leave starts.
- In the Alert Field section, specify the date for the reminder, such as the Leave Start Date.
- In the Reminder section, set the number of days before or after the leave starts that you’d like to receive a reminder (e.g., 2 days). You can also select the time frame (days, weeks, etc.).
- Click on Add Reminder if you want to add more reminders.
- In the Send Alerts At section, choose the time of day when you want the reminder to be sent (like 12:00 AM) In the Timezone Selection, select your timezone to ensure you receive the alerts on time.
- In the Mail Customization section, enter the recipient’s details, such as entering the email title, and the recipient’s details, such as name, role, department, or location, along with the subject.
- If you choose a Name, the email will be sent to that specific employee.
- If you select a Role, Department, or Location, the email will be sent to all employees associated with that specific role, department, or location.
- You can edit the email information.
- In the This Alert For section, use the Filter option to select either all employees or only specific employees to send this email, and then click Save.
- Finally, click on Save.
Note: This same process applies to all reminders.
