Managing employee benefits involves adjusting coverage options, tracking eligibility status, processing enrollments, and maintaining a record of benefit-related activities. This comprehensive approach simplifies the overall management and oversight of employee benefits within an organization.
Employee Benefits
- Navigate to the Employee menu and click on the employee’s name.
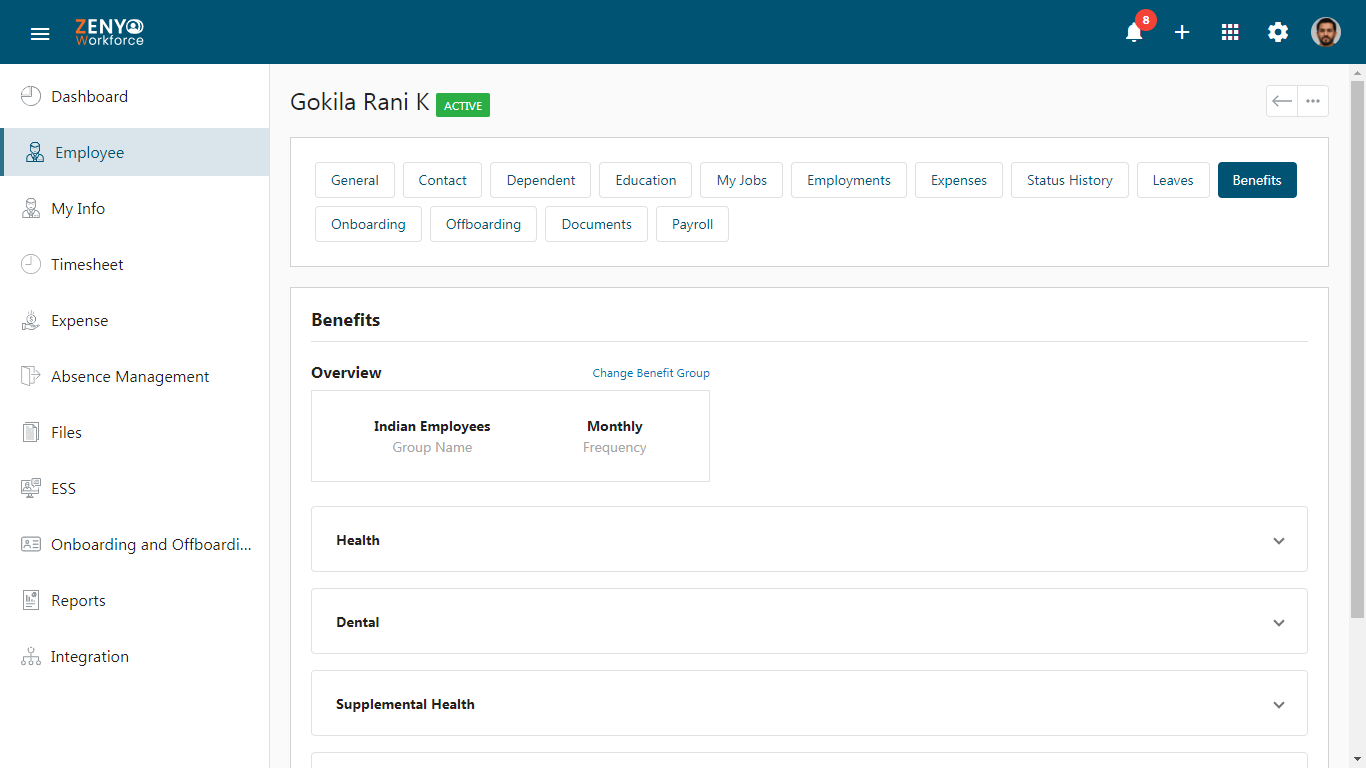
- You will be redirected to the employee information page. Click on the Benefits tab.
Benefit Plans and Groups
You can view the Benefits Overview and Benefits History in the Benefits tab.
Benefits Overview
- In the benefits Overview, the employee’s current benefit group and its frequency are displayed.
- If the employee is not part of any benefit group, an Add Benefit Group link will appear. Click it, and a dialog box will open. Select a benefit group by clicking on the dropdown, then click Save.
- If the employee is already in a benefit group but needs to change it, click the Change Benefit Group link. A dialog box will open where you can select a new benefit group from the dropdown, then click Save.
Note: Be cautious. Moving the employee to another group will remove them from their current group, and they may lose benefits as a result
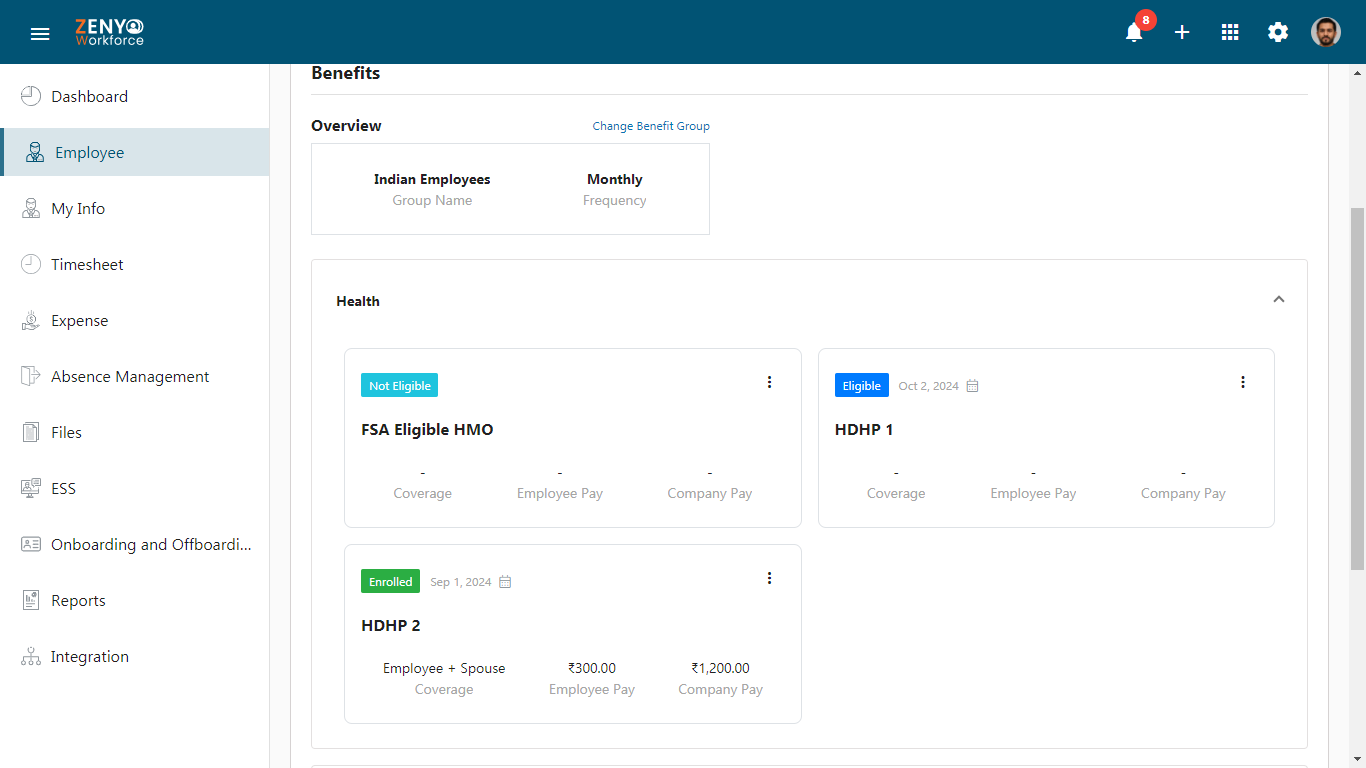
- When a benefit group is assigned to an employee, all the plans in that group will be listed under their plan-types.
Eligibility for Selected Plans
- Each plan under the plan types will display a label, either eligible or not eligible, based on the eligibility criteria set in the designated field when the selected plan is assigned to the benefit group in the Add Benefit Group option in the group’s submenu.
- If the When it is marked manually option is selected, the plans will be labeled as Not Eligible. If the Immediately Upon Hire, After Waiting Period, or First of the Month Following a Waiting Period options are selected, the plans will be labeled as Eligible, starting from the effective date, which will be displayed.
More Options
Click on More Options to view six statuses for each plan.
- Edit Not Eligibility: If an employee is marked as non-eligible and you need to edit this information, click on Edit Not Eligibility to update the data.
- Mark as Eligible: In the Mark as Eligible section, select the date when the employee becomes eligible for the plan in the Eligibility Date field. Enter a comment and click Save. The plan will now be eligible for the employee.
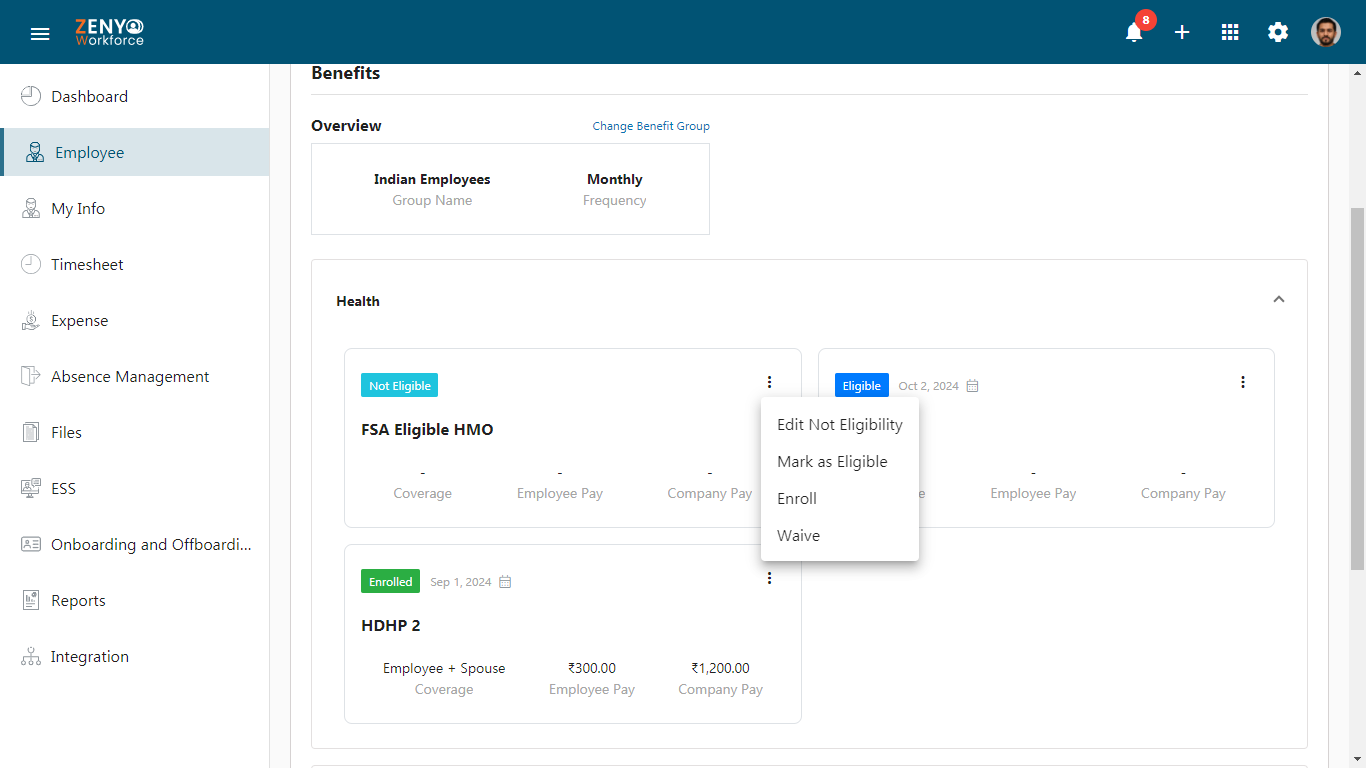
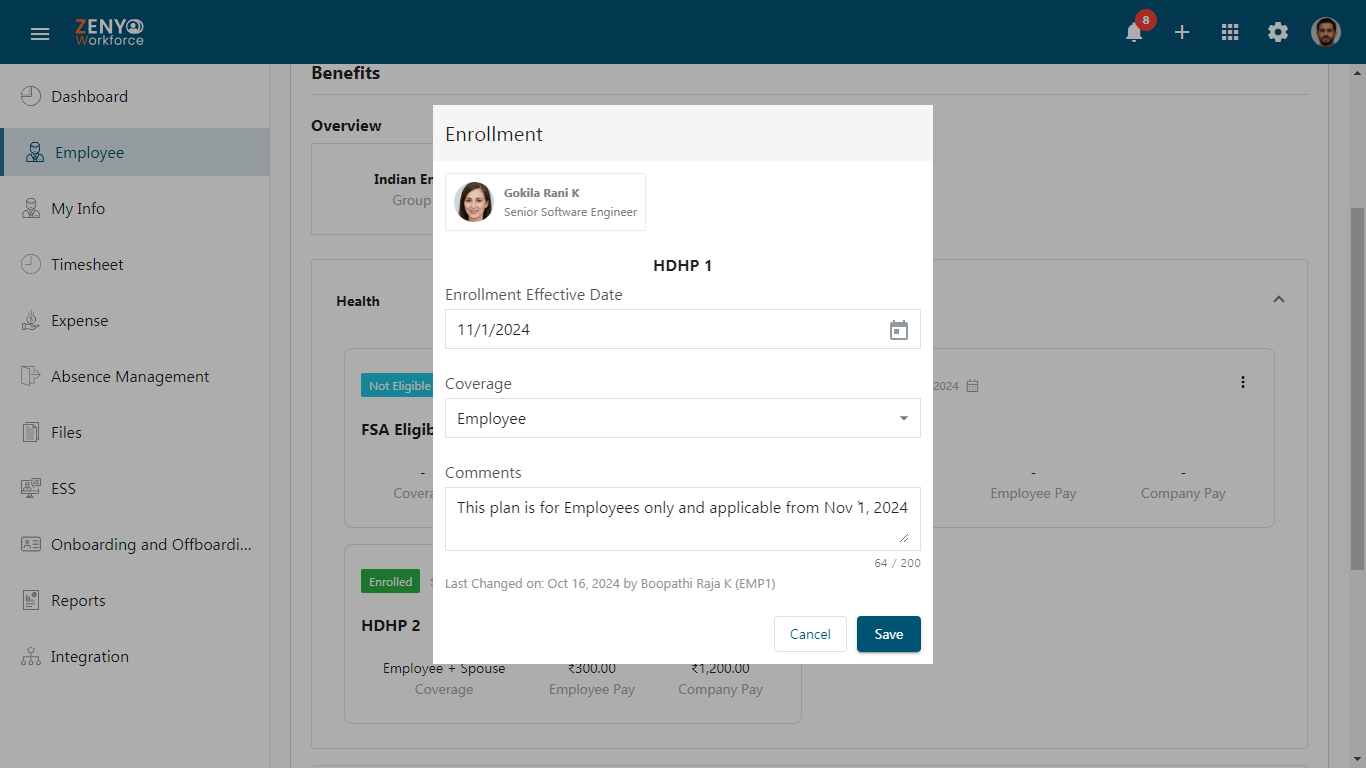
- Enrollment Process: Click on Enroll. In the Enrollment section:
- For Standard Rate Plans with Coverages:
Select the enrollment effective date and choose a coverage option from the dropdown in the Coverage field, where the available coverages added to the plans will be displayed. Enter a comment and finally, click Save.
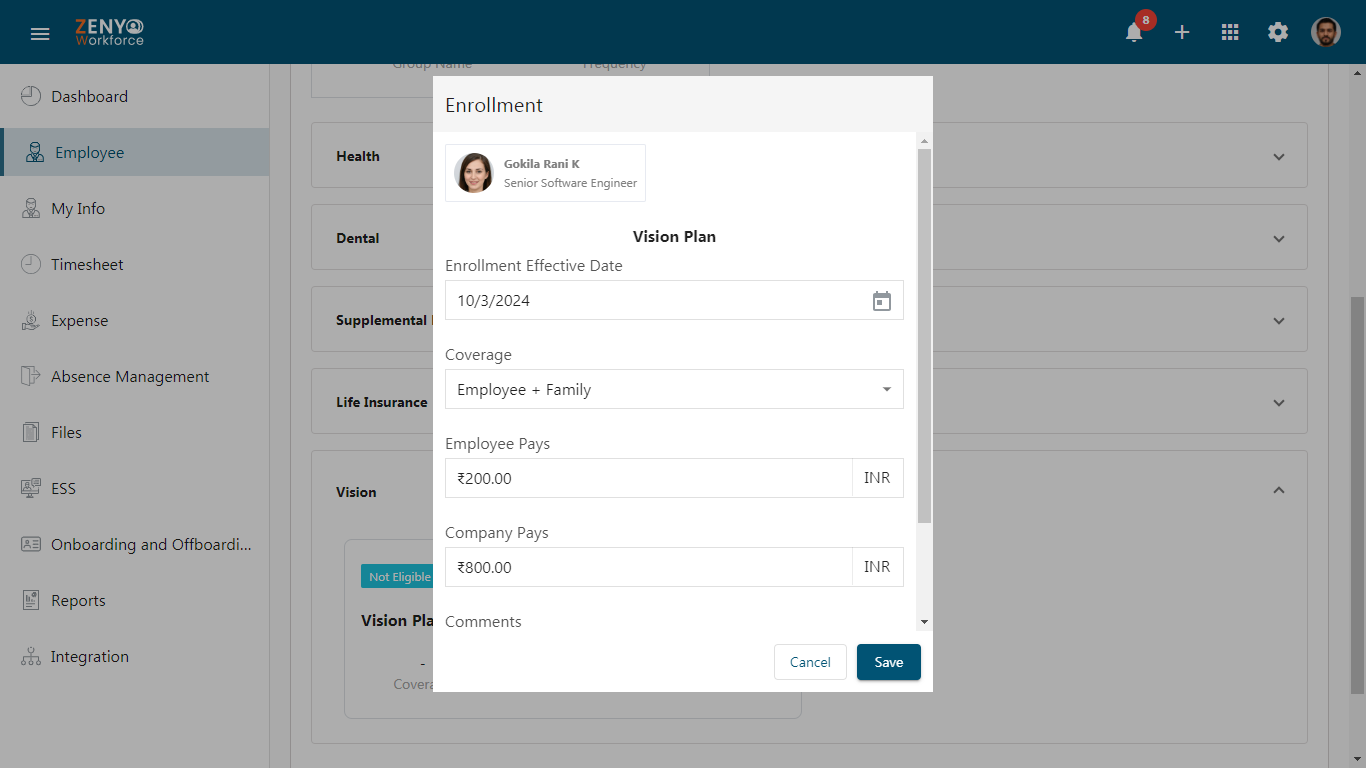
- For Variable Age-Based Rate Plans with Coverages:
Select the effective enrollment date. Choose the coverage from the dropdown in the Coverage field, where the available coverages added to the plan will be displayed. Enter the amounts for both Employee Pays and Company Pays. Enter a comment and click Save.
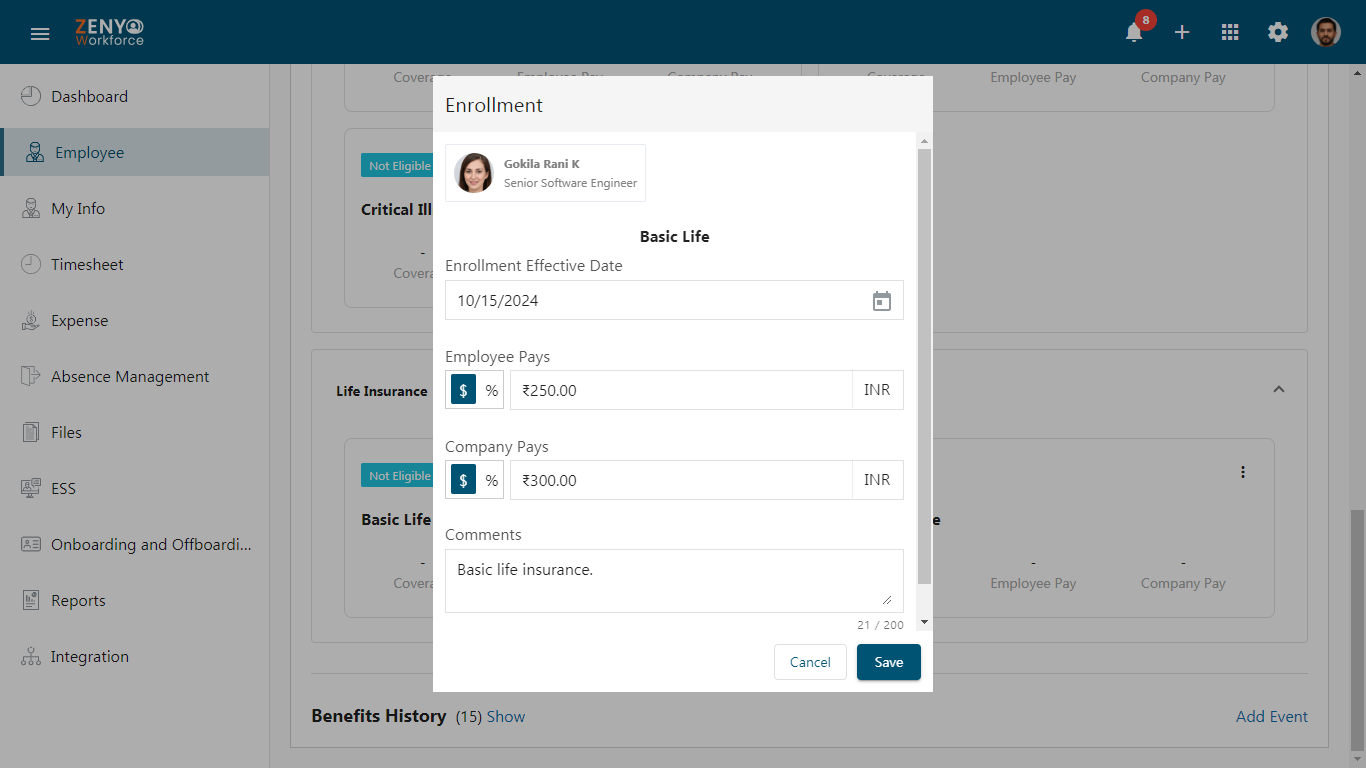
- For Variable Age-Based Rate Plans without Coverages:
Plans such as Flex Spending Account, Disability, Life Insurance, Others, Health Savings Account, and Retirement are categorized as plans without coverages. When paying the associated costs, the company and the employee can choose to pay either as a percentage by clicking on the (%) symbol or as a specific amount by clicking on the ($) symbol. Select the effective enrollment date, choose the coverage cost paid by both the employee and the company (either in percentage or amount), enter comments, and click Save.
After enrolling in the plan, the status will show as Enrolled, along with the coverage details, Employee Pay, and Company Pay.
Note:
1. Plans without coverages consist solely of variable age-based rates. In each plan type, the employee can have only one active plan.
2. You can also schedule the enrollment of the plan by selecting a future effective date. The plans will be automatically enrolled when the date arrives.
3. If you want to remove the scheduled enrollment, click on the Change Scheduled option in the dialog box and save. The scheduled enrollment will be removed. - For Standard Rate Plans with Coverages:
Select the enrollment effective date and choose a coverage option from the dropdown in the Coverage field, where the available coverages added to the plans will be displayed. Enter a comment and finally, click Save.
- Terminate Coverage: In each plan type, an employee can have only one active plan. If an employee activates another plan of the same type, the current plan will be closed with a status of Coverage Terminated, and the new plan will become active.
- Waive: Waive indicates that the employee has chosen not to participate in the plan. To waive the plan, select the waive date, enter any comments, and click Save. Once saved, the waived date will be displayed.
- Withdraw:
If you want to withdraw from the plan, click on Withdraw, select the withdrawal date, enter any comments, and click Save. After saving, the withdrawal date will be displayed.
Note: You can modify employee plans at any time, including editing enrollment and marking a plan as not eligible.
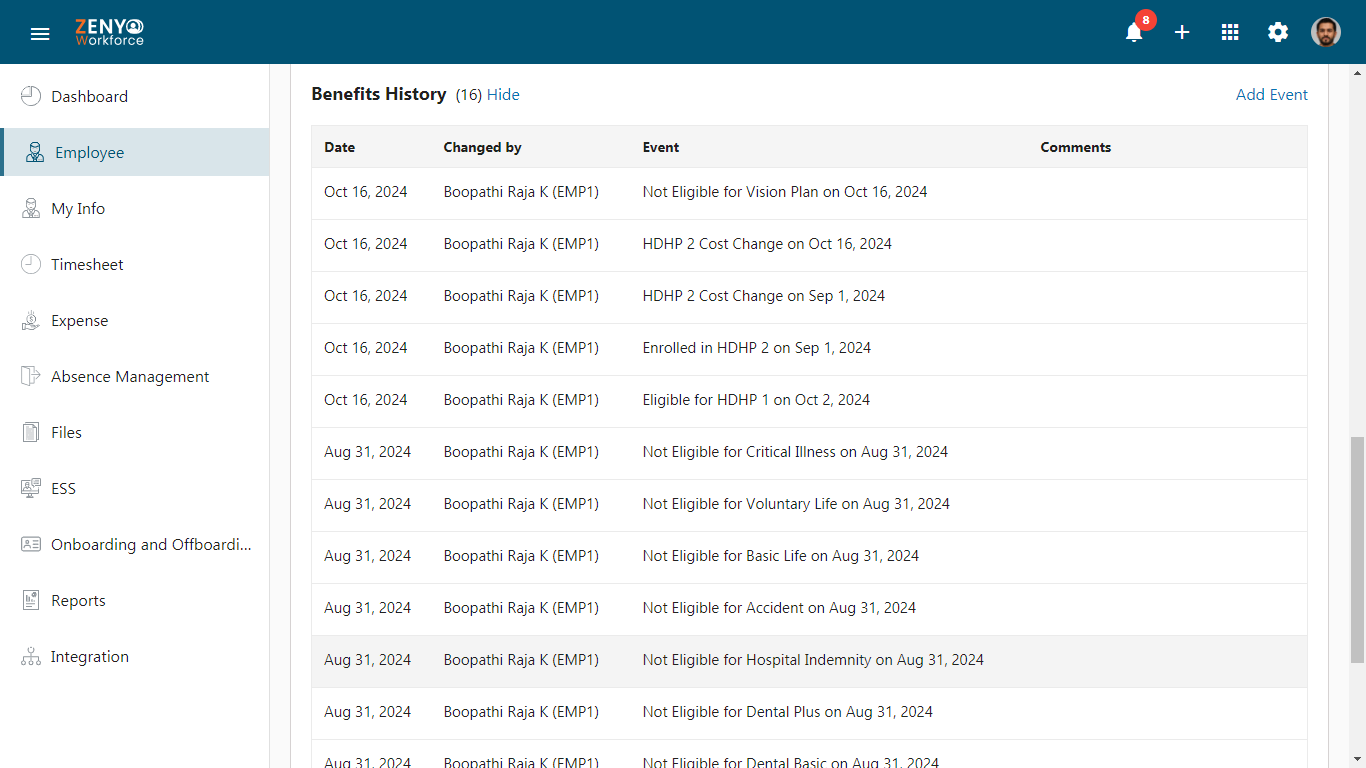
Benefits History
Benefits History tracks plan details, including eligibility, enrollment, termination of coverage, withdrawal, and ineligibility.
- To view the Benefits History, click on the Show link next to it.
- The Benefits History shows details of employee benefits, including the date of changes, the individual who made the update, the specific events (such as enrollment status or eligibility), and any related comments.
- Click on Add Events to enter the event name and comments, then click Save.
- The added events will also appear in the Benefits History, making it easier to track employee details related to specific events.
- Click on the Hide icon to hide the benefits history.