Employee Onboarding streamlines the process of integrating new hires into the organization by assigning tasks, sending onboarding kits, and tracking progress. This allows HR to assign and import tasks from templates, and customize task lists for each employee. Additionally, it facilitates the creation and sending of onboarding kits, which include arrival details, team introductions, and required tasks. The process is split into easy-to-follow steps, ensuring a seamless experience for both HR and new employees.
How to Manage Employee Onboarding?
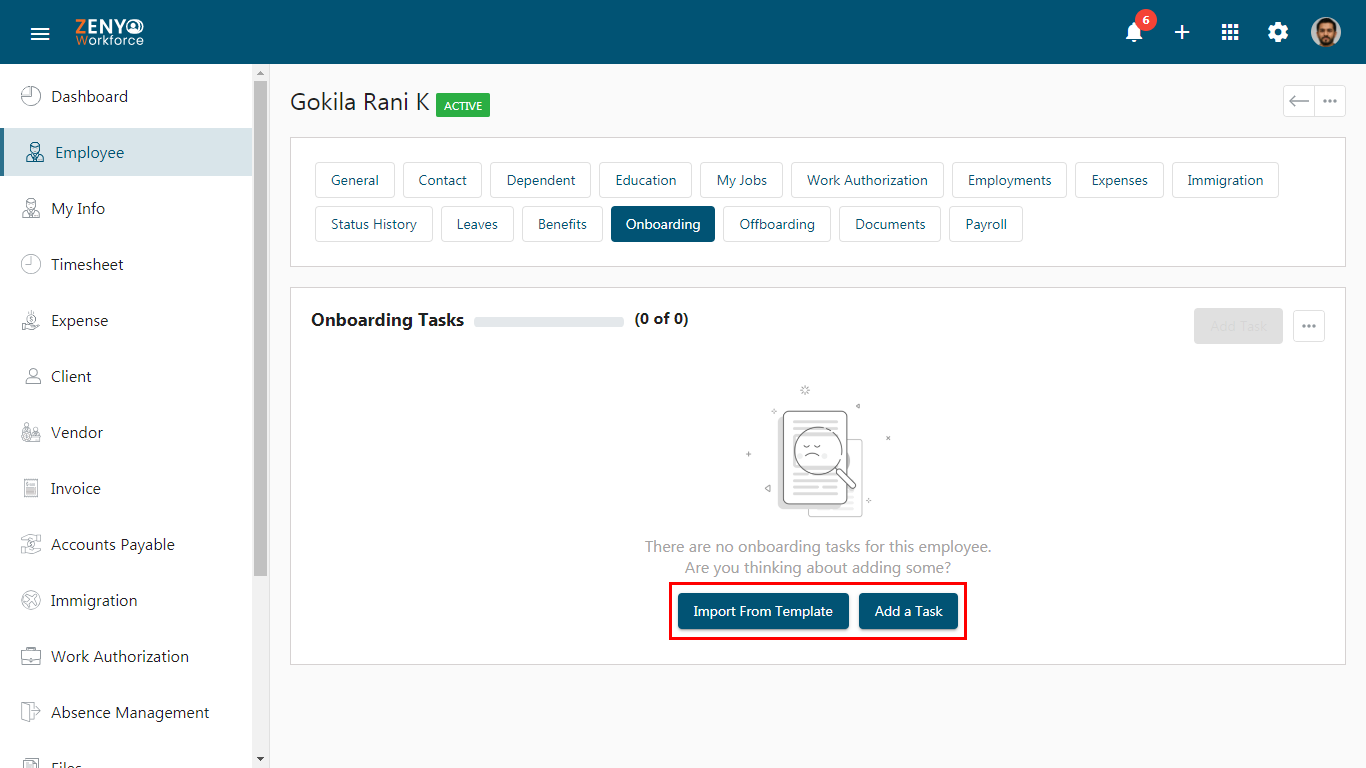
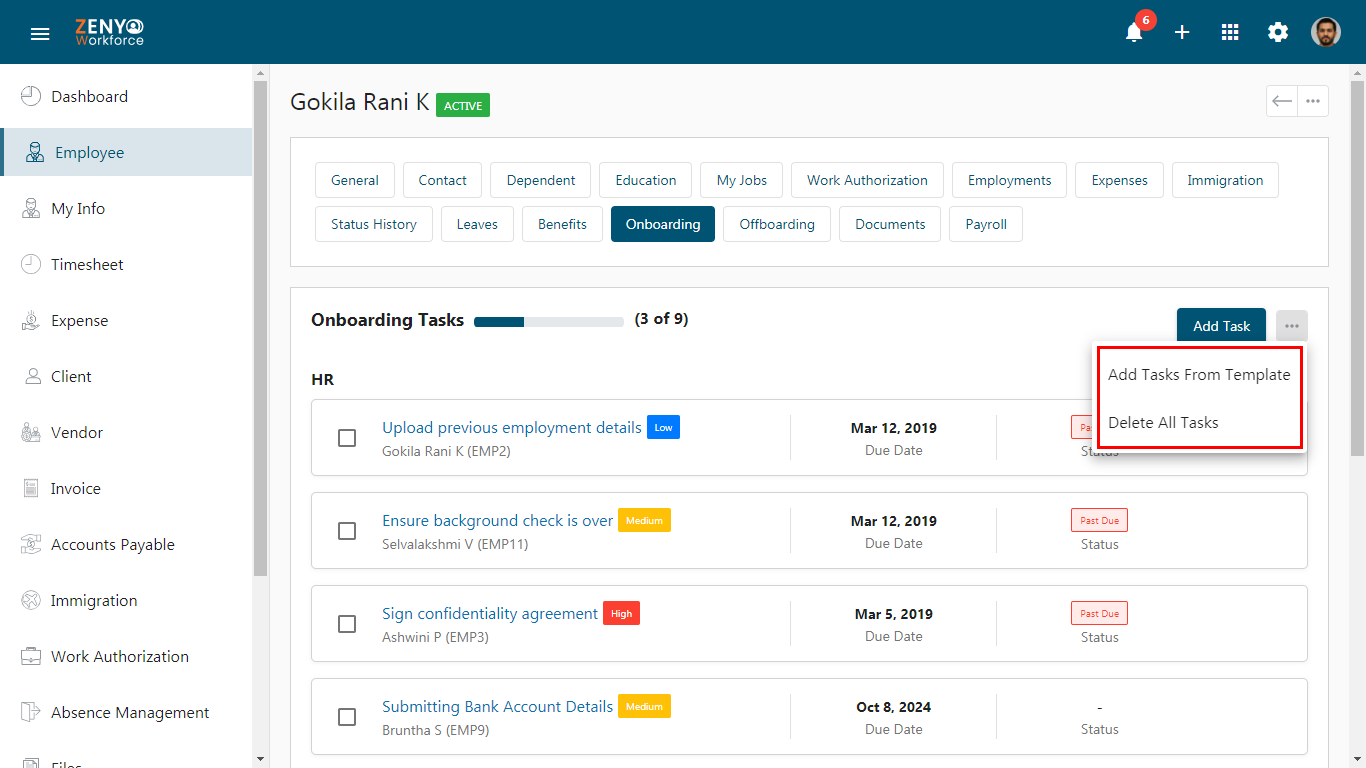
- Navigate to the Employee menu and select the specific employee, and choose the Onboarding tab.
Onboarding Tasks
- In the onboarding tasks section, if a reporting manager has not yet been assigned, click on the Reporting Manager link. This will navigate to the General tab, where you can assign a reporting manager.
- After assigning the manager, two buttons will appear in the Onboarding Tasks section:
- Import From Template - Click this button to import all the tasks applicable for this employee, based on the ‘Required for’ option set in the onboarding task settings.
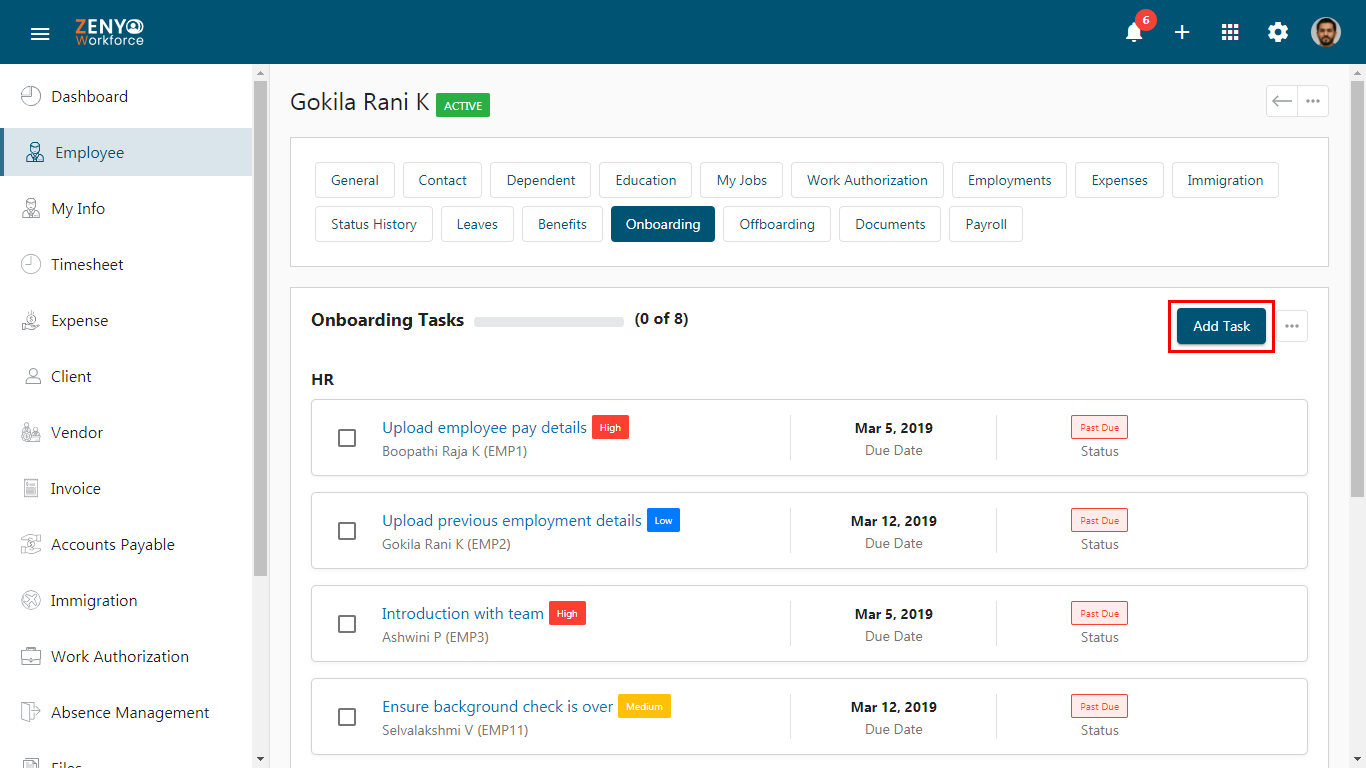
- Add a Task - Click this button to add a new task. Fill in the required details and click Add Task to save it.
- In this section, the tasks are categorized and displayed with the task name, employee name, code, due date, and status.
- To delete a particular task, hover over the task and click the Delete icon. To edit a task, click the Edit icon.
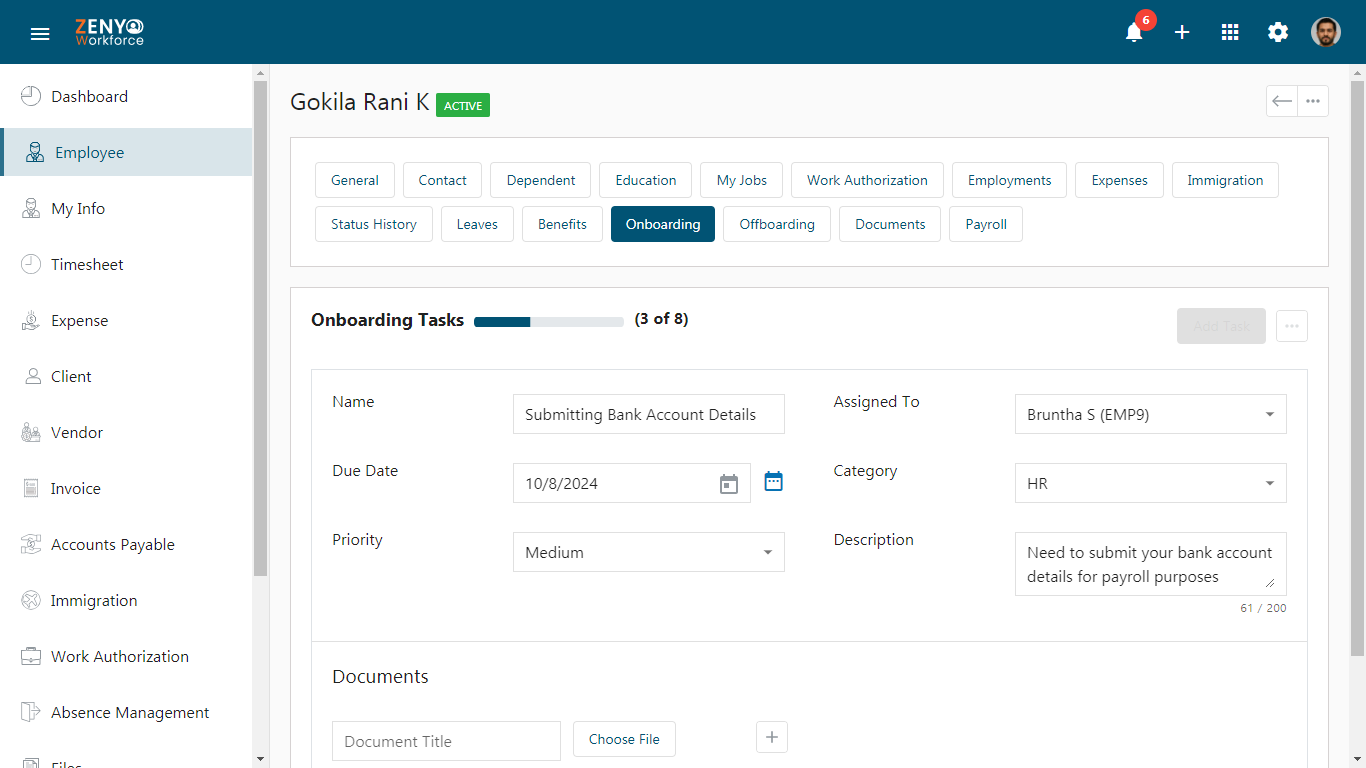
- Clicking the task name will open a side panel showing the employee’s name, designation, priority level, and status.
- You can mark the task as complete by checking the box next to the task name. Documents attached to the task can be downloaded by clicking the Download icon, if available.
- Add comments and upload relevant documents by clicking the Attachment icon. After adding, click Submit.
- Click the document uploaded to download it, click the View icon to view the document, and choose More icon to Email or Download. Click the Delete icon to delete the document.
- Hover over the comment to Edit or Delete. You can also reply to the comment. A comment box icon will appear near the task name in the Onboarding Tasks section indicating the task has some comments.
- Once a task is completed, check the checkbox, and the task will move to the bottom of the list.
- Clicking the More icon reveals options such as:
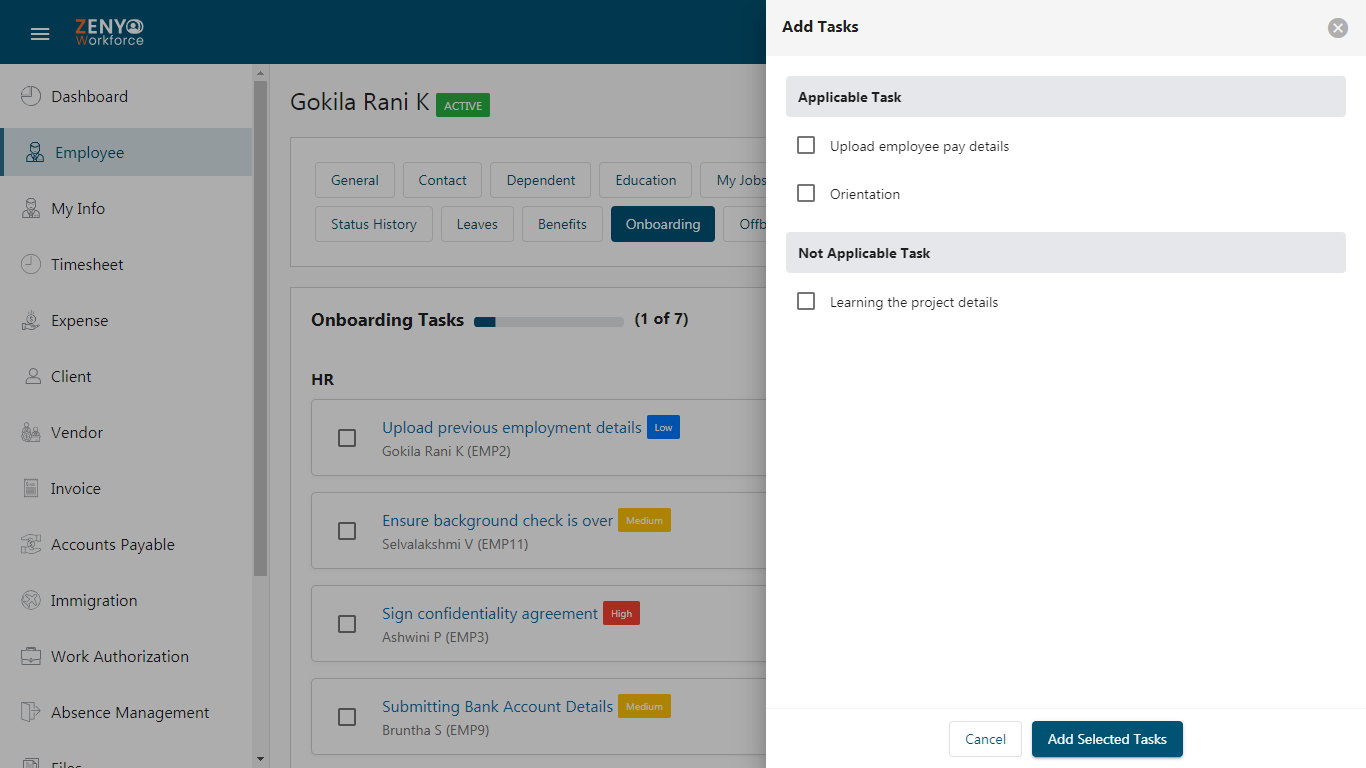
- Add Tasks From Template: Click Add Tasks From Template, it opens a side panel displaying both applicable and not-applicable tasks. Select the tasks you want to add, and click Add Selected Tasks.
- Delete All Tasks: Click Delete All Tasks. A dialogue box will appear to confirm the deletion. To include completed tasks in the deletion, check the corresponding checkbox and click Delete These Tasks.
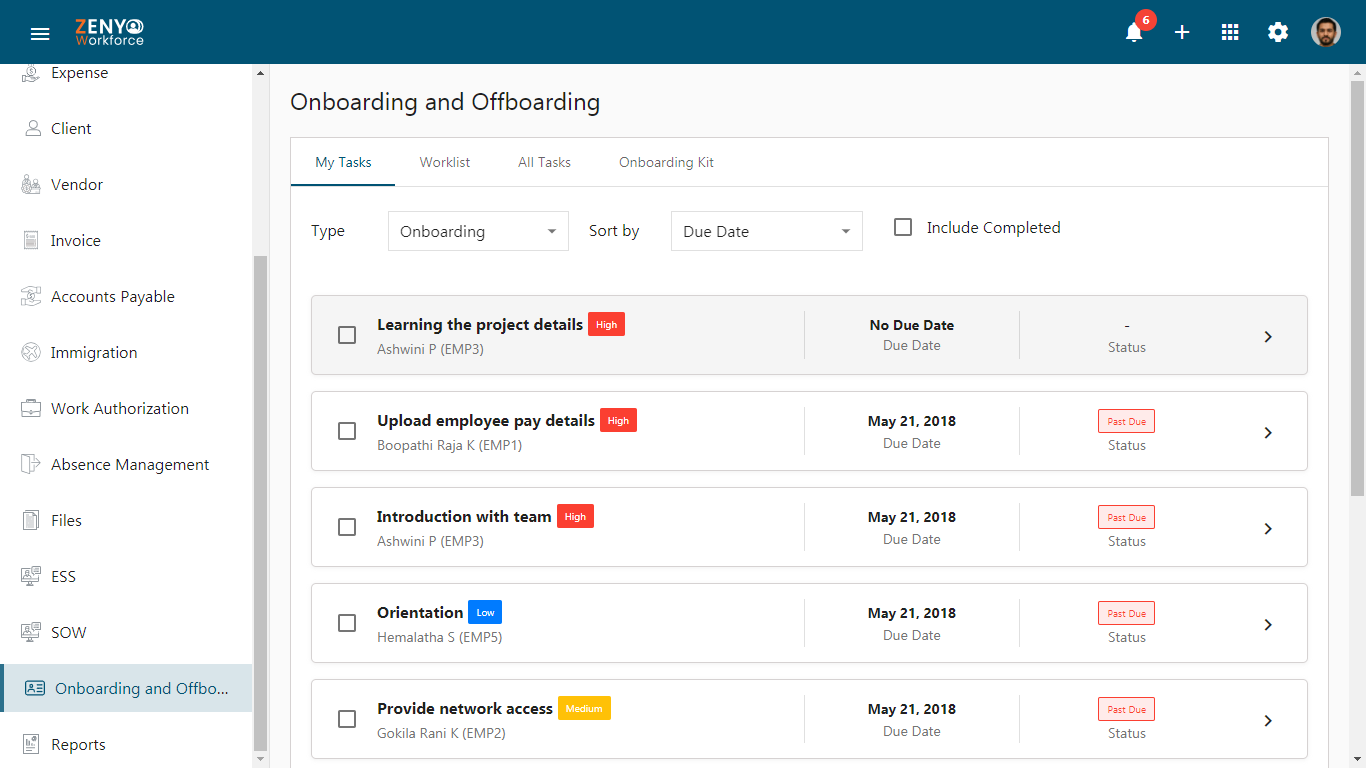
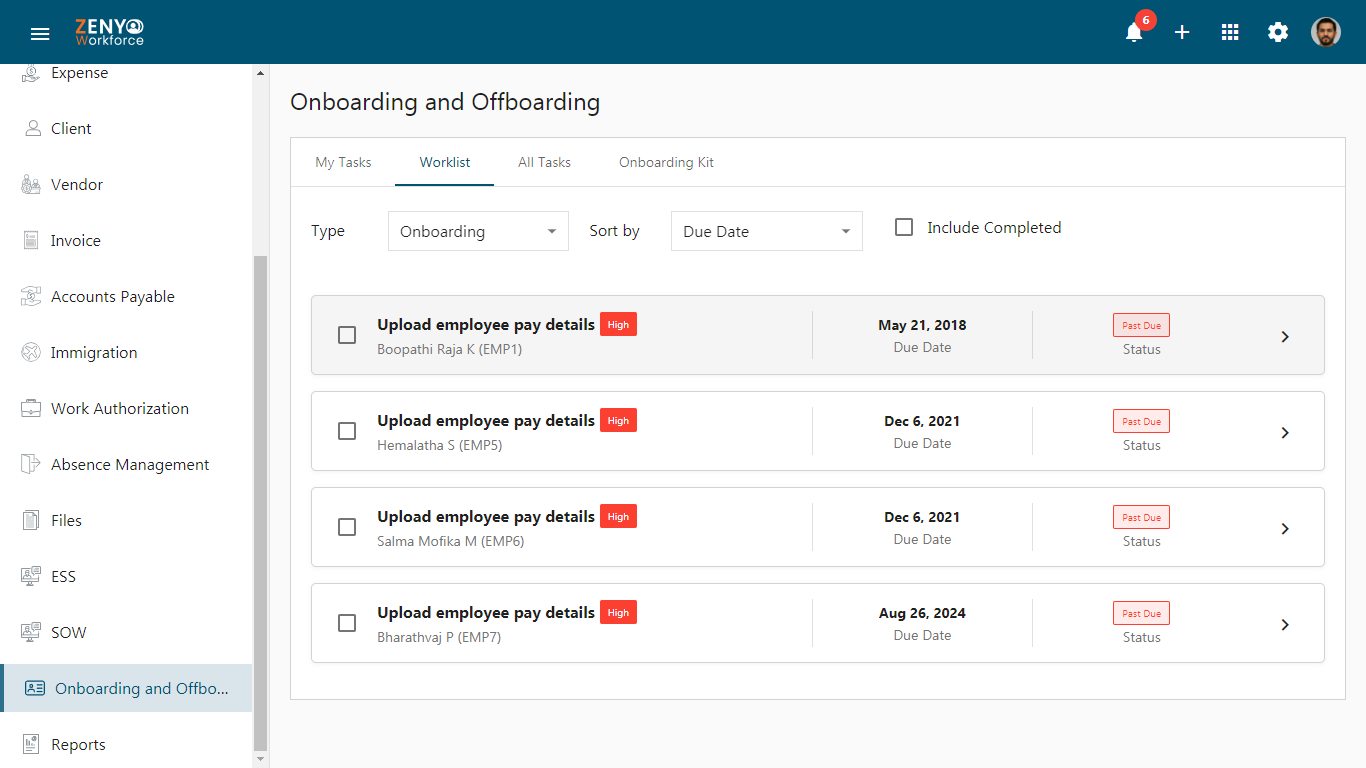
How to Access All Onboarding Tasks?
- Navigate to the Onboarding and Offboarding menu, where you’ll find four tabs:
- My Tasks
- Worklist
- All Tasks
- Onboarding Kit
Note: Make sure the type is set to Onboarding.
My Tasks
- This tab displays all your added and imported tasks, including task names, assignee details, priority status, due dates, and statuses.
- Mark a task as complete by checking the box near the task name.
- Sort tasks by due date or task name. Use the Include Completed checkbox to show completed tasks.
- Clicking the task record will open a side panel showing the employee’s name, designation, priority level, and status.
- You can mark the task as complete by checking the box next to the task name. Documents attached to the task can be downloaded by clicking the Download icon, if available.
- Add comments and upload relevant documents by clicking the Attachment icon. After adding, click Submit.
Worklist
- Displays all tasks assigned to you, along with the employee name, employee code, priority level, due date, and status.
- Mark a task as complete by checking the box near the task name.
- Sort tasks by due date, employee, or task name. Use the Include Completed checkbox to show completed tasks.
- Clicking the task record will open a side panel showing the employee’s name, designation, priority level, and status.
- You can mark the task as complete by checking the box next to the task name. Documents attached to the task can be downloaded by clicking the Download icon, if available.
- Add comments and upload relevant documents by clicking the Attachment icon. After adding, click Submit.
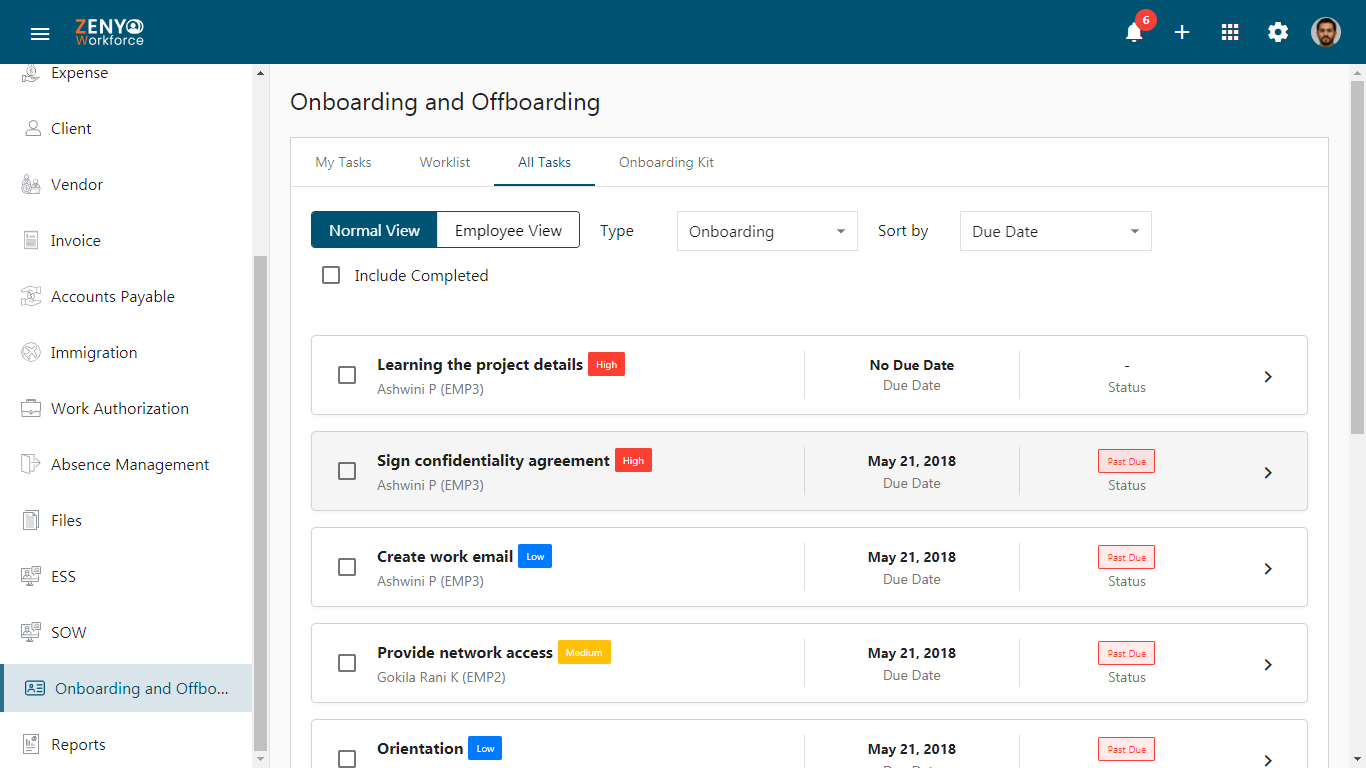
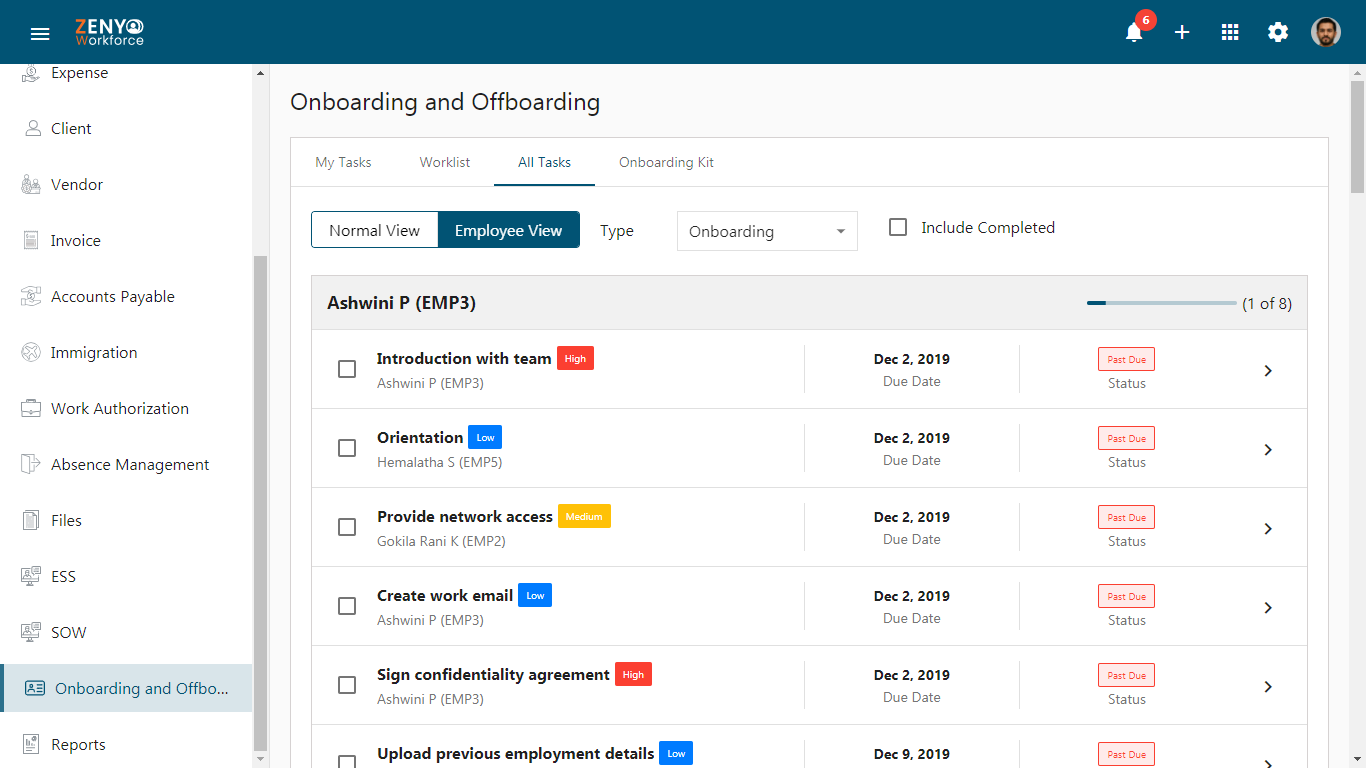
All Tasks
- This tab shows all tasks imported during the onboarding process.
- Normal View: Displays all tasks assigned to each employee with task names, priorities, and due dates.
- Employee View: Displays tasks grouped by each employee.
- Mark a task as complete by checking the box near the task name.
- Sort tasks by due date, employee, or task name. Use the Include Completed checkbox to show completed tasks.
- Clicking the task record will open a side panel showing the employee’s name, designation, priority level, and status.
- You can mark the task as complete by checking the box next to the task name. Documents attached to the task can be downloaded by clicking the Download icon, if available.
- Add comments and upload relevant documents by clicking the Attachment icon. After adding, click Submit.
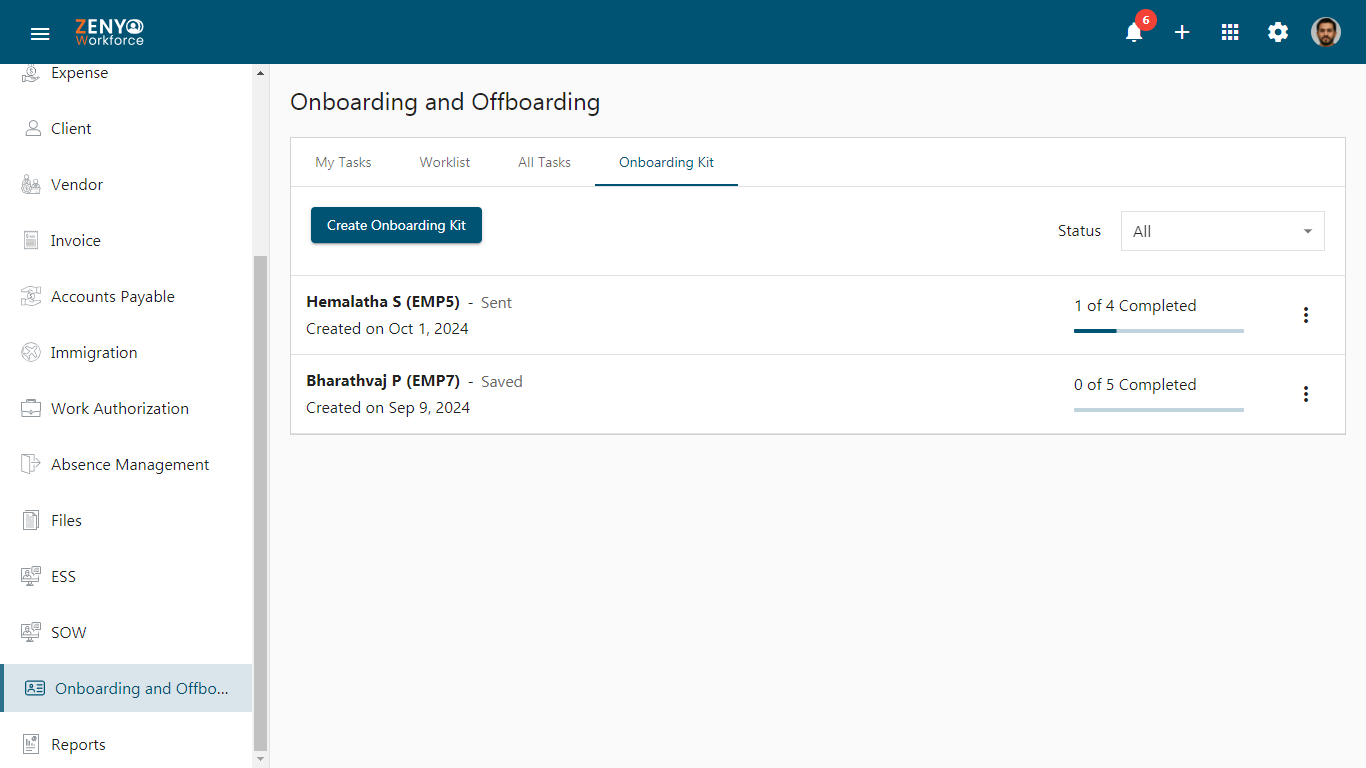
Onboarding Kit
- The Onboarding Kit displays all the onboarding kits created along with a progress score.
- Use the Status filter to sort kits by status (All, Sent, Viewed, Info Added, Questions Answered, Tasks Completed, or Completed).
- Clicking the More icon next to a saved onboarding kit provides options to Edit, View, Send, or Cancel the kit. Once the kit is sent, only the options to View, Resend, or Cancel will remain. For completed kits, only the View option will be available.
How to Create an Onboarding Kit?
- Click the Create Onboarding Kit button to start creating a new kit.
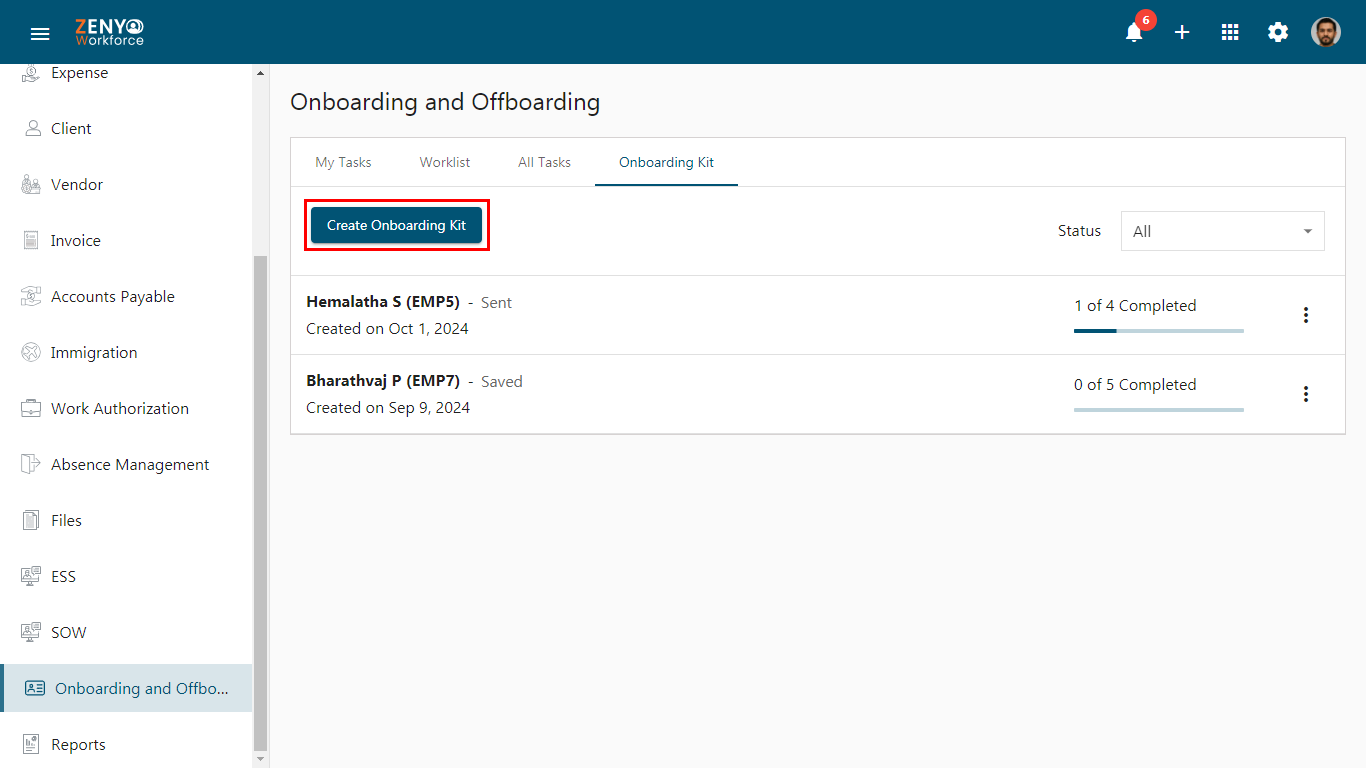
- A pop-up window will appear where you can select an employee using the dropdown.
- Click the Next button to proceed with the onboarding kit creation.
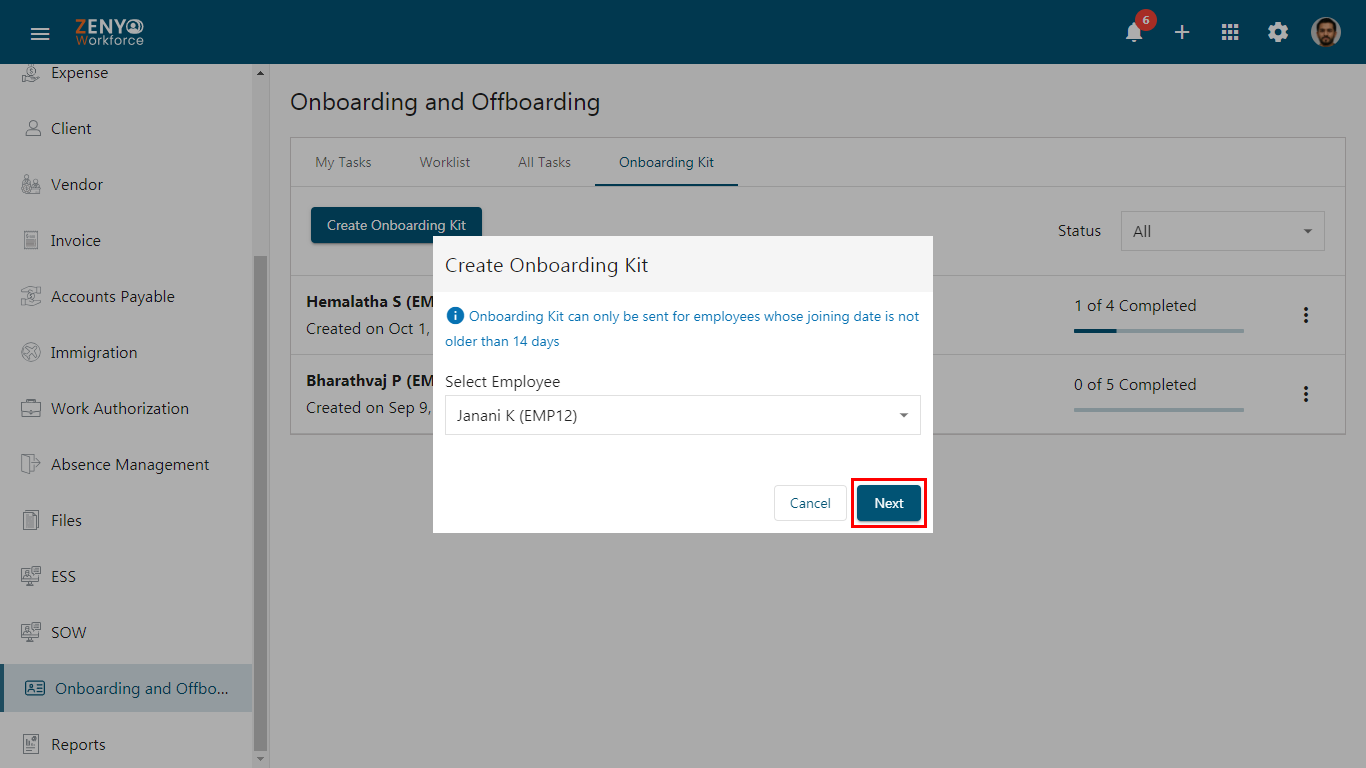 Note: The onboarding kit can only be sent to employees whose joining date is within the last 14 days or in the upcoming days.
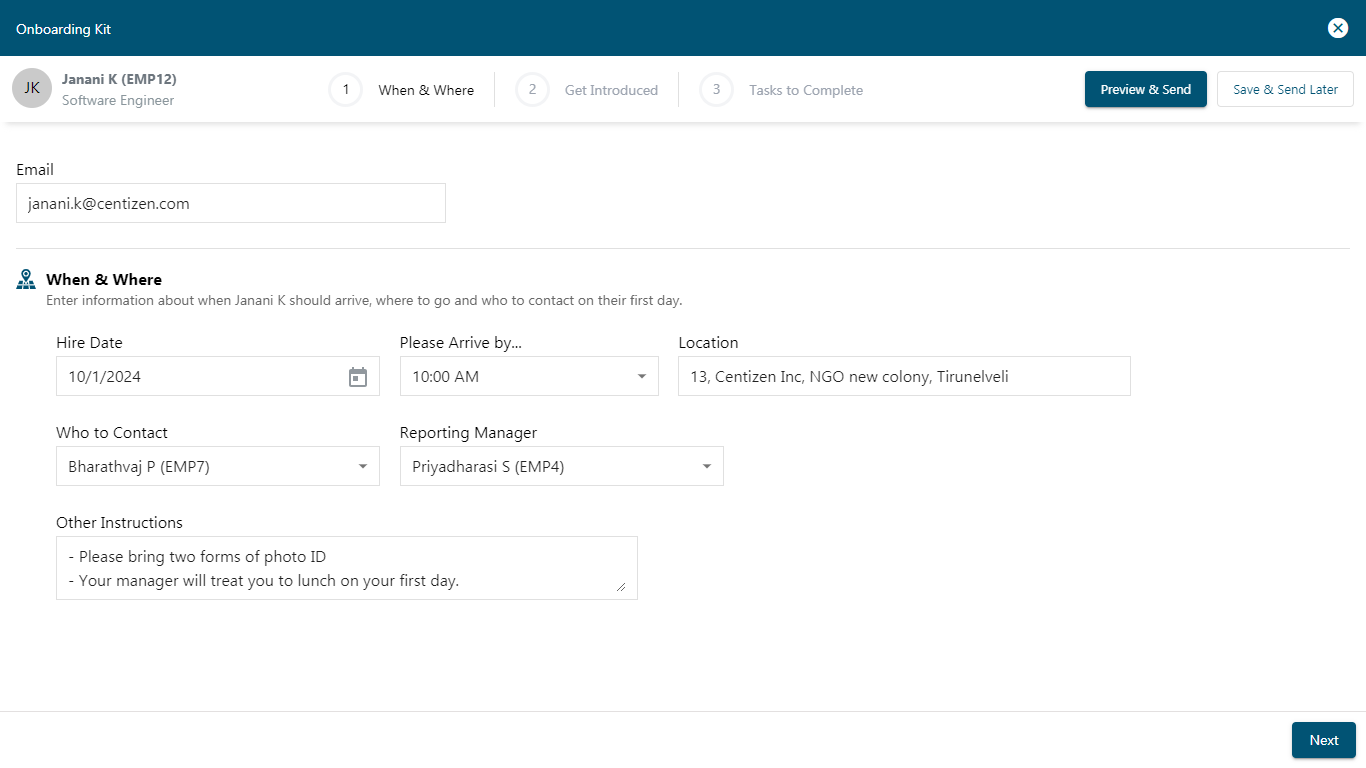
 - The Onboarding Kit creation is divided into three steps:
- Step 1: When & Where
- Enter information about when the employee should arrive, where to go (the office address), and who to contact on their first day.
- Modify the reporting manager and joining date if needed, and provide any additional instructions. Click Next.
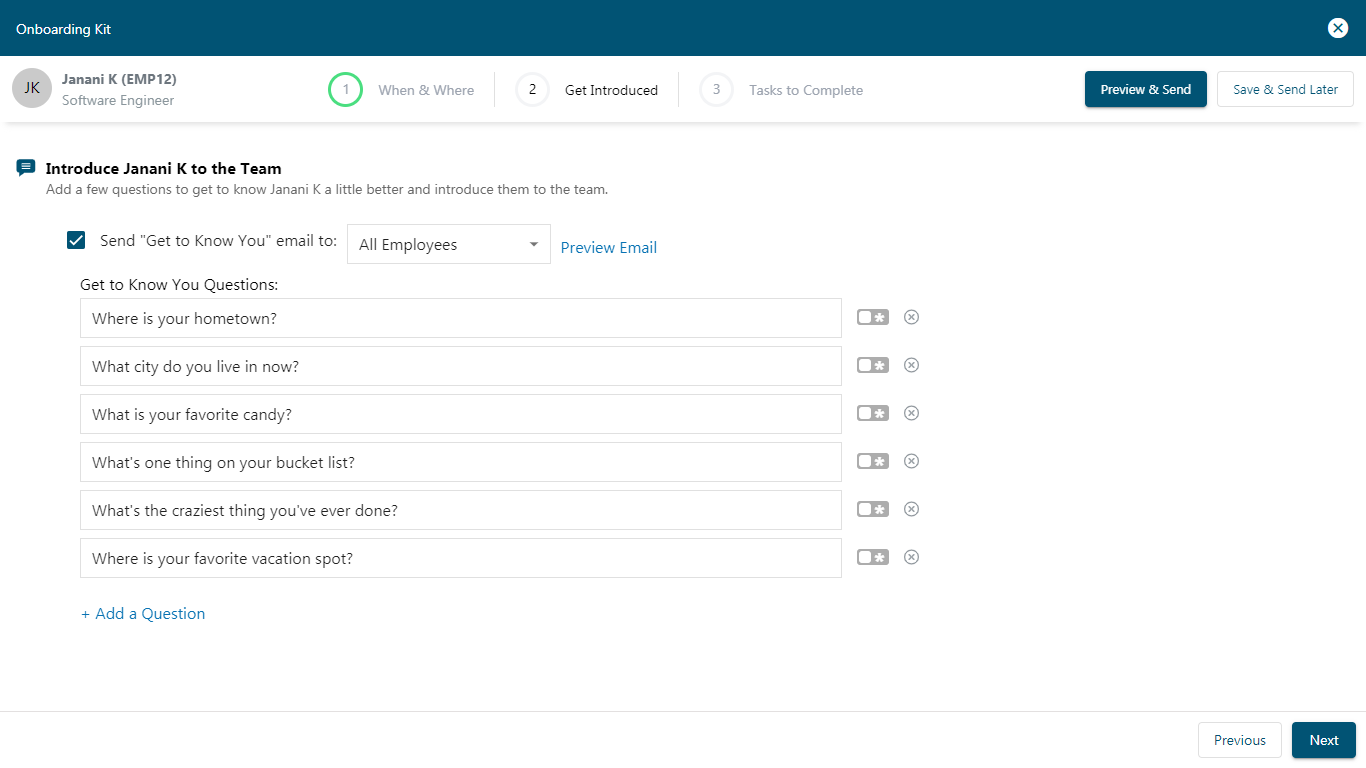
- Step 2: Get Introduced
- Default questions will be sent to the new hire. You can create new ones by clicking +Add a Question.
- You can remove any default questions by clicking the remove icon or mark a question as *required by enabling the toggle next to the question.
- Check the checkbox to share the new hire’s answers to these questions with other employees. You can also select the recipient from the dropdown menu, filtered by Location and Department. To preview how the email will appear to the selected employee, click Preview Email. After reviewing, click Next to proceed.
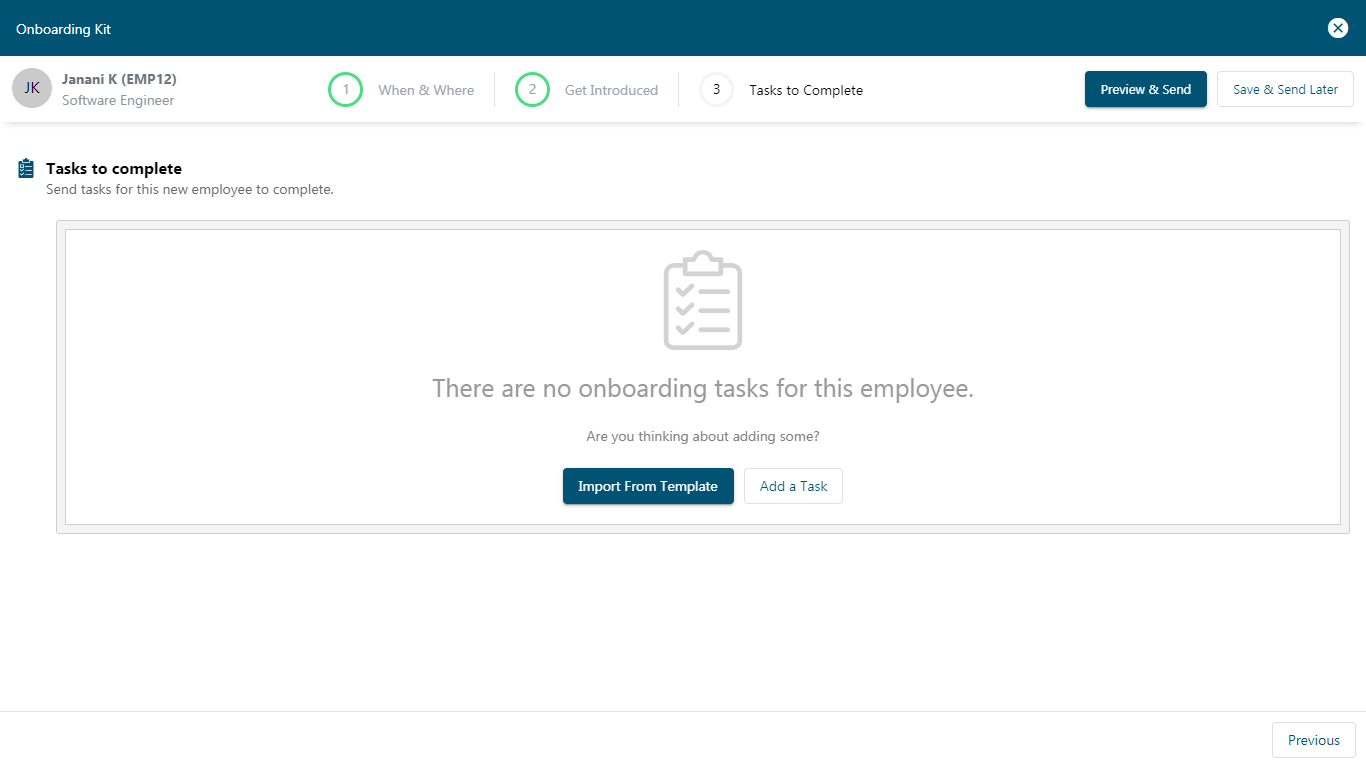
- Step 3: Tasks to Complete
- Add tasks manually or import them from a template. Here, you have the option to Edit or Delete the task.
- Step 1: When & Where
- After creating the onboarding kit, you have two options:
- Preview & Send: Click the Preview & Send button to review how the kit will appear to the employee before sending.
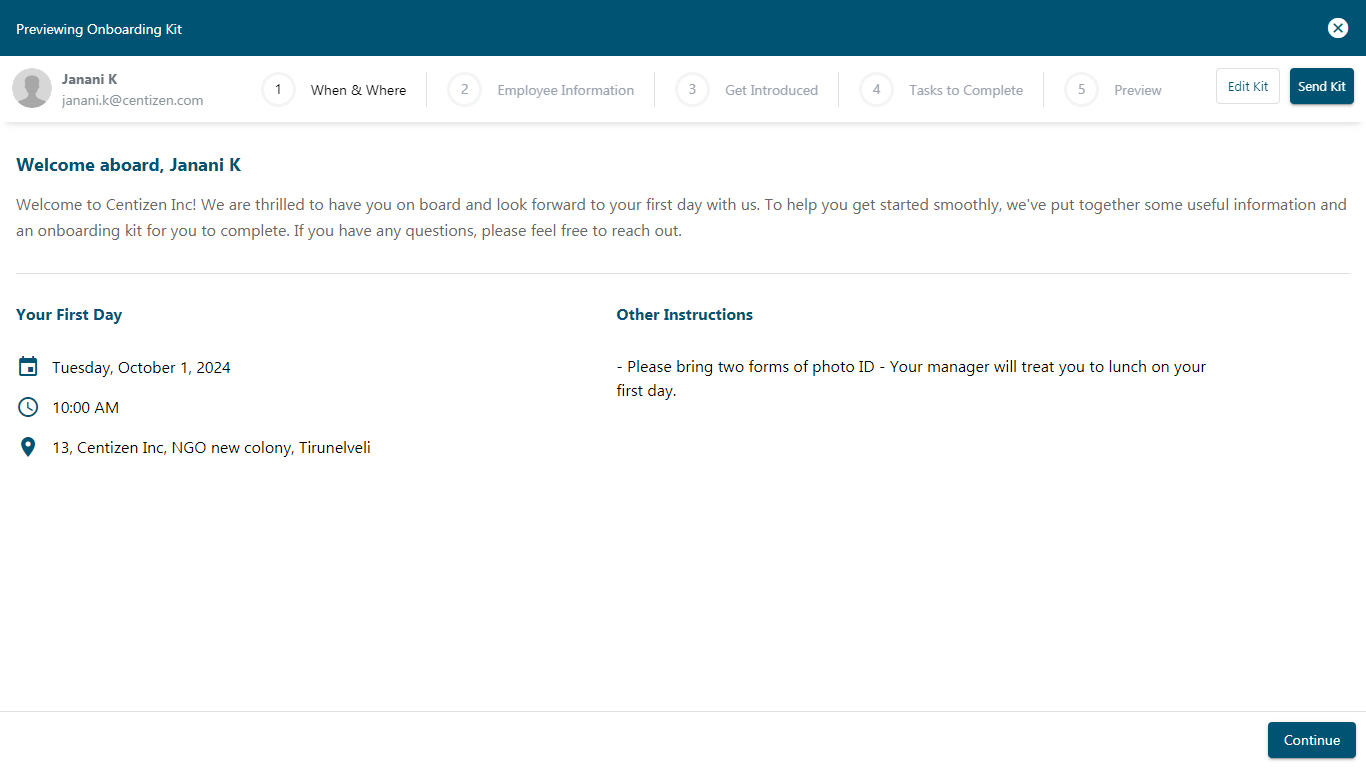
- In the Preview, you will find the When & Where section of the onboarding kit created specifically for that employee.
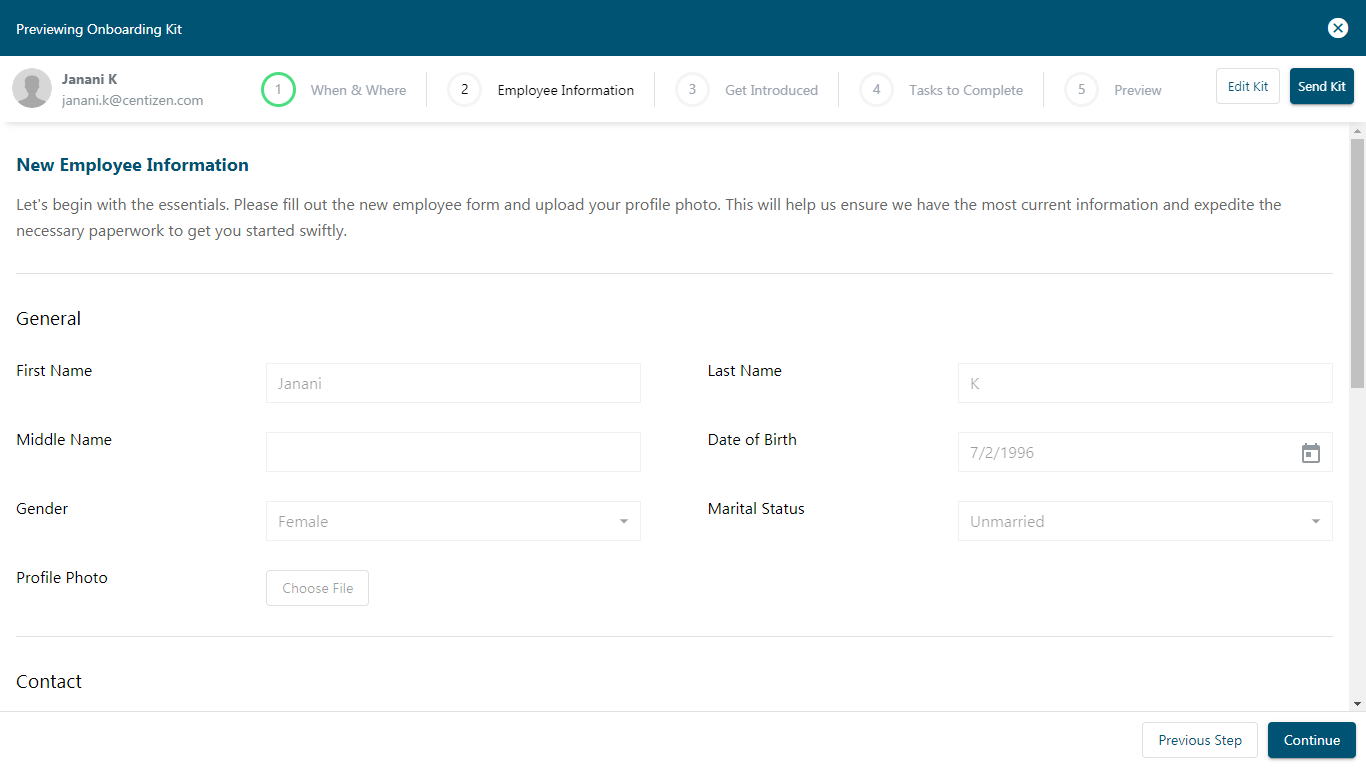
- The Employee Information section consists of basic information fields that should be filled out by new hires. Click Continue.
- In the next step, Get Introduced, a set of questions will be provided for the employees to fill out.
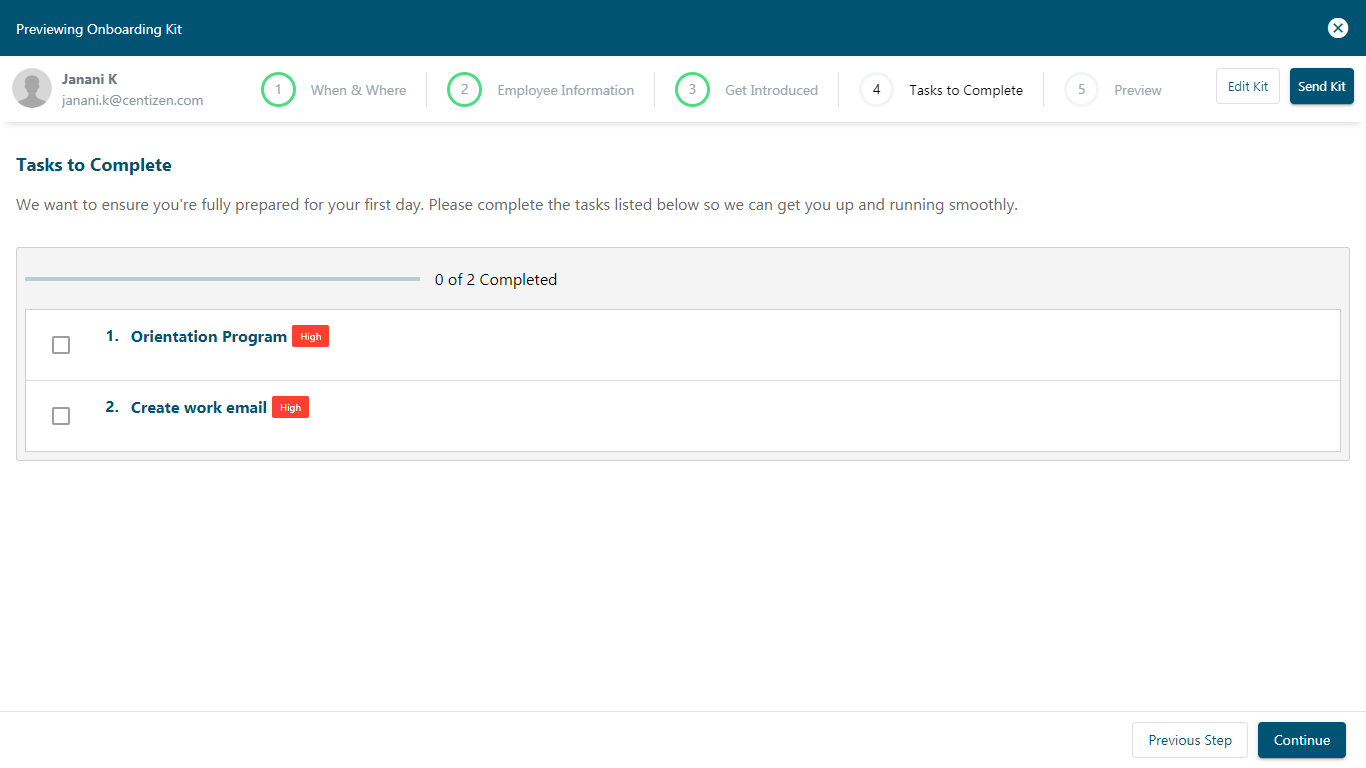
- In the fourth step, Tasks to Complete, new hires should complete the assigned tasks by simply checking the box next to each task name.
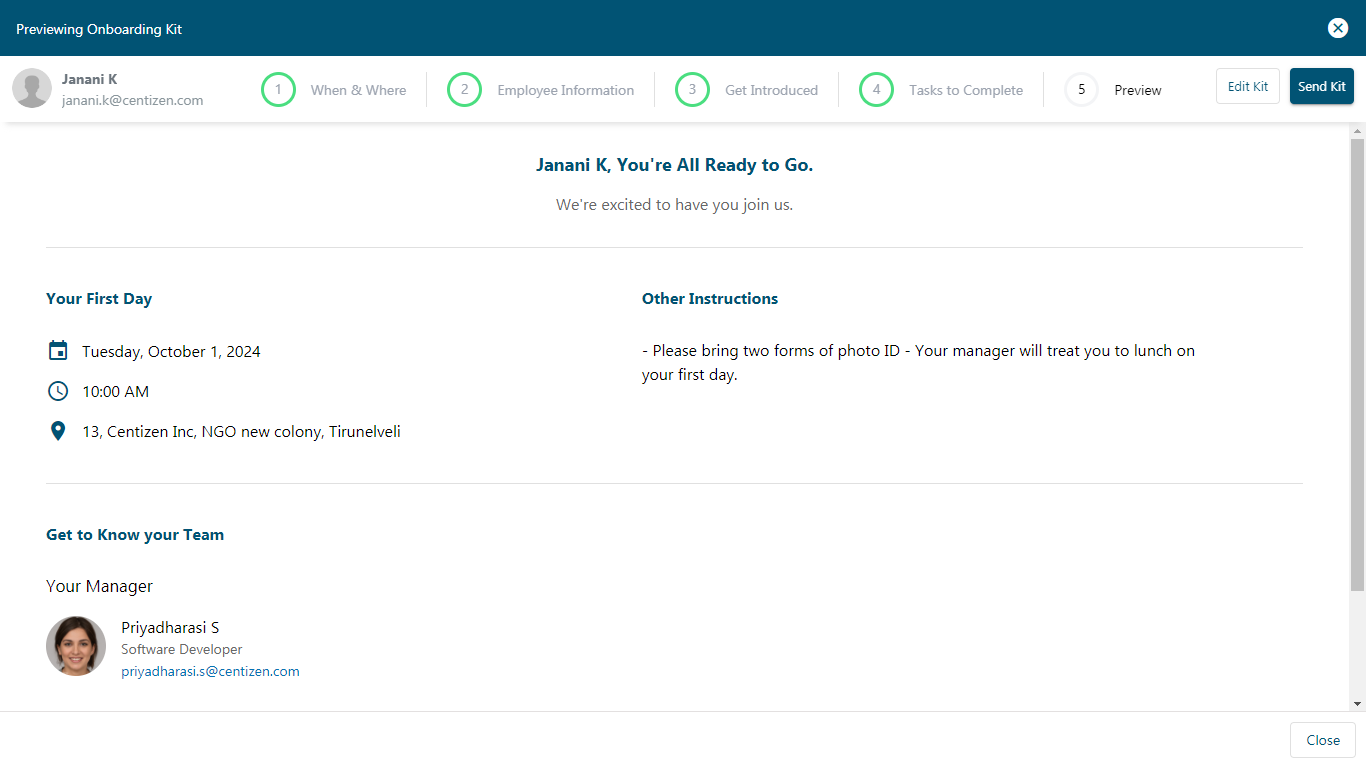
- Once you’ve finished the onboarding kit, click the Continue button to proceed to the Preview step. From there, click Send Kit at the top to complete the process.
- If needed, you can make last-minute changes by selecting the Edit Kit option at the top of the page. Once satisfied with the kit, click the Send Kit button to finalize and send it to the employee.
- Save & Send Later: Save the kit and send it at a later time by clicking the Save & Send Later button.

- Preview & Send: Click the Preview & Send button to review how the kit will appear to the employee before sending.
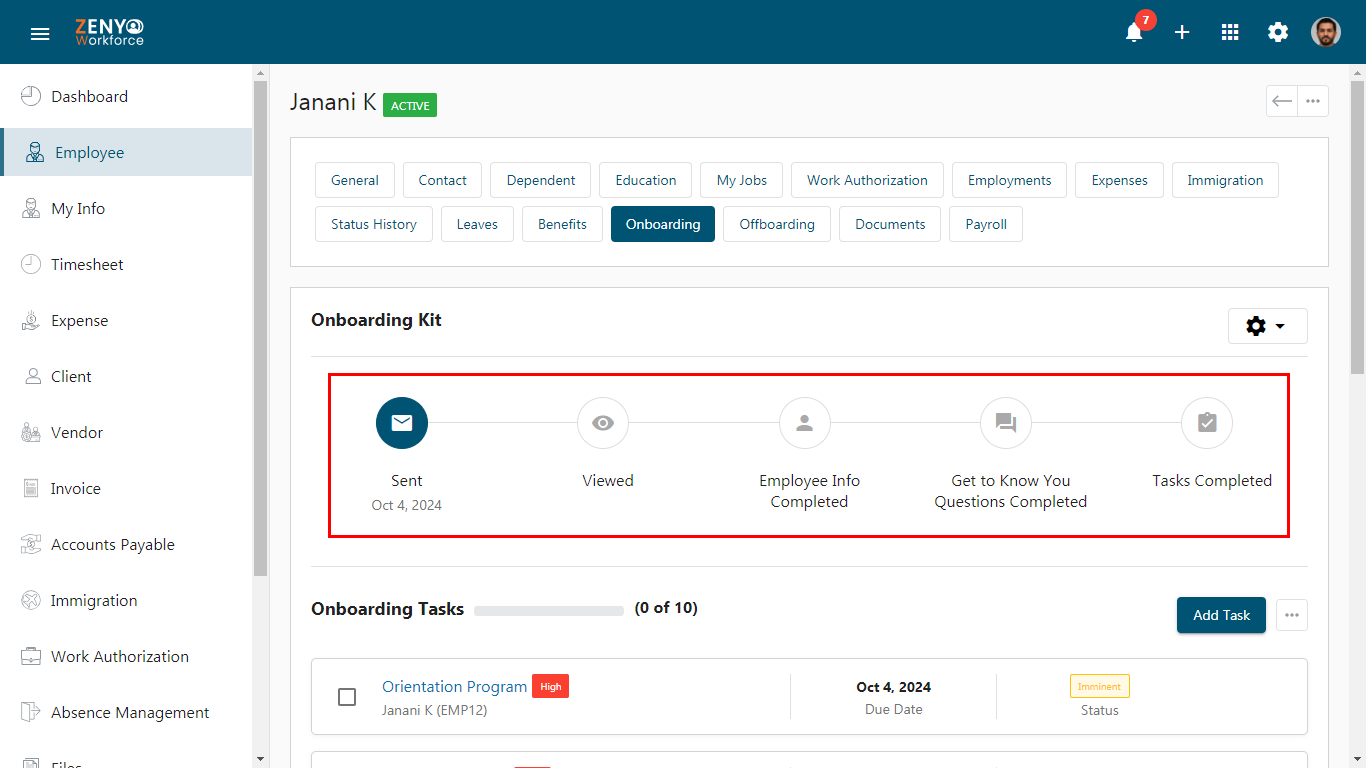
How to Check Onboarding Kit Status?
- Once the kit is sent, go to the Employee menu and select the employee. Under the Onboarding tab, you will see the kit’s status flow.
- Click the Settings icon. You have the option to View, Resend, or Cancel the onboarding kit.
- View - View the onboarding kit details.
- Resend - Resend the hire packet.
- Cancel - The Onboarding Kit will be deleted and cannot be accessed.
Note: The Edit option for the onboarding kit will be accessible only if the kit is in a saved status and has not been sent.