Employee Self-Service (ESS) is a vital feature of modern workforce software, allowing employees to directly access and manage their requests. This simplifies processes and boosts overall efficiency. By enabling employees to handle their HR tasks online, ESS saves time and reduces the administrative workload for the HR team.
To create a request template
- Click on the Settings icon in the top right corner of the navigation bar.
- Select ESS from the main menu.
- Select the Request Template submenu.
- You will be directed to the Request Template page, where you can create and assign various requests. To get started, click the Add button located at the top of the page.
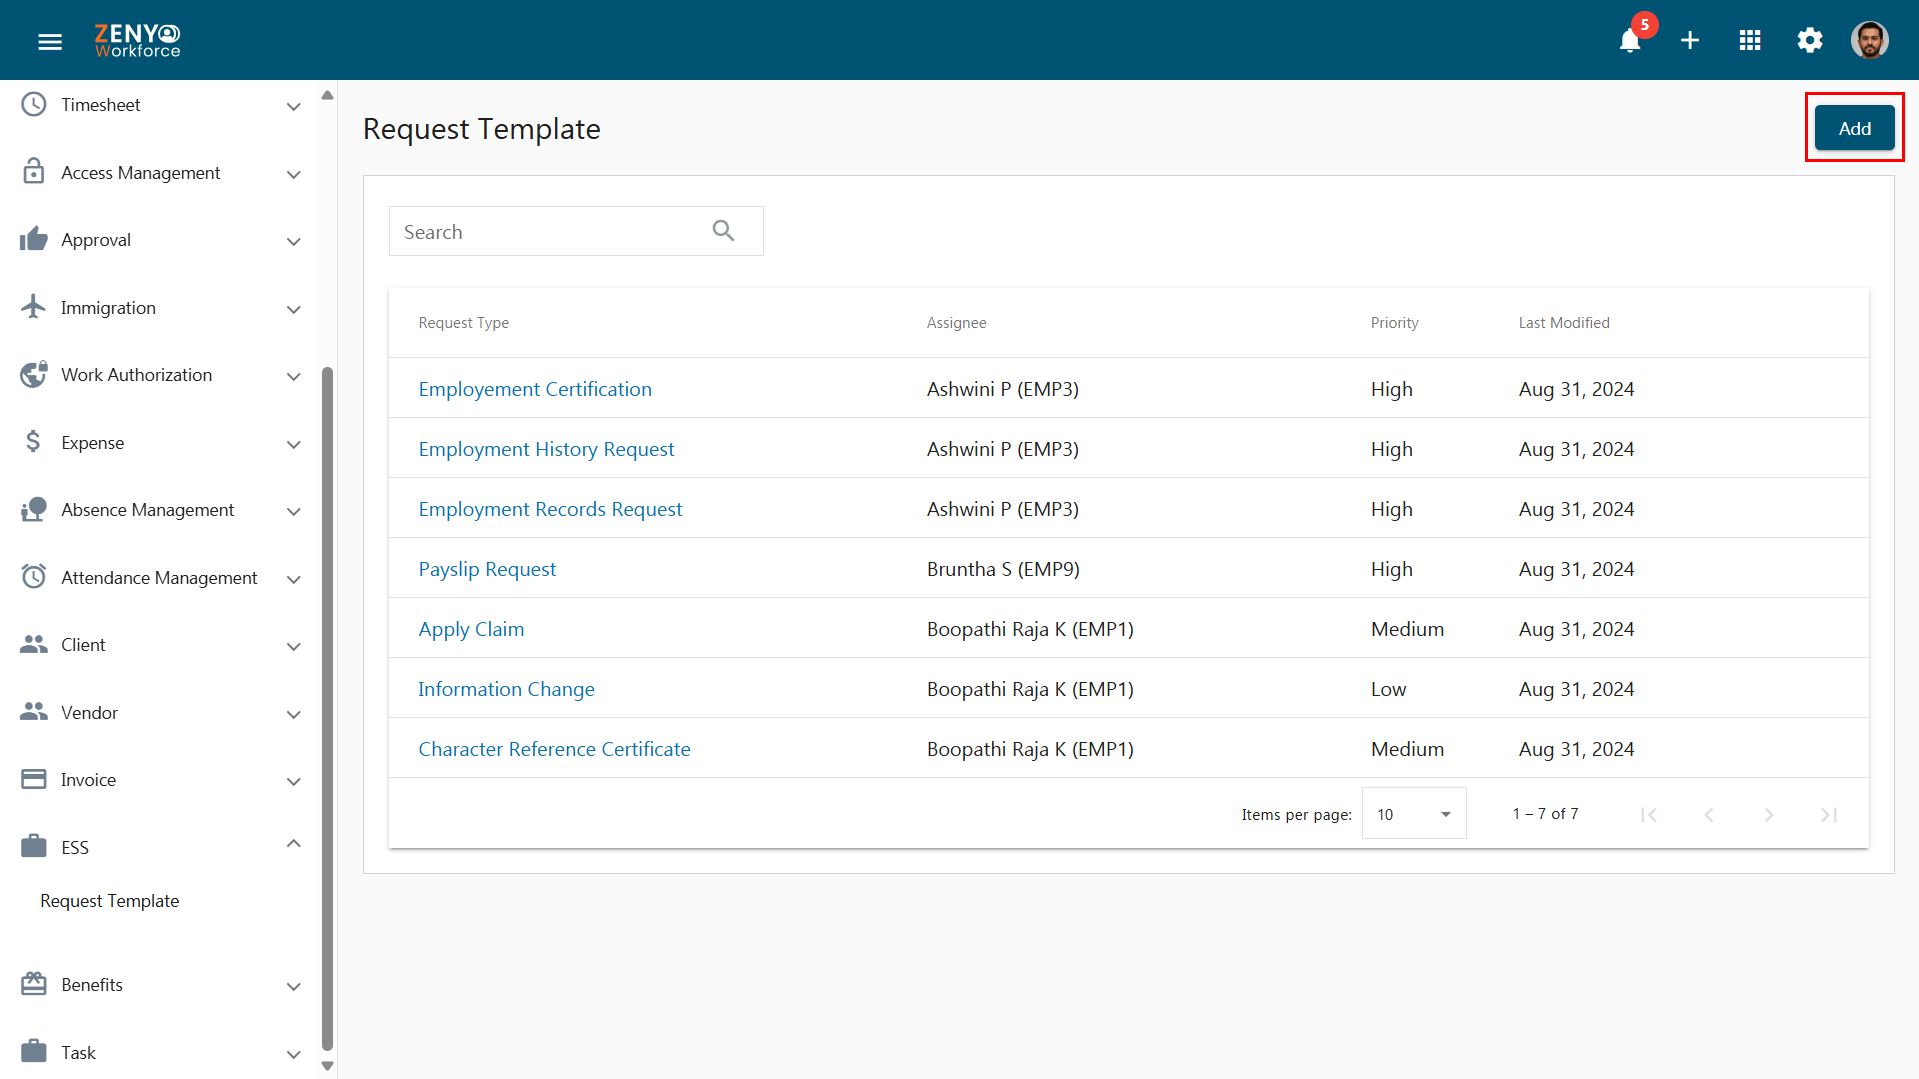
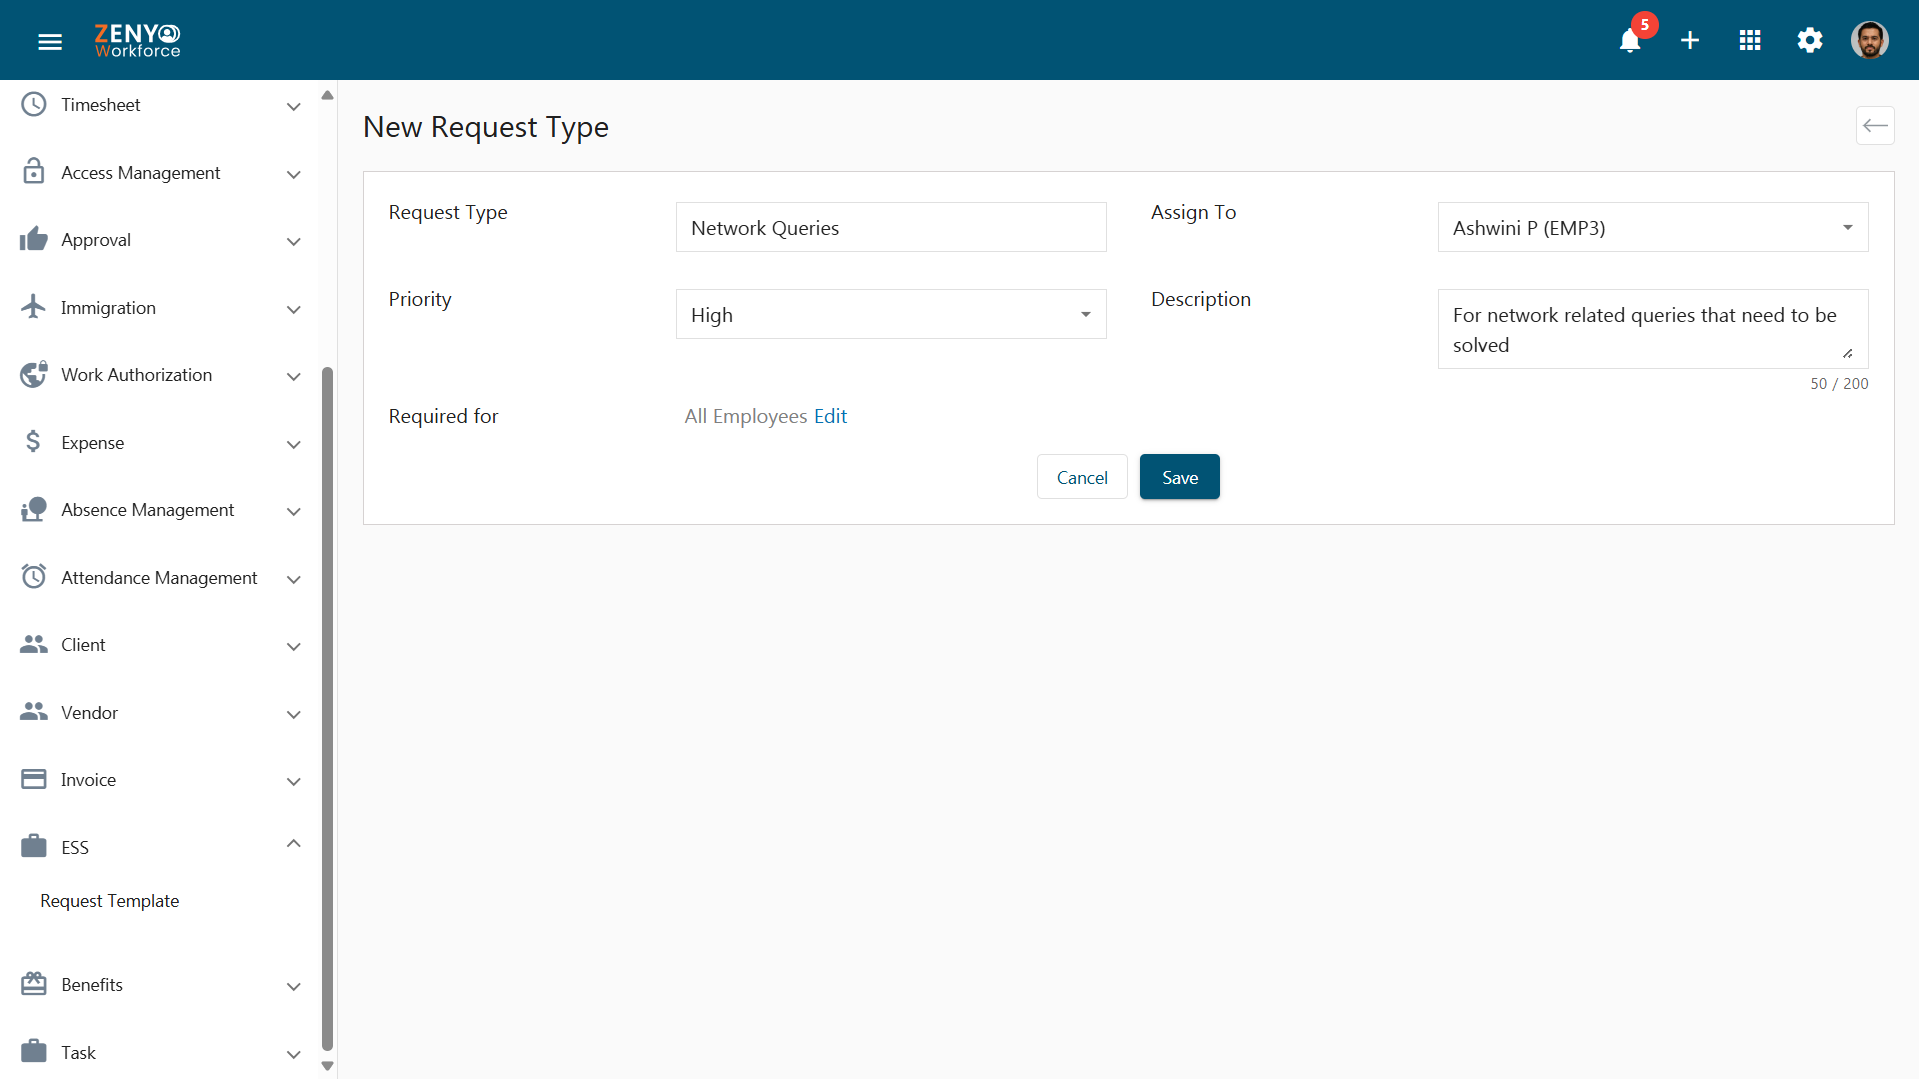
- Enter a clear and descriptive name for the request type in the Request Type field. This name should accurately convey the purpose or details of the request.
- Next, assign an employee to handle this request type. From the drop-down menu, select the appropriate employee who will be responsible for addressing the request.
- Next, choose the Priority level for this request type to indicate its urgency or importance. If needed, describe the request type in the designated field.
- Then, add employees to whom this request type will apply. You can choose to apply it to All Employees or select Only Some Employees for specific individuals. If you select Only Some Employees, you can further refine the criteria based on employee roles, departments, office locations, or employment types.
- Once you have made your selections, click the Save button to finalize the creation of the request type.
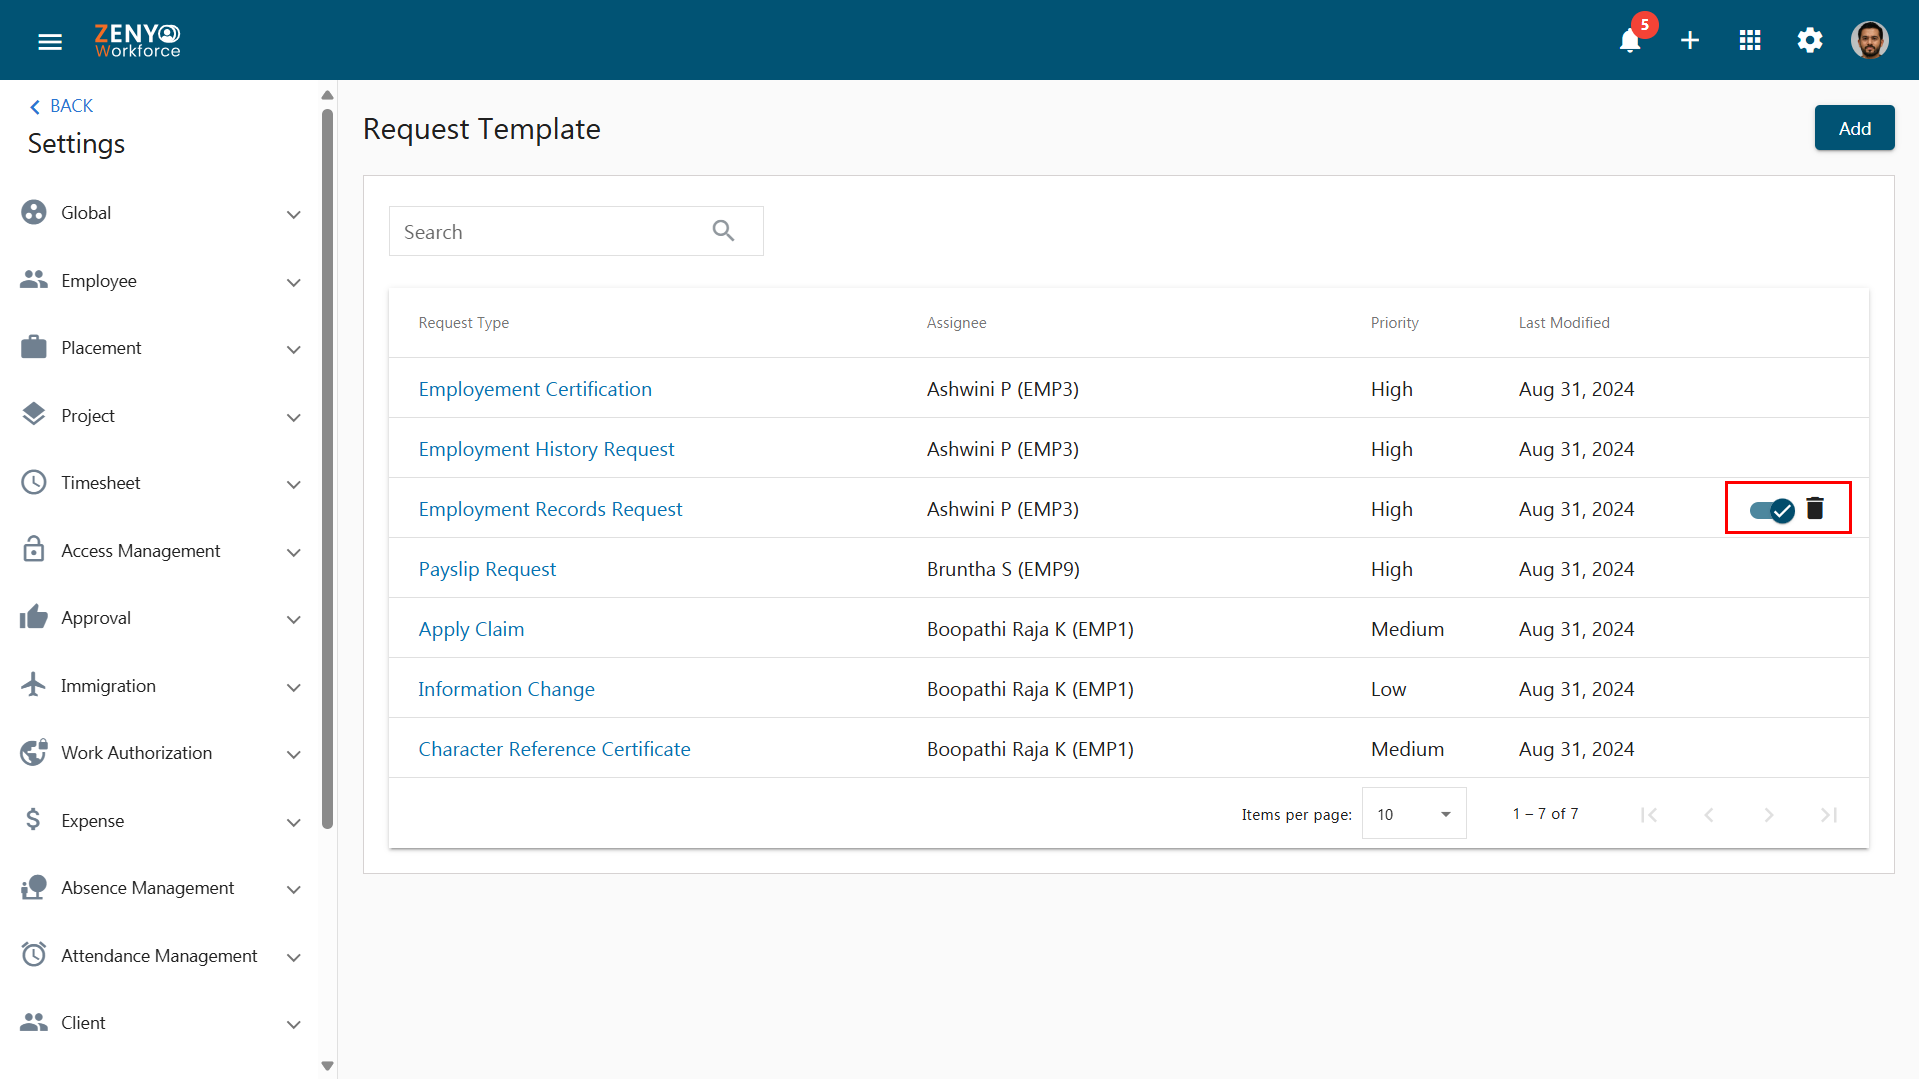
- The newly created request type will now appear in the list. To find a specific request type, use the Search Bar to quickly locate it.
- To deactivate a request type, locate the toggle switch next to the request type and switch it to the Inactive position.
- To completely remove a request type, click the Remove button next to the request type. This action will permanently delete the request type from the system.
How to use the newly created request type
- To use the newly created request type for submitting a request, navigate to the ESS section in the main menu.
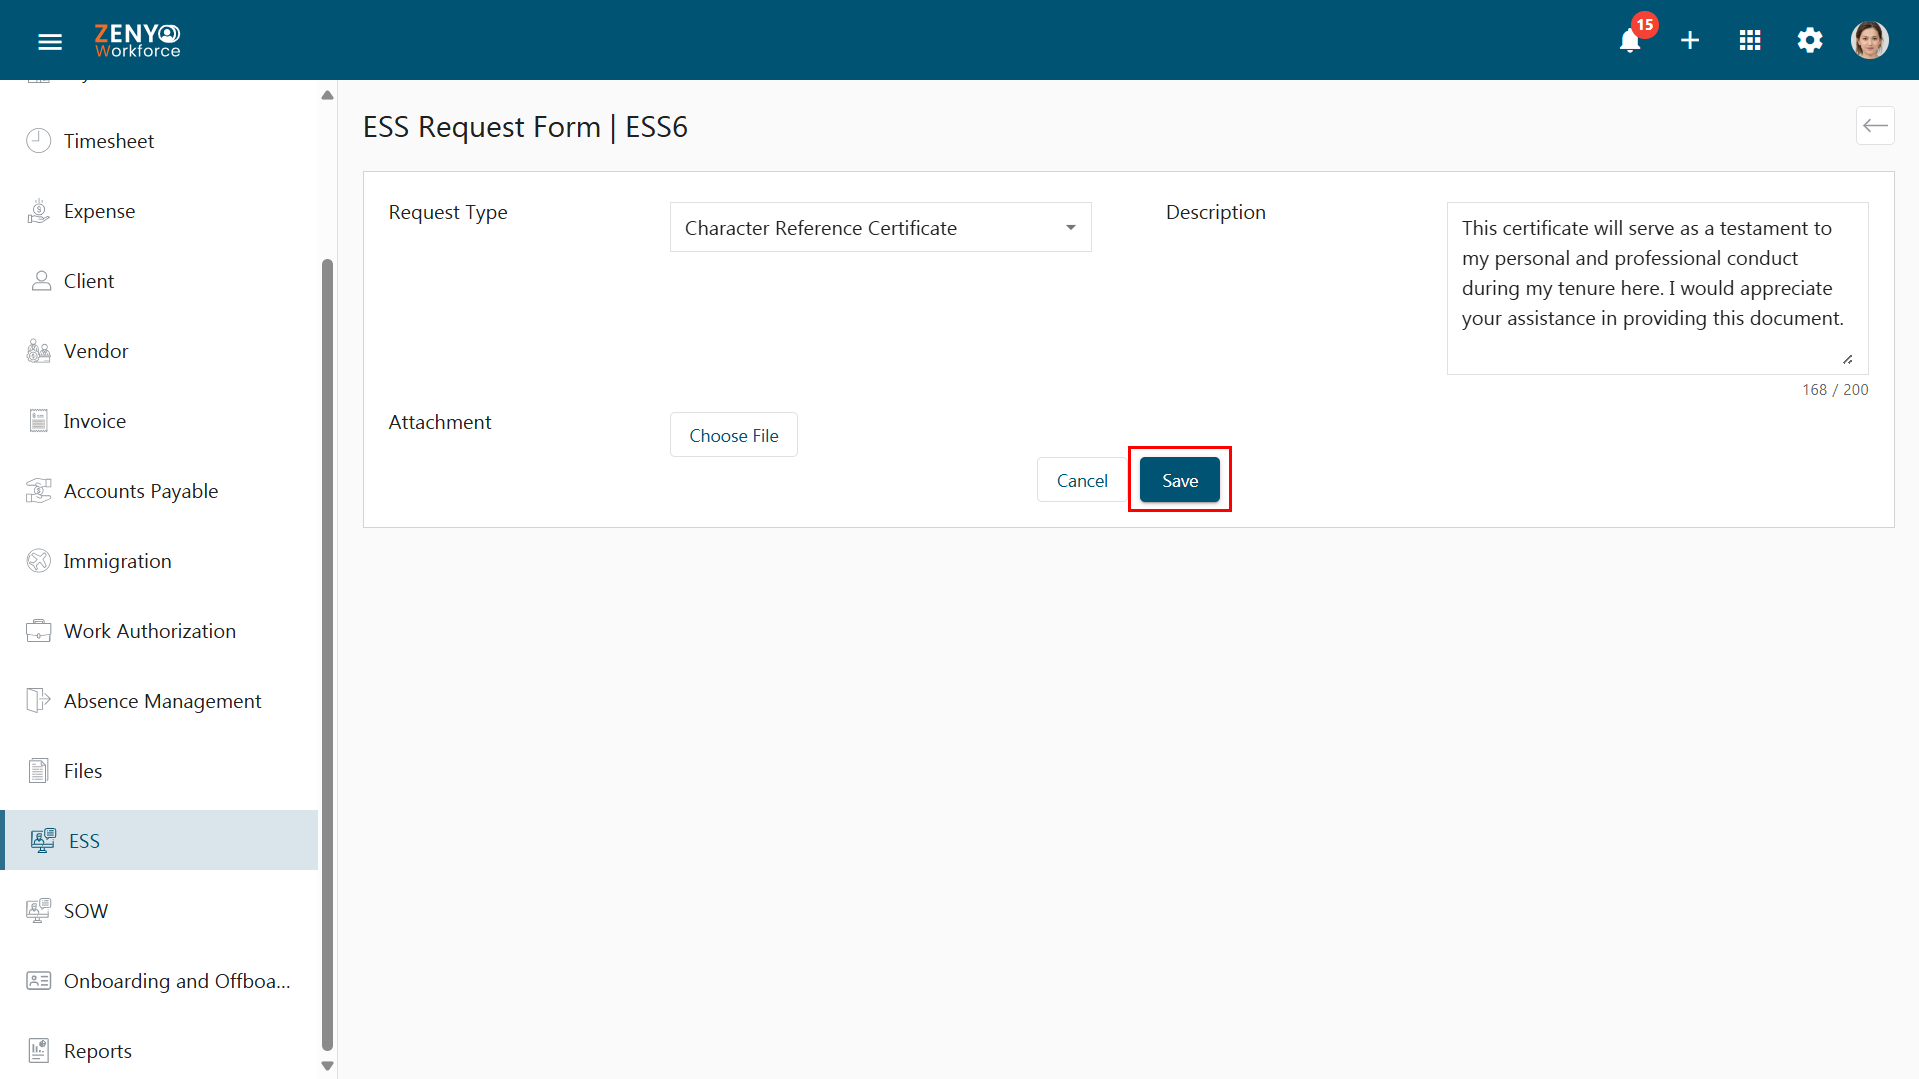
- To submit a request, click the Add icon in the top right corner of the ESS page. This will open the ESS Request Form page.
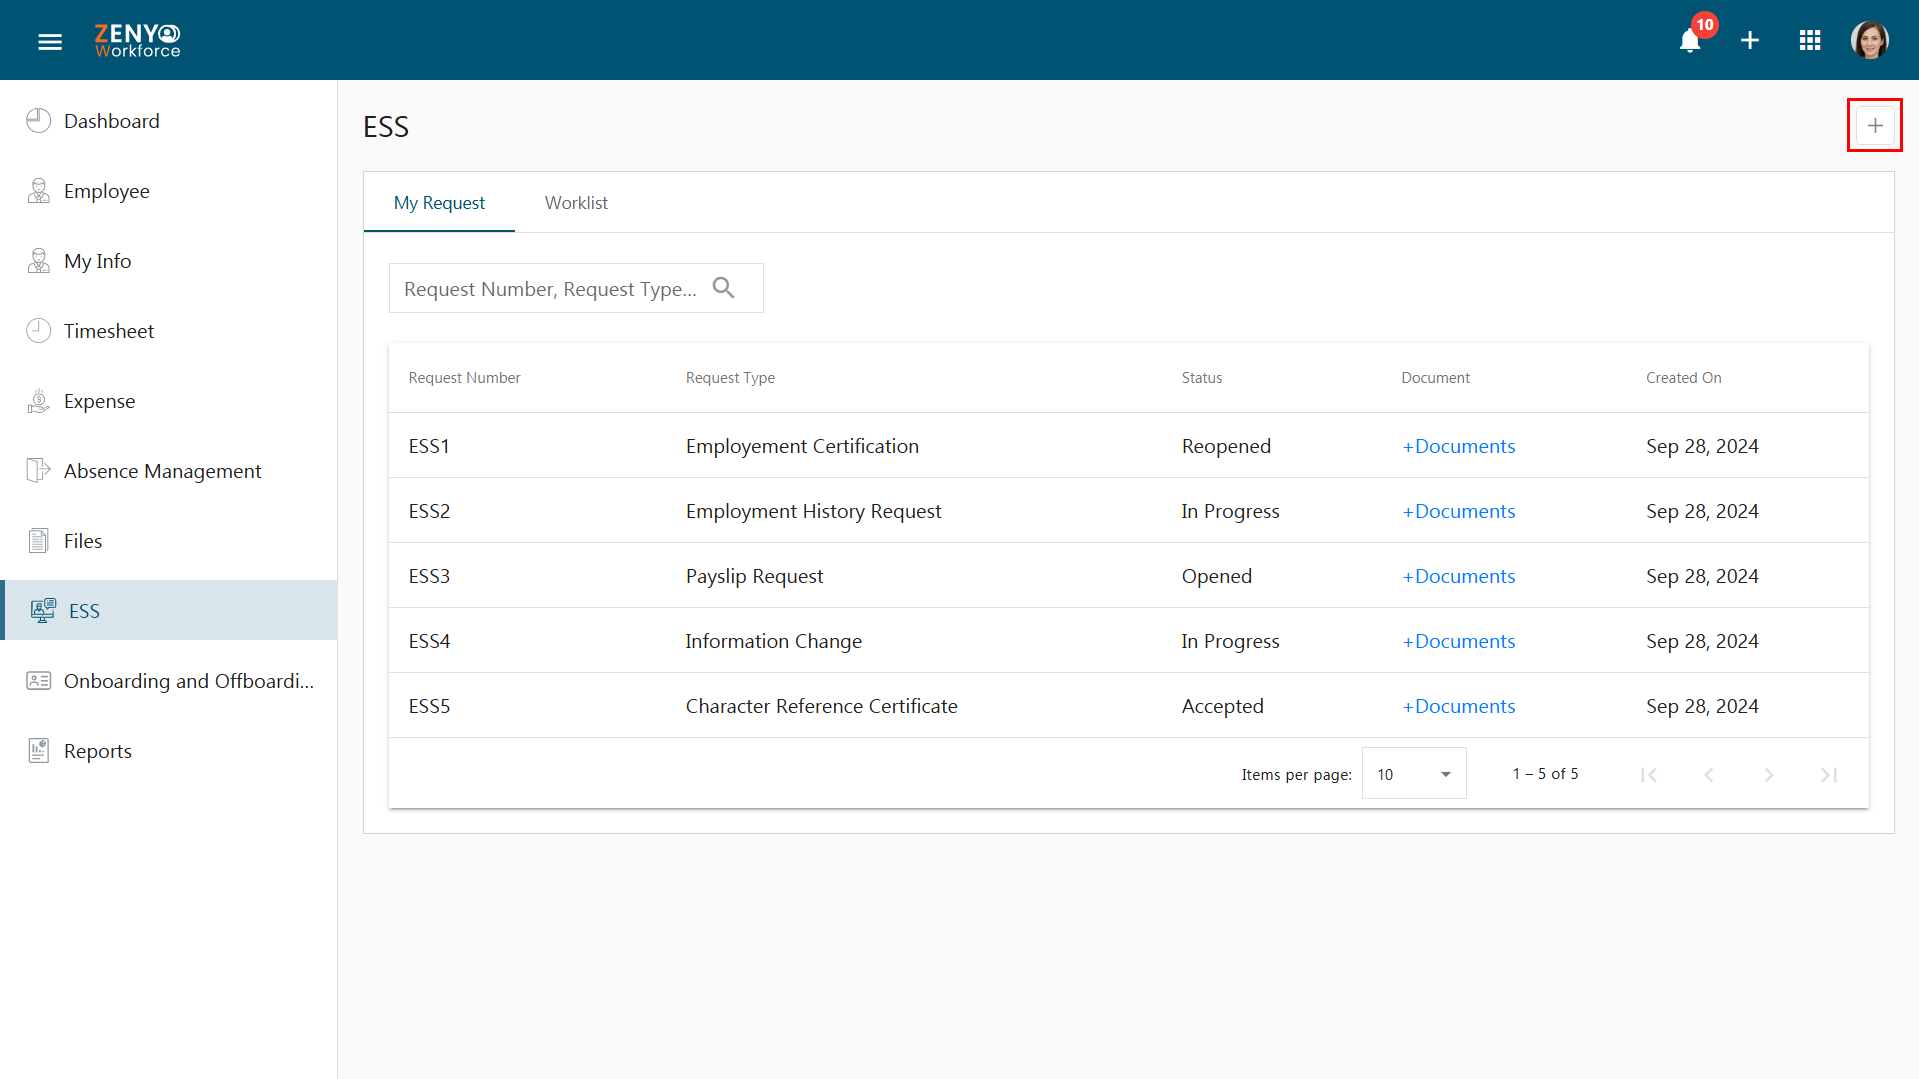
- On this page, select the relevant request type and provide a clear description outlining the reason or need for the request. If necessary, you may also upload an attachment directly from your device.
- Once all required fields are completed, click the Save button to finalize and submit the request. Once the request is submitted, the assigned employee will receive a notification via email.
To view the assignee’s request
- To access the requests, click on ESS in the main menu.
- On the ESS page, navigate to the Worklist tab. Here, the assignee can view assigned requests submitted by the employees.
- To find a specific request, the assignee can search by employee name. For more detailed filtering, use the advanced filters to specify the Request Type, Status, and Priority, then click the Apply button. If necessary, the assignee can reset the filter settings by clicking the Reset button.
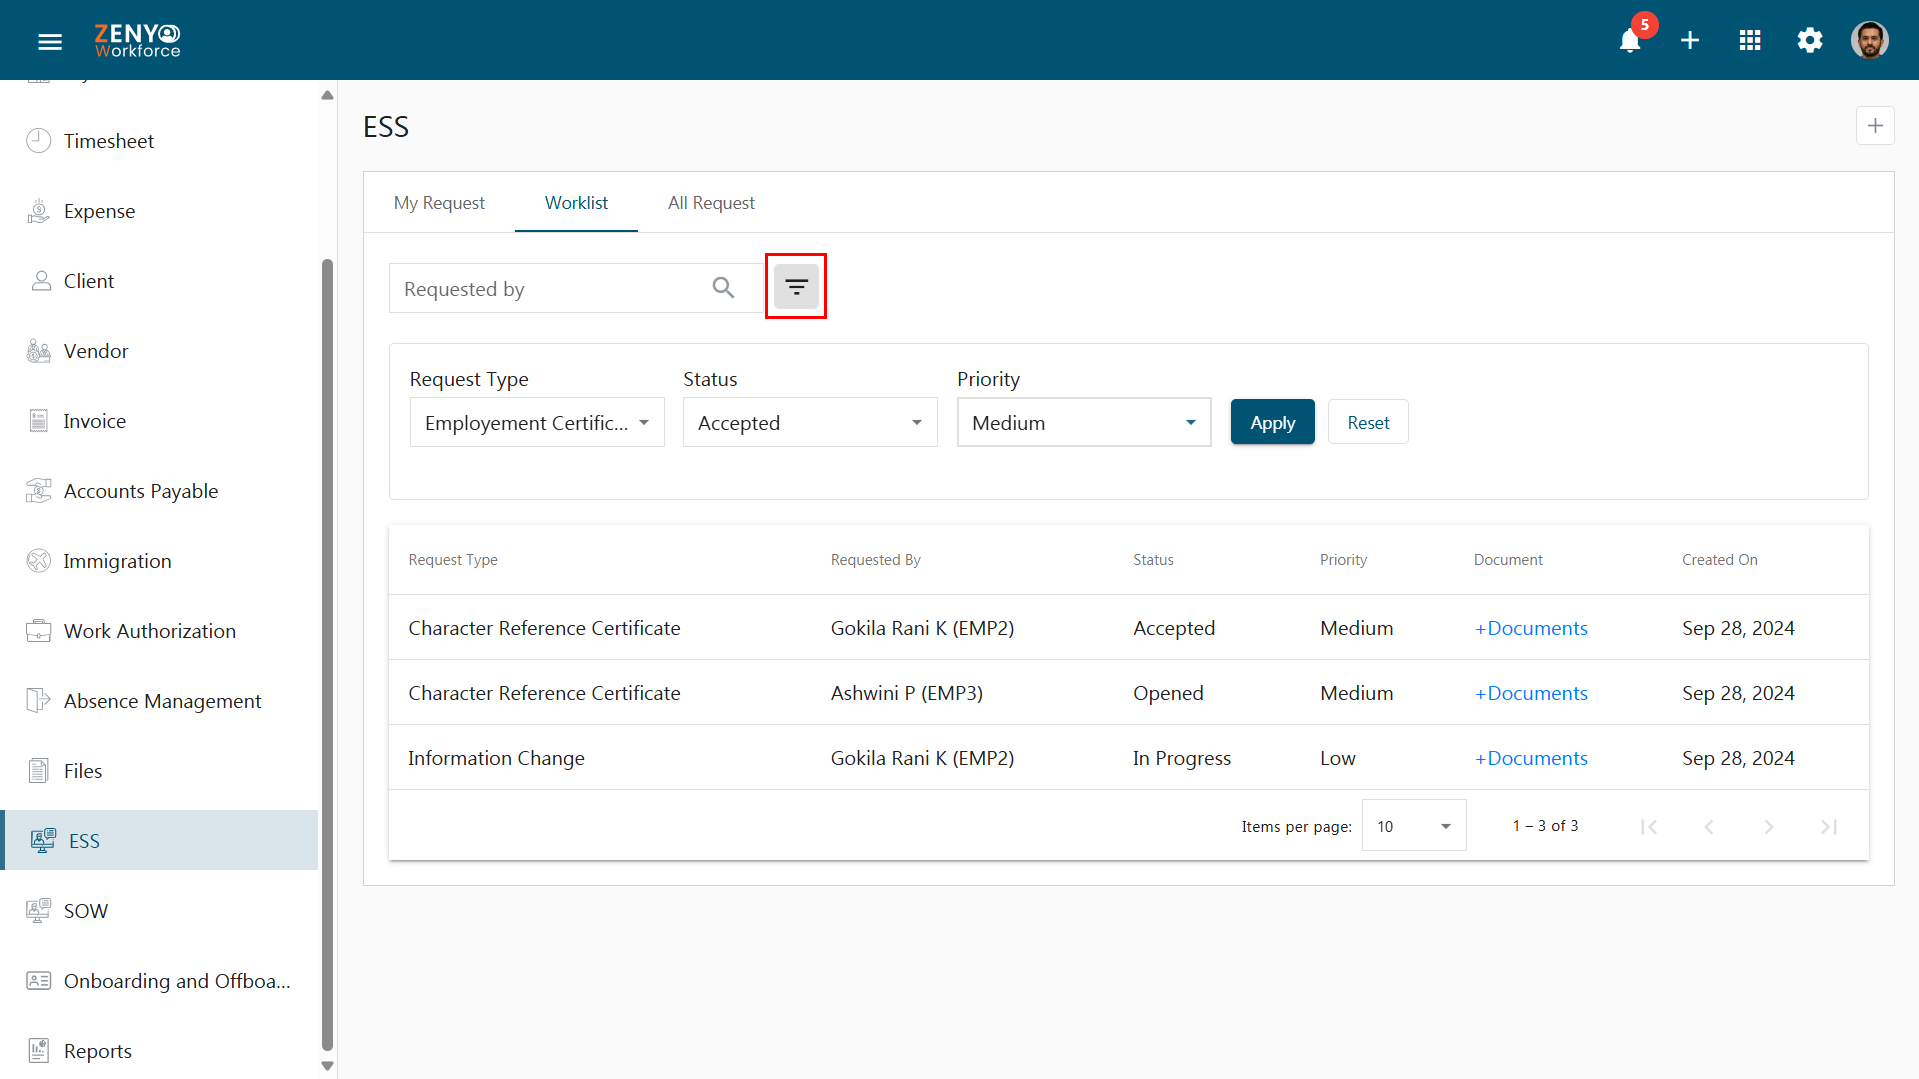
- In the Worklist tab, you can view employee requests that require a response. Click on a request to be directed to the request details page, where you will see information such as Assigned To, Request Number, Requested Date, Priority, and Description.
- On this page, you can add comments or respond to comments from the employee. You may also attach files if necessary.
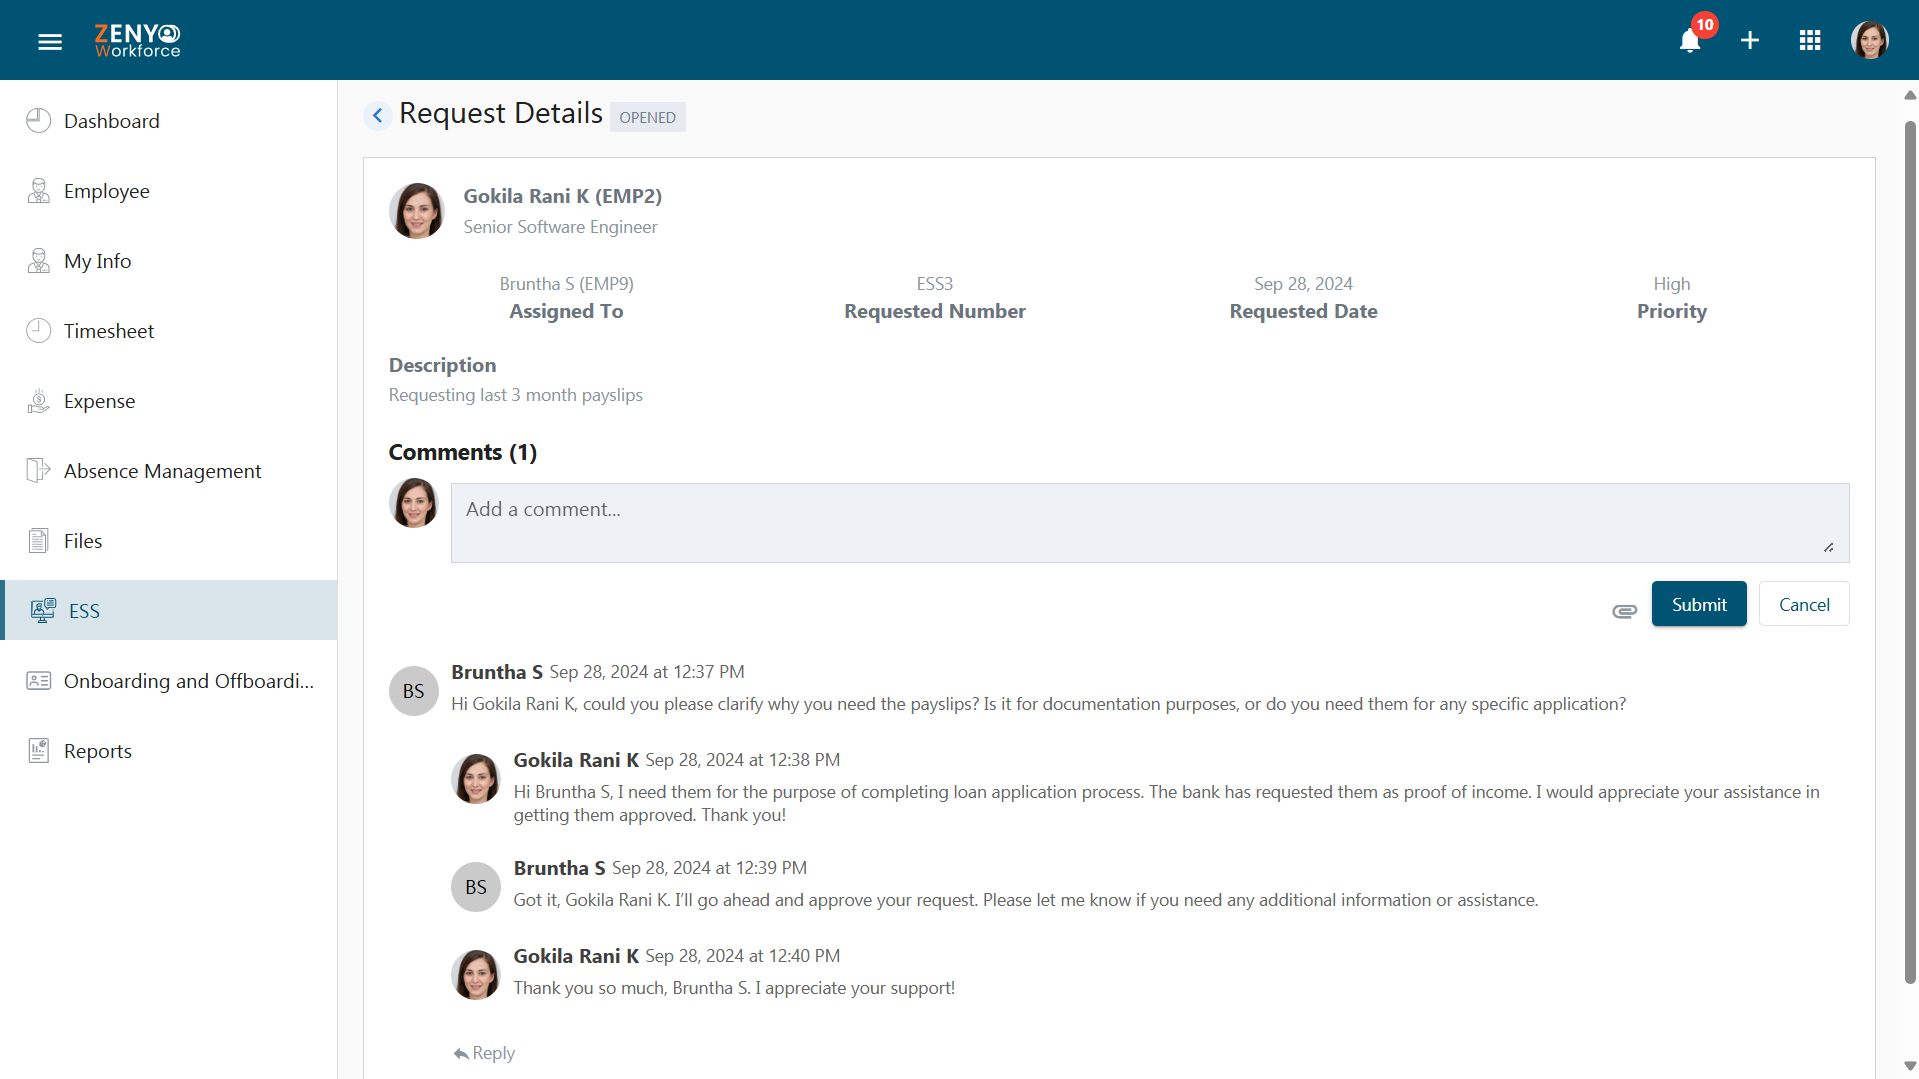
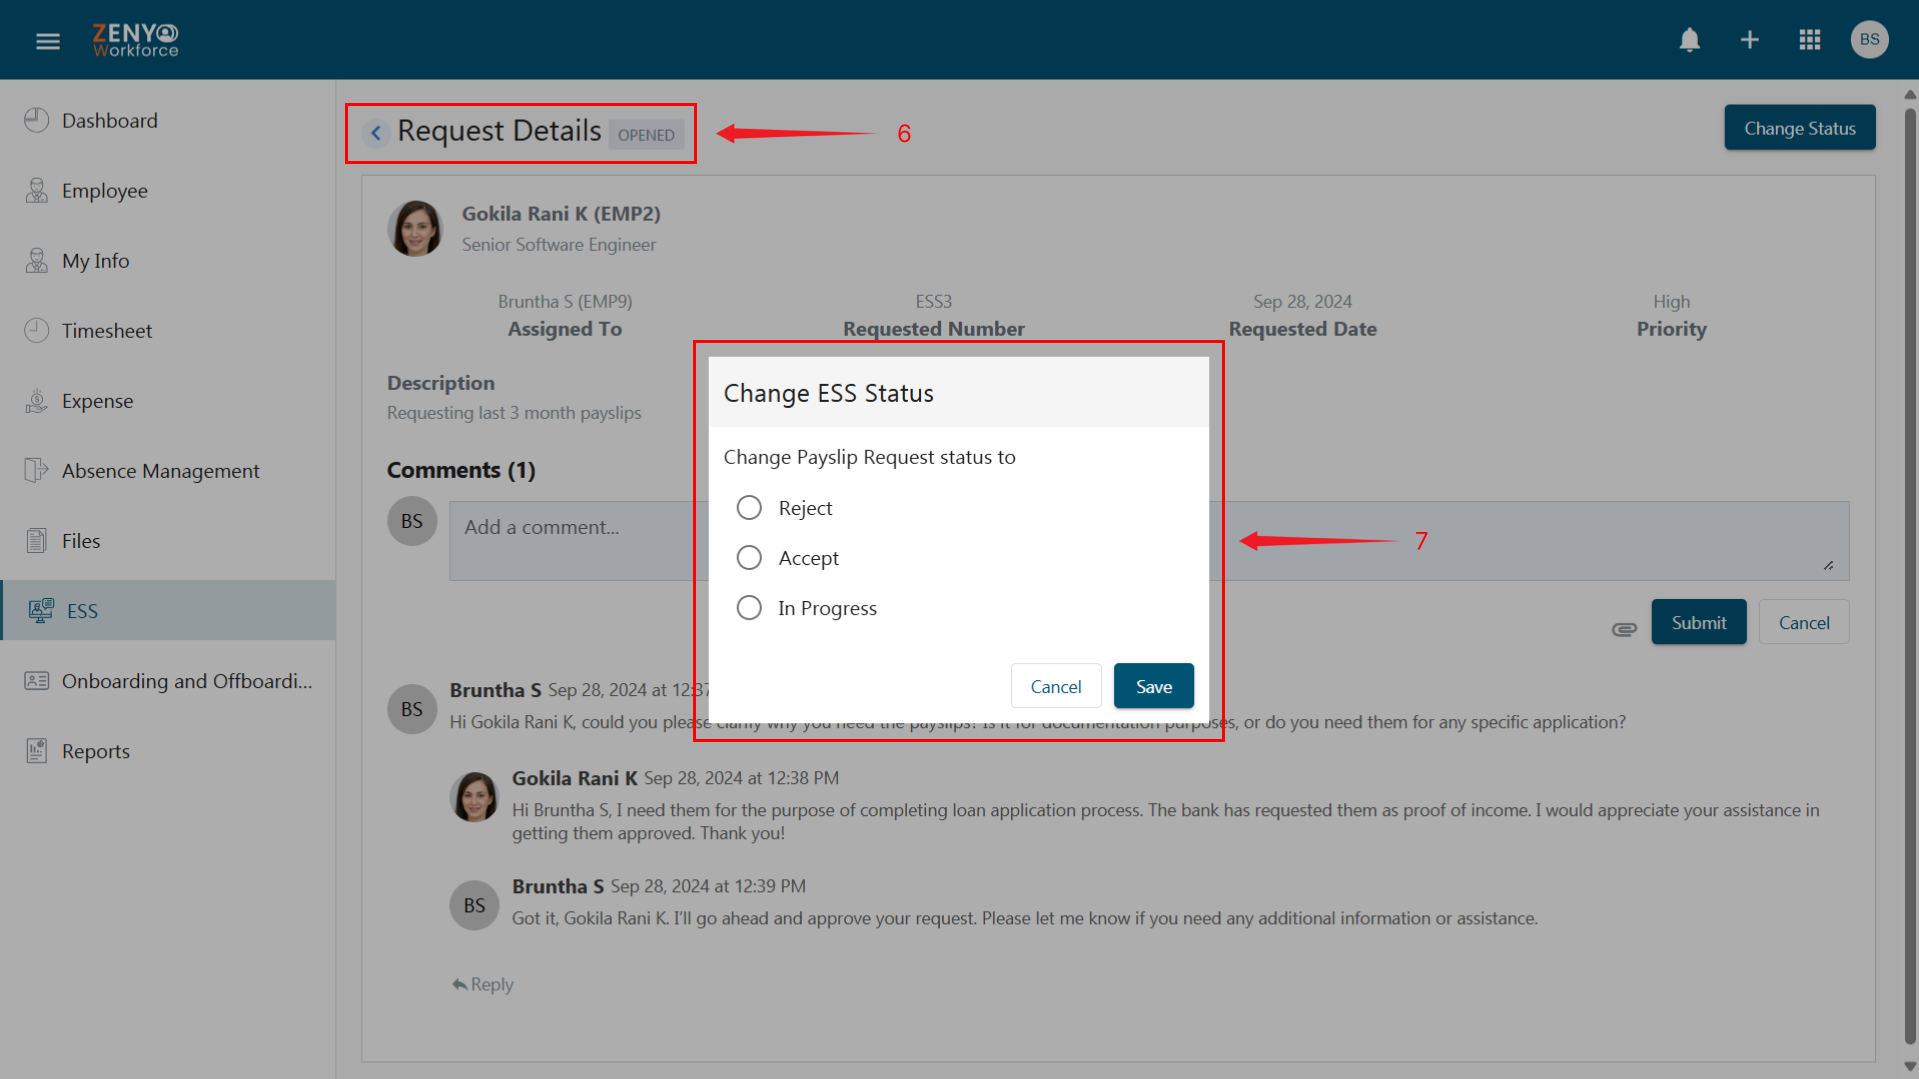
- The request status is initially marked as Opened, signifying that it is a new request awaiting action. To update the status of the request, click the Change Status button.
- A pop-up window will appear, presenting options to set the status as Reject, Accept, or In Progress. Select the appropriate option to proceed.
- If the assignee selects the Reject option, the request status will change to Rejected, and no further status changes can be made.
- Choosing the Accept option from the pop-up box will update the status to Accepted. Once accepted, the assignee can choose to change the status to Reject, Close, or In Progress.
- If In Progress is selected and the Save button is clicked, the status will update from Opened to In Progress.
- While the request is In Progress, the assignee can either Reject or Close the request. If the request is moved to Closed, the status can be changed back to Reopen by the requested employee if necessary.
- Users with access to the All Requests tab can view and review all requests submitted by employees. To view the details of a specific request, click on it. You can then add comments and attach files as needed.
