Global settings in Zenyo Workforce offer a centralized platform to configure various aspects of your company’s operations, including company details, office locations, email settings, payment options, and subscription preferences. By customizing these settings, you can tailor Zenyo Workforce to meet your organization’s specific needs and ensure efficient communication and smooth workflows.
How to manage global Settings?
- Click the Settings icon in the top right corner of the navigation bar.
- Select the Global menu. The Global Settings section contains five sub-menus:
- Company Settings
- Office Location
- Payment Method
- Subscription
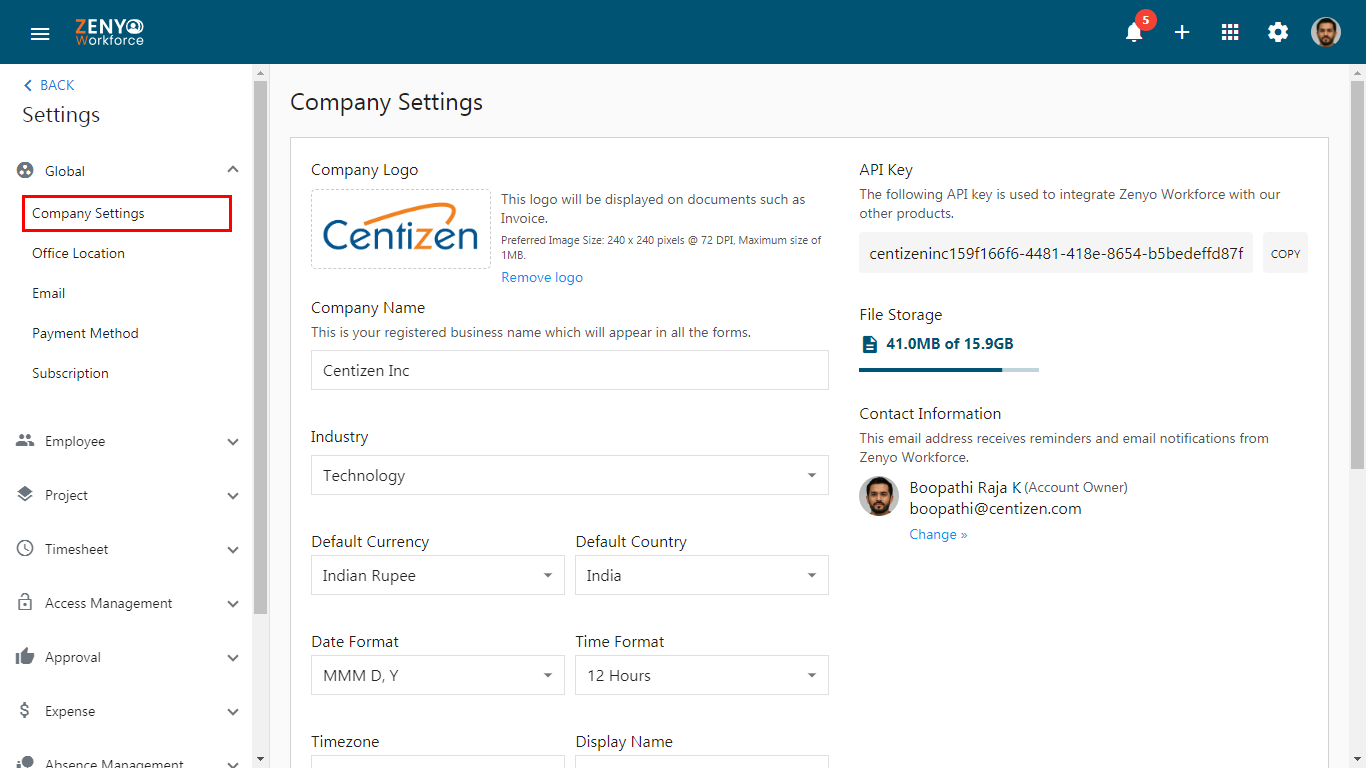
Company Settings
- Upload your company logo in the Company Settings, which will appear on all documents like invoices (file size must be under 1MB).
- You can update the already configured setup details and can find the API key necessary for integrating Zenyo Workforce with other products to enable seamless data exchange.
- Review file storage information and contact details below the API key.
- Contact information will be used to send notifications about payment invoices and software updates to the designated person or entity. To change the account owner, click on the Change link.
Note: Only users with an admin role can be assigned as the main contact.
- Click Save to successfully configure your company’s settings.
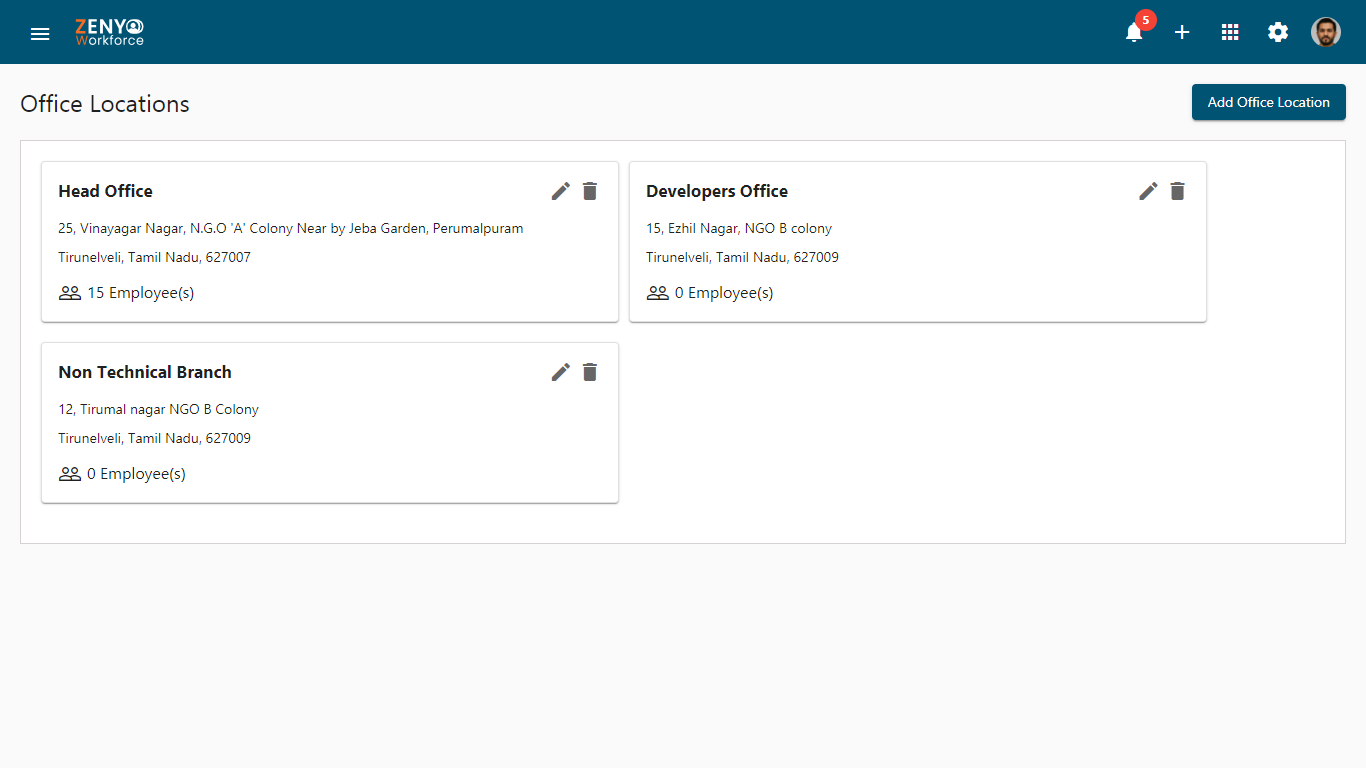
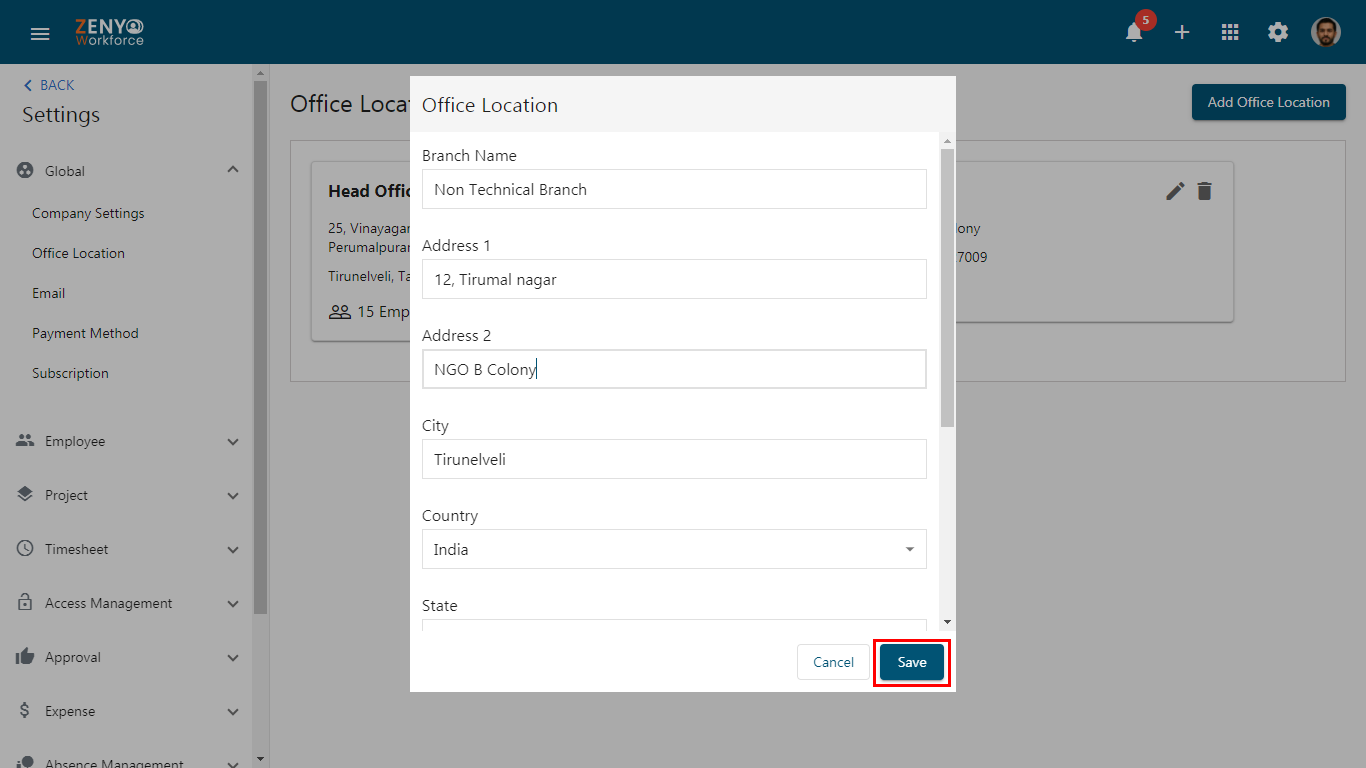
Office Location
- In the Office Location settings, the primary work location is set by default.
- To add more locations, click on Add Office Location and enter the branch name, address, contact number, and total working hours per day.
- Click Save after entering the details of the office location.
- Click on the Edit icon to update the office location information.
- Click on the Delete icon to remove the office location. Ensure that no employees are assigned to the location before deleting it. If employees are assigned to the location, it cannot be deleted.
Note: You may add multiple work locations similarly.
Configure email settings and manage predefined email templates. This feature streamlines communication by ensuring that email settings are correctly configured and that automated notifications are sent for specific actions. Under the email, there are two tabs:
- General
- Templates
General
In the General tab of Email Settings, you enter the email provider, address, profile name, password, and outgoing SMTP server details to set up your email. You can also select the Require SSL box for secure connections and click Save.
Note
- Service Provider denotes the name of the email service provider. Examples: Gmail, Outlook, and Yahoo.
- Email Profile Name could be a label or identifier for the specific email account/profile.
- Email Address is the email address associated with the account.
- Password represents the password used to access the email account (masked for security).
- The outgoing SMTP Server is the server address used for sending emails.Examples: Gmail.com, office 365.com, Yahoo.com.
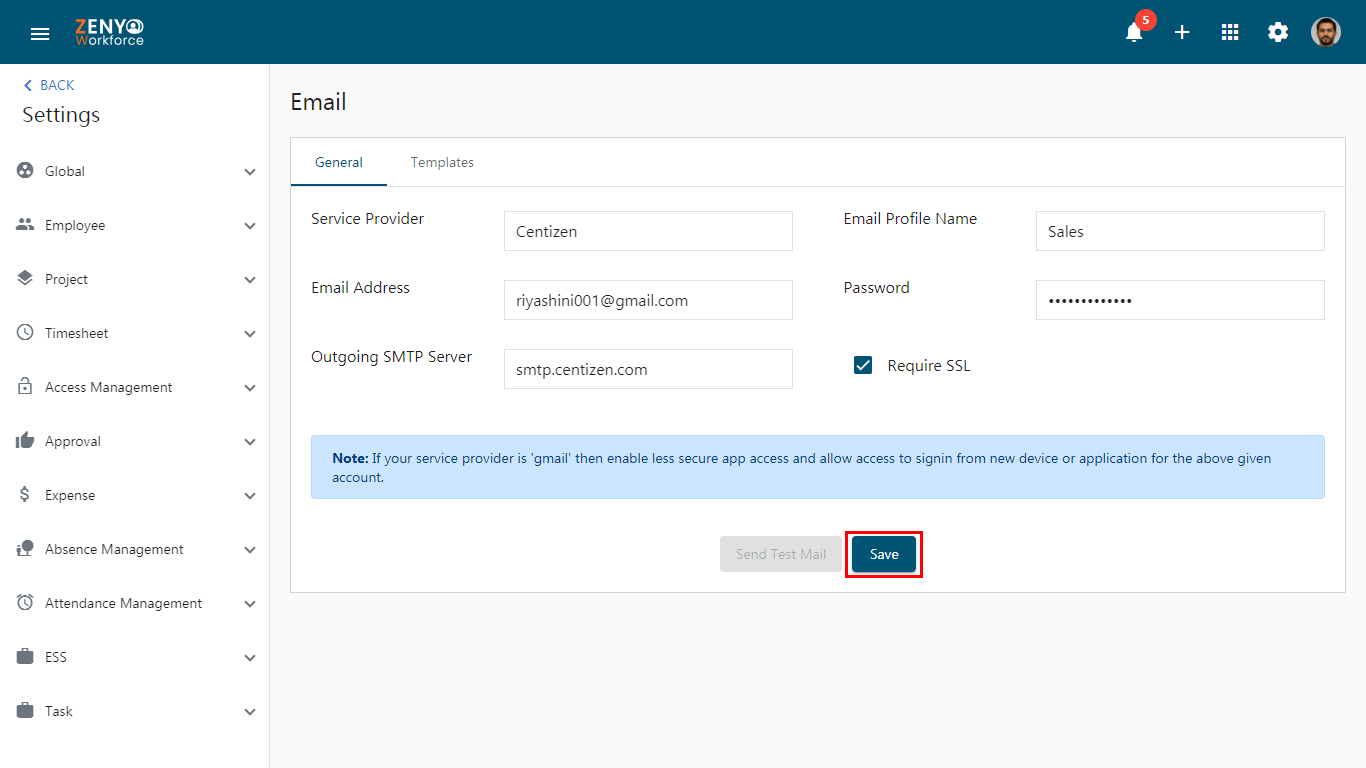
- After clicking Save, you’ll see the Send Test Mail option. Click the Send Test Mail button to send a test email and make sure your email settings are working correctly.
- If you want to edit the information in the general tab, make your edits and click on Update.
Templates
Predefined email templates are automatically sent when a specific action occurs. For example, if an employee’s leave is approved, an approval email is automatically sent to the employee who submitted the request.
- In the Email Templates tab, 23 email templates are displayed, such as Employee Invitation, Leave Requested, etc.
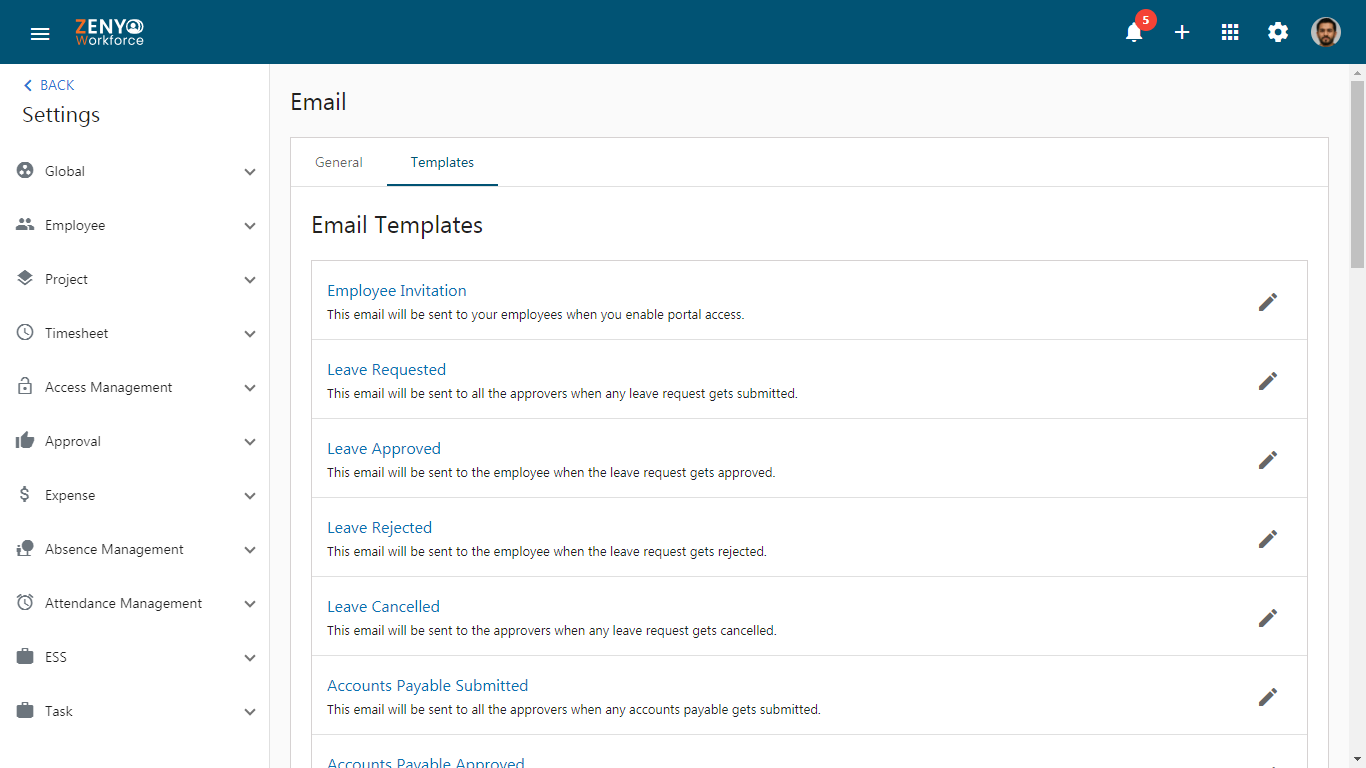
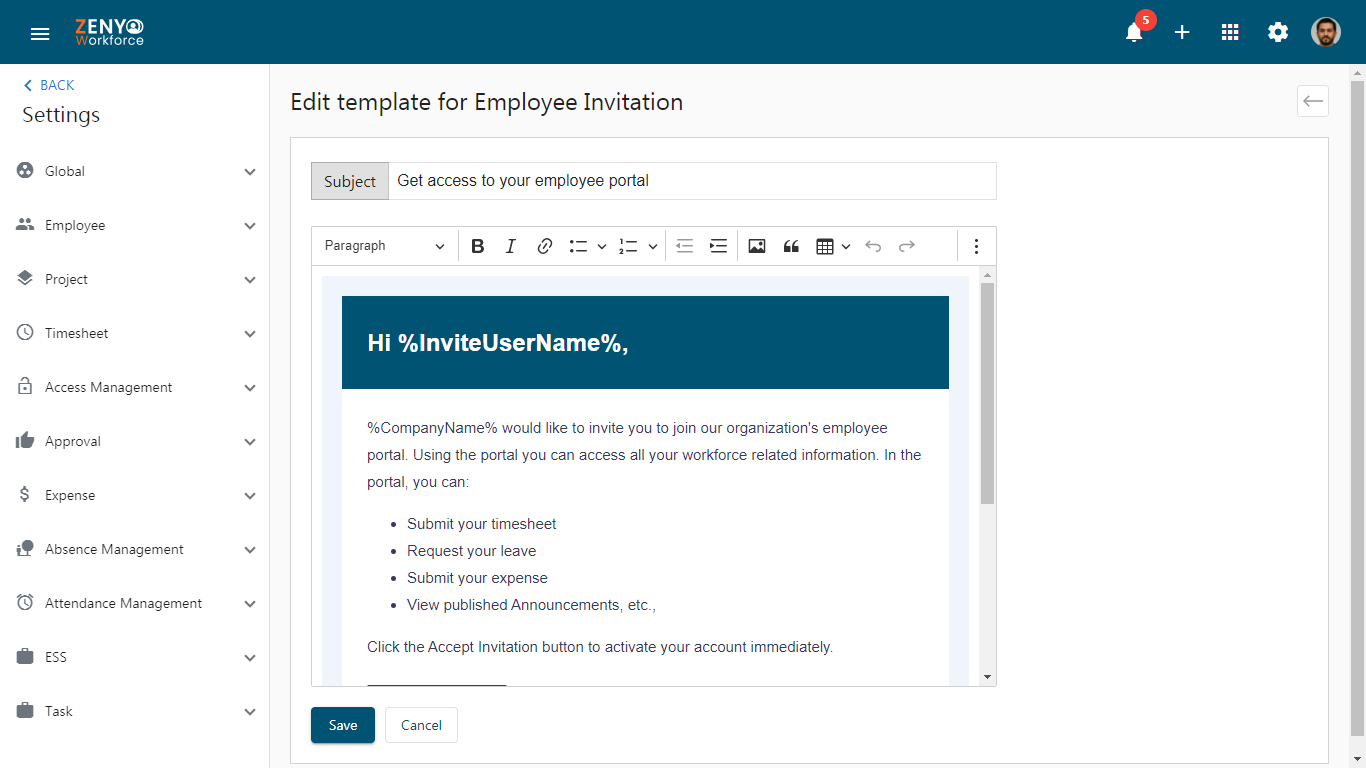
- Click the Edit icon to modify the content of the email.
- In the Edit Template for employee invitations, you can edit the email information and click on Save.
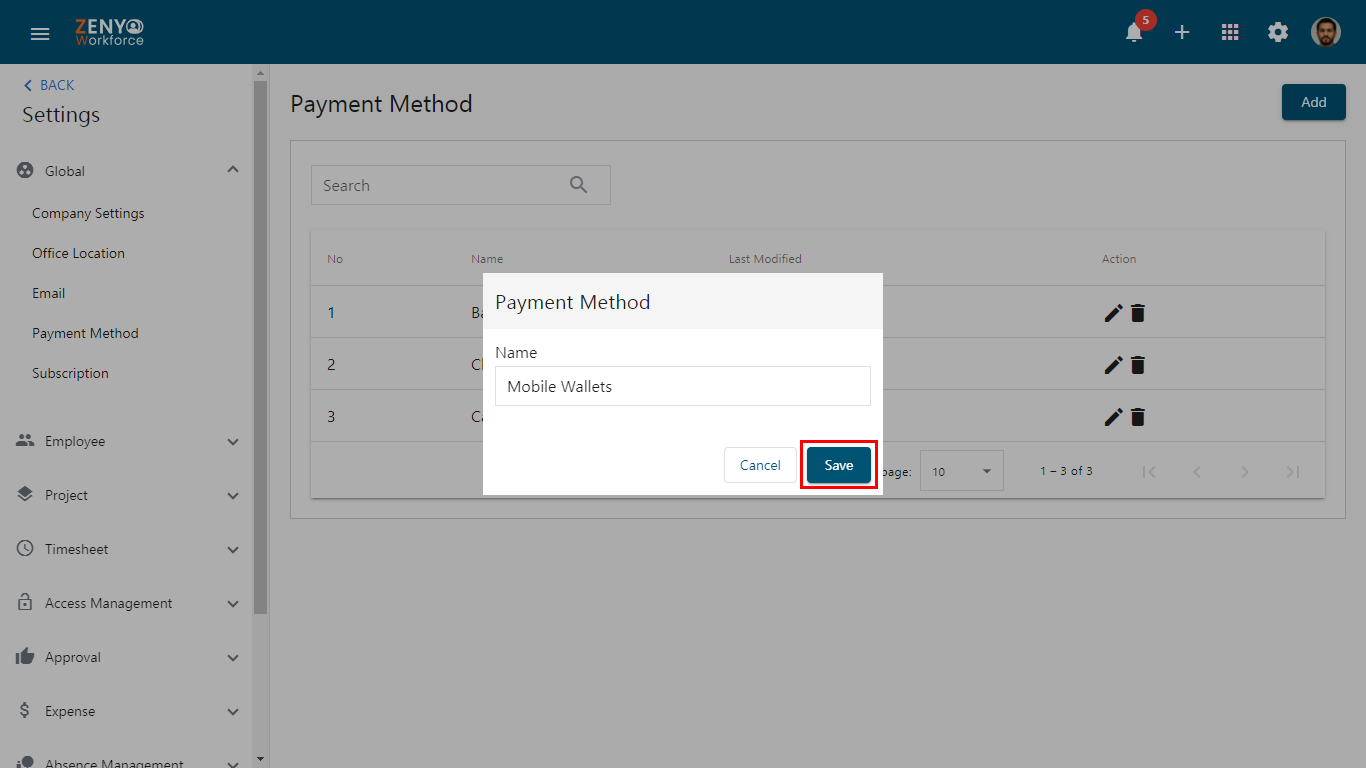
Payment Method
- In the Payment Method settings, a list of payment methods will be displayed, showing their name, last modified date, and available actions.
- To edit a payment method name, click the Edit icon; to delete a payment method, click the Delete icon.
- To add more payment methods, click Add, enter the payment method name, and then click Save.
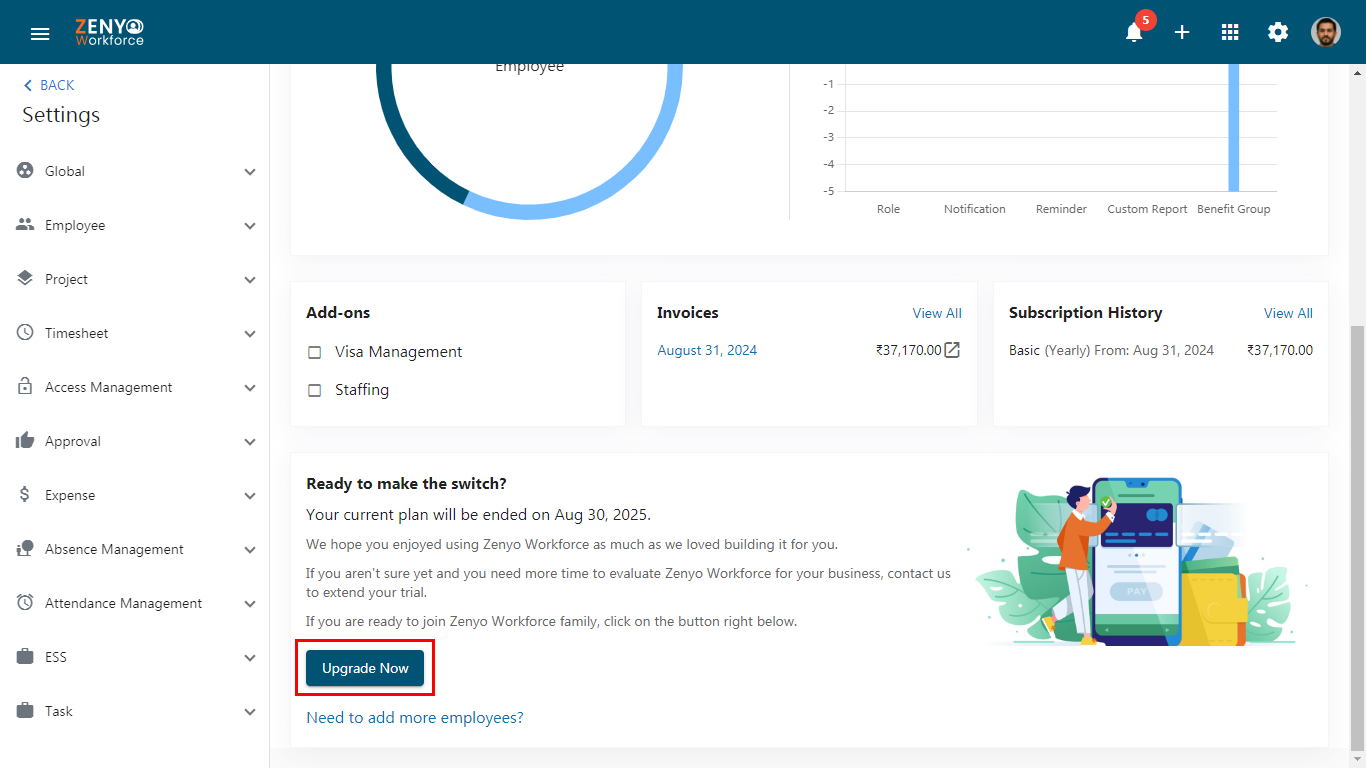
Subscription
When you create an account with Zenyo Workforce, you start on the free plan. Upgrade anytime to the Standard, or Enterprise plans, available monthly or yearly. Visit the Zenyo Workforce website for pricing and feature details.
To change your subscription plans
- The Subscription page, shows current subscription details, including add-ons, billing, and subscription history.
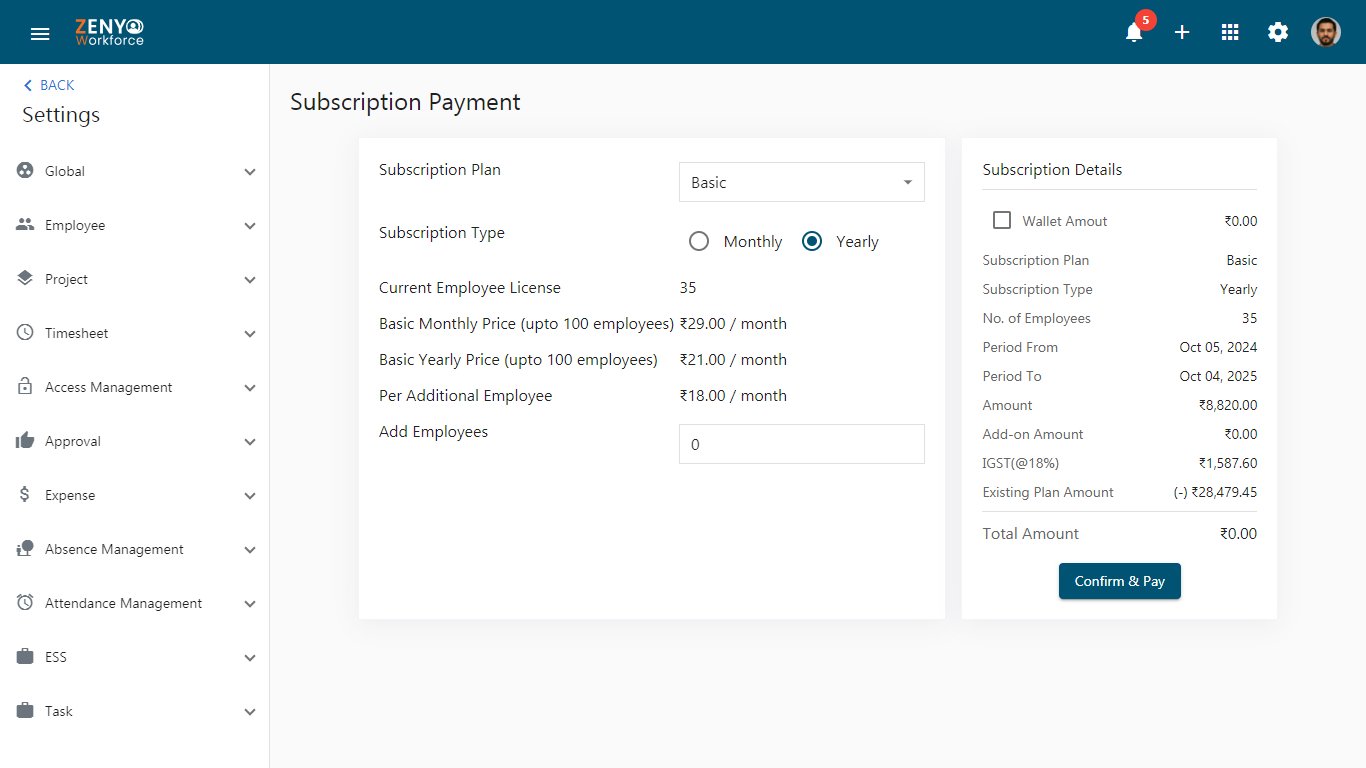
- To upgrade plans, click on Upgrade Now, choose the subscription plan (Standard or Enterprise), and add employees if needed. If necessary, check the boxes for staffing or visa management add-ons:
- Staffing Add-On includes Client, Vendor, Accounts Payable, Invoice, and Placement features.
- Visa Management Add-On is designed for US customers and includes LCA, H1B, Greencard, I94, and E-Verify features.
- Check the wallet amount if using it for payment.
- Review the invoice details and proceed with the payment to finalize the subscription plan switch and any selected add-ons.
- To add more employees to the existing plan, click the Need to add more employees? link, Enter the number of employees, and proceed with payment.