How to Generate Invoice?
Zenyo Workforce Management streamlines invoice generation with easy steps. Generate accurate invoices effortlessly through this step-by-step process.
- Navigate to the Invoice menu and click on the Add icon. Four main sections will be displayed on the screen:
- Billing Information
- Timesheet Details
- Expenses Details
- Service Summary
- In the Billing Information section, enter details for whom the invoice is created (client or vendor), choose their name, and select the project assigned to them.
- The Invoice Number, Invoice Date, Due Date (based on Net terms), Billing Address, From Address, and Shipped Date are automatically generated after selecting the client/vendor name.
Note: The Billing and From Address can be set up during the initial setup process or entered while generating the invoice.
- In the Timesheet Details section, employees listed under the Statement of Work (SOW) or placements associated with the project will be displayed. Choose the employee assigned to the client for the specific project. The employee’s name, employee code, job code, and regular pay rate will be displayed.
- In the Expenses Details section, any expenses incurred by an employee while working for a client, and subsequently claimed, will be listed. This allows for easy tracking and addition of these expenses to the client’s invoice. The employee’s name, employee code, expense name, and expense amount will be displayed.
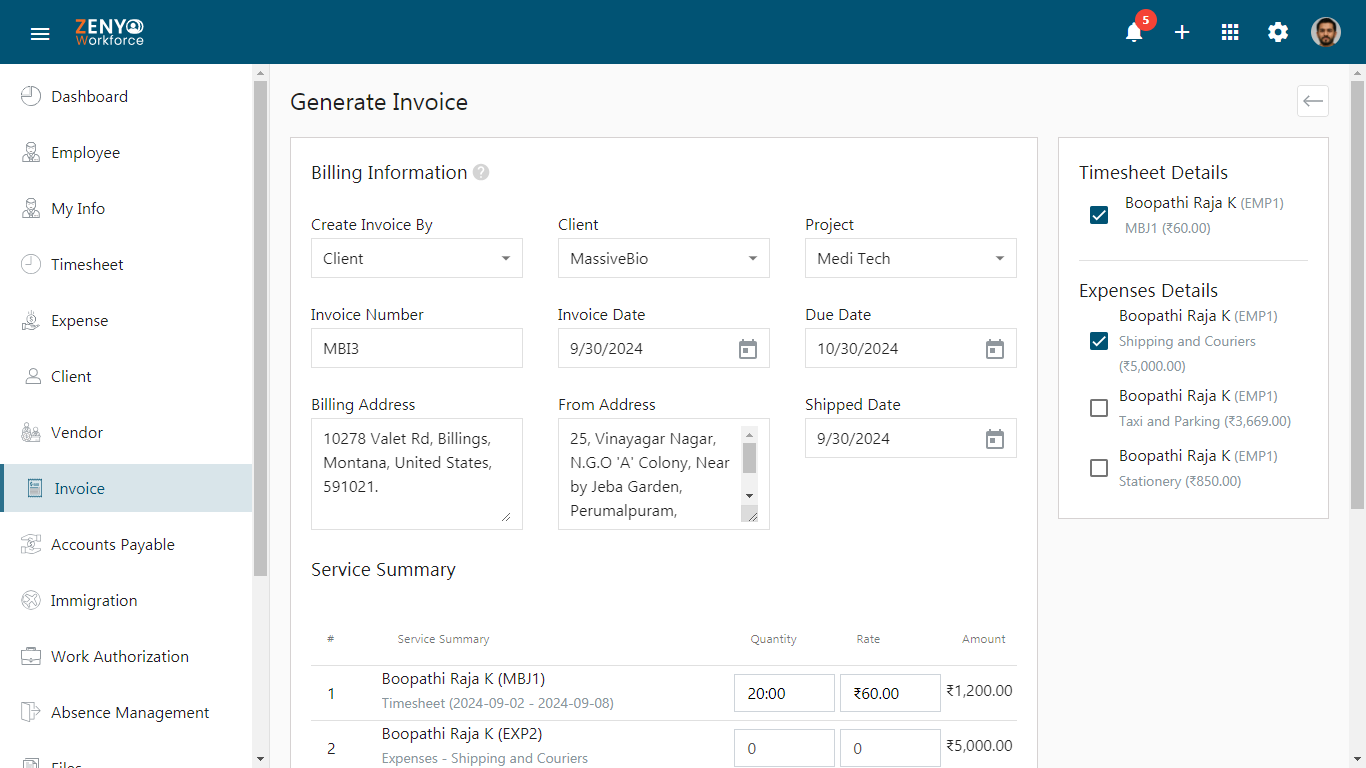
- In the Service Summary section, a comprehensive overview of the total hours worked, overtime hours, total pay, and expenses incurred will be listed.
It consists of four main fields:
a. Service Summary
b. Quantity
c. Rate
d. Amounta. Service Summary
In the Service Summary field, the employee name, job code, timesheet from & to date, and overtime pay details will be displayed if the timesheet checkbox is checked in the timesheet details section. The expense name, and expense code are displayed, if the expense checkbox is checked in the expense details section.
b. Quantity
The Quantity field displays the total hours worked, based on the regular timesheet and overtime timesheet. The quantity can be modified manually if needed.
c. Rate
The Rate field displays the payment amount for regular hours, as well as the additional pay for overtime or holiday hours, all on a per-hour basis. These rates can be modified manually if required.
d. Amount
The Amount field calculates the total pay based on regular hours worked, hours worked on holidays, and overtime. You can modify the amount manually by changing the quantity and rate values. The amount is calculated as:
Amount = Quantity x Rate
For example, if an employee worked 40 hours at a regular pay rate of Rs.1,500 per hour, then the amount would be:
Amount = 40 x 1500 = 60,000
Additionally, if an employee works 9 hours of overtime with a pay rate of 1.5 times the regular rate of Rs. 1,500 per hour, the calculation for the overtime pay amount would be as follows:
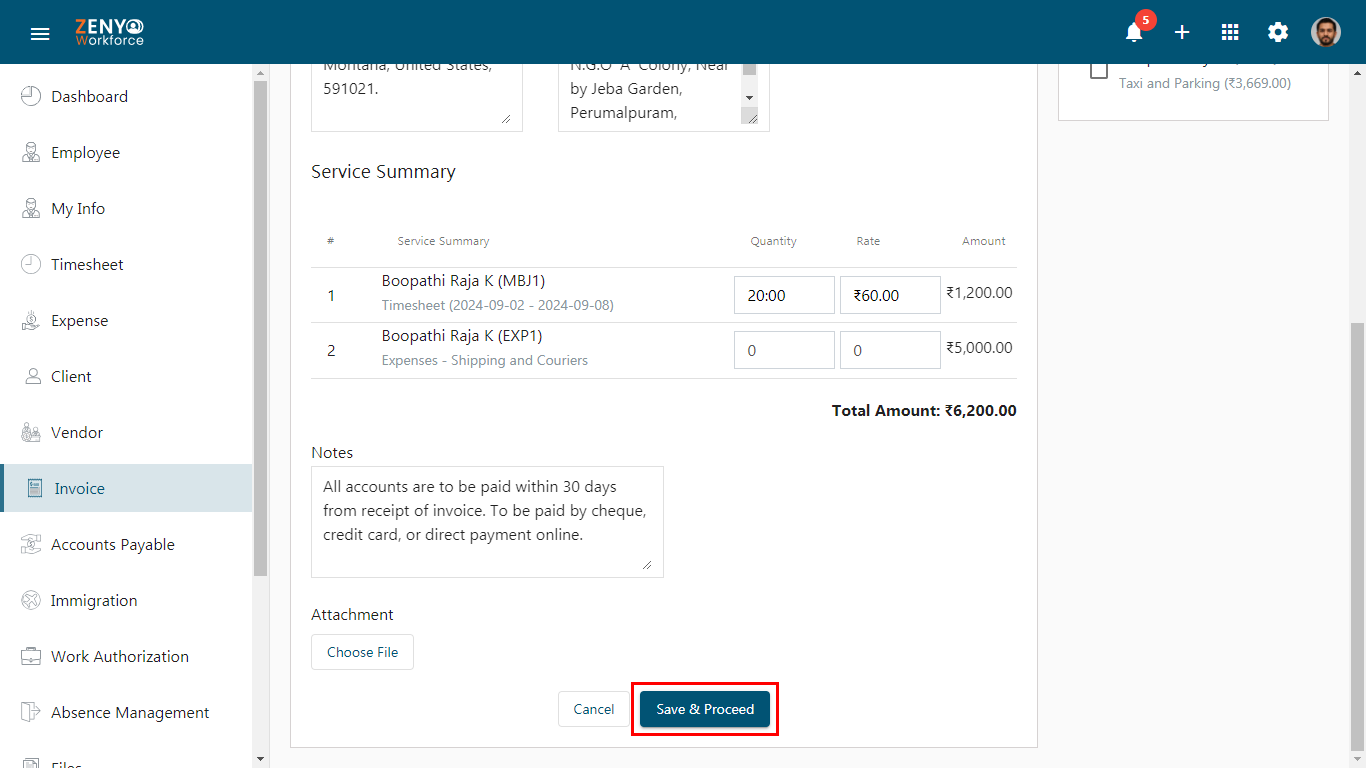
Overtime pay = 9 hours x Rs. 1,500 x 1.5 = Rs. 20,250. - The Total Invoice Amount is calculated by adding all individual amounts based on regular pay, overtime pay, holiday pay, and expenses.
- A note box is provided to write any additional notes for the client/vendor about the due date or payment methods. Choose the Attachment file if available and then click Save & Proceed.
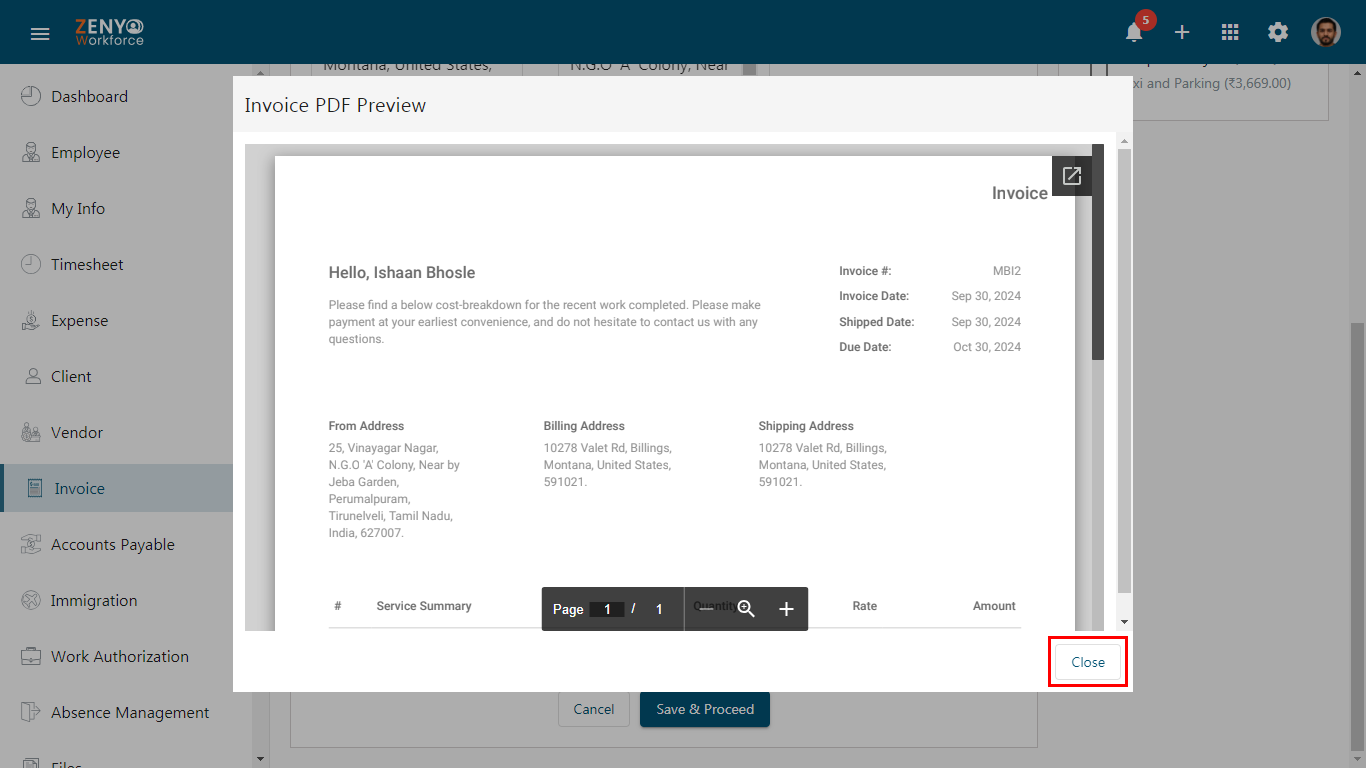
- A dialogue box will appear to confirm Invoice Details, including the invoice number, From address, Billing address, Invoice details, Service Summary, Total amount, and Notes.
Click the Preview button to view the invoice PDF preview, which will be generated based on the selected template.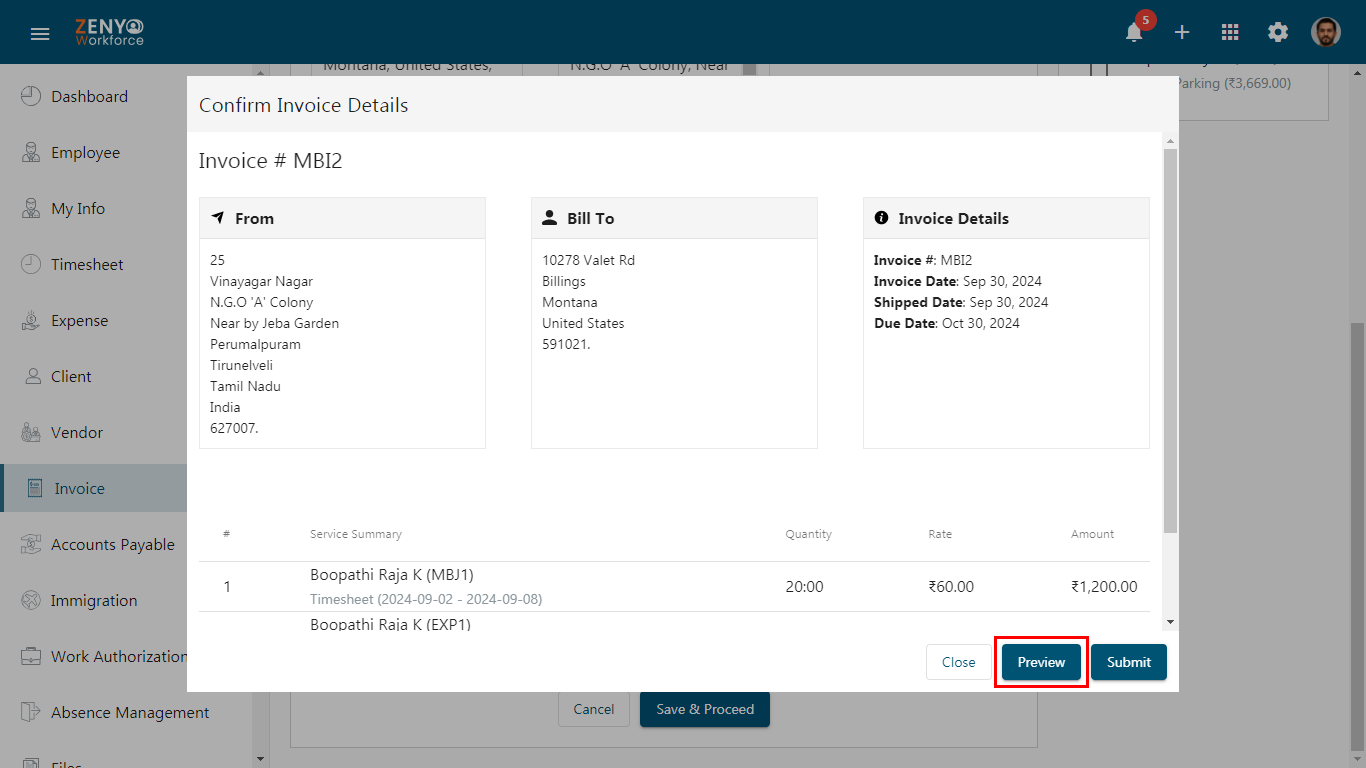
- Click the redirect icon to download the Invoice in PDF format or click the Close button to make any changes to the invoice.
- After making changes, click Save & Proceed again and then Click Submit.
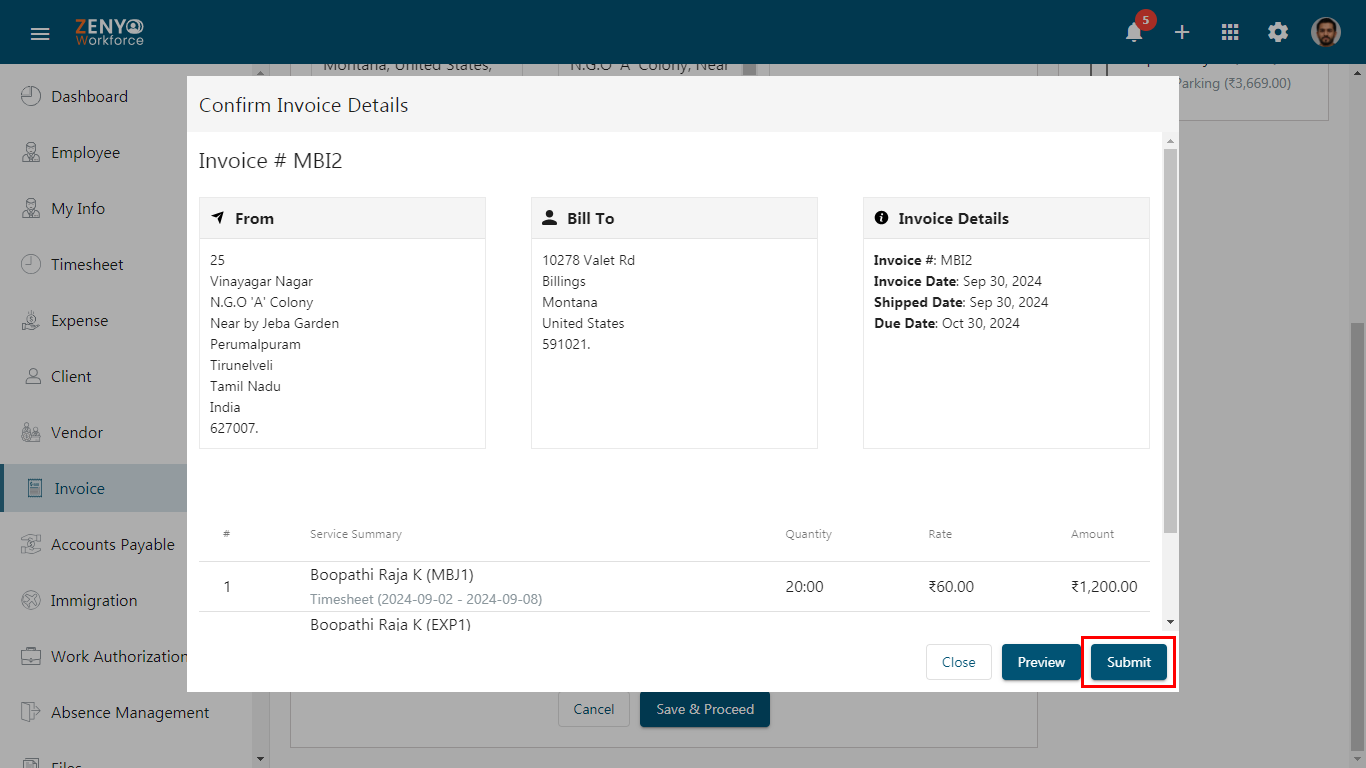
- A pop-up will appear stating “Invoice Submitted Successfully”.
Note: The invoice approval process follows the predefined approval flow set in the settings. An invoice will be fully approved only after the final approver in the sequence has granted their approval.
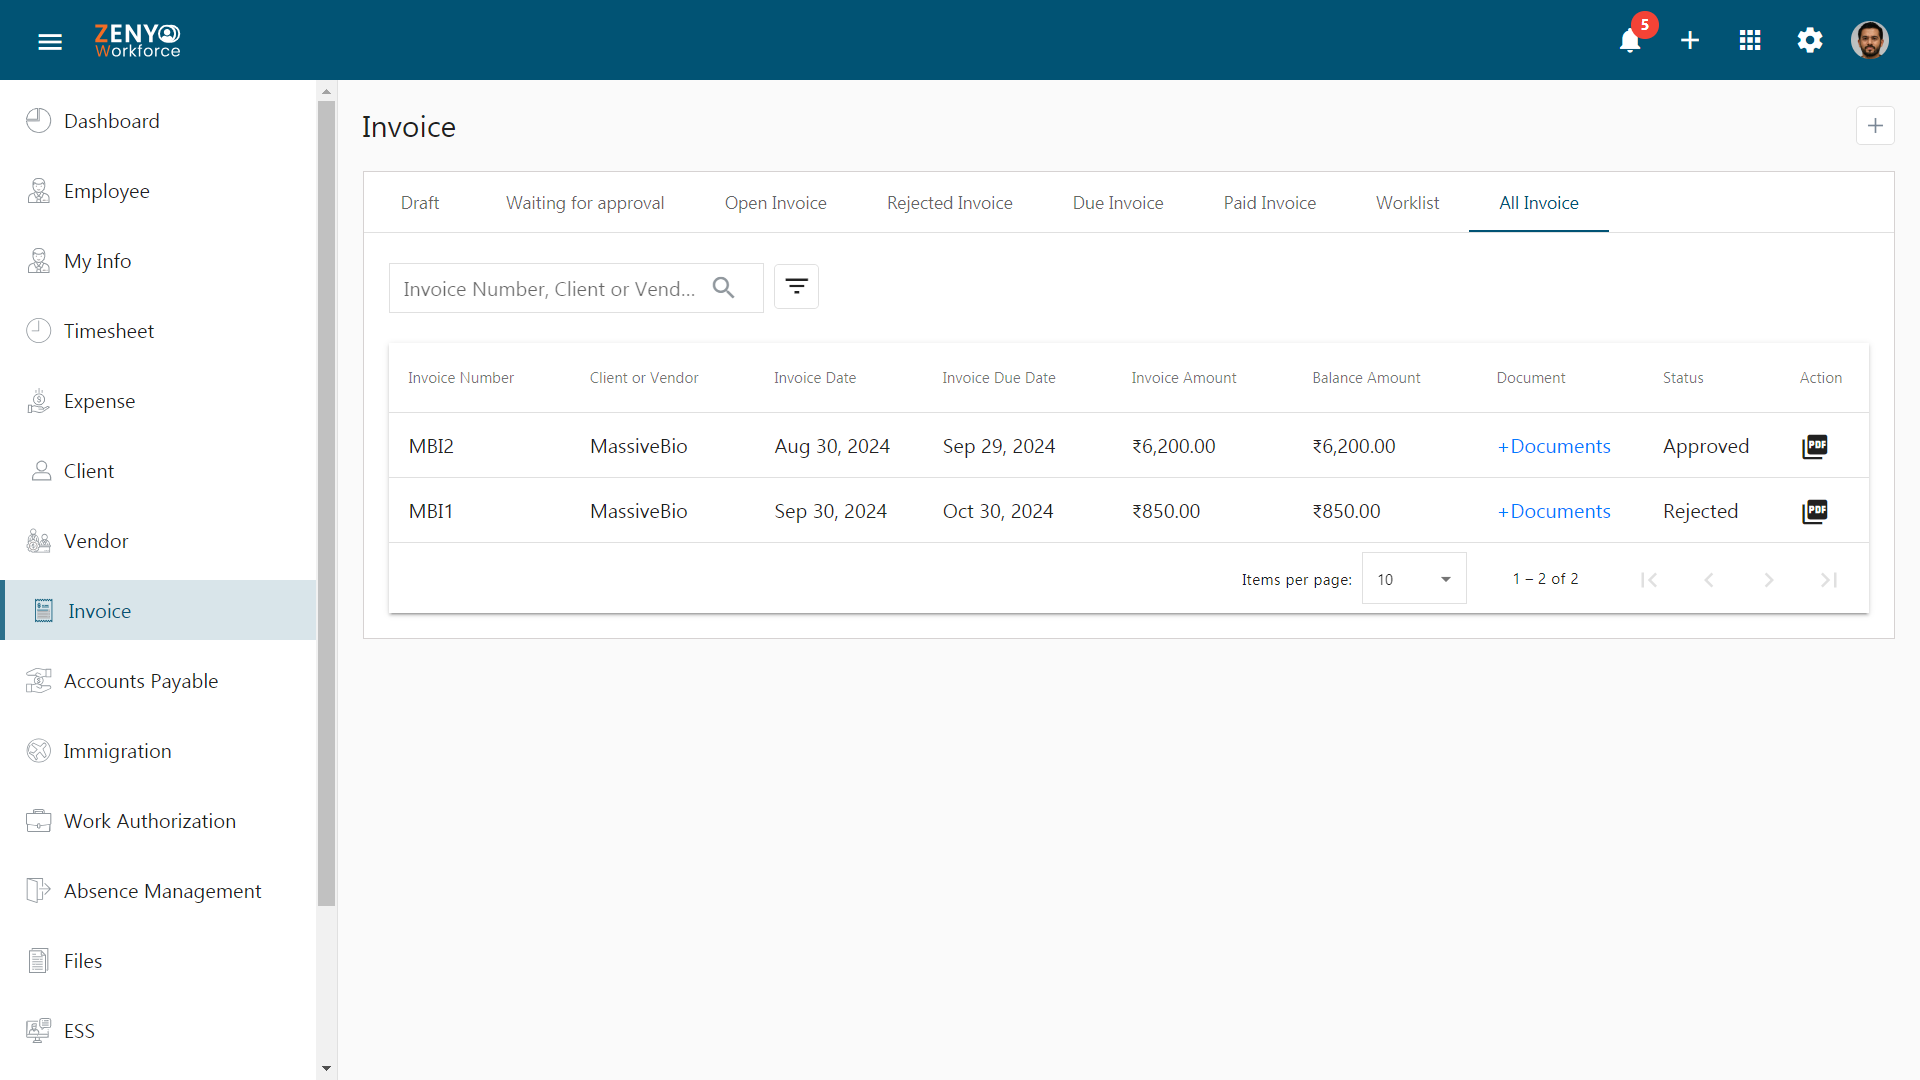
Steps for navigating the eight tabs under the Invoice menu
The Invoice module features eight tabs that help you manage and track invoices at different stages of the process.
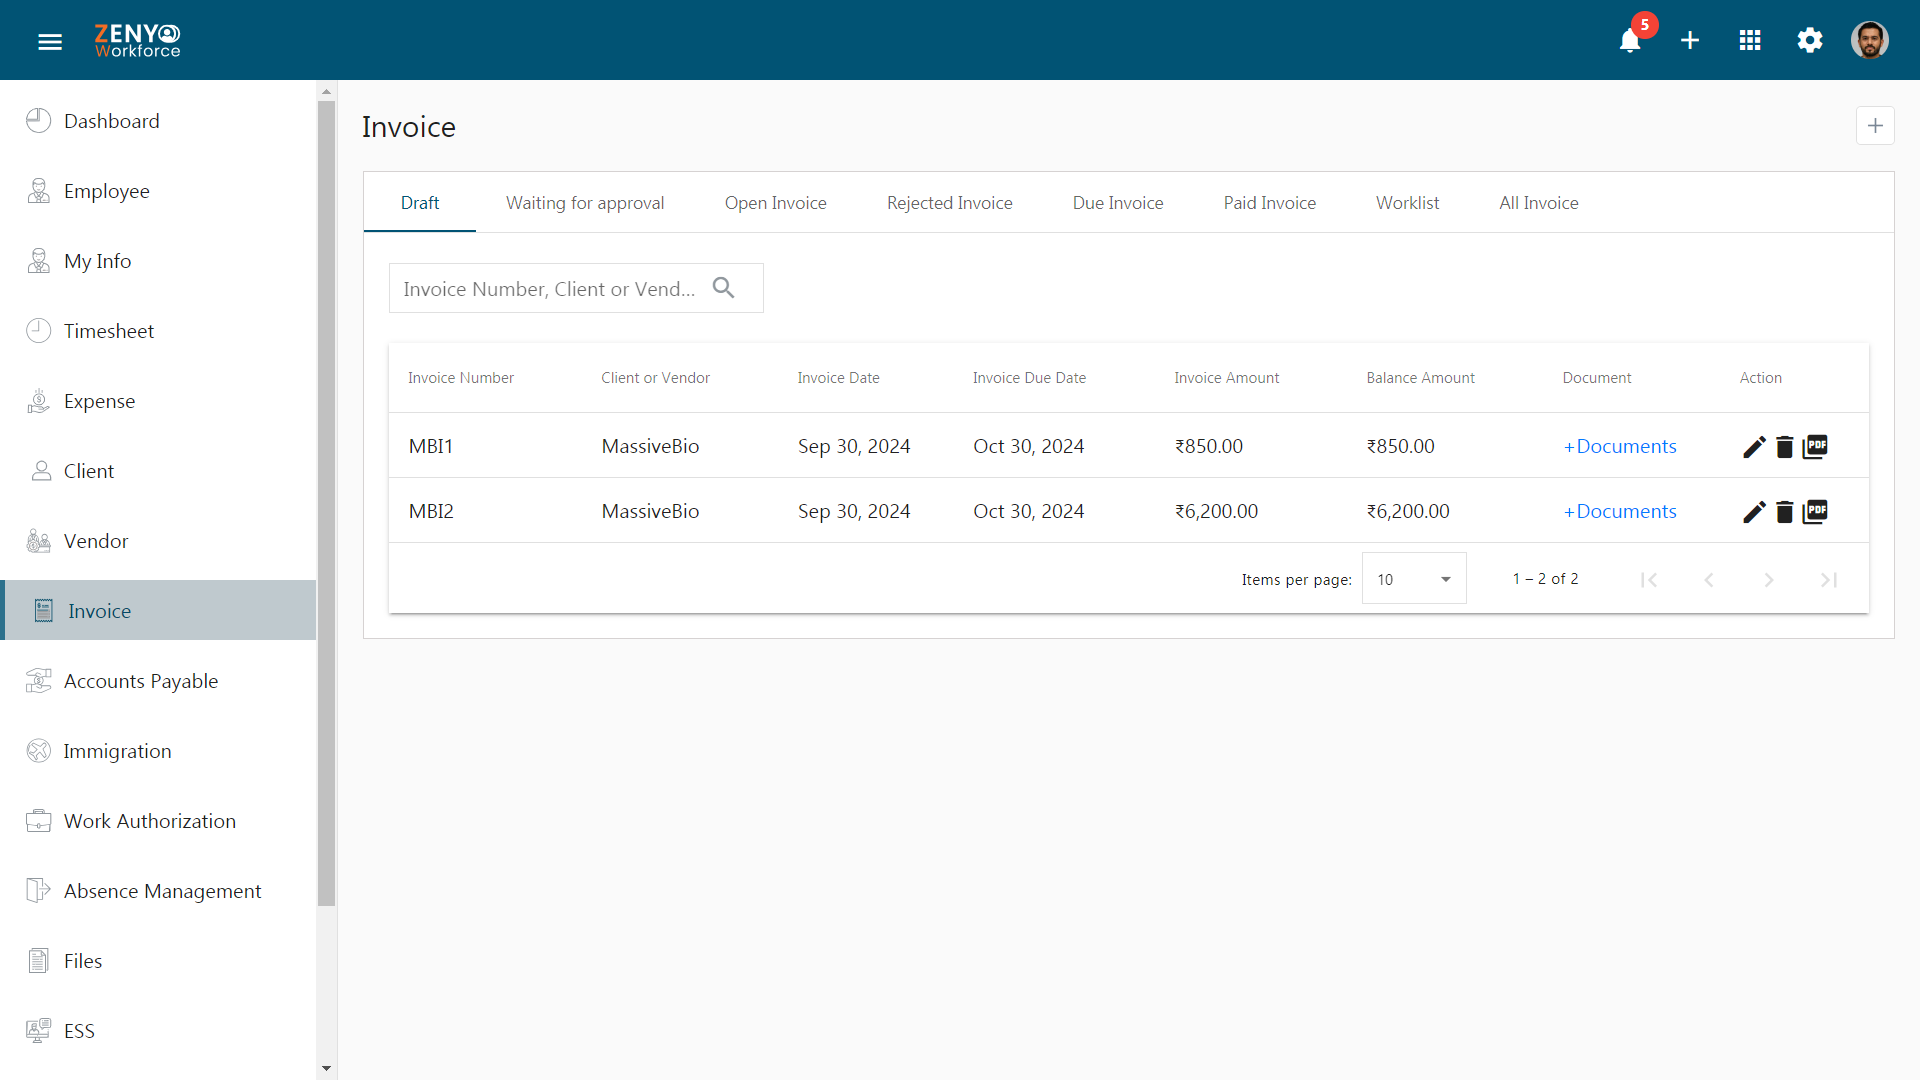
- The Invoice table includes the Invoice Number, Client or Vendor name, Invoice Date, Invoice Due Date, Invoice Amount, Balance Amount, Document, and Action fields.
- Utilize the search box to find a specific invoice by entering the Invoice Number, Client, or Vendor name.
- You can sort the rows using the up/down arrow located near the field names.
1. Draft
- The Draft displays invoices that have been generated and saved but not yet finalized or sent to the client/vendor.
- Options to edit, delete, or view the invoice PDF are under the Action field.
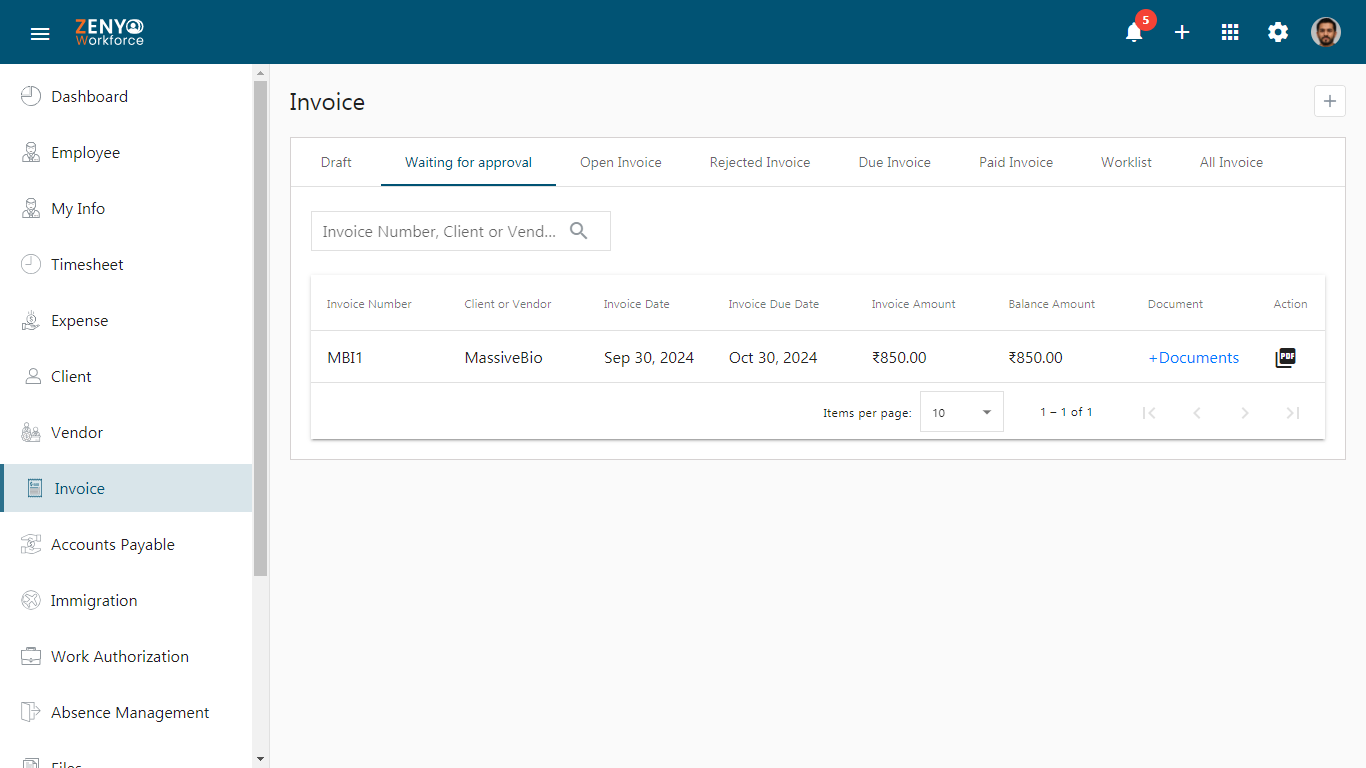
2. Waiting for approval
- Invoices awaiting approval are listed here.
- Click the PDF icon under the action field to view the invoice.
- It remains in this section until completely approved by everyone in the approval flow.
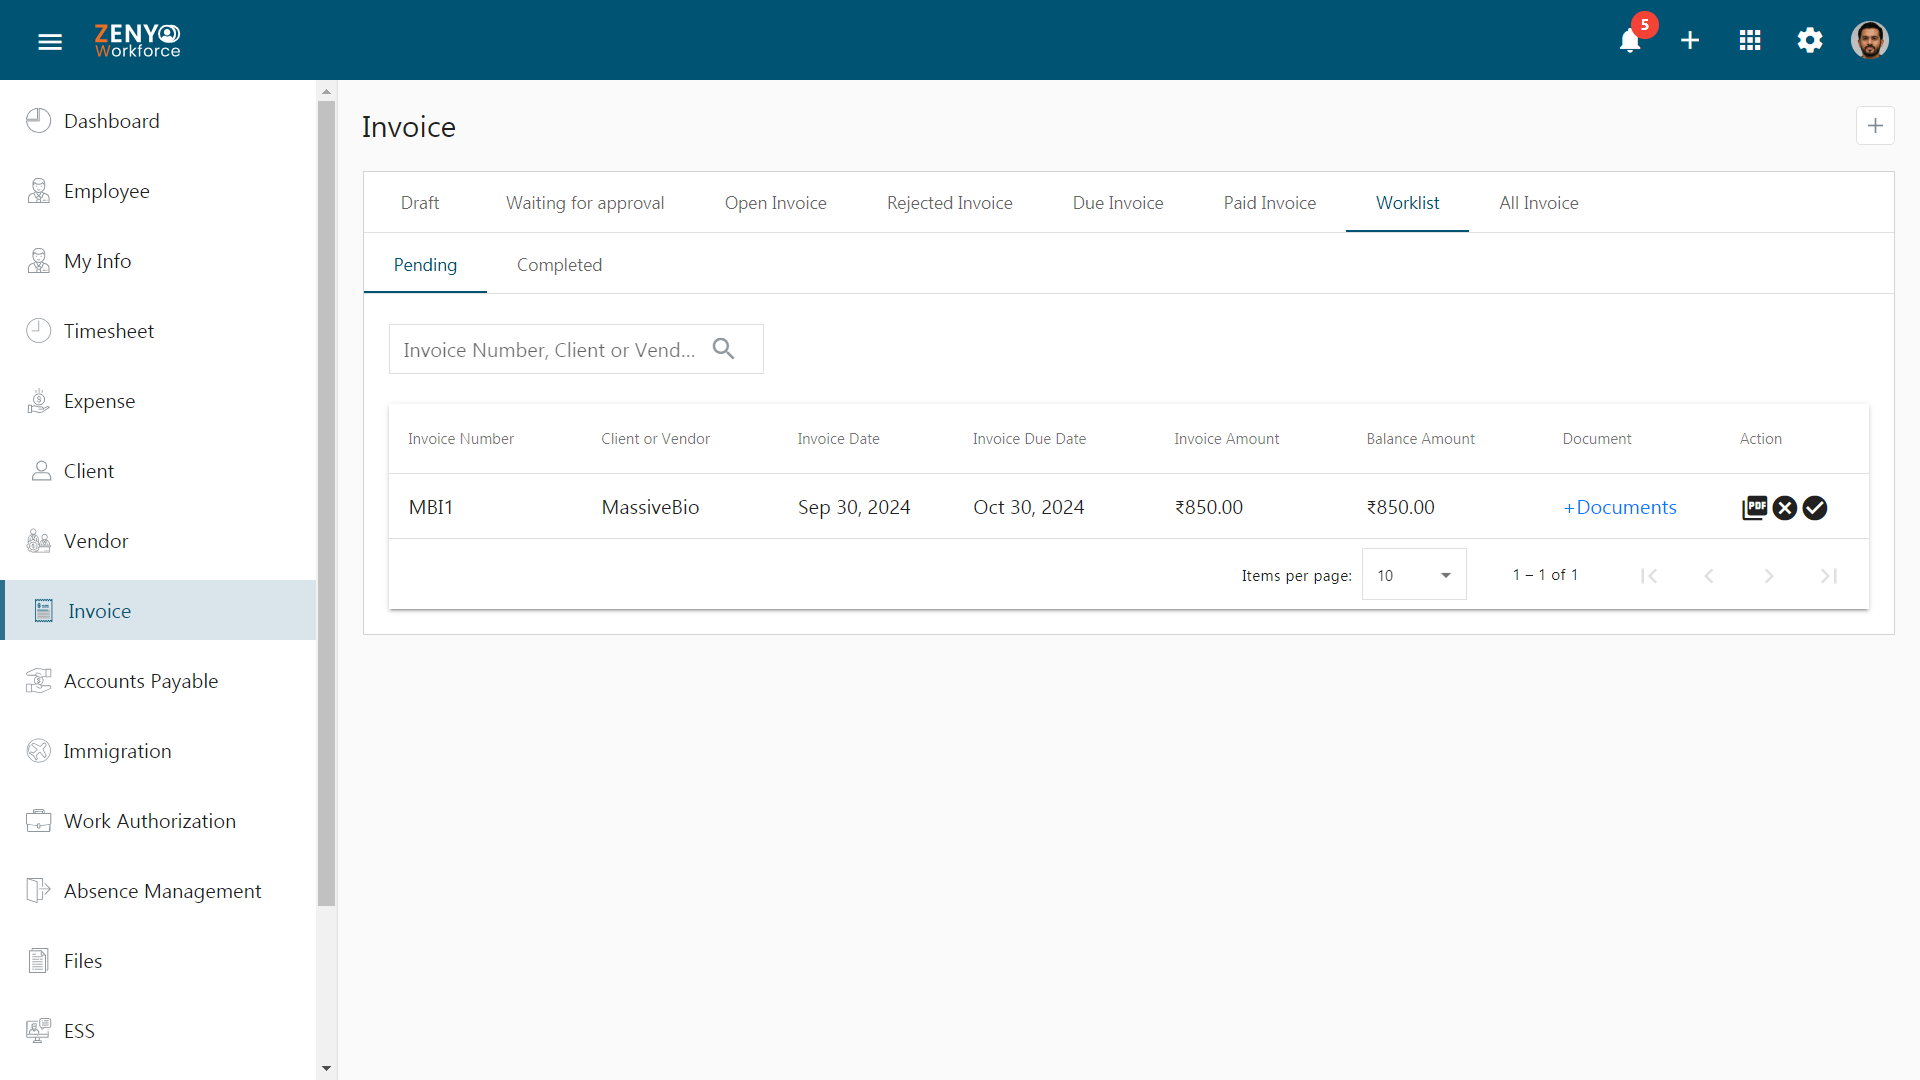
3. Worklist
The worklist provides a view of pending and completed tasks for individuals in the invoice approval hierarchy, and includes two sub-tabs: ‘Pending’ and ‘Completed’.
- In the Pending tab, the invoices pending approval will be displayed. You can view the invoice PDF and reject or approve the invoice under the Action field.
- To approve the invoice, click the Approve icon. A dialogue box appears to review details or proceed with the approval.
- A pop-up confirmation appears stating “Invoice has been approved successfully”.
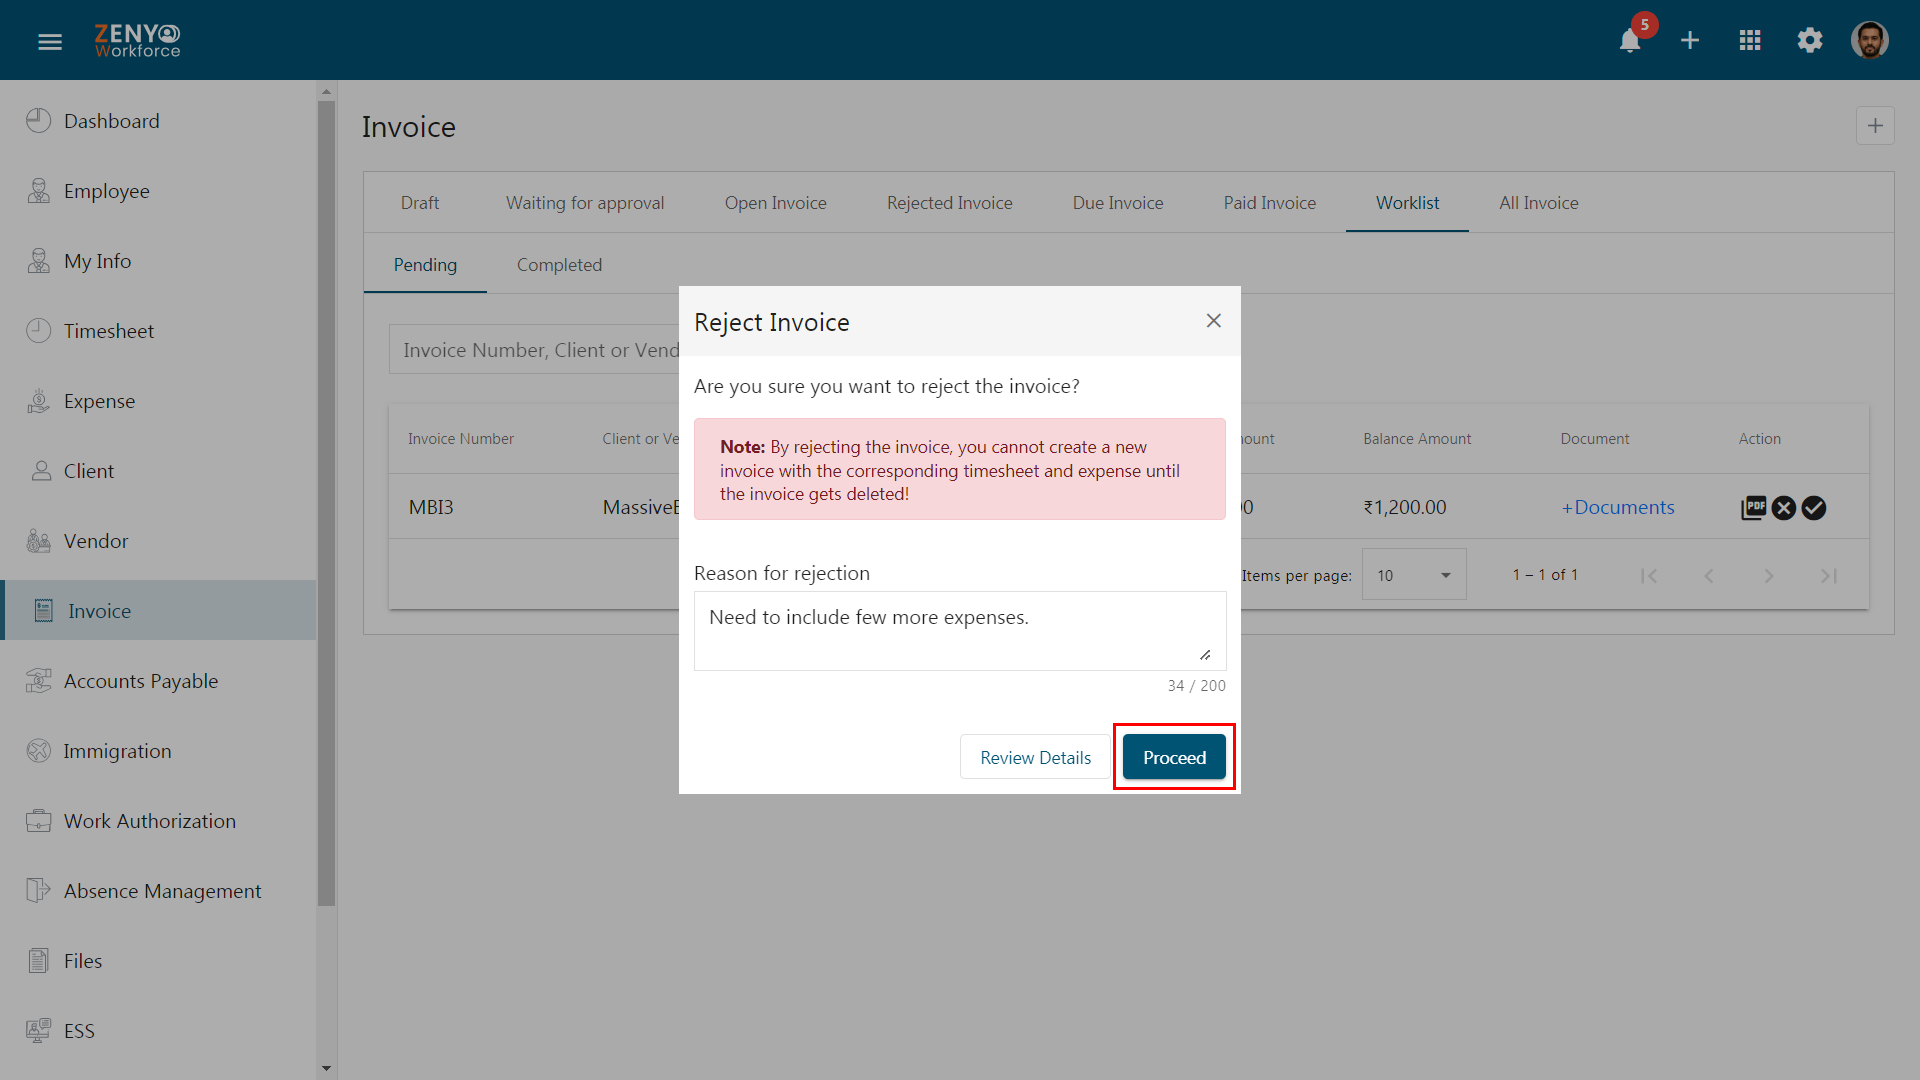
- To reject the invoice, click the Reject icon and enter the reason for rejection in the dialogue box. Note that by rejecting the invoice, you cannot able to create a new invoice with the corresponding timesheet and expense until the invoice gets deleted.
- After making changes, re-submit the invoice for approval.
- After approval, the invoice moves to the Completed tab. In this tab, a new field includes the status as Approved or Rejected.
- Under the Action field, you can view the invoice.
4. Open Invoice
After final approval, if the due date is not reached, the invoice moves to the open invoice stage, where you can perform actions like sending a mail to the client/vendor or creating a payment.
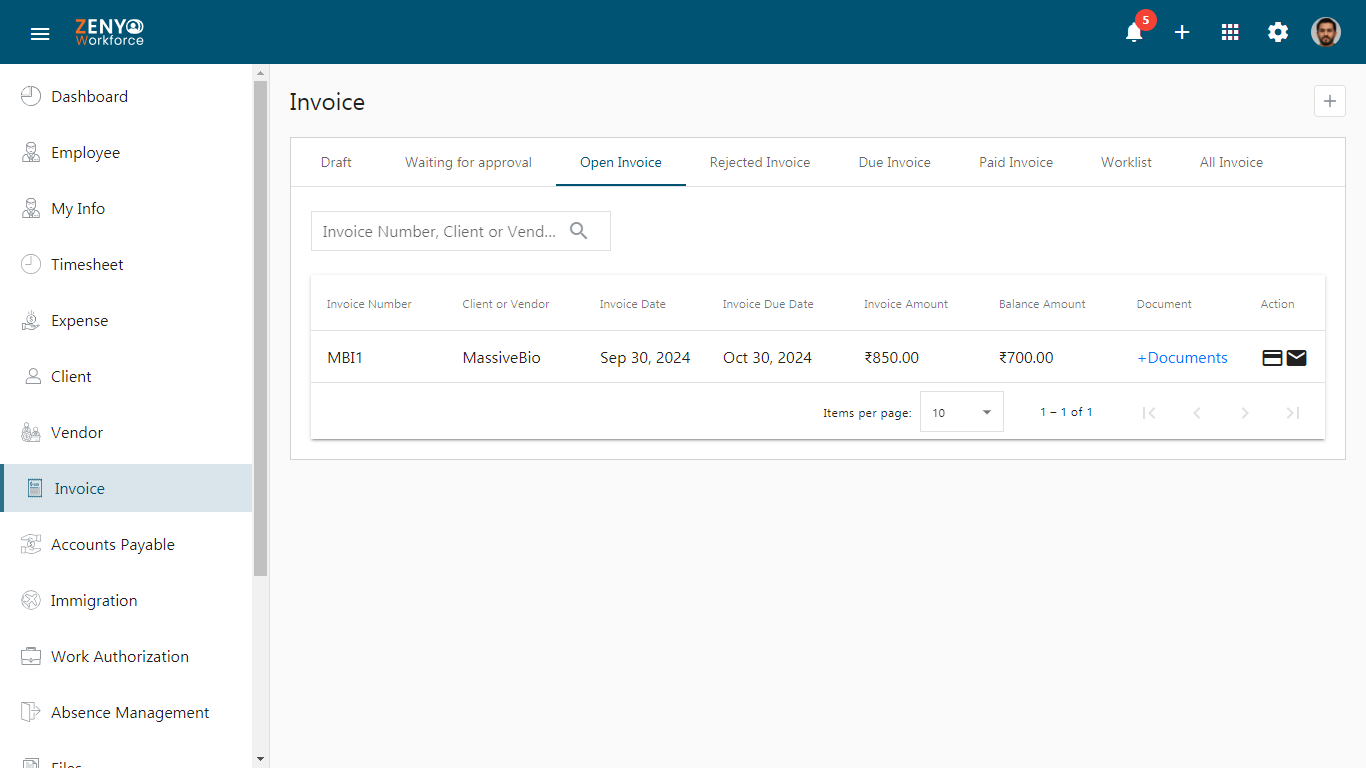
- Click on the Create payment icon to initiate the payment process.
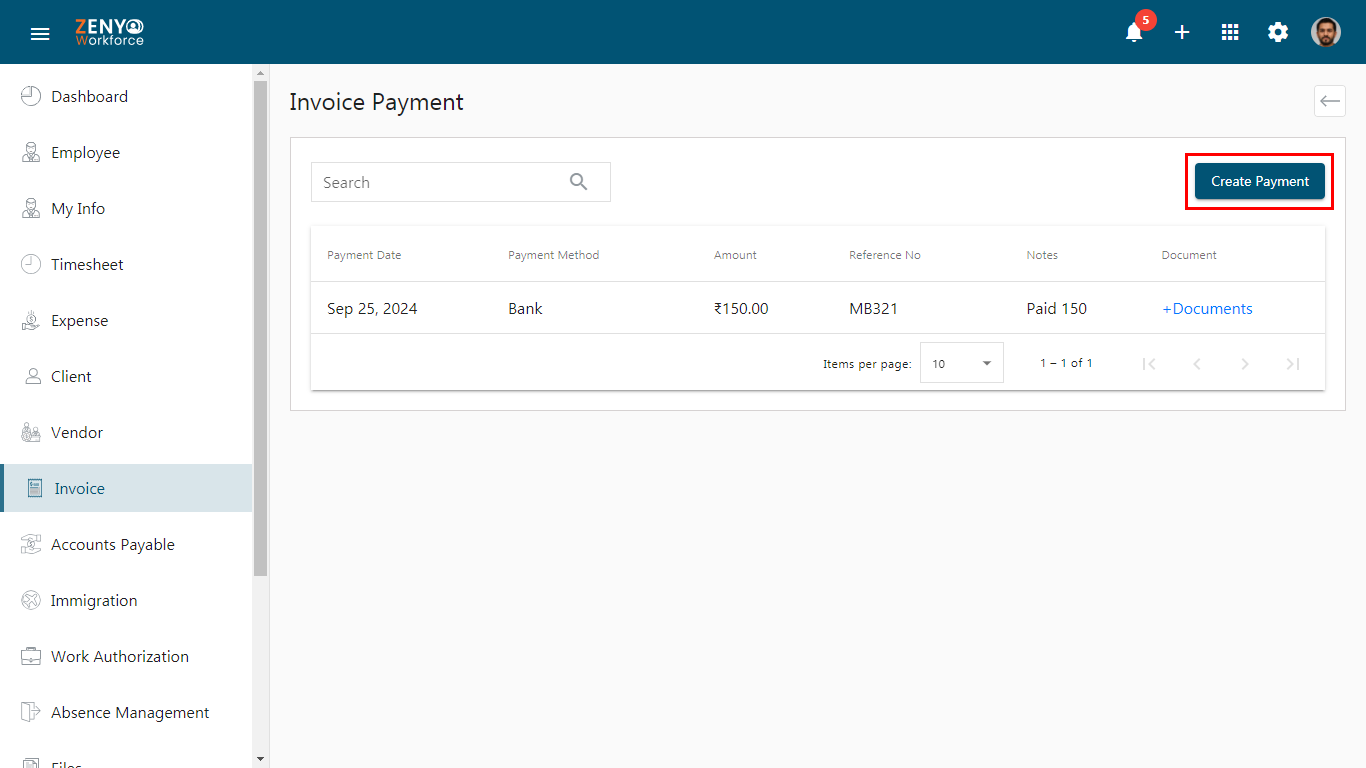
- A page for invoice payment will be displayed, containing previous payment details such as Payment Date, Payment Method, Amount, Reference No., Notes, and Documents.
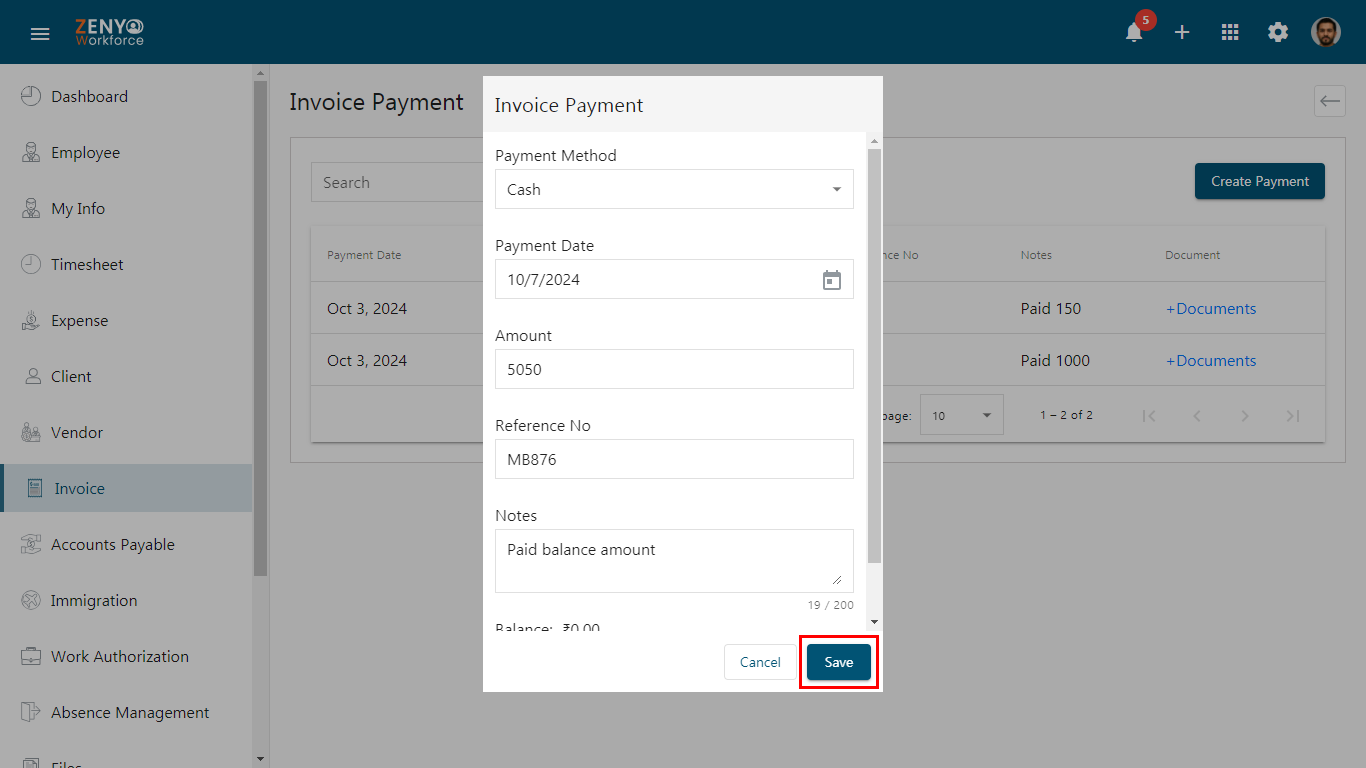
- Click the Create Payment button to proceed with making the payment, and the Invoice Payment dialogue box appears.
- Choose the Payment Method (Bank, Cheque, Cash), Payment Date, Amount, Reference no., and add some notes. The remaining Balance amount will be presented at the end along with the option to upload an attachment file.
- Click on the Save button to confirm the updated Payment Details.
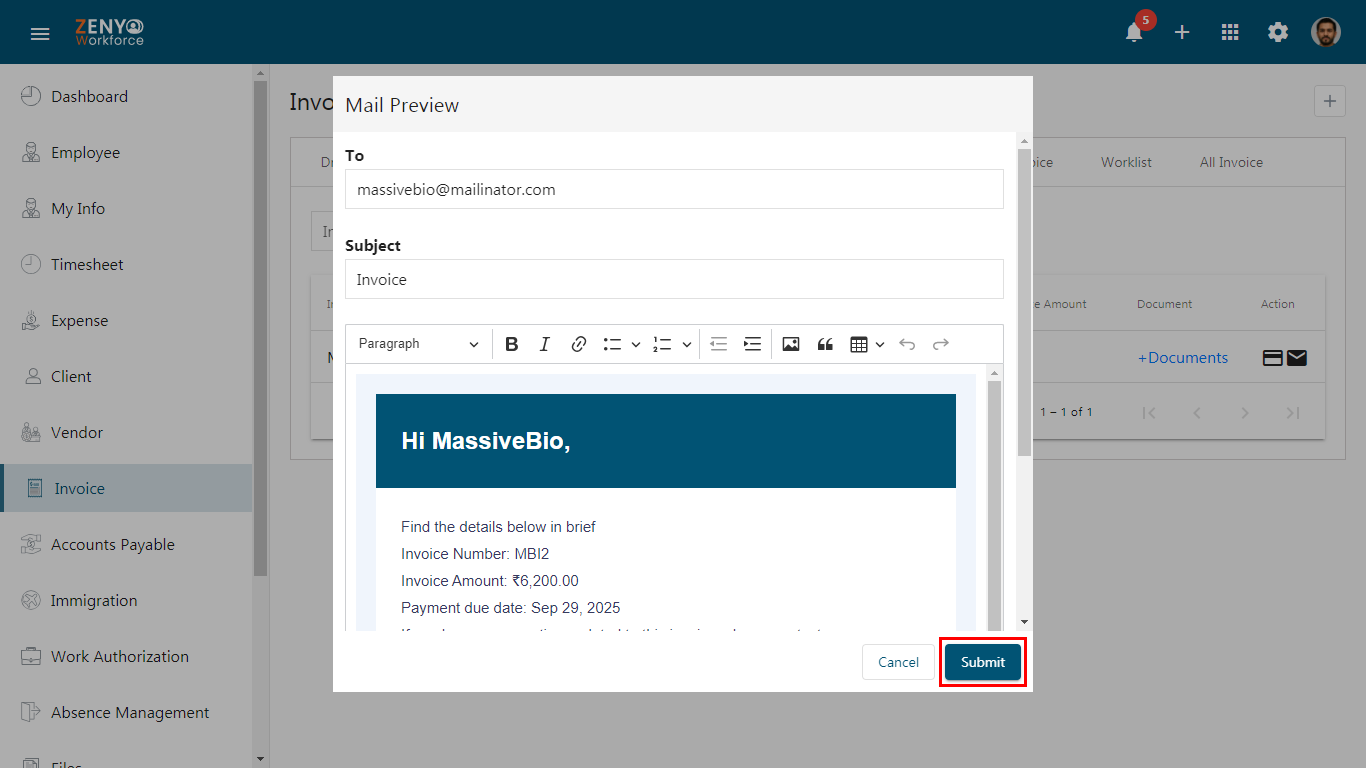
- Return to the open invoice tab and click on the ‘Send mail’ icon under Action to send an email and preview the mail.
- Finally, click Submit to complete the process.
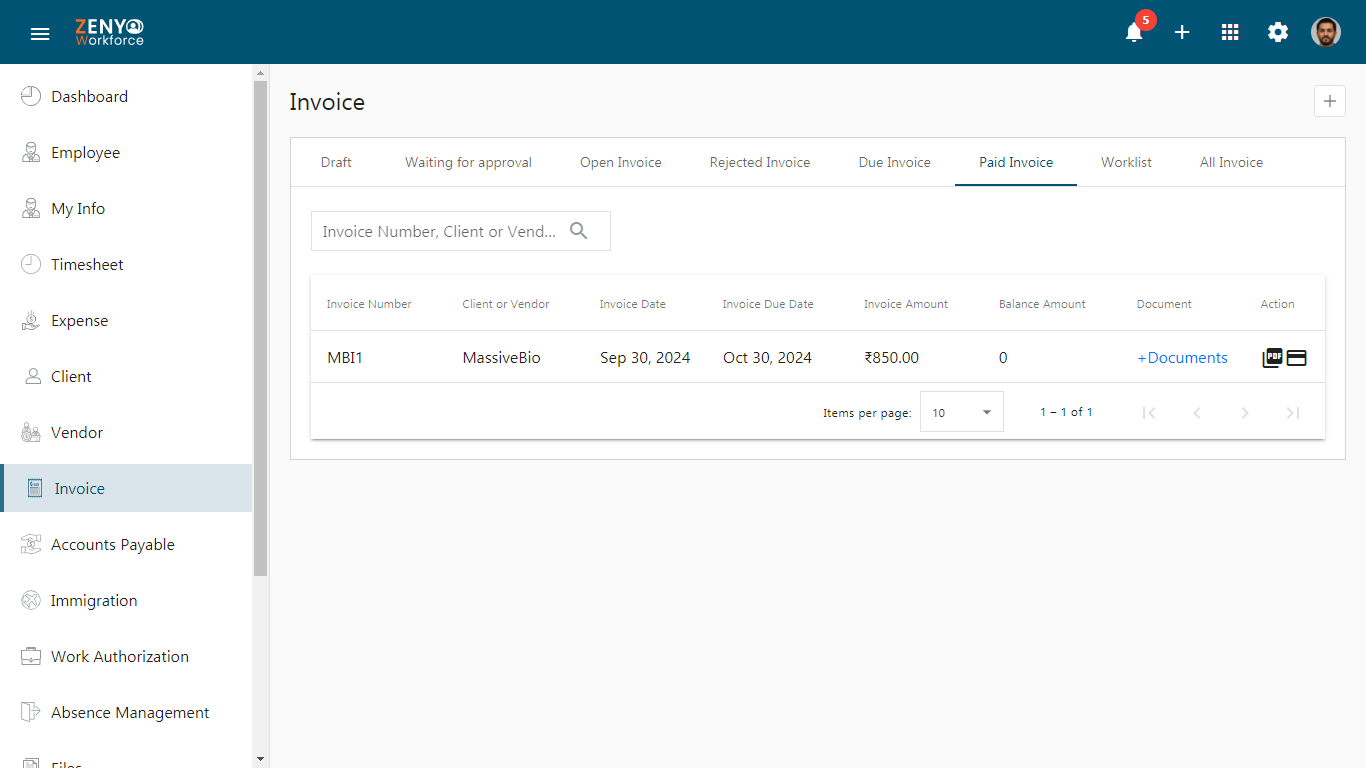
5. Paid Invoice
- Under the Paid Invoice tab, you can view the details of completely paid invoices. You have the option to View the Invoice PDF or View Payment under the Action tab.
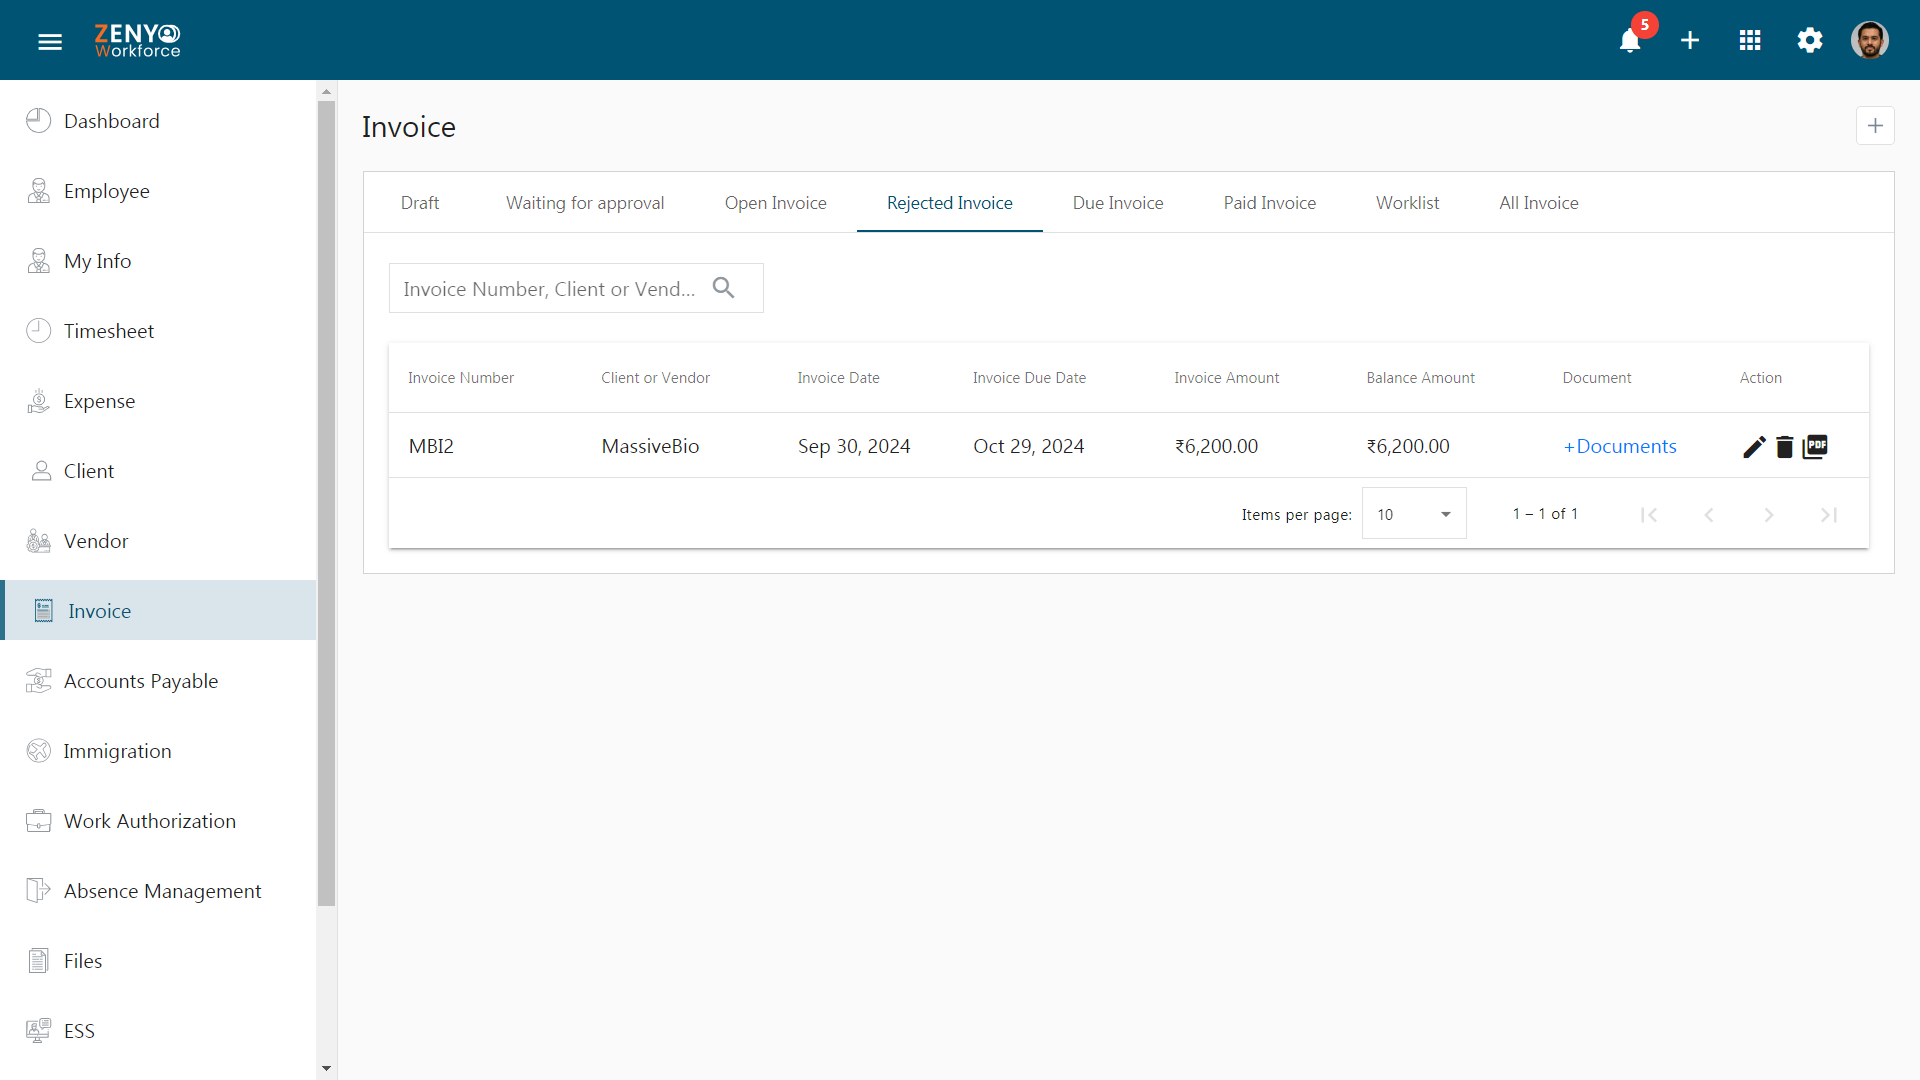
6. Rejected Invoice
- In the Rejected Invoice tab, you can find the list of invoices that have been rejected.
- Edit and re-submit the invoice for approval by clicking the ‘Edit’ icon under Action.
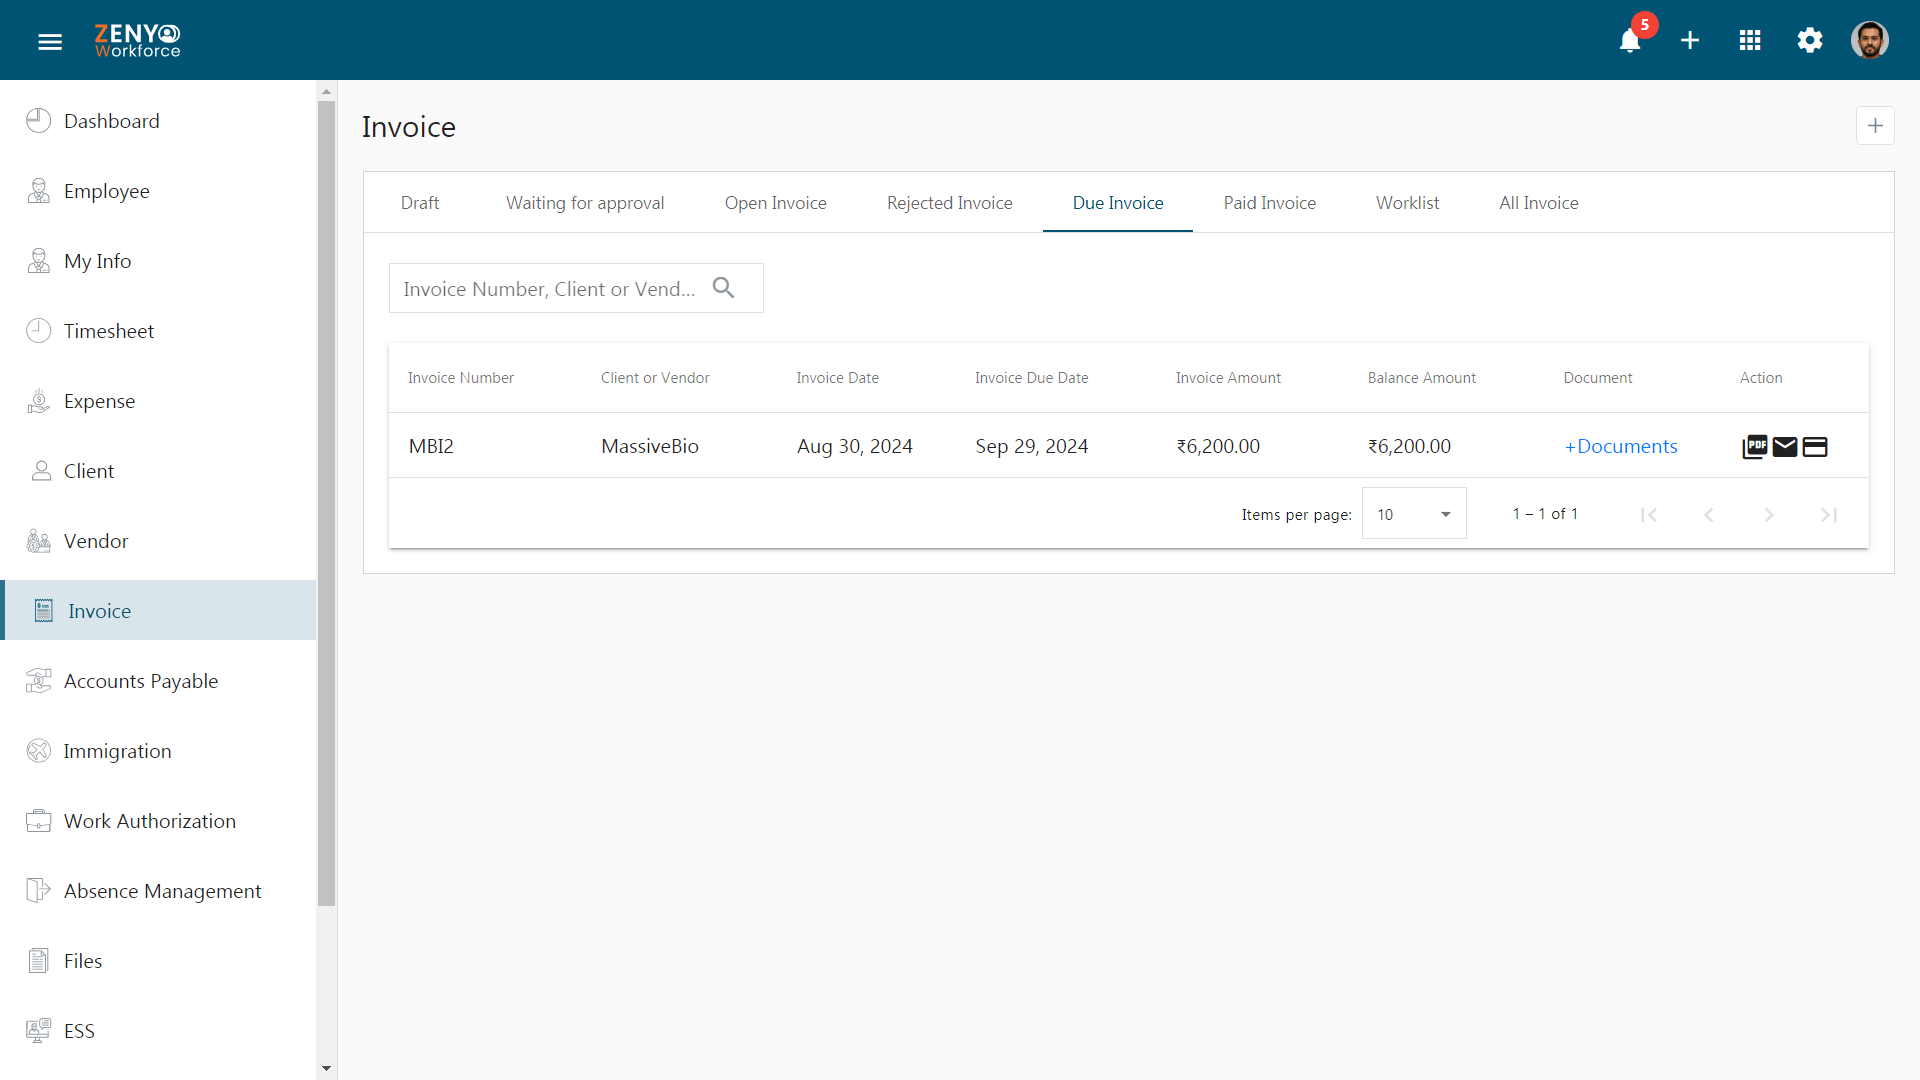
7. Due Invoice
- The Due Invoice tab displays invoices for which the due date has arrived, serving as a reminder to make the payment.
8. All Invoice
- The All Invoice tab presents a complete list of submitted invoices along with their respective status.