Attendance features help organizations track and manage employee attendance effectively. They include monitoring daily attendance, viewing individual attendance records, scheduling shifts, and allowing flexibility for late arrivals, promoting efficient workforce management.
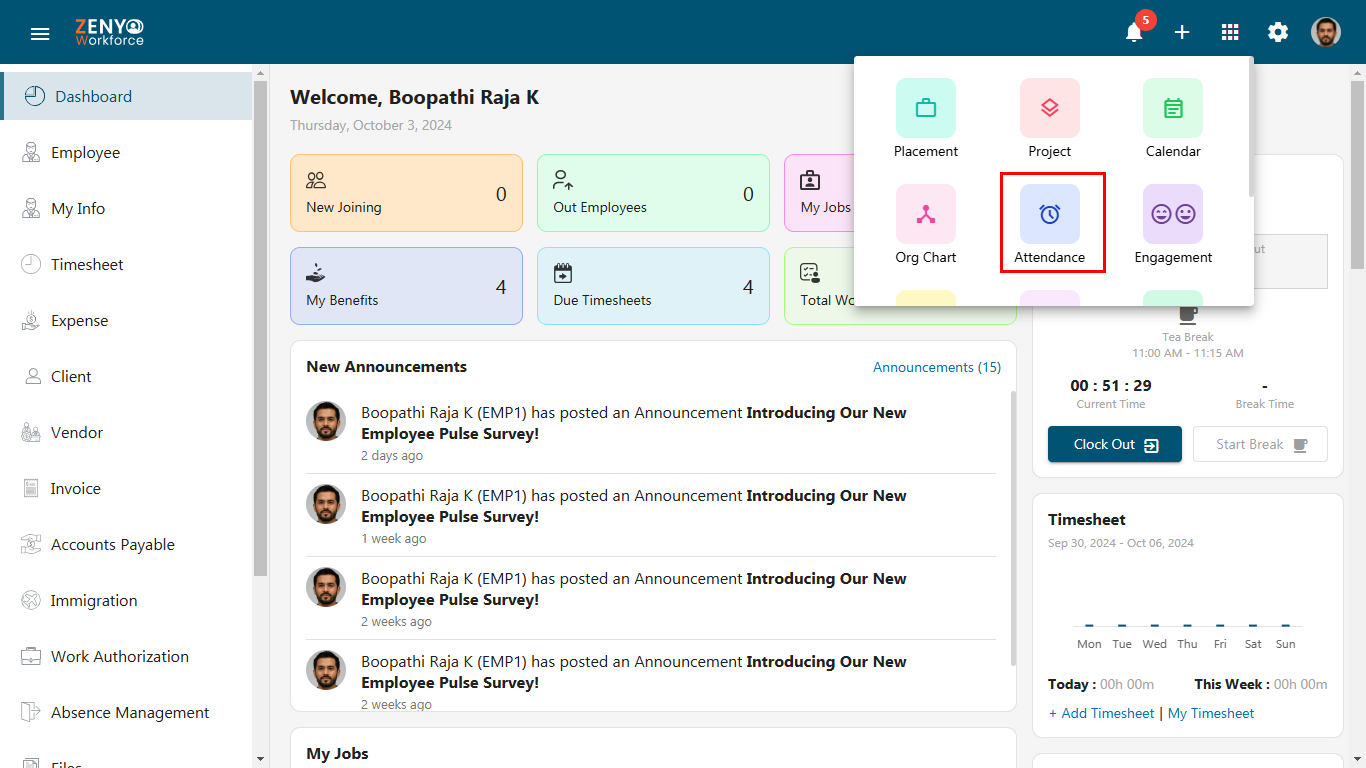
Click on the App icon in the top corner of the navigation bar and select Attendance.
Attendance Overview
The Attendance Overview tab provides a detailed analysis of employees’ attendance patterns and you can view the attendance details of your employees by applying specific filters.
- You can select All Employees or Specific Employees based on Department, Role, Employment Type, and Office Location. Select a year from the drop-down menu, then choose a month and click Apply.
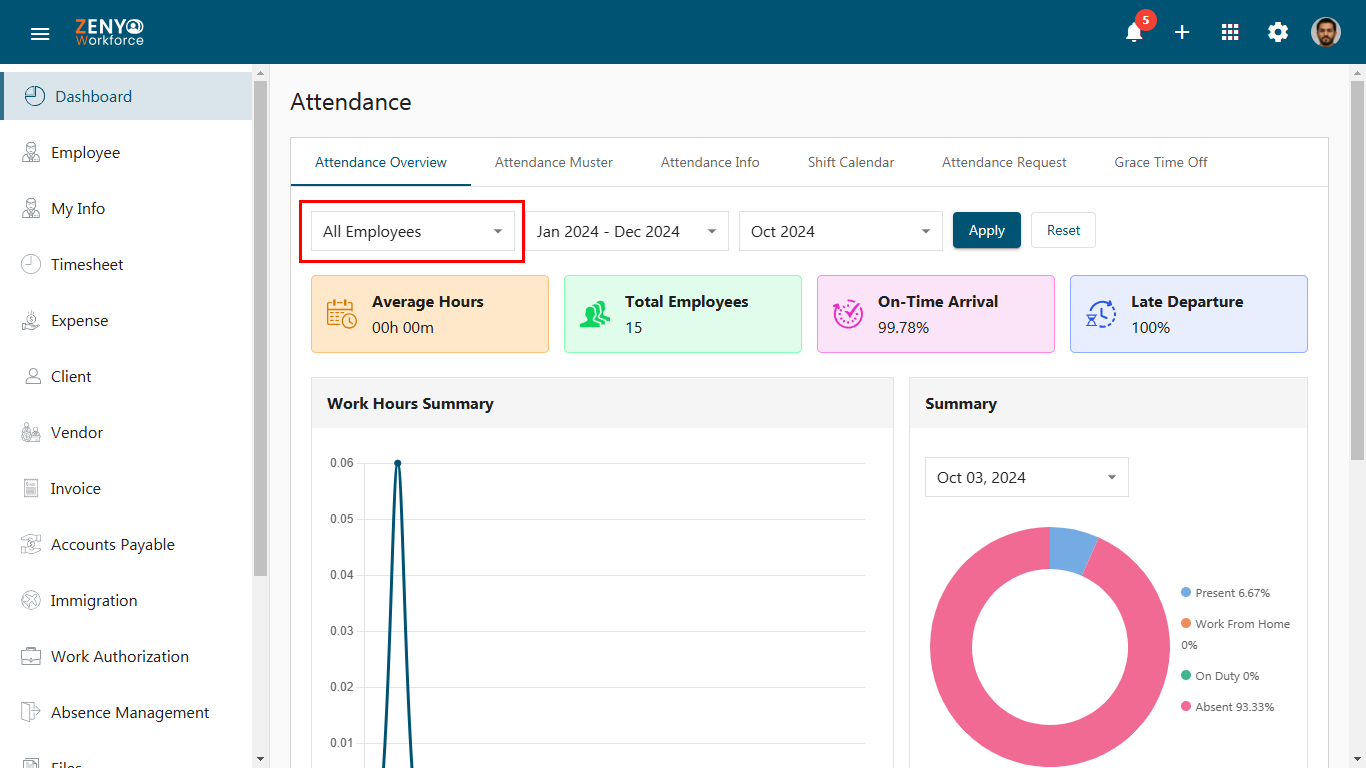
- You will see details such as Average Hours Worked, Total Employees, On-Time Arrivals, and Late Departures.
- The Work Hours Summary chart presents the Average Hours worked by the selected employees, while the Summary section features a pie chart illustrating the percentage of employees who were present, working from home, on duty, and absent on a specific day. You can choose any day from the dropdown within the month to view daily reports.
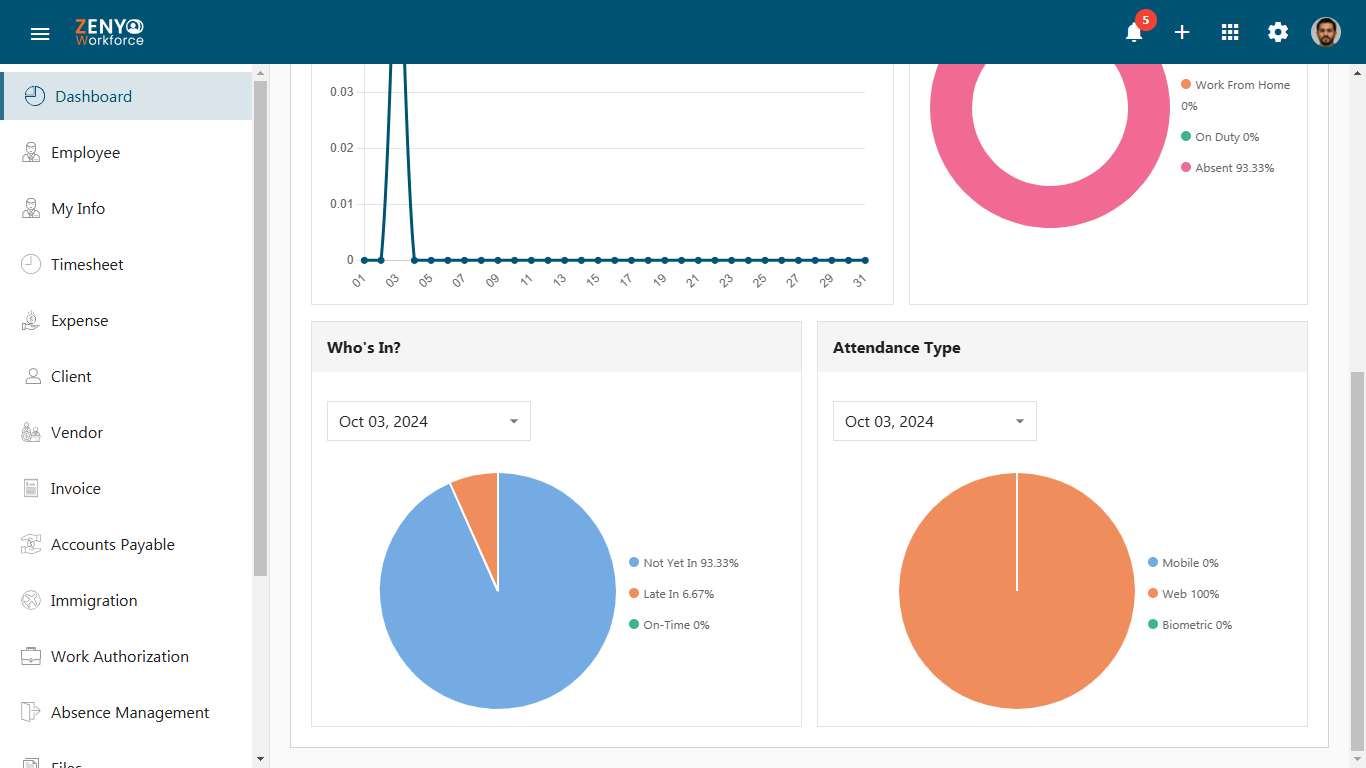
- In the Who’s In? section, you can view the employees’ arrival status reports for a selected day as Not Yet In, Late In, or On-Time.
- The Attendance type reports allow you to analyze how employees clocked in and out on a specific day. See the distribution of clock-in/out methods used by employees, categorized as Mobile, Web, or Biometric.
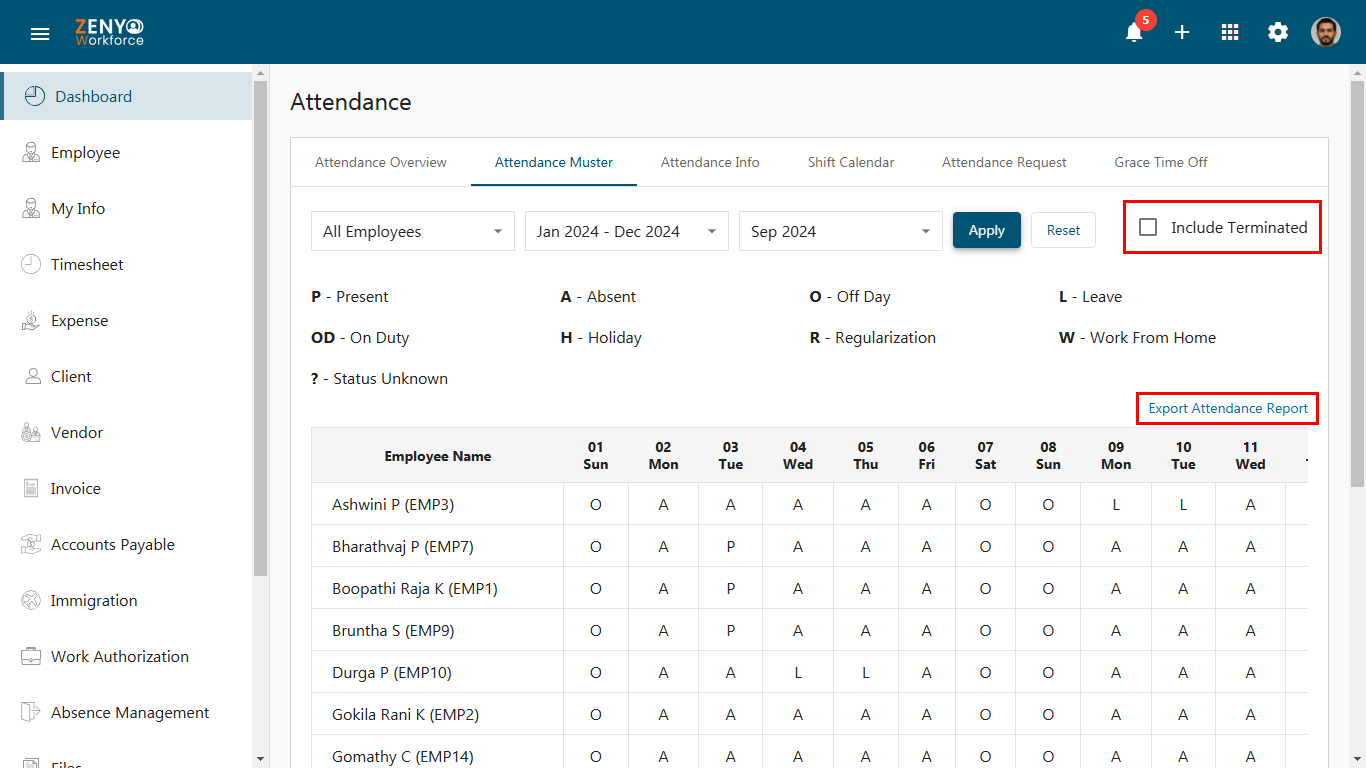
Attendance Muster
The Attendance Muster tab displays a comprehensive manual record of each employee’s attendance status.
- You can view the attendance of your employees by applying specific filters. Selecting All Employees or specific employees based on Department, Role, Employment Type, and Office Location. Choose a year from the drop-down menu, then select a month and click Apply.
- View the attendance record for the selected month. The report categorizes attendance as Present, Absent, Off Day, Leave, On Duty, Holiday, Regularization, Work From Home, or Status Unknown.
- By selecting the Include Terminated checkbox, you can also view the attendance data of former employees within the report.
- Additionally, you can easily export these attendance reports to Excel for further analysis or record-keeping purposes by clicking Export Attendance Report.
Attendance Info
Attendance Info provides detailed records of each employee’s attendance. This feature helps organizations track attendance accurately and manage related issues, supporting better workforce management and decision-making.
- Use the dropdown menu to choose the employee whose attendance data you want to review. Specify the year and month for which you want to view the attendance report, then click Apply.
- On the right-hand side, you will see a summary of the employee’s attendance for the selected month, including Average Work Hours, number of Late In, Early Out, Present, On Duty, and Absence/ Leaves.
- In the Attendance History section, view the breakdown of the employee’s On Time, Late, and Absence reports for the selected month, displayed as percentages.
- The attendance calendar shows a visual representation of the monthly attendance report, with each day marked by a specific color and letter corresponding to the attendance status on that day.
- Clicking on a specific day within the calendar, you can access a detailed report for that day.
- The detailed report of the employee’s attendance for that day appears on the right-hand side. See the selected date and the name with start and end time of the shift assigned to the employee, along with First In, Last Out, Total Work Hours, Break Hours, Actual Working Hours, Work Hours in Shift Time, Short Fall Hours, and Excess Hours.
- Within the Session Details, you can view the session name, session time, first check-in and last check-out times, late hours, early out hours, total working hours, break hours, and actual working hours for each shift session.
- The Swipes section displays the employee’s clock-in and clock-out details for both work hours and breaks for the chosen day.
- Click View More to access a comprehensive report that includes specific addresses for each clock-in and clock-out, along with a map visualization of the location.

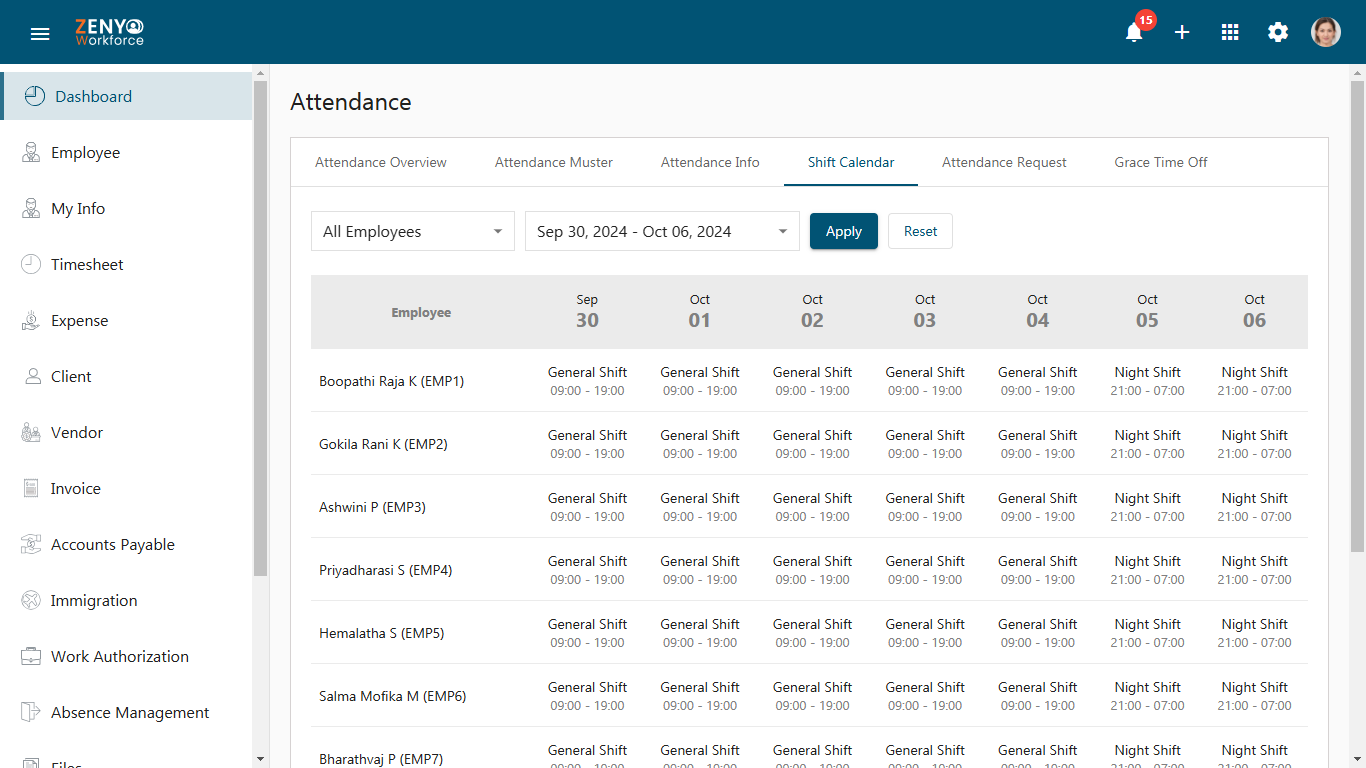
Shift Calendar
The Shift Calendar tab allows you to view the employee shift schedule for a selected week.
- If you need a shift calendar of specific employees, filter by selecting employees based on Department, Role, Employment Type, and Office Location.
- Choose the desired week from the dropdown menu and click Apply to generate the detailed weekly shift report.
- The Shift Calendar will display the name of each employee, the date of their shift, the designated shift name, and the corresponding timing for each day throughout the entire week.
Attendance Request
The Attendance Request feature allows employees to submit requests for Regularization, On-Duty, or Work From Home. Approvers can review, approve, or reject these requests. The rejected ones can be resubmitted or deleted, helping to manage attendance smoothly.
For Employee:
- In the Attendance Request tab, You can choose from options like Regularization, On Duty, and Work From Home.
- You can view all the attendance requests, along with the Date, Start Time, End Time, Total Hours, Status, and Action options. Requests in Draft status can be edited or deleted, while those in Submitted and Approved status are viewable only. Requests in Rejected status can be deleted or resubmitted.
- For example, select Regularization from the first dropdown for the attendance request. By default, My Request will be displayed in the second dropdown. Click the Add button to start the submission process.
- An Add Regularization dialog box will appear. Choose the Date from the calendar, specify Check-in and Check-out times, and provide a description for the request.
- The total hours will be displayed for review. After providing the required details, you can either save the request as a draft or submit it for approval.
- Upon submission, the request will be promptly forwarded to the designated approver for review and approval.
- The same processes applied to the on-duty and work-from-home.
For Approver:
- Choose Regularization from the drop-down menu, and select Worklist.
- By selecting Pending, you can view a list of pending requests from the employees, including details such as Employee Name, Date, Start Time, End Time, Total Hours, and actions.
- You will find the regularization request submitted by the employee. Under “Action,” there are two options: Reject or Approve. To approve a request, click the Approve icon. Then, click the Approve button to confirm.
- Select Completed from the drop-down menu. The request will now be listed among the other approved or rejected requests. You can view the details by clicking the View icon.

Grace Time Off:
Grace Time Off records any extra period employees take beyond the allowed grace period mentioned in their shift and after reviewing it may lead to leave deductions. This approach encourages flexibility in attendance management while ensuring employees remain accountable for their attendance.
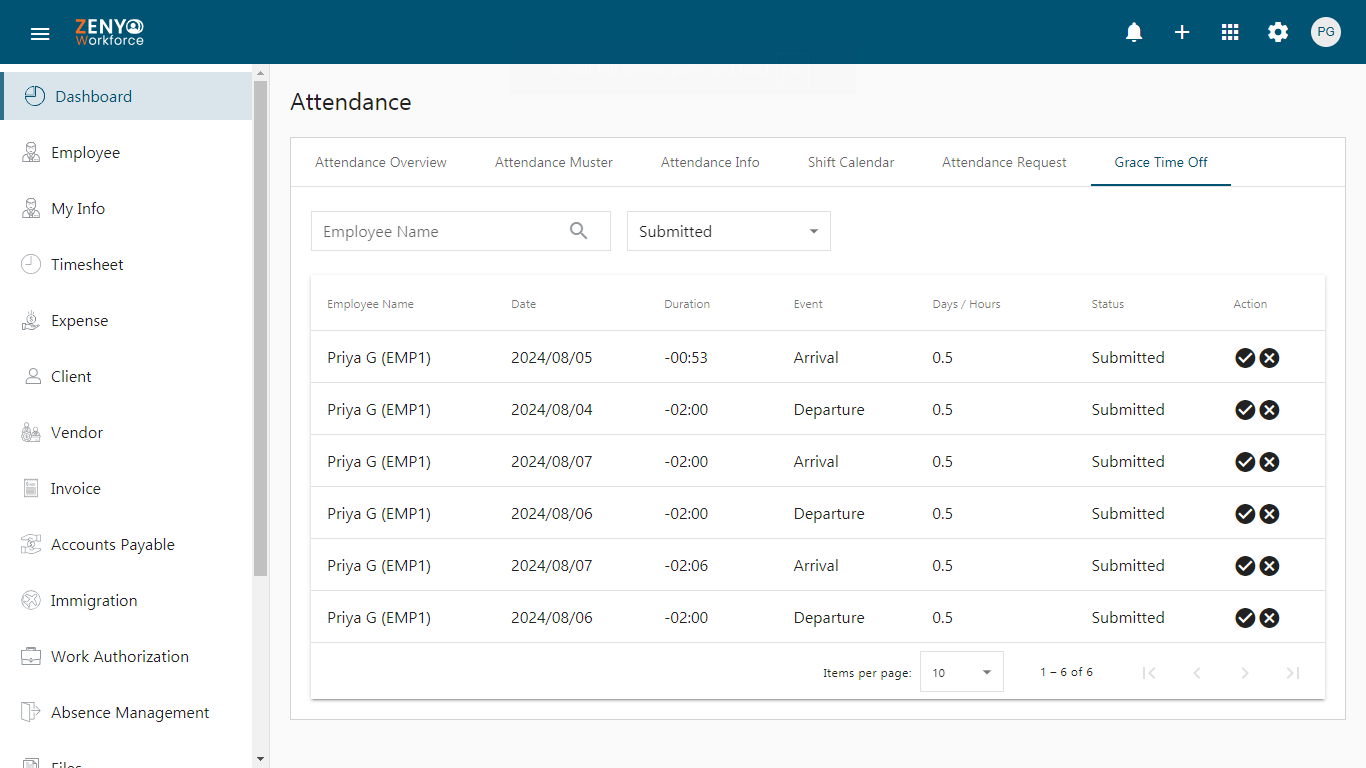
- Use the Search Bar to find a specific employee’s grace time off record by entering their name. The drop-down menu with options like Submitted, Approved, Rejected, and Cancelled. By selecting each option, you can filter and view employees’ grace time off requests based on their current approval status.
- To view the list of employee grace time off requests currently awaiting approval, select Submitted from the drop-down menu. The list includes Employee Name, Date, Duration, Event, Days / Hours, Status, and Action.
- Under the Action, there are two options: Approve or Reject.
- To approve a specific employee’s grace time off, click on the Approve icon. A dialog box will appear with unchangeable dates, a dropdown to select the leave type, and automatically calculated leave in days. Add notes if needed, then click the Save button. To reject a grace time off, click the Reject icon.
- To view the requests in an approved state, select Approved from the dropdown menu, where you can cancel the request by clicking the Cancel icon.
- Selecting Rejected shows requests that were rejected during the submission stage.
- By selecting Cancelled, you can view requests that were canceled after being approved.
