The Offboarding Task Management System is designed to streamline and improve the employee exit process. It enables HR professionals and managers to efficiently create, organize, assign, and track offboarding tasks. This system ensures that departing employees follow a smooth and structured exit, making the offboarding process consistent, compliant, and hassle-free for both the employee and the organization.
How to Manage the Offboarding Settings?
- Click on the Settings icon.
- Navigate to the Task menu. It has two submenus:
- Onboarding
- Offboarding
- Select the Offboarding submenu.
How to Create a Category?
- Categories help organize and streamline offboarding tasks by different areas of responsibility, such as HR, IT, or compliance. They facilitate efficient tracking and assignment of tasks to the appropriate teams, ensuring a structured and clear offboarding process for departing employees.
- Click the New Category button.
- Enter the Category Name and click Save.
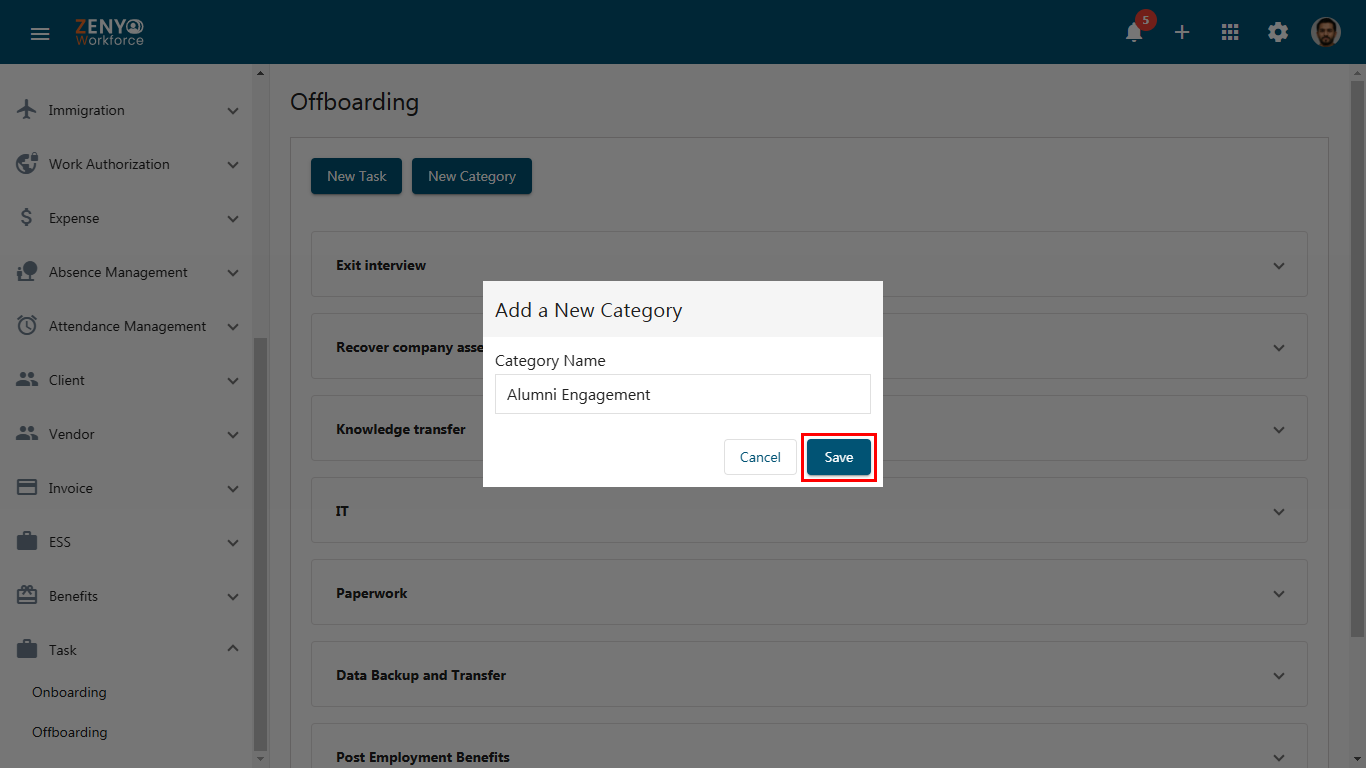
- Hover over the category and click the Edit or Delete icon next to it to modify or remove the category.
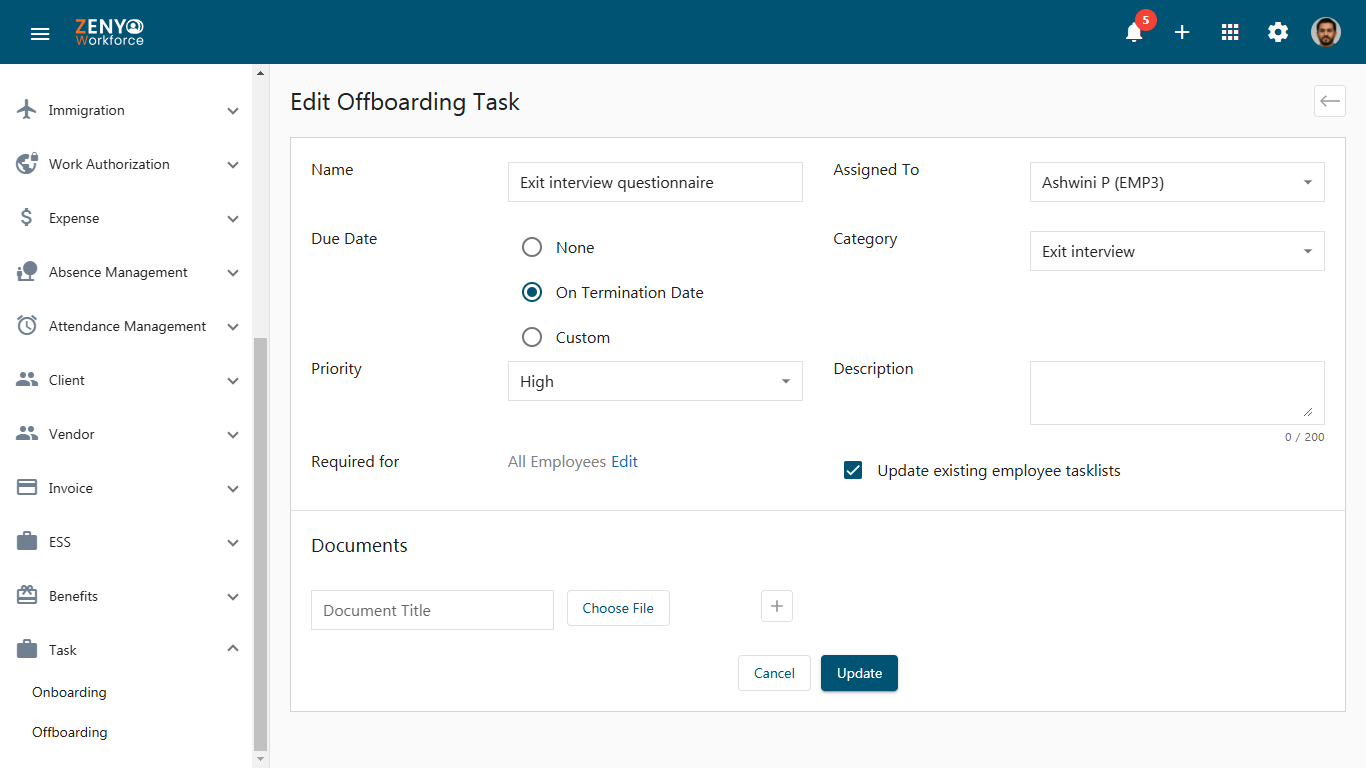
How to Create a Task?
- Click on the New Task button to add a new task.
- Enter the Name & Description, and select values for the Assigned To, Priority (High, Medium, Low), and Category from the dropdown. By clicking on the +Add Item from the dropdown, you can add a new category for the task.
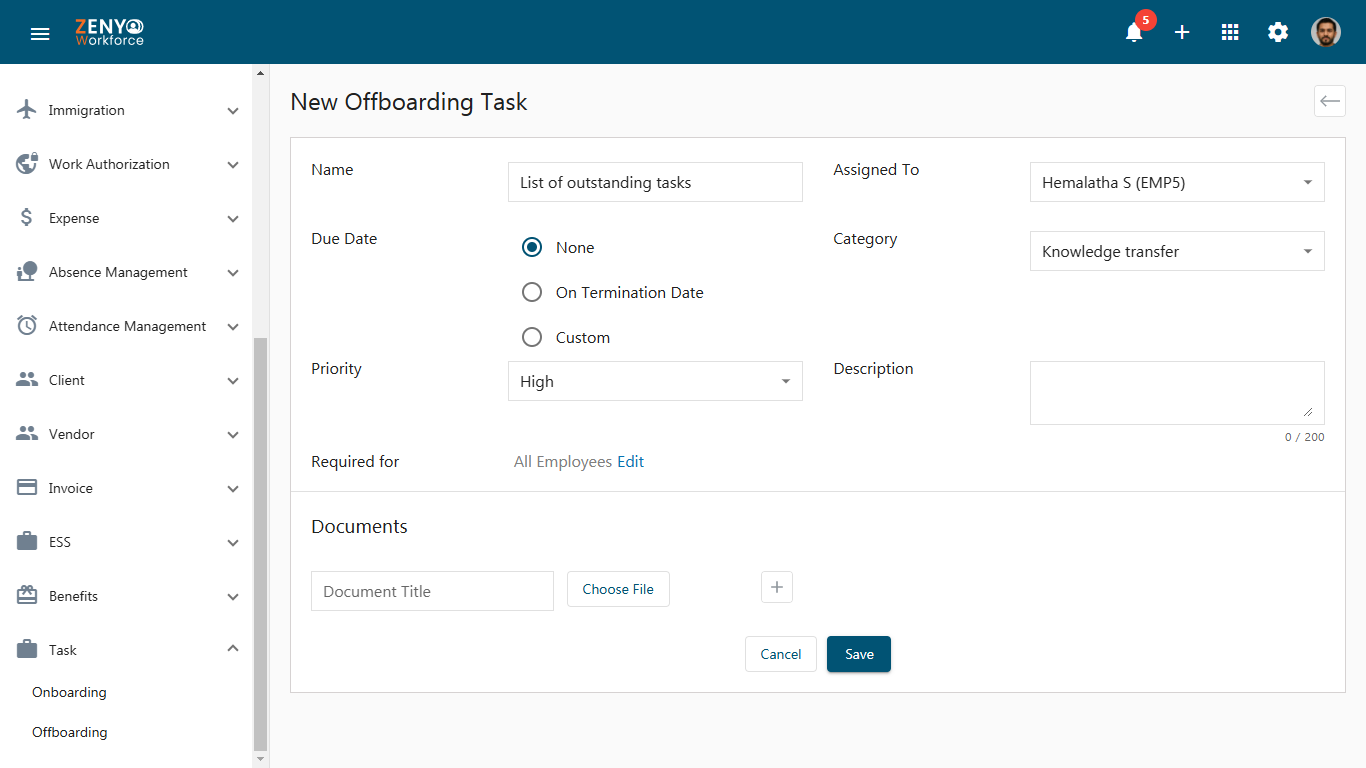
- Choose the Due Date. If you choose Custom, a specific due date is set. By using the dropdown you have the option to choose Days, Weeks, or Months, and selecting After or Before a termination date.
- It is necessary to confirm that this task applies to All Employees or a specific employee. To do so, click Edit in the Required For field and use the dropdown menu to choose the appropriate employee for this task.
- If you select Only Some Employees from the dropdown, then you have to filter employees from the list of options.
- Select the checkbox within the chosen option. Click the Save button.
- In the Documents section, click on Choose File to add a document to the task and enter the document name in the Document Title field.
- Add more files to this task by clicking on the Add icon or remove using the Remove icon. Click Save.
- The task created is displayed under the Category selected along with the priority level, the person assigned to, and the due date.
- You can delete the task by clicking the Delete icon next to each task.
- After creating the task, you will have the option to make further changes by clicking on the task name. Additionally, an extra checkbox will be available, Update existing employee tasklists.
- If you check the Update existing employee task lists checkbox, the changes made in this task will automatically update the employees’ existing tasks; otherwise, the changes will not be updated to the already existing tasks. Click Update.