The Immigration feature specifically focuses on recording the Advertisement and Green Card details.
Navigate to the Immigration menu on the homepage.
The Immigration page includes two tabs.
- Advertisement
- Green Card
The job details will be advertised first, followed by the green card applications.
Advertisement Tab
-
In the Advertisement tab, click the Add button to add a new advertisement. a. In the Job Information section, enter the Job Name, select a Status (Active/Inactive), and provide a Job Description. You can add comments if necessary.
b. In the Advertisement section, select an Advertisement Type or add a new one by clicking the Add Item button in the drop-down. Choose the Published date, and Expiry date, and attach the file by uploading it from your device.
c. Finally, click Save.

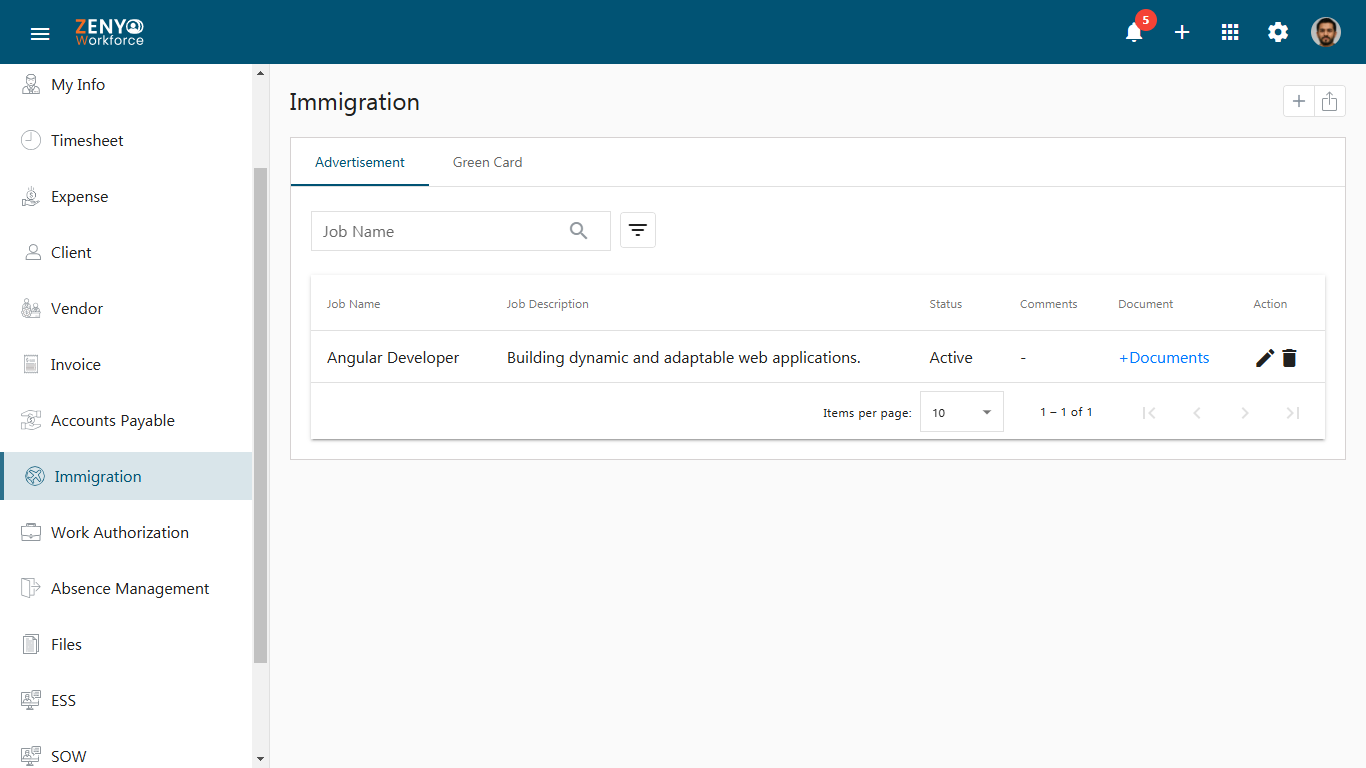
- You can search by Job Name or use the advanced filter option based on the Status of the advertisement.
- You can see that the advertisement created is added to the list along with the Job Name, Job Description, Status, Comments, Document, and Action available.
- In the Action field, you can edit and update the saved advertisement details using the edit icon, or remove the advertisement (only if it is not linked to the Green Card) using the delete icon.
- To deactivate the advertisement, select Inactive from the Status drop-down menu; note that advertisements associated with green cards cannot be moved to the Inactive state or deleted.
- You can export all the saved Advertisements in an XLSX or CSV file by selecting the required fields.

Green Card Tab
In the Green Card tab, to add new Green Card details, click the Add button.
A. Labor Details Section
- In the Labor Details section, select the Employee Name with Employee Code, Advertisement, GC Classification, and Status. The status options include: Questionnaire Sent, Filed, Job Filed, Interview, or Approved.
- You can choose the status from the drop-down. When selecting a specific status, additional fields related to that status will dynamically appear below the Labor Details section. Please fill in these fields accordingly.
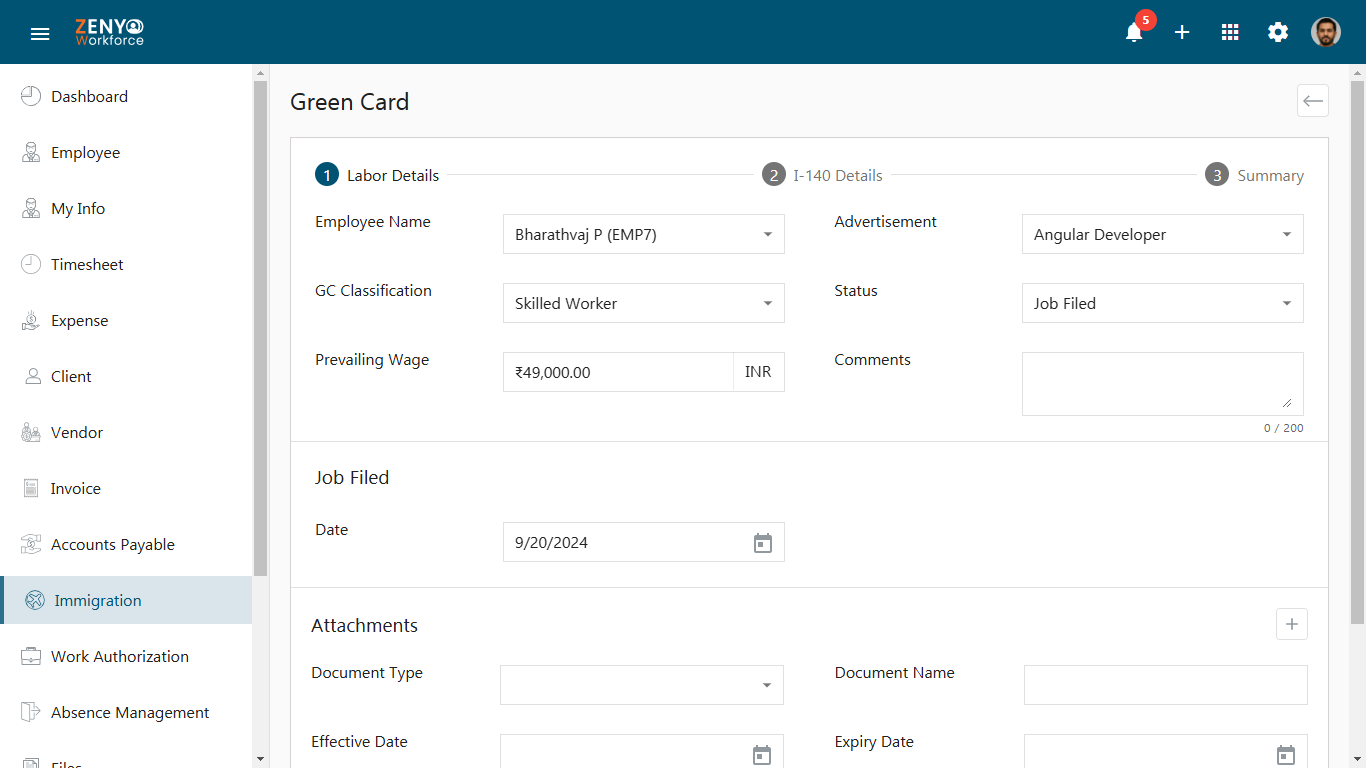
- You can proceed to the next section, which involves entering the I-140 Details, only if the status is at the Approved stage.
- In the Attachments section, enter the Document Type, Document Name, Effective Date, and Expiry Date, and upload the attachment file.
- Click Save.
B. I-140 Details
Now, proceed with the I-140 details.
- Choose the Processing Type, Status (Questionnaire Sent, Approved, Cancelled, Denied, Draft, In Progress, Revoked, RFE, RFE Approved, or Submitted).
- Upon selecting a status, additional fields will automatically appear below, allowing you to provide the necessary details.
- If the status is Questionnaire Sent, choose Questionnaire Sent On Date from the calendar icon.
- If the status is Approved, choose Approved Date and Priority Date from the calendar icon.
- If the status is Cancelled, choose Cancelled Date from the calendar icon.
- If the status is Denied, choose Denied Date from the calendar icon.
- If the status is Draft, no additional fields need to be entered.
- If the status is In Progress, choose Receipt Date from the calendar icon and enter the Receipt Number.
- If the status is Revoked, choose Revoked Date from the calendar icon.
- If the status is RFE, choose RFE Date, Due Date, and Responded On from the calendar icon.
- If the status is RFE Approved, choose RFE Approved On, Due Date, and Responded On date from the calendar icon.
- If the status is Submitted, choose Submitted On date from the calendar icon.
- Enter the Labor Document Number and add a comment if necessary.
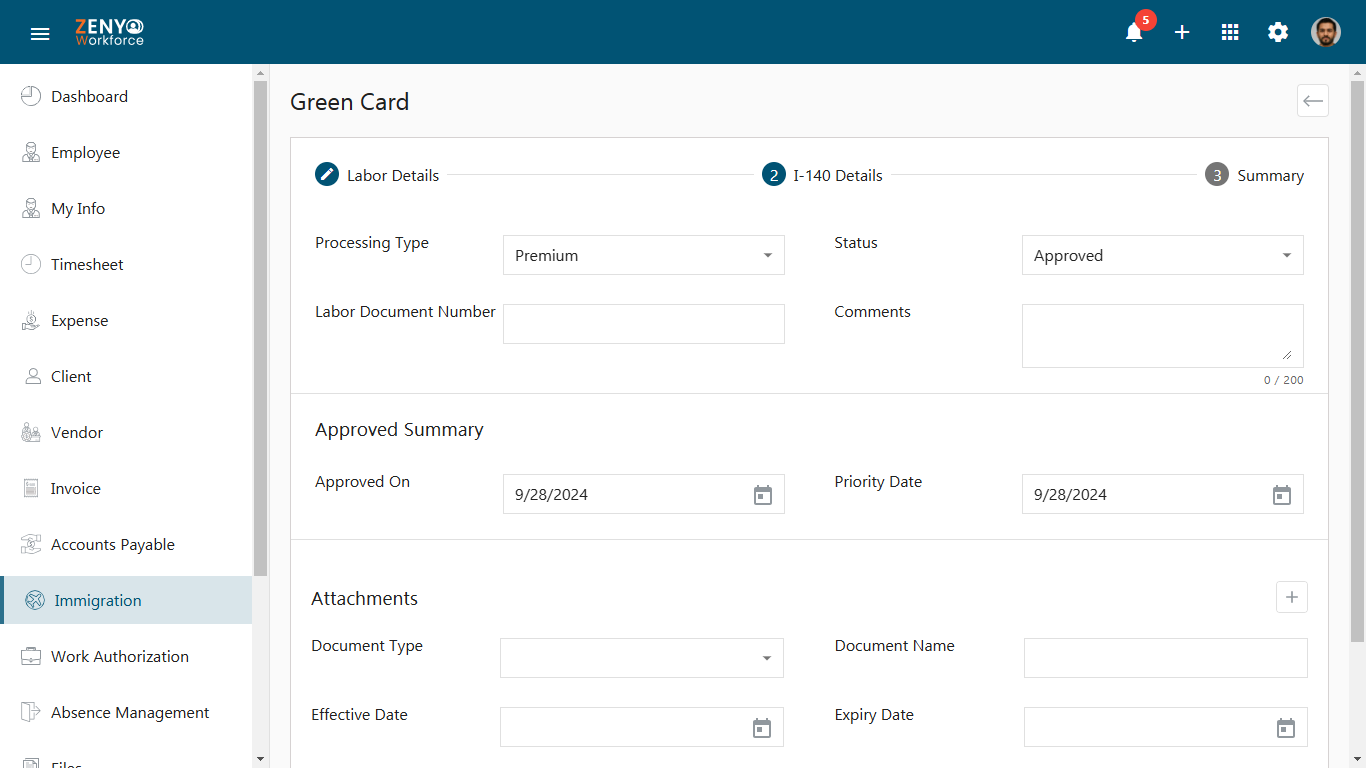
- In the Attachments section, enter the Document Type, Document Name, Effective Date, and Expiry Date, and choose the attachment file. Then, click Save.
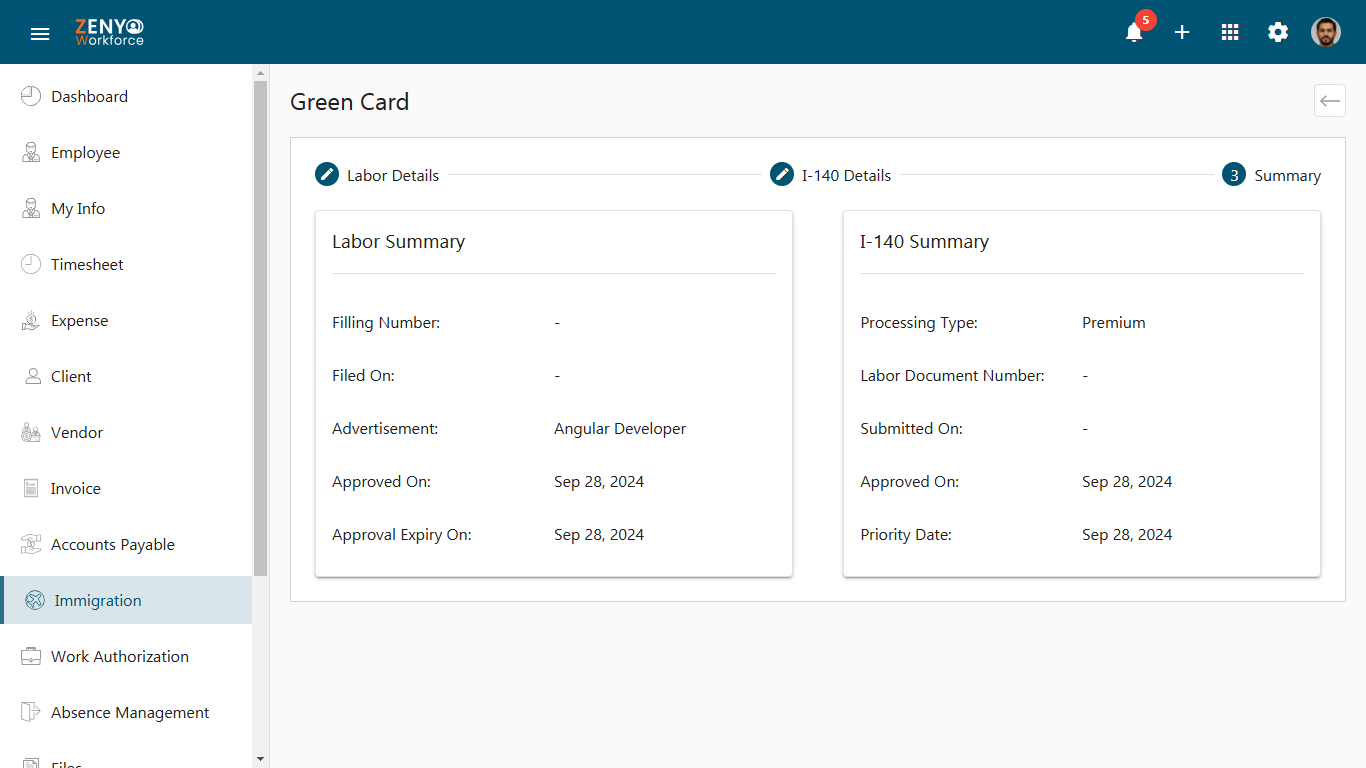
C. Summary
In the Summary section, you can view the summary of Labor Details and I-140 Details.
- Under the Green Card tab, you will find the new Green Card listed along with the Employee name, Job name, Labor Status, I-140 Status, Green Card Classification, Prevailing Wage, Document, and Action.
- You can edit it using the edit icon or view the status history using the history icon.
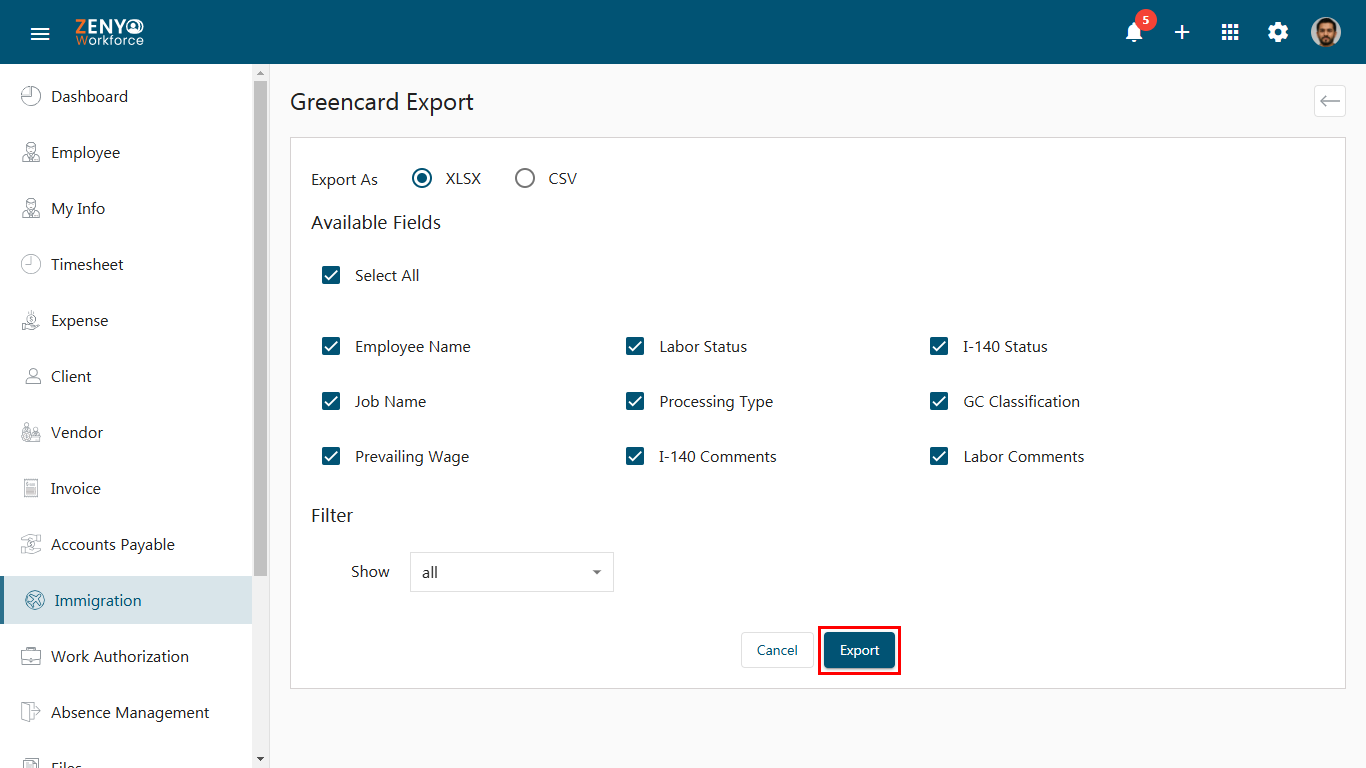
- You can export Green Card details by clicking the export icon and selecting the required fields to download the data in an XLSX or CSV file.
- You can search by Employee Name or Job Name, or utilize the advanced filter option by entering the Status or Processing Type.
Employee Immigration Details
- Navigate to the Employee main menu.
- Select the employee whose profile you want to view.
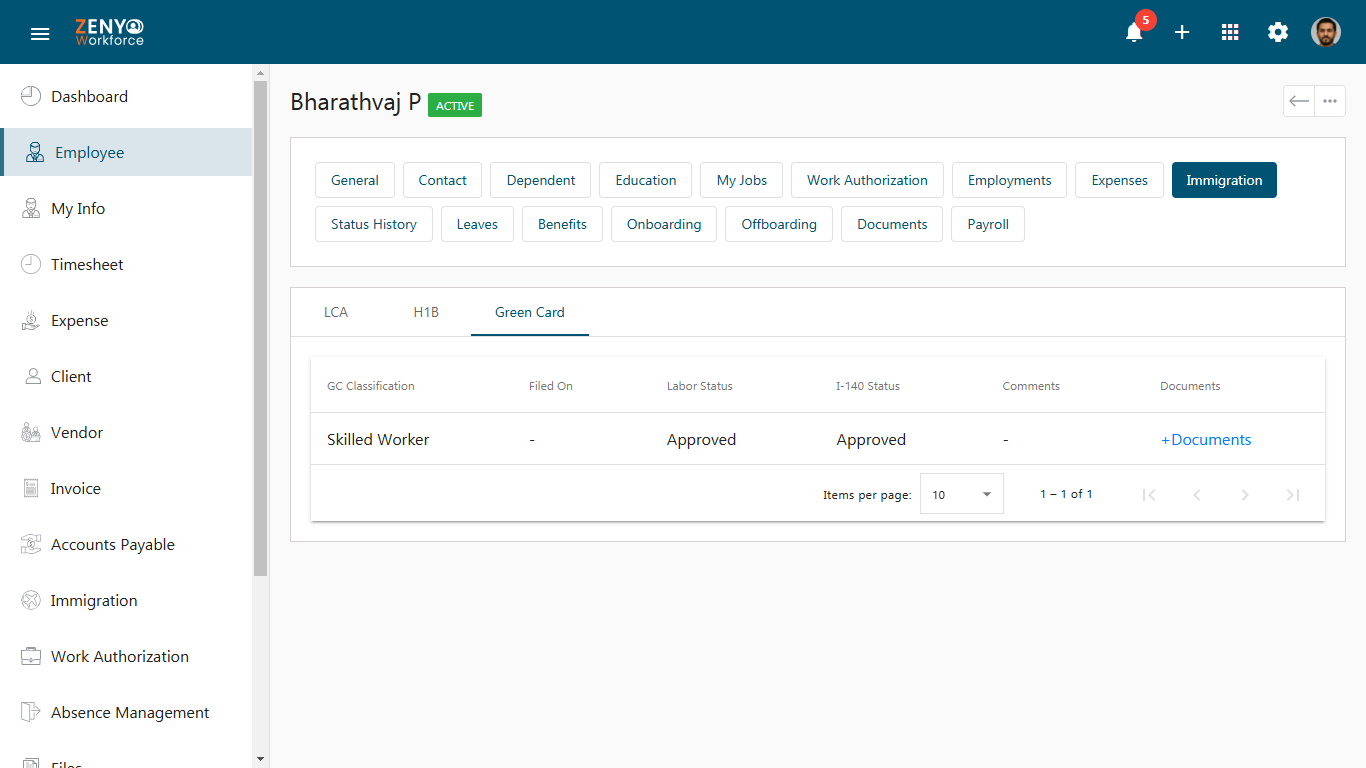
- On the employee page, click on the Immigration tab.
- In this section, you can view the LCA, H1B, and Green Card details.
- You also have the option to download, delete, or view the documents.