The Placement Module in our software simplifies the tracking and management of employee placements. Designed for staffing companies and HR teams, it allows easy entry and monitoring of key placement information.
How to Create a Document Type?
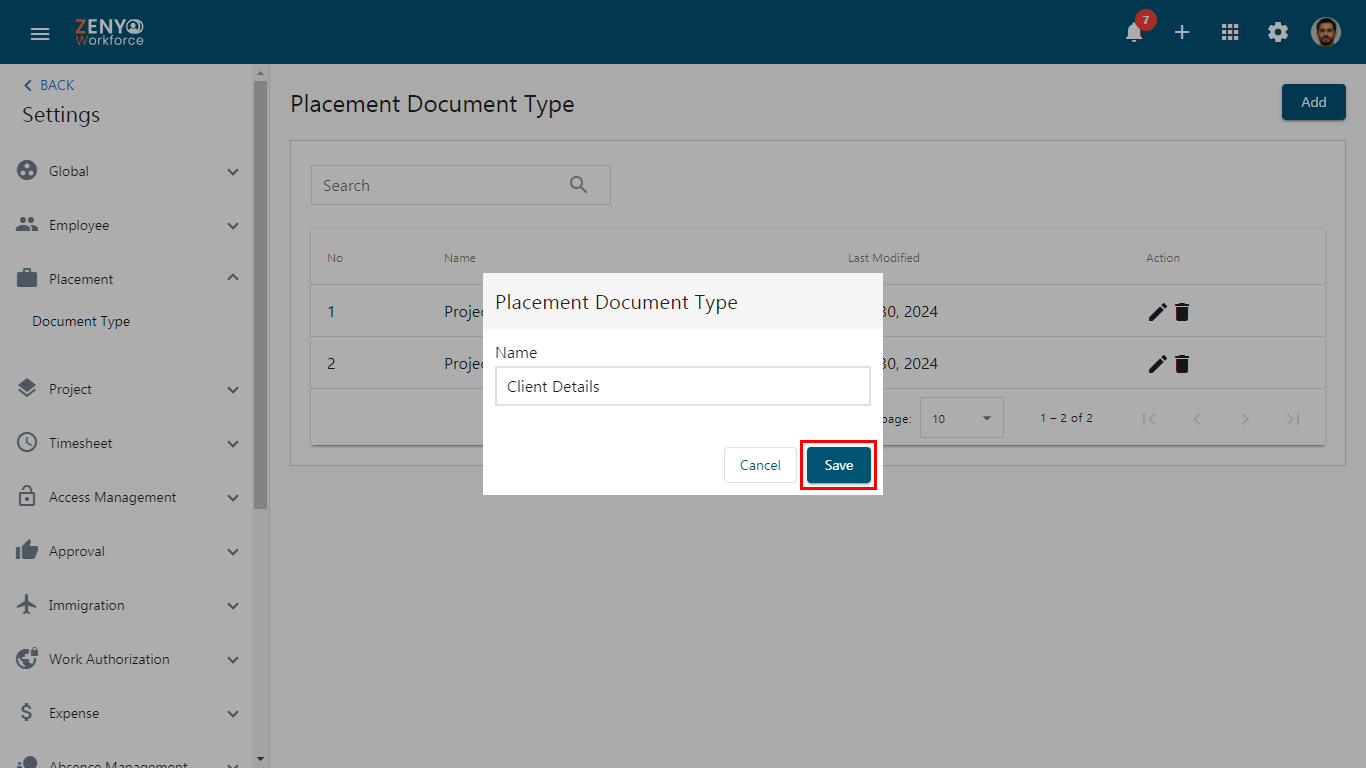
- Click the Settings icon, Navigate to the Placement menu, and select Document type.
- A list of Placement Document Types will be displayed, showing their Name, Last Modified Date, and Action.
- Edit or Delete the Document Type under the Action field.
- Click the Add button to create a new document type, enter the document name, and click Save.
How to Manage Placement Details?
- Click the App icon in the navigation bar and select Placement.
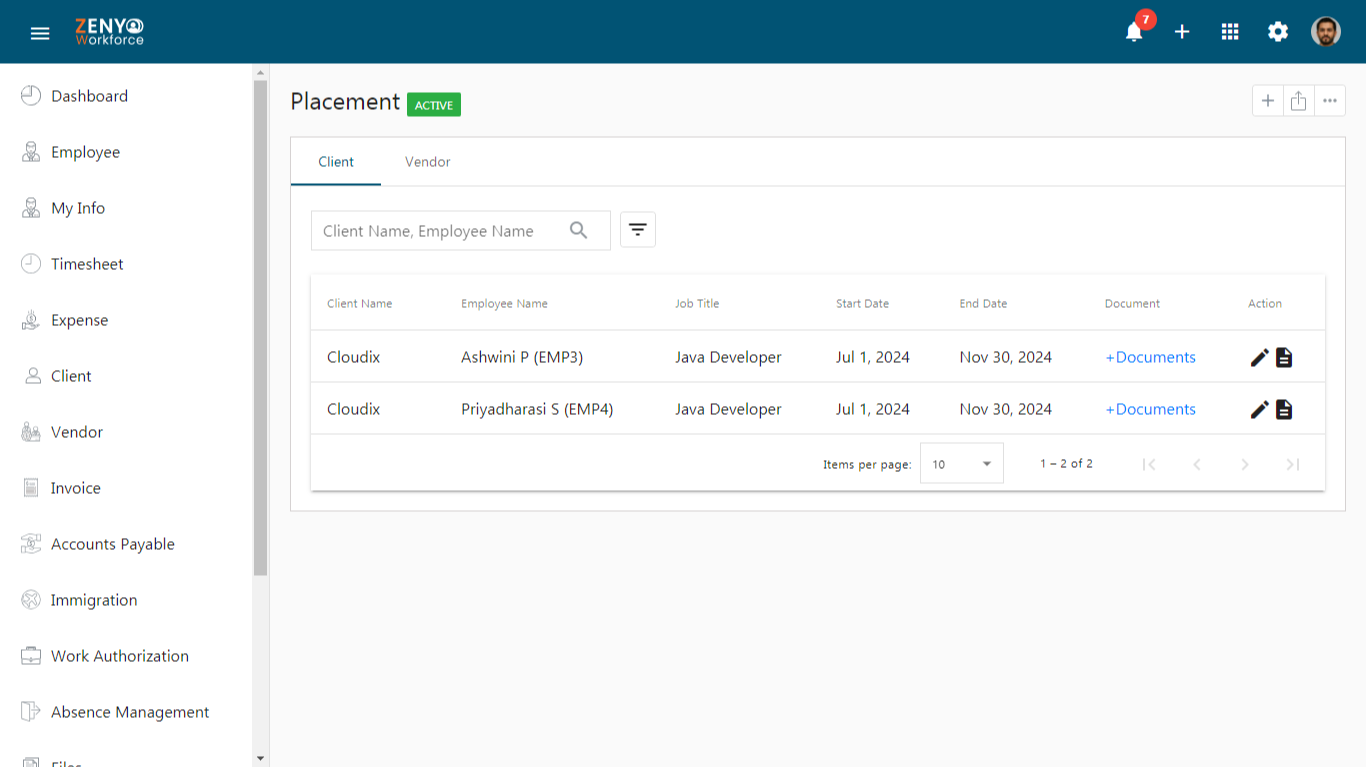
- Active Placement details appear under the Client and Vendor tabs.
How to Add a Placement?
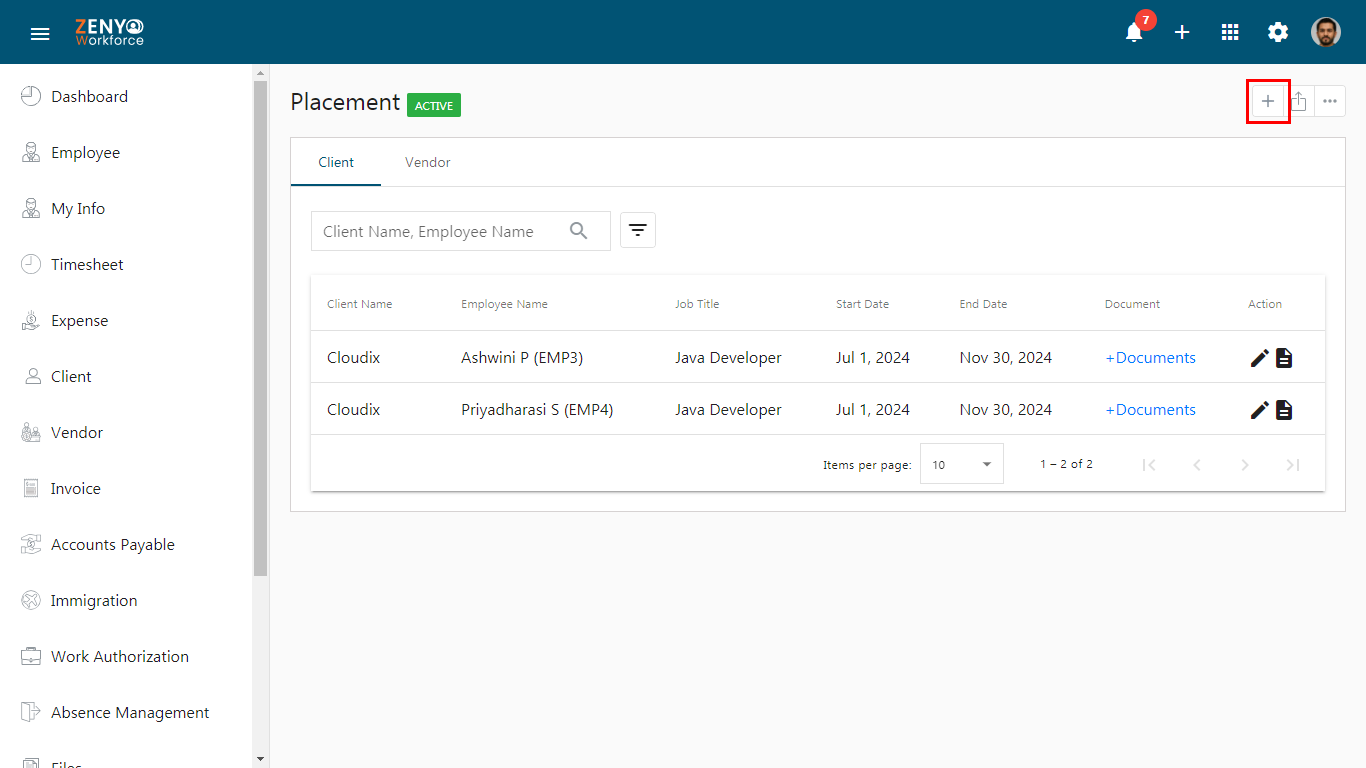
- Click on the Add icon to add a new placement.
- Use the dropdown to select an employee and click on Next. Internal employees are not visible in this section.
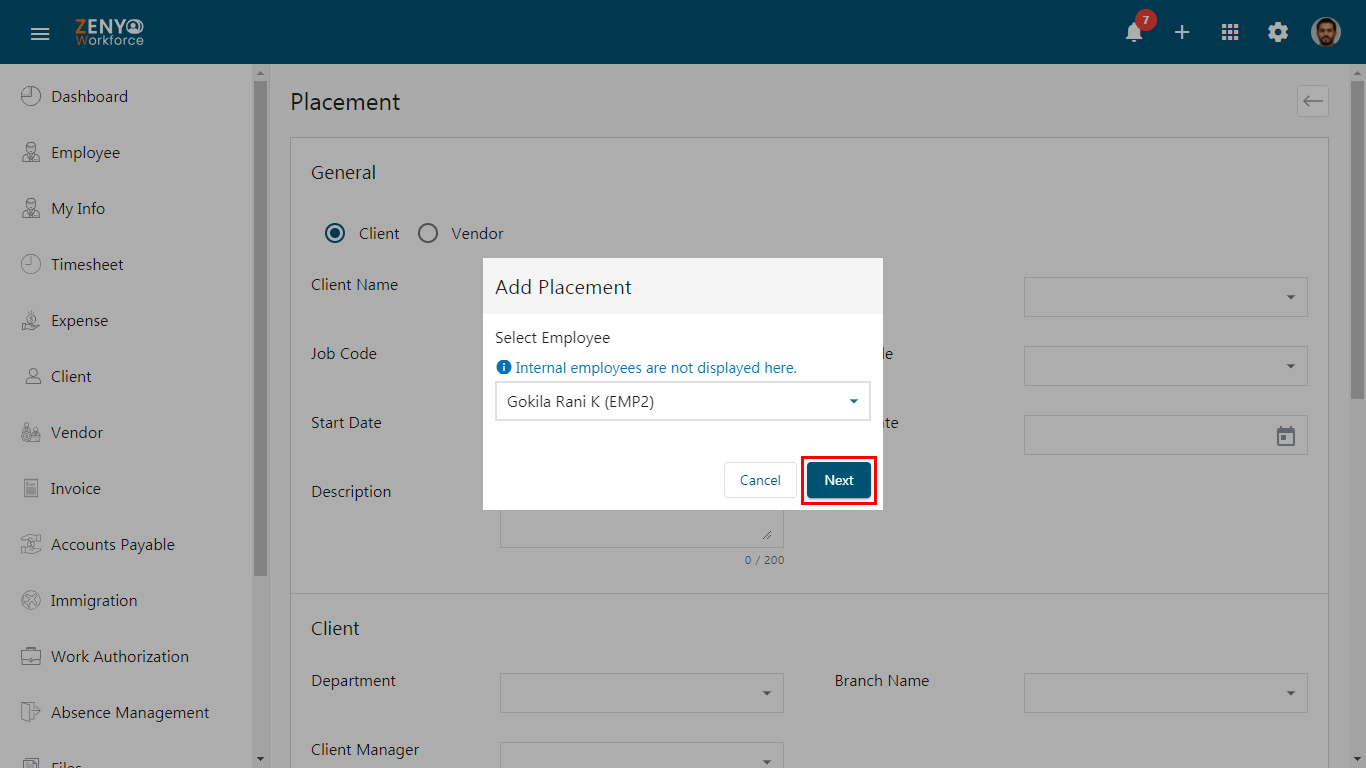
- The selected employee’s name will appear next to the Placement title.
- The addition process comprises the following sections: General, Payment, Others, and Attachments. The Client section is included if the client is chosen for the placement.
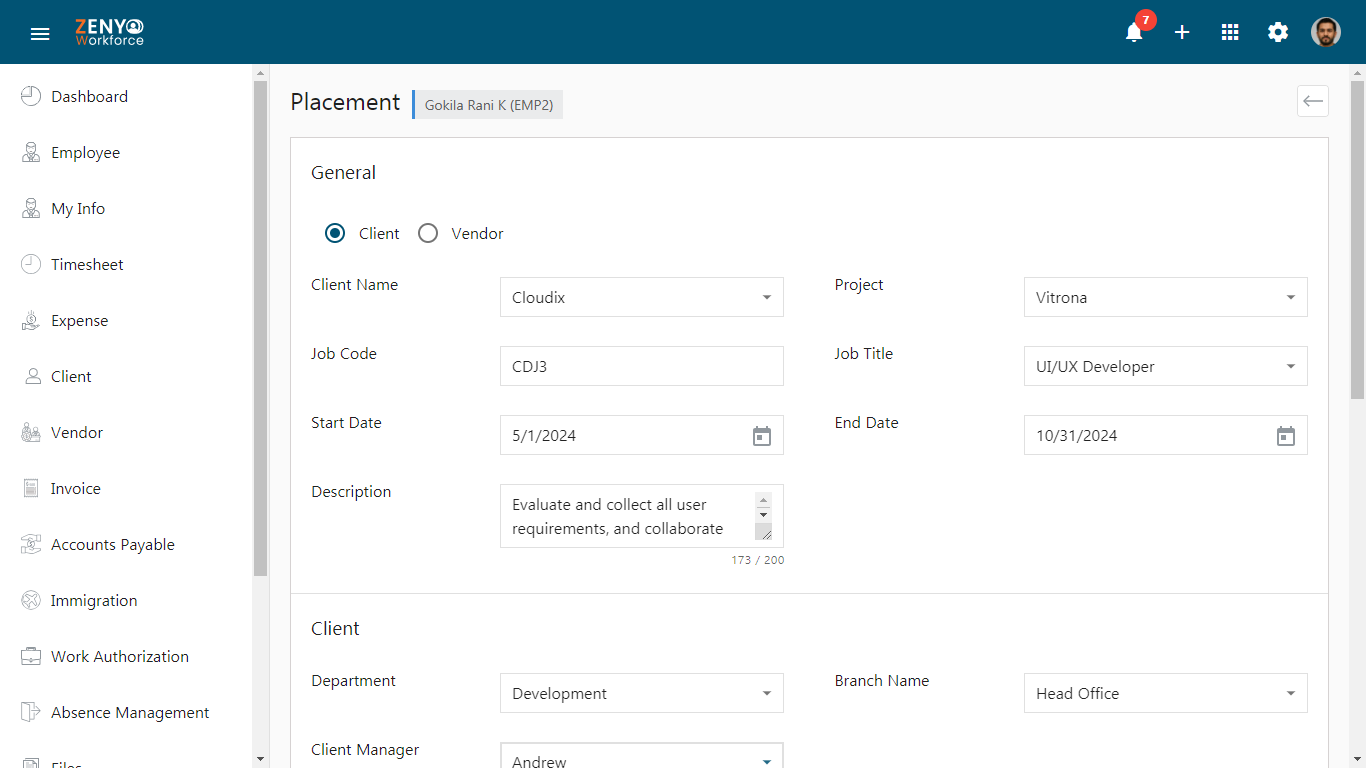
- In the General section, choose either Client or Vendor. When ‘Client’ is chosen, a list of all active clients is listed in the drop-down. Similarly, when you choose ‘Vendor’, a list of all active vendors is listed. All the projects mapped with this client/vendor are listed in the drop-down. The Job Code will be generated automatically based on the code generation configuration. Fill in the Job Title, Start Date, End Date, and Description.
- Within the Client section, specify the client Department, Branch Name, and Client Manager.
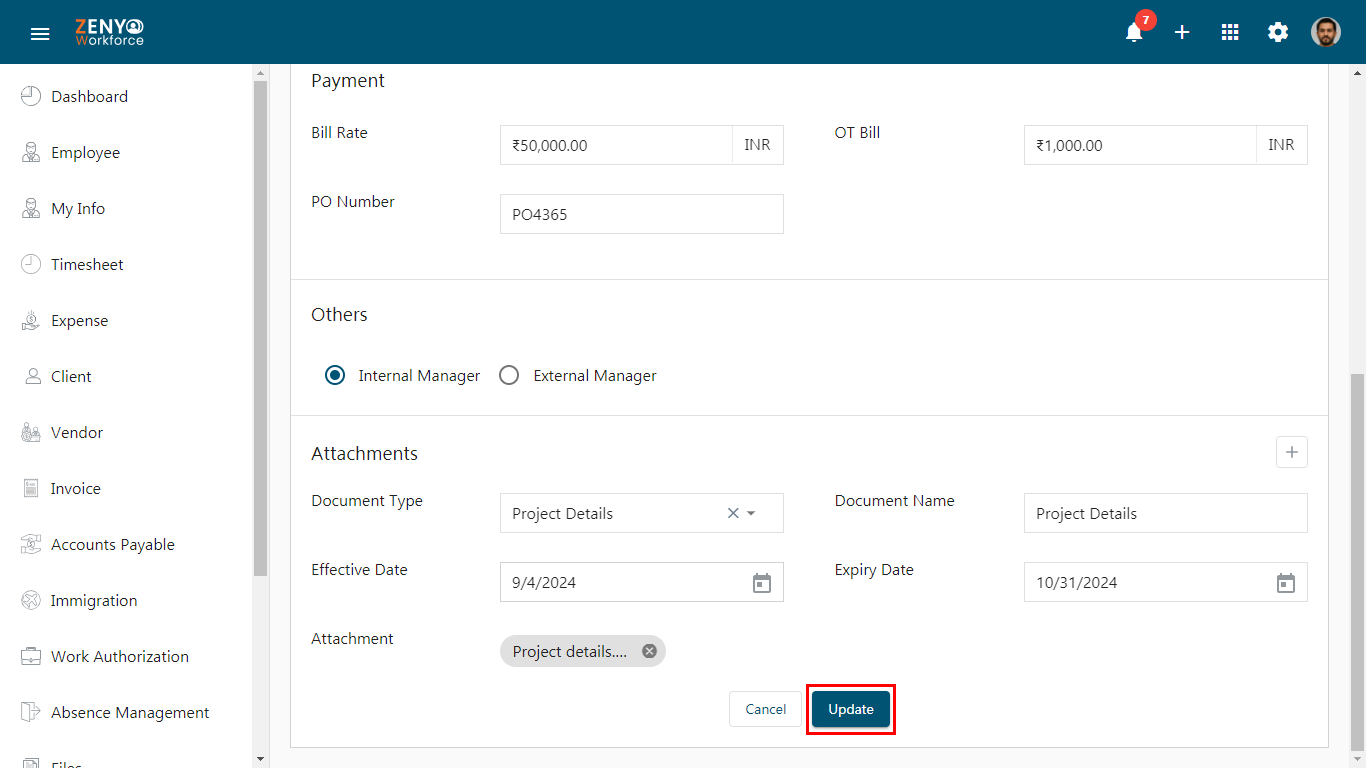
- In the Payment section, enter the basic and OT Bill Rate for the employee, including the Purchase Order number.
- For the Others section, select either Internal or External Manager. If choosing an External Manager, provide their Name and Email.
- In the Attachments section, choose the Document Type, Document Name, Document Effective and Expiry Date, and upload the necessary File. You can add multiple documents by clicking the Add icon.
- Finally, click on Save to complete the placement process successfully.
Client Placement
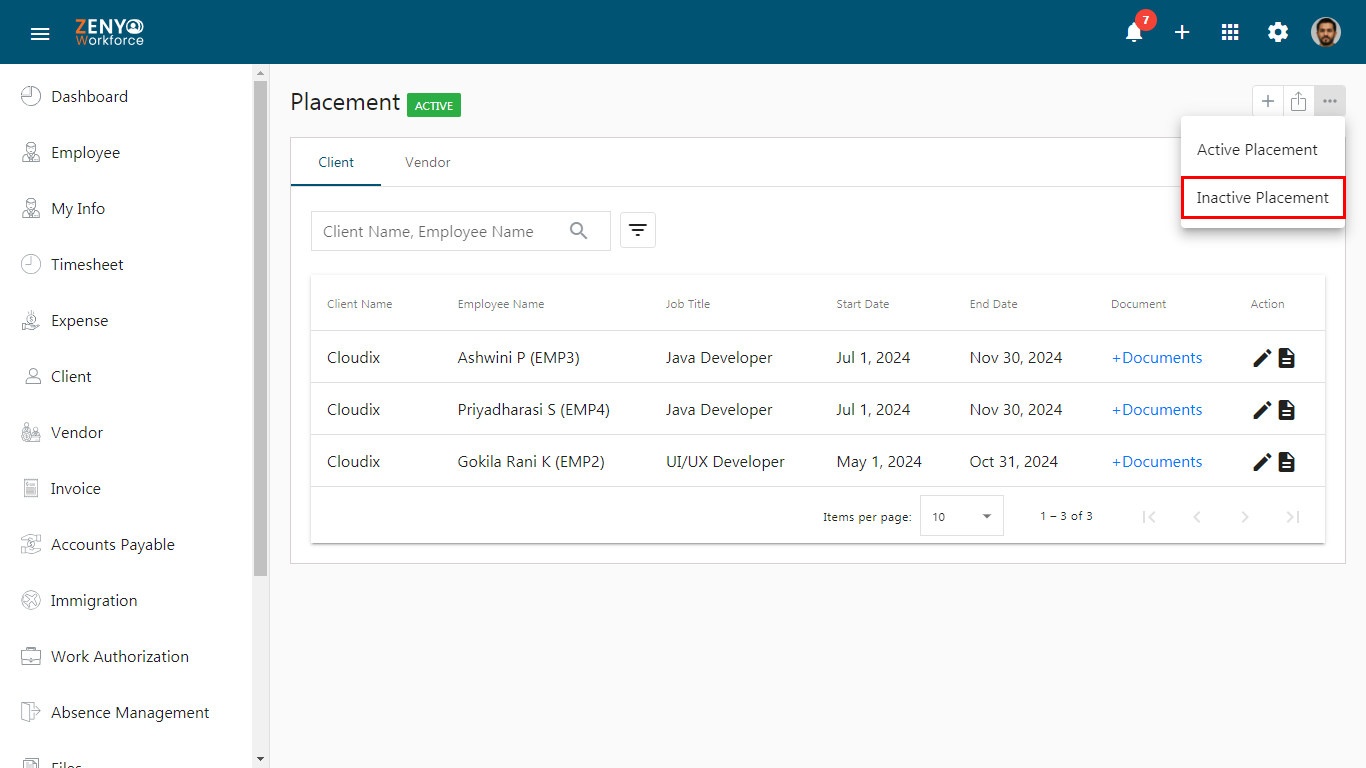
- Client Name, Employee Name, Job Title, Start Date, End Date, Document, and Action details are displayed.
- Search for a Placement using Employee Name or Client Name. Use advanced filters to search for a placement by giving the Job Title, Start Date, and End Date.
- Edit or View the placement under the Action field.
- Click the Edit icon to edit the placement details and after changes, click Update.
Note: Client/Vendor Name can’t be changed.
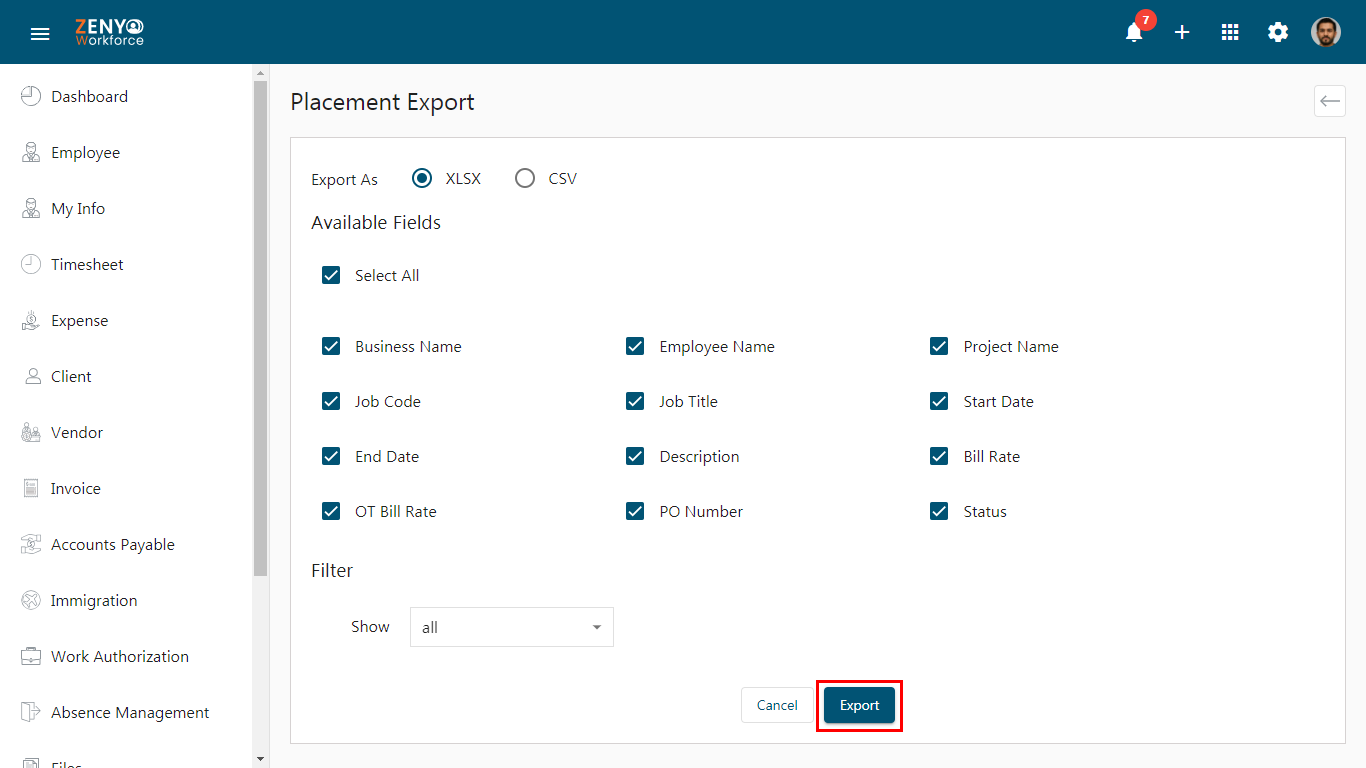
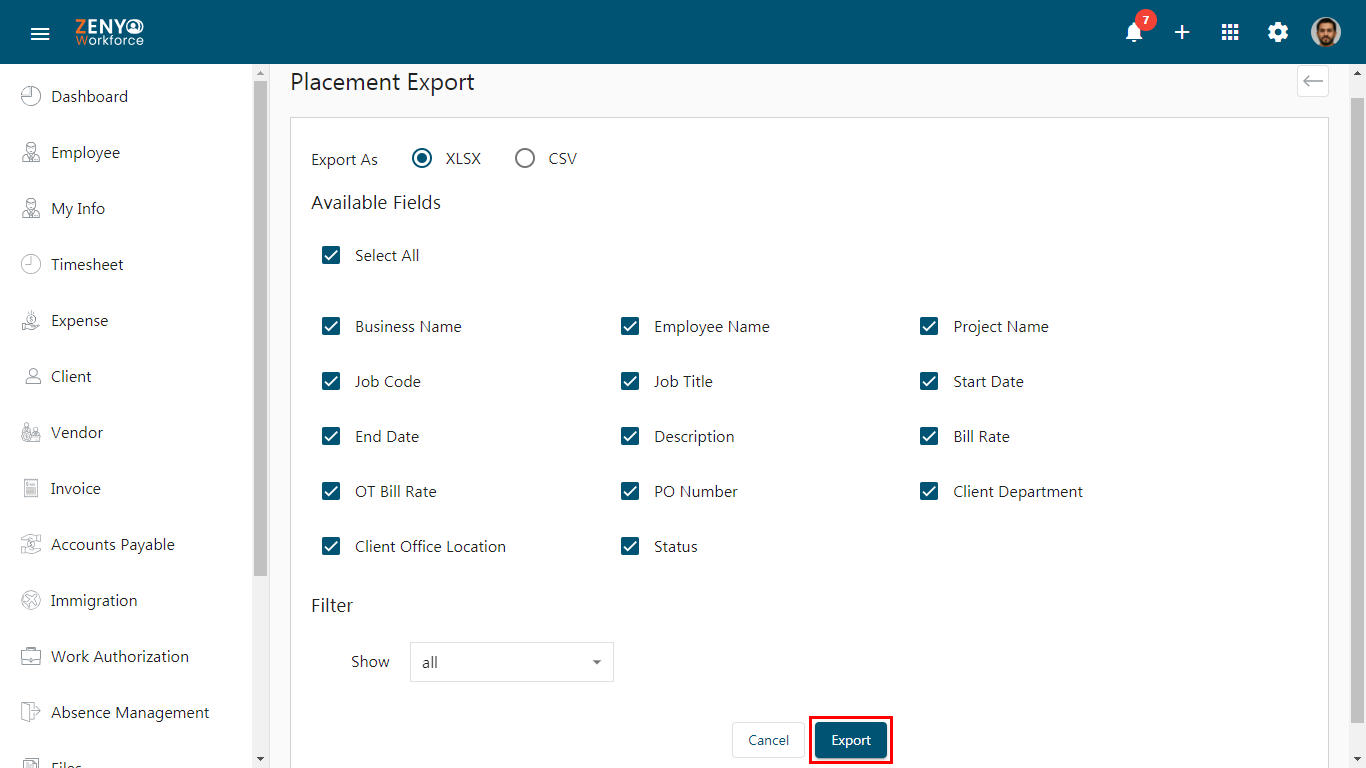
- Click the Export icon to export the client placement list in XLSX or CSV format. Select the desired format, either XLSX or CSV. Choose the fields that you want to include in the exported file. Add filters, if needed, to refine the data according to your requirements. Finally, click export.
- Click the More icon and choose Active or Inactive Placements to view the list of active or inactive placements.
Vendor Placement
- Vendor Name, Employee Name, Job Title, Start Date, End Date, Document, and Action details are displayed.
- Search for a Placement using Employee Name or Vendor Name. Use advanced filters to search for a placement by giving the Job Title, Start Date, and End Date.
- Edit or View the placement under Action.
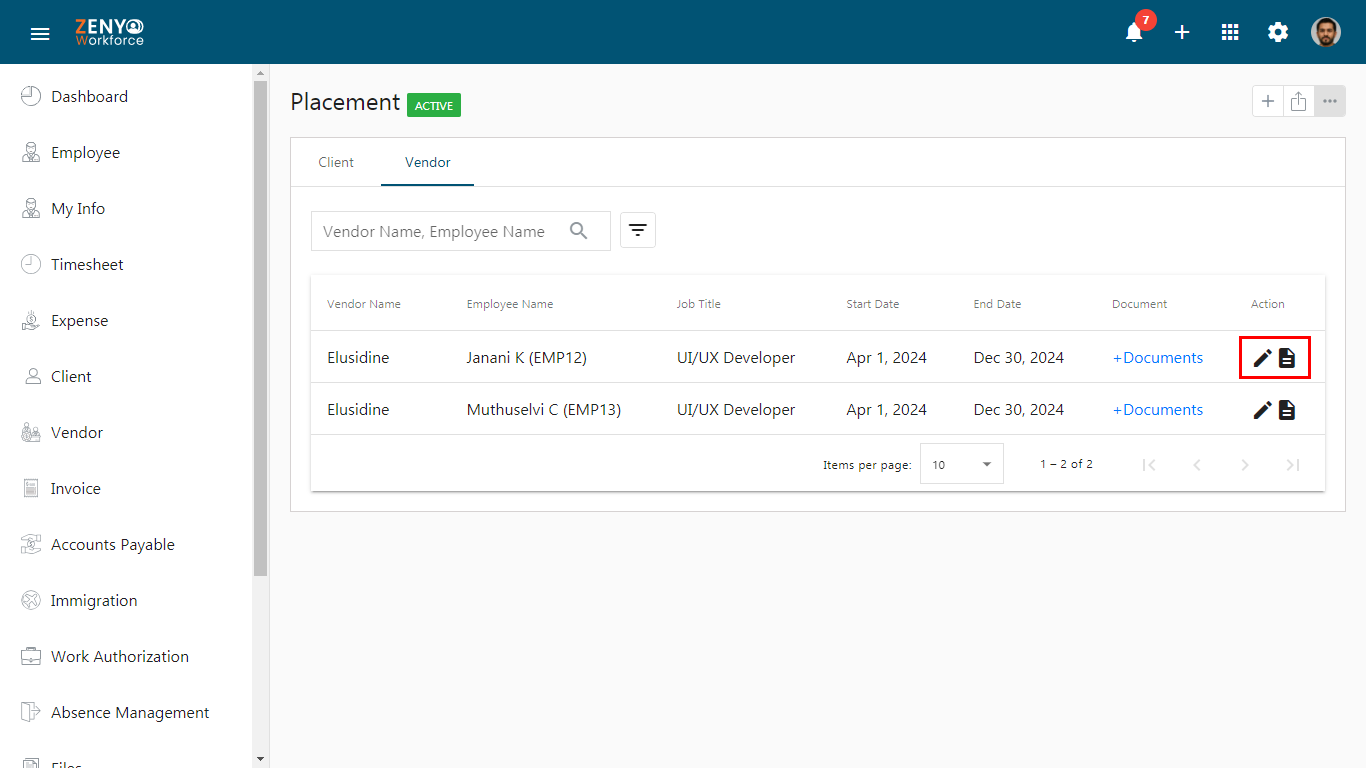
- Click the Edit icon to edit the placement details and after changes, click Update. You can change the Placement status from Active to Inactive.
Note: Client/Vendor Name can’t be changed and once the Placement is moved to Inactive status, it cannot be reactivated.
- Click the More icon to check the list of Inactive Placements.
- Click the Export icon to export the vendor placement list in XLSX or CSV format. Select the desired format, either XLSX or CSV. Choose the fields that you want to include in the exported file. Add filters, if needed, to refine the data according to your requirements. Finally, click export.