The My Reports and Groups allow users to personalize their reporting experience and efficiently manage their custom and shared reports. These features enable employees to access, organize, and share reports tailored to their specific needs and responsibilities.
My Reports
- Click on the Reports menu. It comprises three tabs: My Report, All Reports, and Groups.
- Click on the My Reports tab. It has three subtabs:
- Show All: Displays custom-created reports by the employee and also displays shared reports and groups (custom & standard) with the employee.
- Show Reports: Lists only the reports that are created or shared with the employee, excluding any groups.
- Show Groups: Displays only the groups shared with the employee.
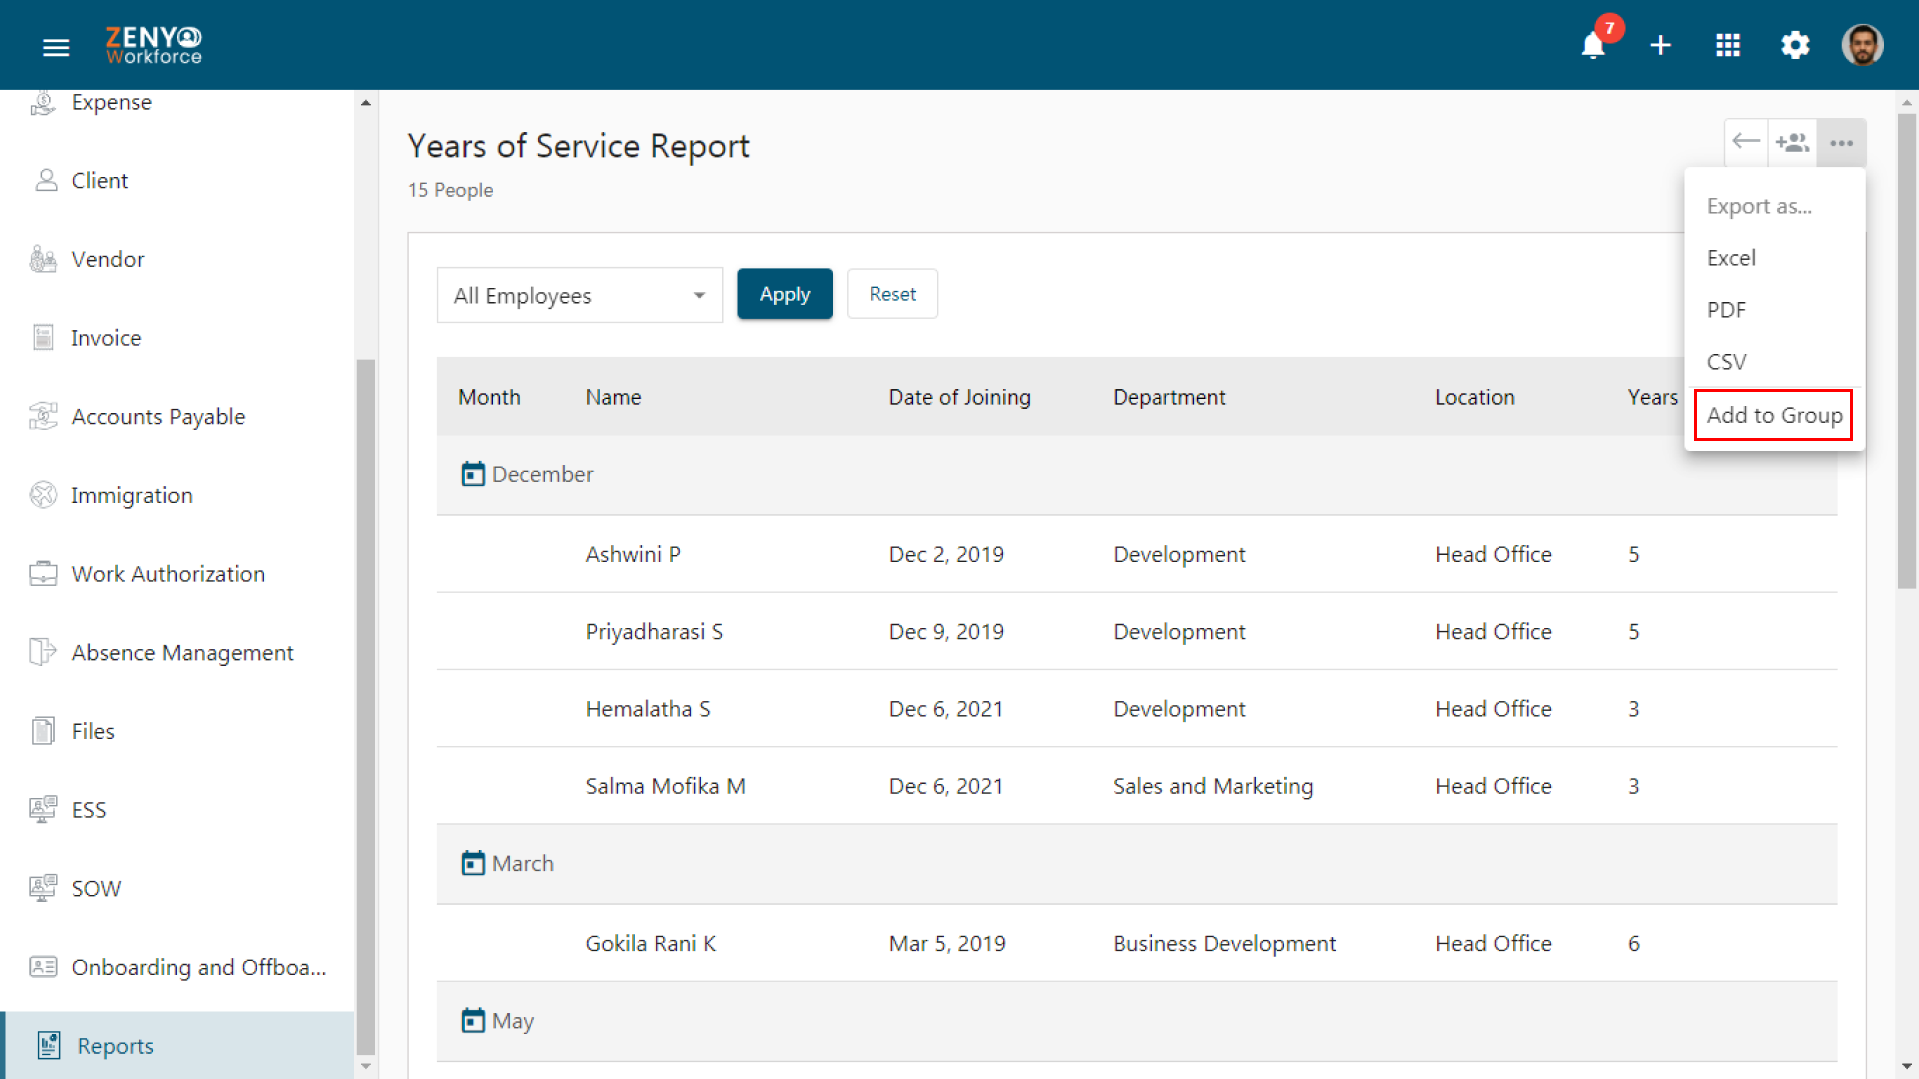
- Click the report to Edit, Share, Export, or Add to Group.
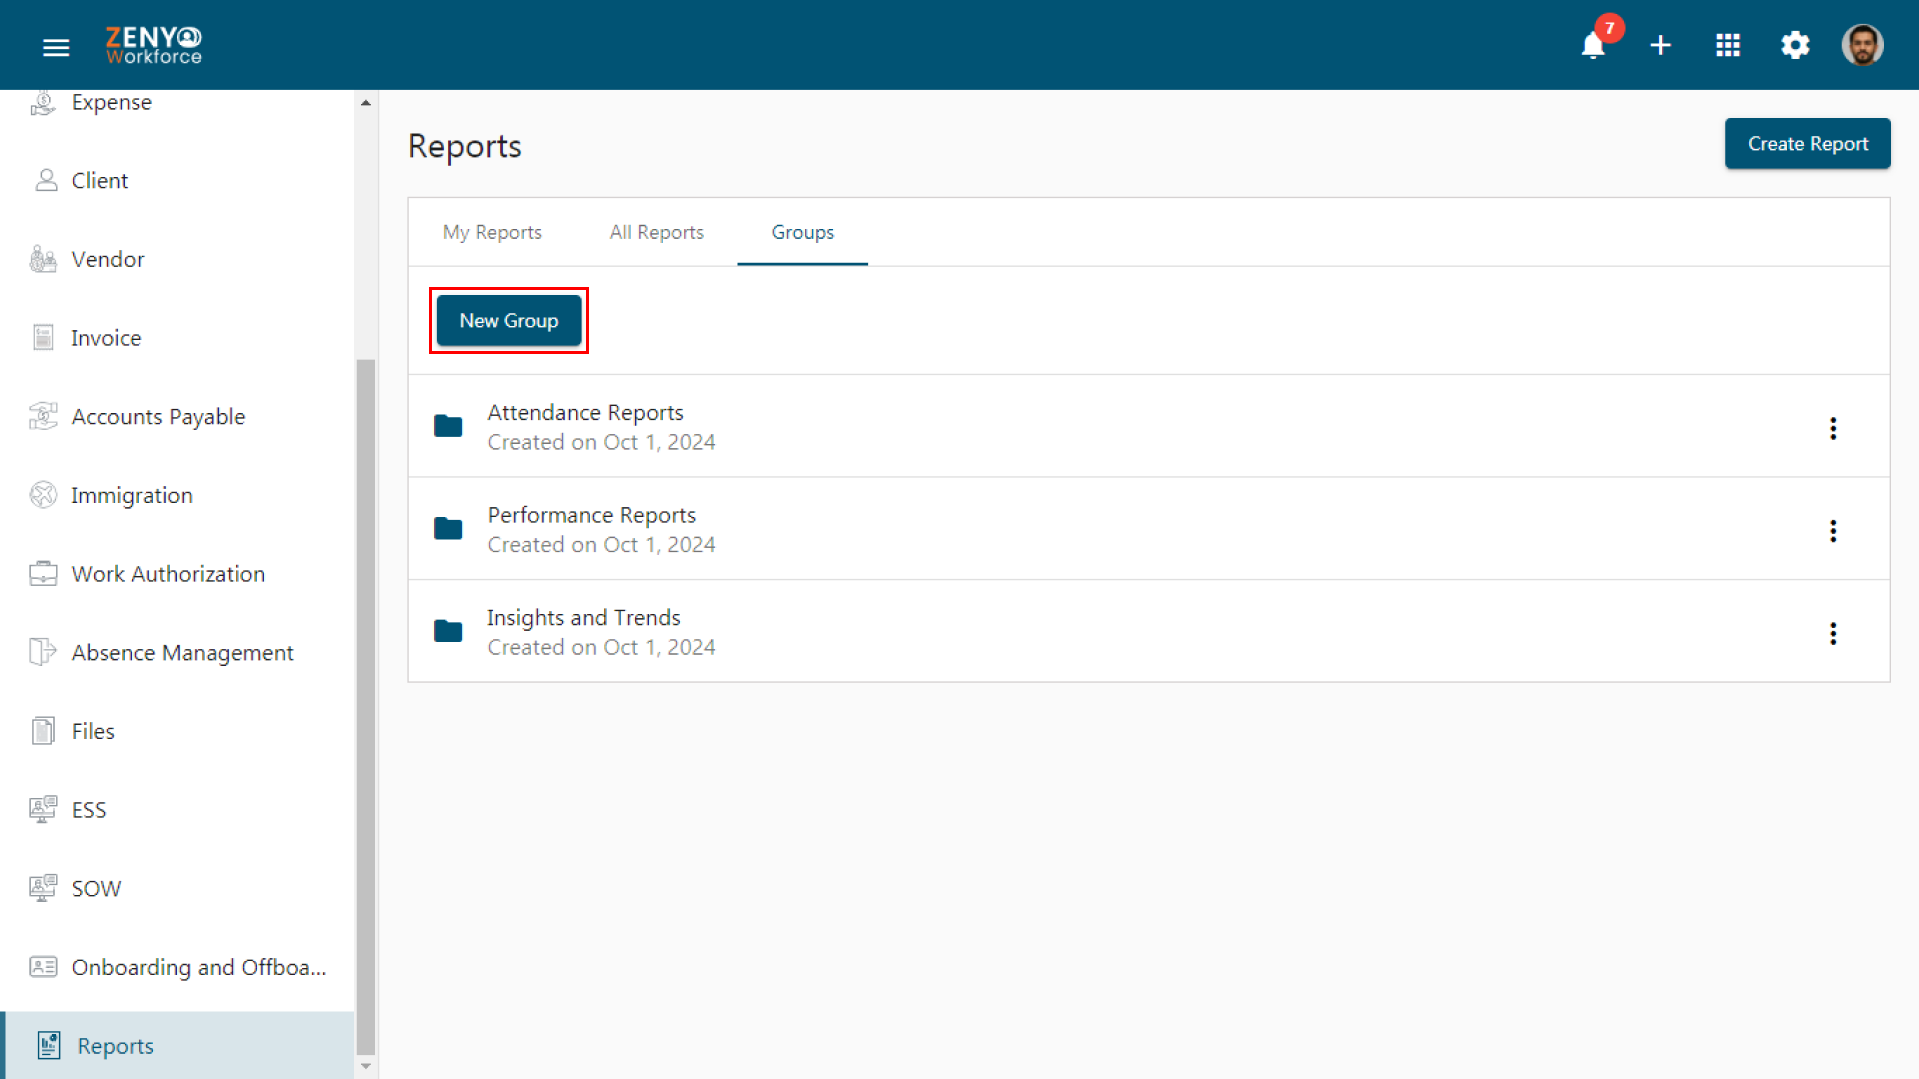
How to Create a Group?
- Navigate to the Groups tab.
- Click the New Group Button.
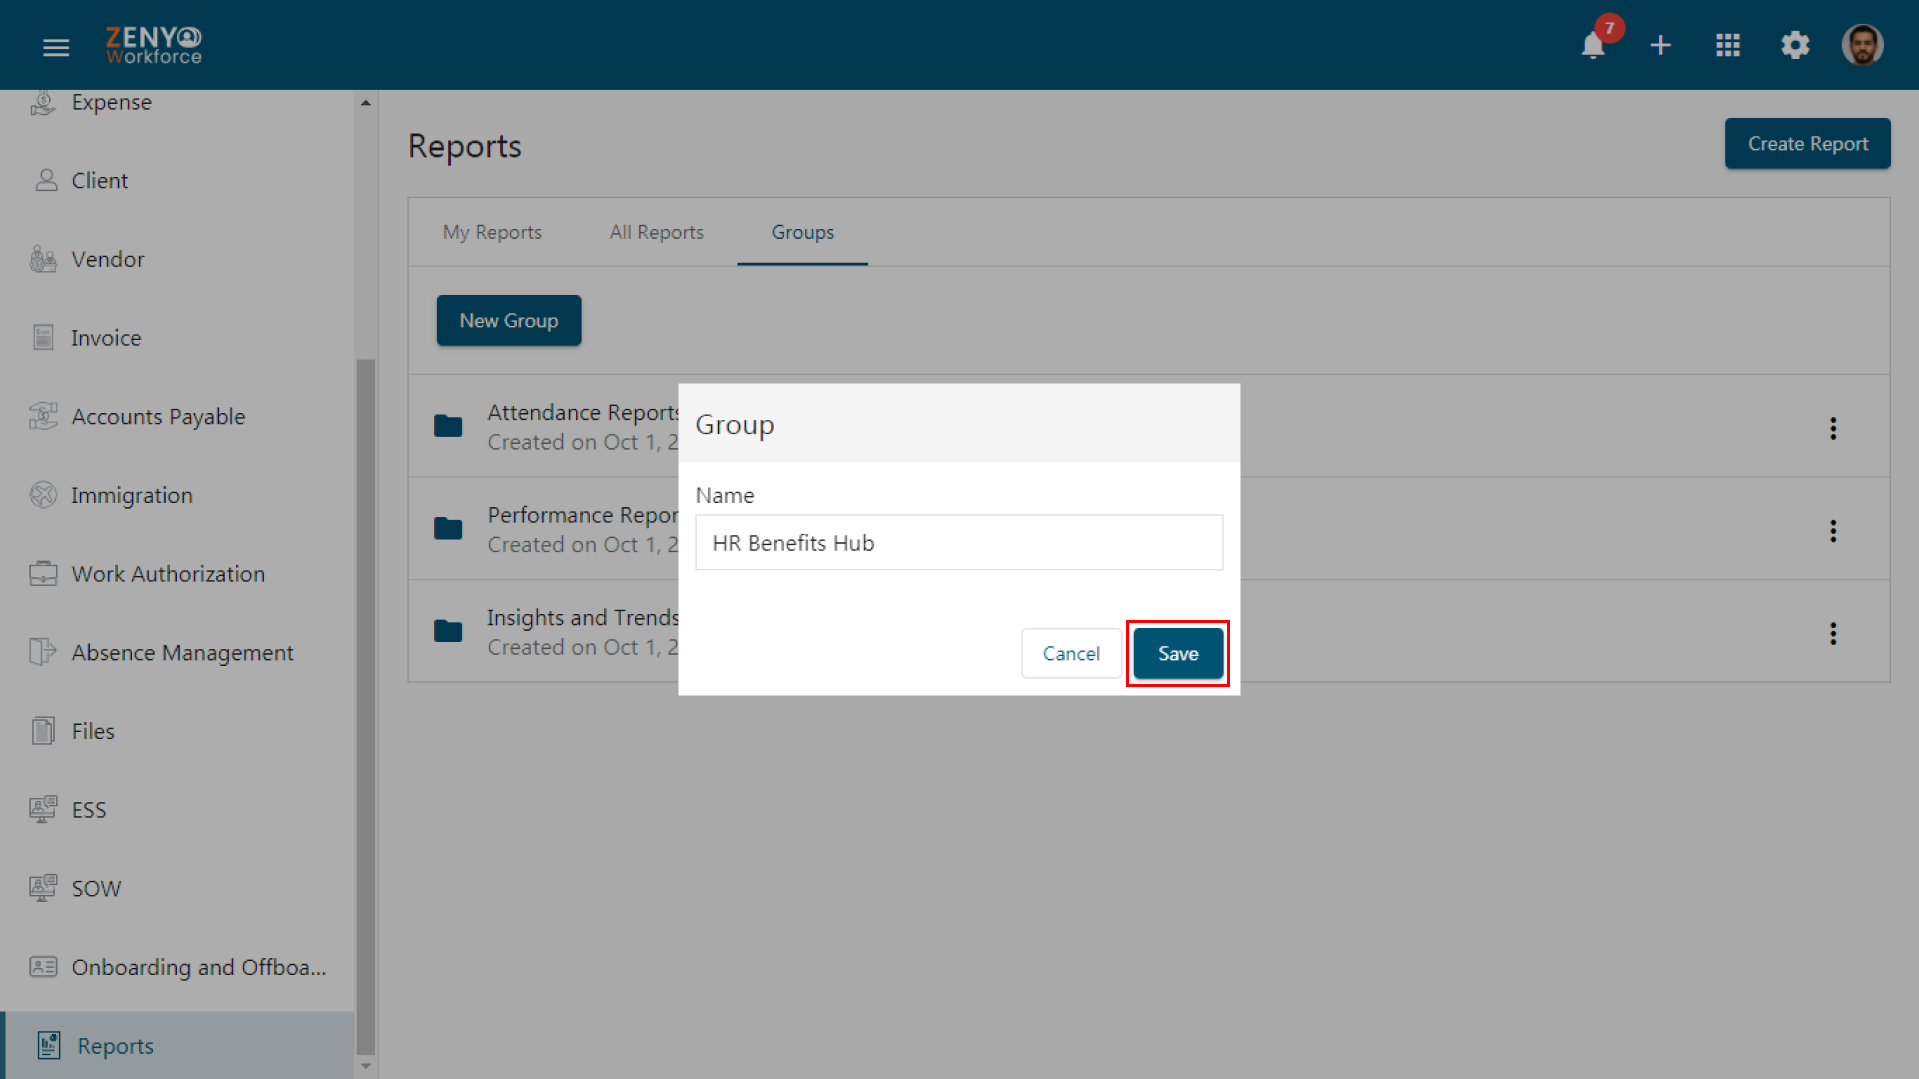
- A pop-up window appears, Enter the Name of the group.
- Click Save.
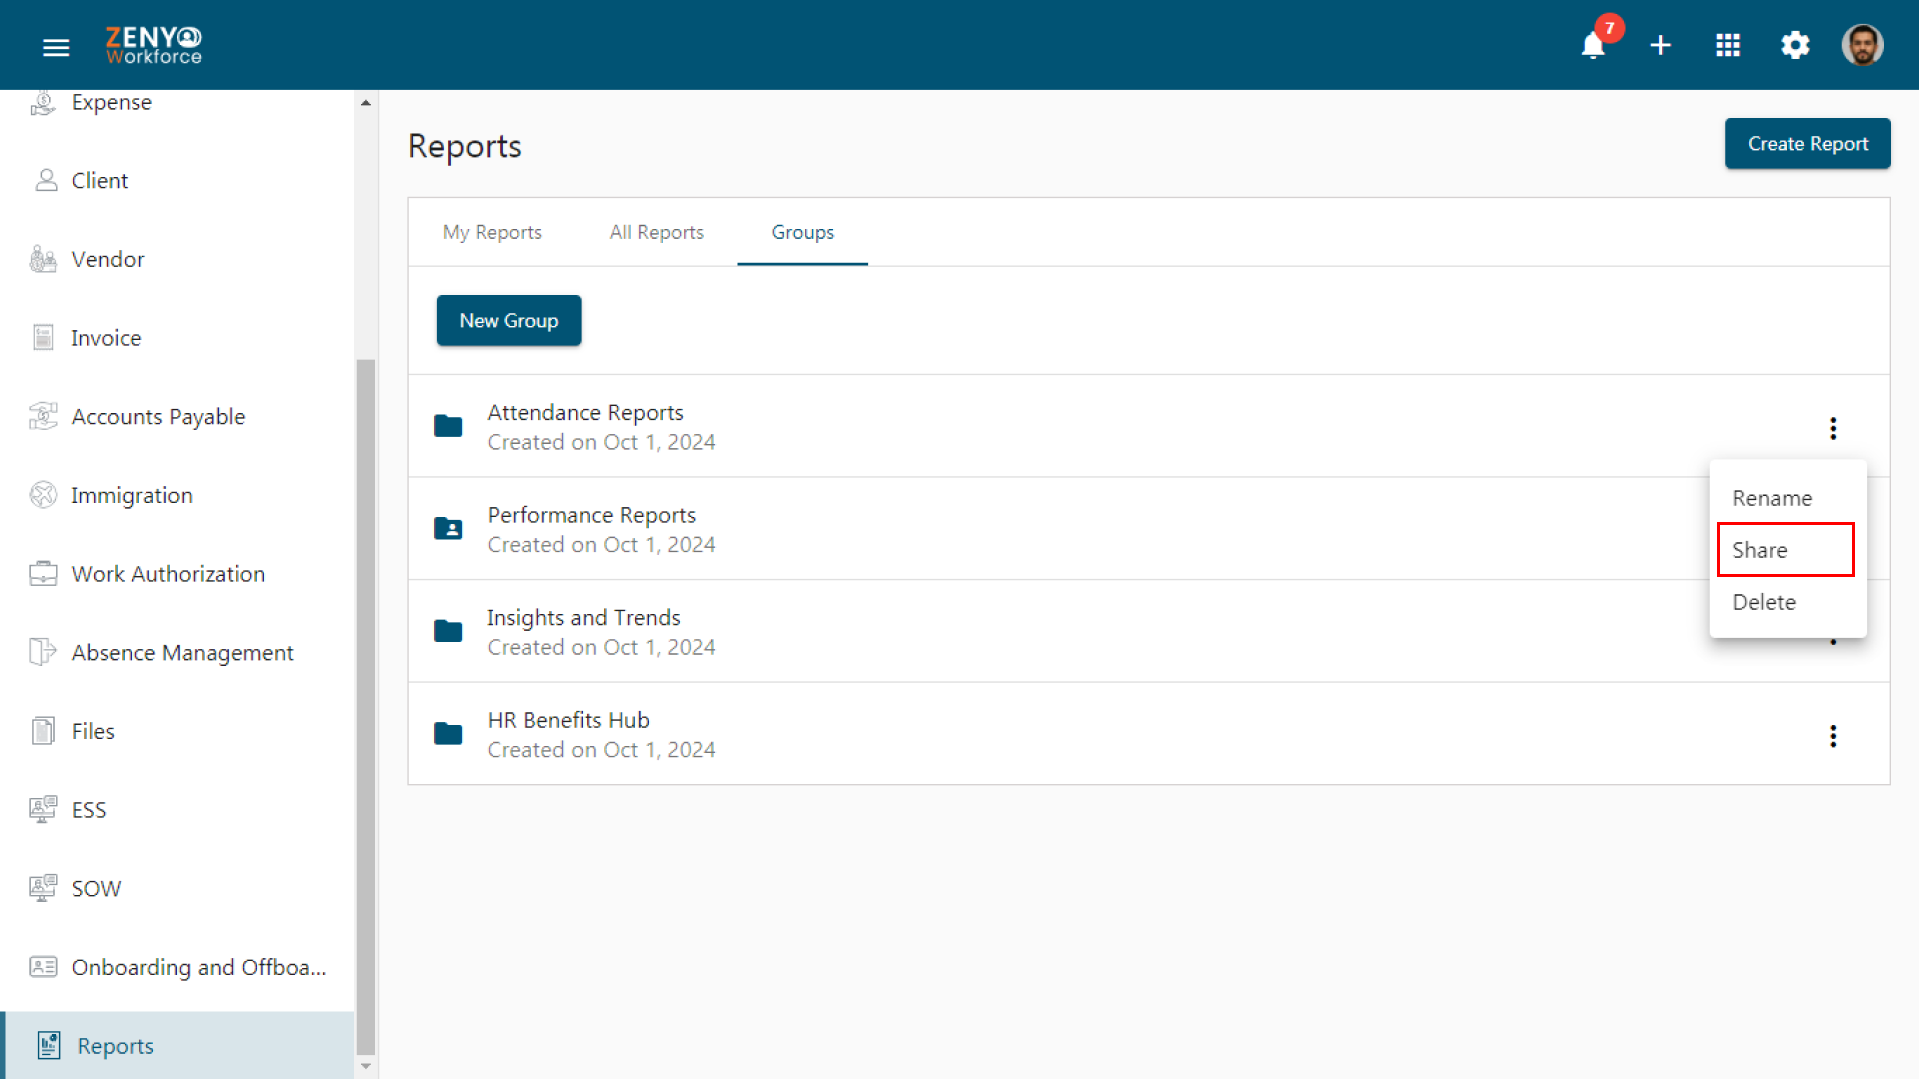
- Click the More icon adjacent to the group. It has three options:
- Rename - Edit the name of the group.
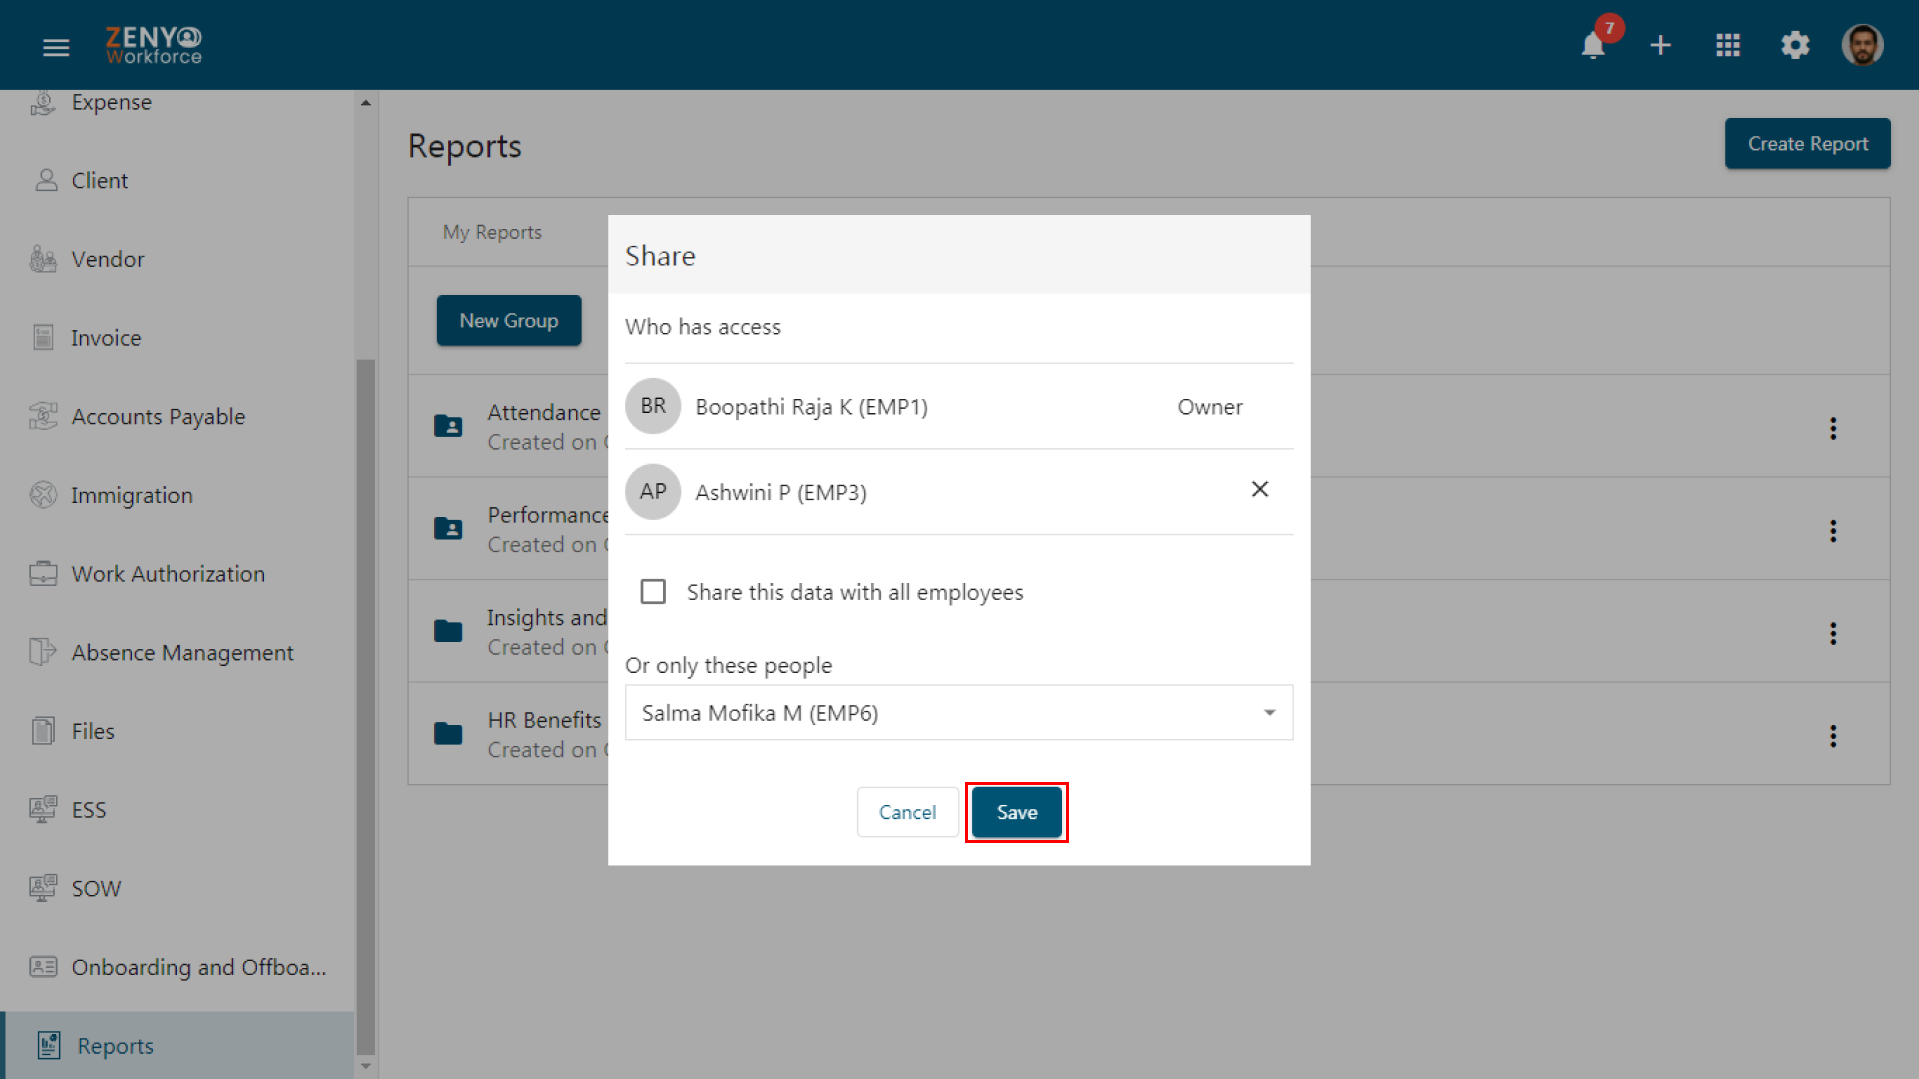
- Share - Click the Share option to share the group. You can either share with all employees by checking the checkbox or select specific people from the dropdown and click Save.
- Delete - Click to delete the group.
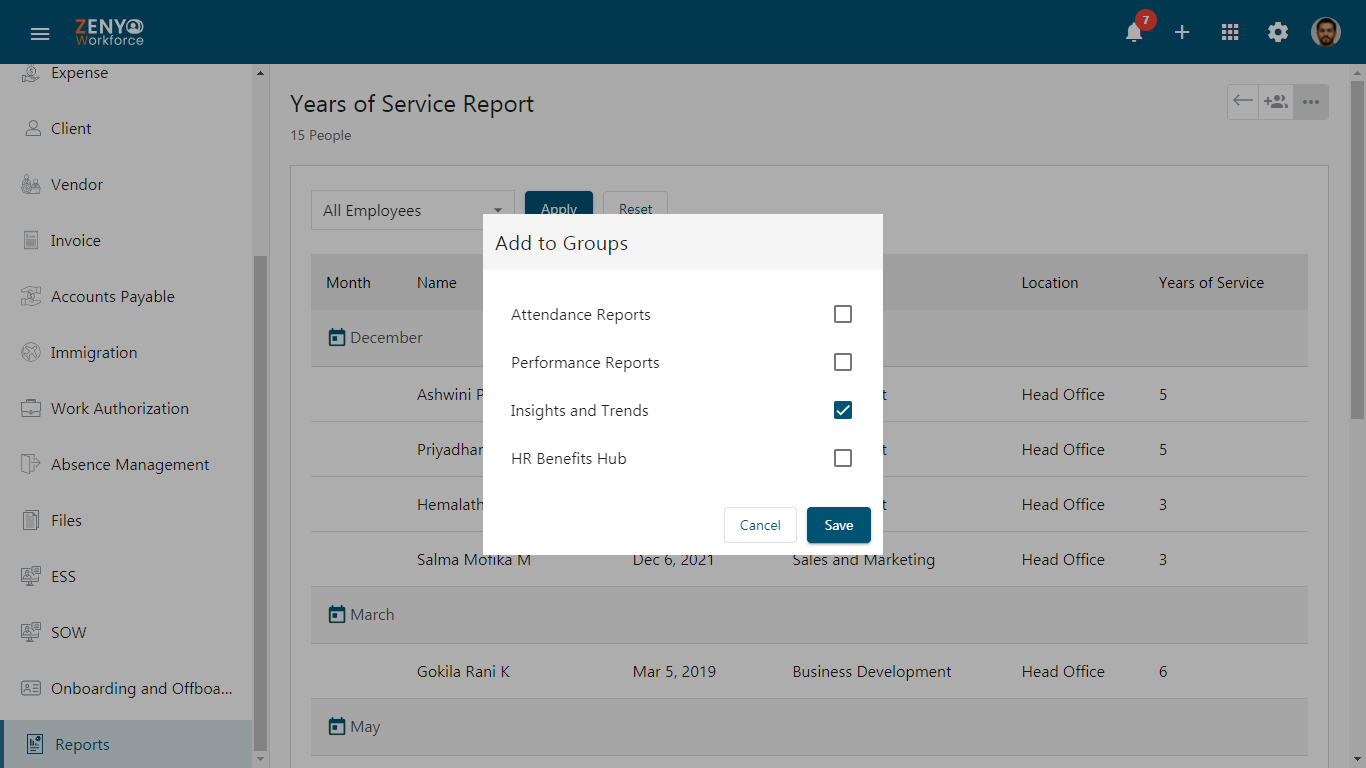
How to Add a Report to the Group?
- Click on the specific report you wish to add to the group either custom or standard report from the All Reports tab.
- Click the More icon and select Add to Group.
- A pop-up window will appear, select the checkbox of the group to which you want to add the report and click Save.