A review setup is the key process for organizing and managing performance evaluations within an organization. It defines the structure of reviews, including participants, workflow, and timelines, ensuring the process aligns with company goals. By outlining clear steps for review cycles and forms, it streamlines evaluations, enabling effective monitoring, constructive feedback, and employee development.
Accessing Review
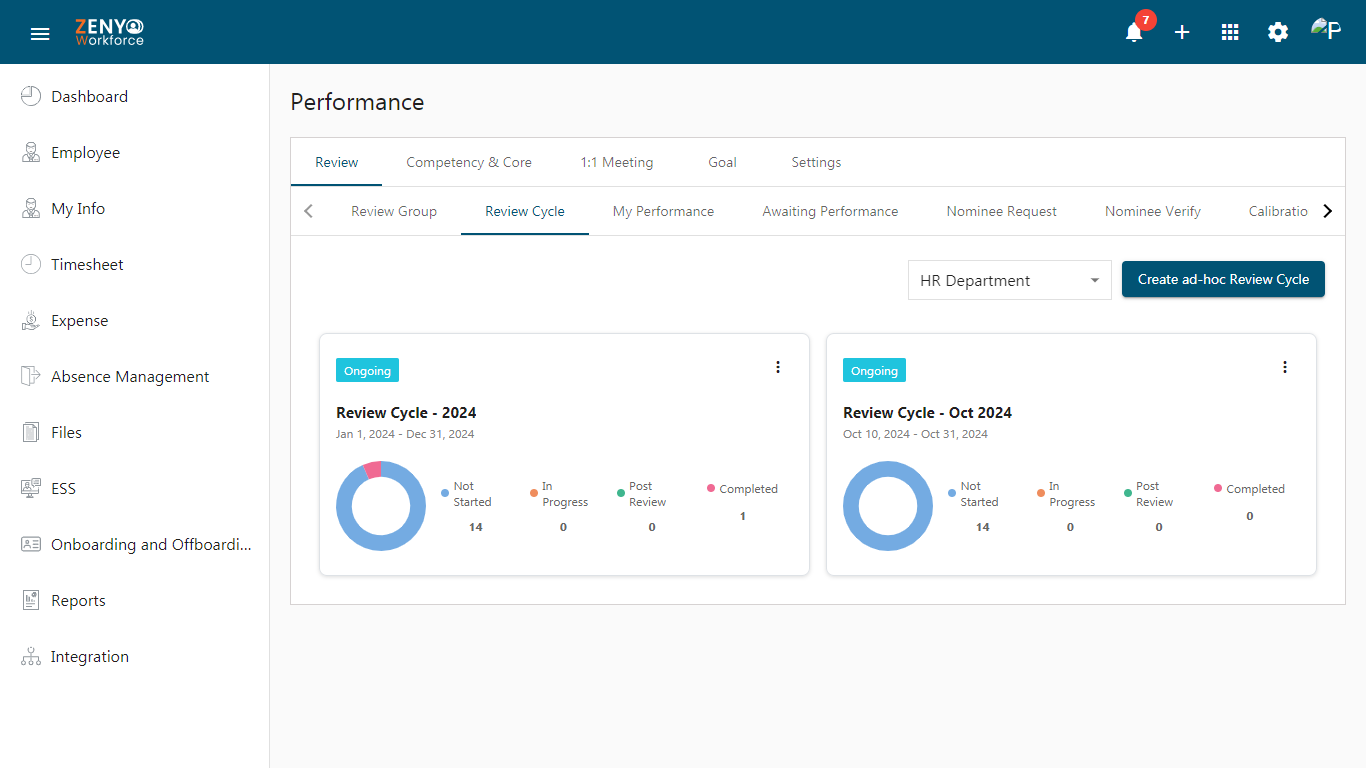
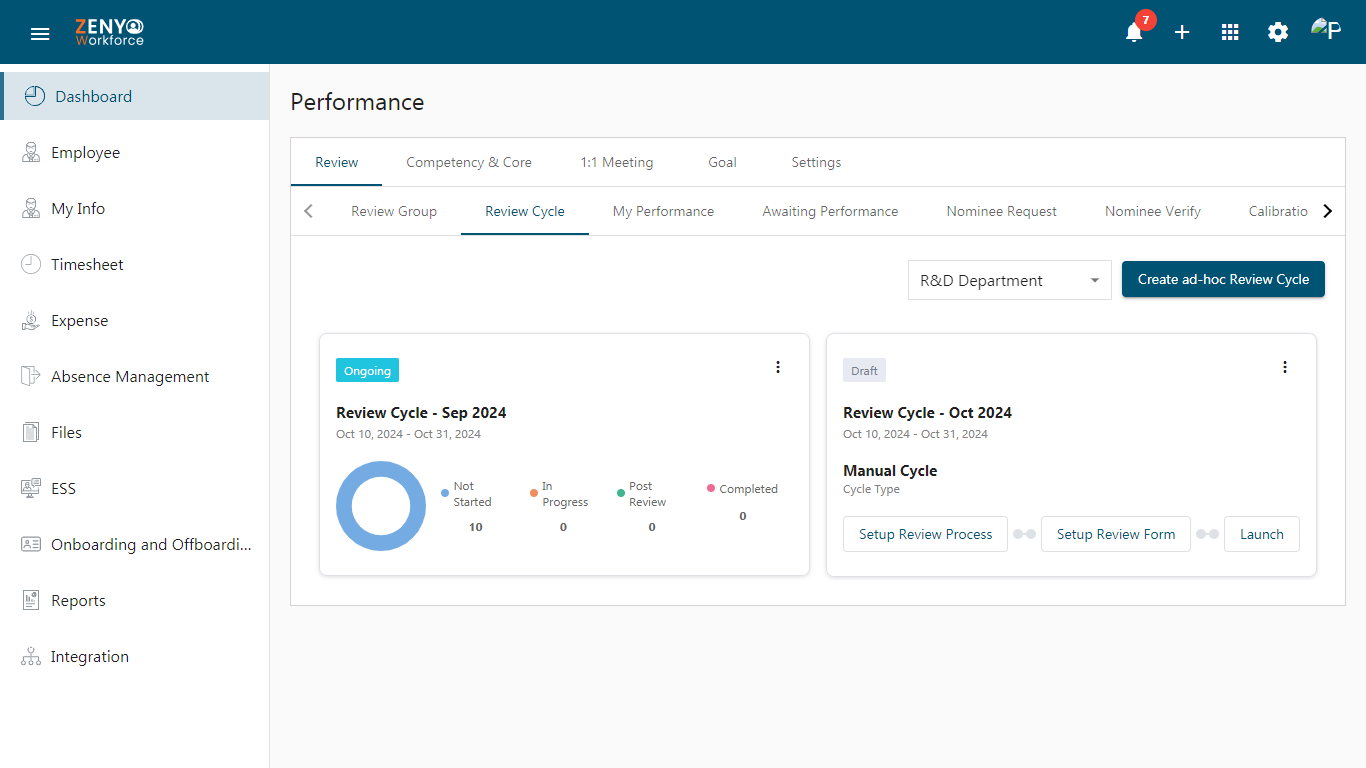
- To access the Review tab, click the App icon in the navigation bar and select Performance.
- In the Review tab, you will find the following sections:
- Review Group
- Review Cycle
- My Performance
- Awaiting Performance
- Nominee Request
- Nominee Verify
- Calibration
- Write Summary
Creating a Review Group
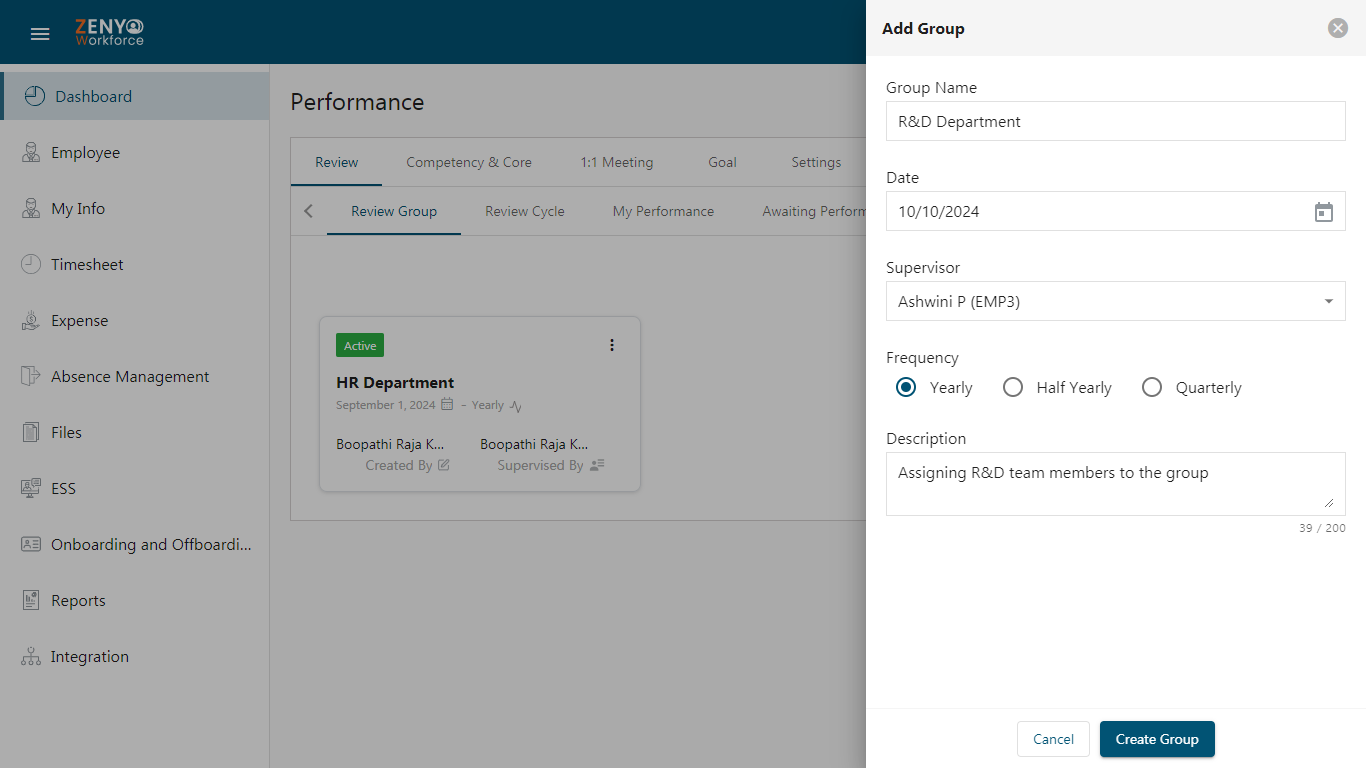
- To create a Review Group, Click the Add Group button.
- Enter the Group Name, set the Date, select the Supervisor from the dropdown options, choose the Frequency, and provide a brief Description.
- Click the Create Group button.
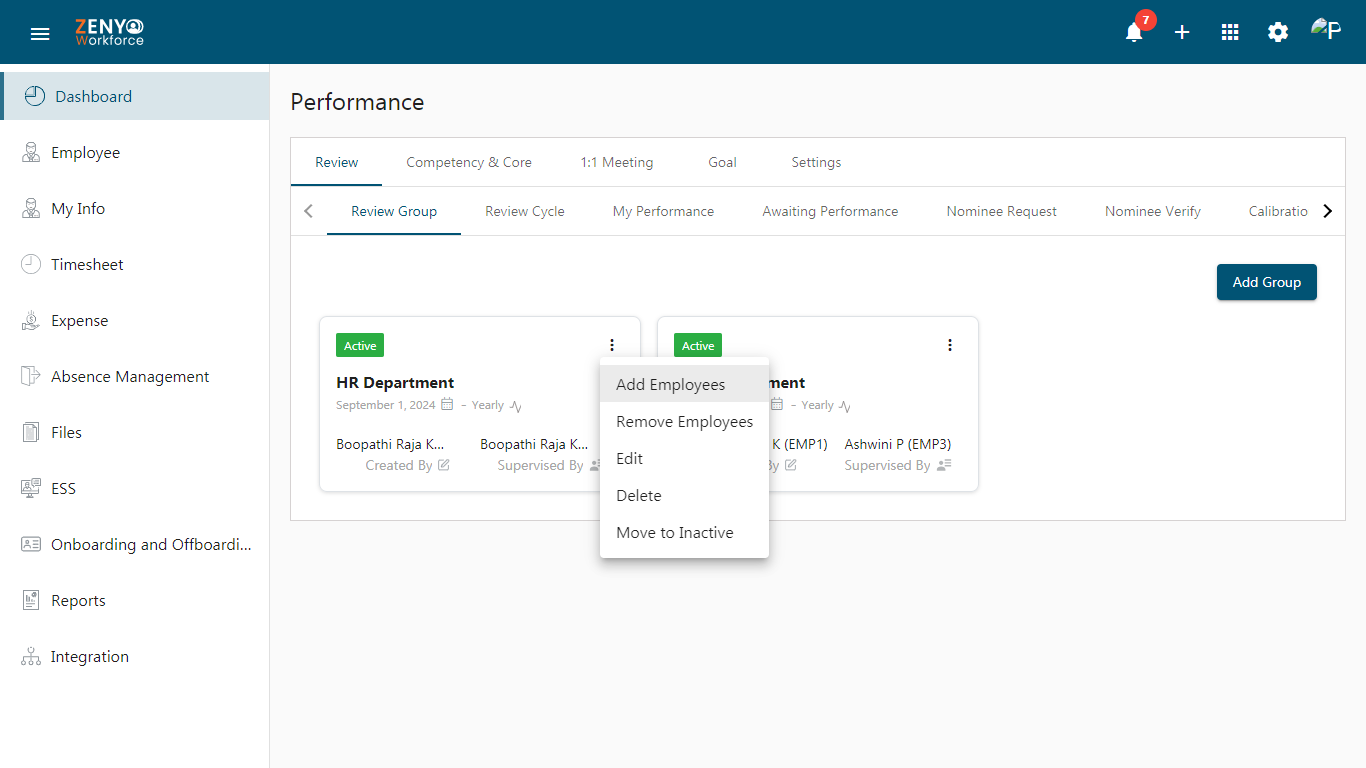
- Once the group is successfully created, you can view its details, including status, name, date, frequency, created by, and supervisor name.
- To manage the group, click the More Actions icon. You’ll have the following options:
- Add Employees: A dialog box will appear, allowing you to filter employees by department, office location, role, and designation. After filtering, click Apply and select the employees to add, then click Add Employee button.
- Remove Employees: This option allows you to remove employees from the group.
- Edit: Modify the group details.
- Delete: Permanently remove the group.
- Move to Inactive: Change the group’s status to inactive.
Creating a Review Cycle
- Review groups are automatically triggered for the review cycle based on the configured frequency. If an immediate review cycle is required, you can click the Create Ad-hoc Review Cycle button.
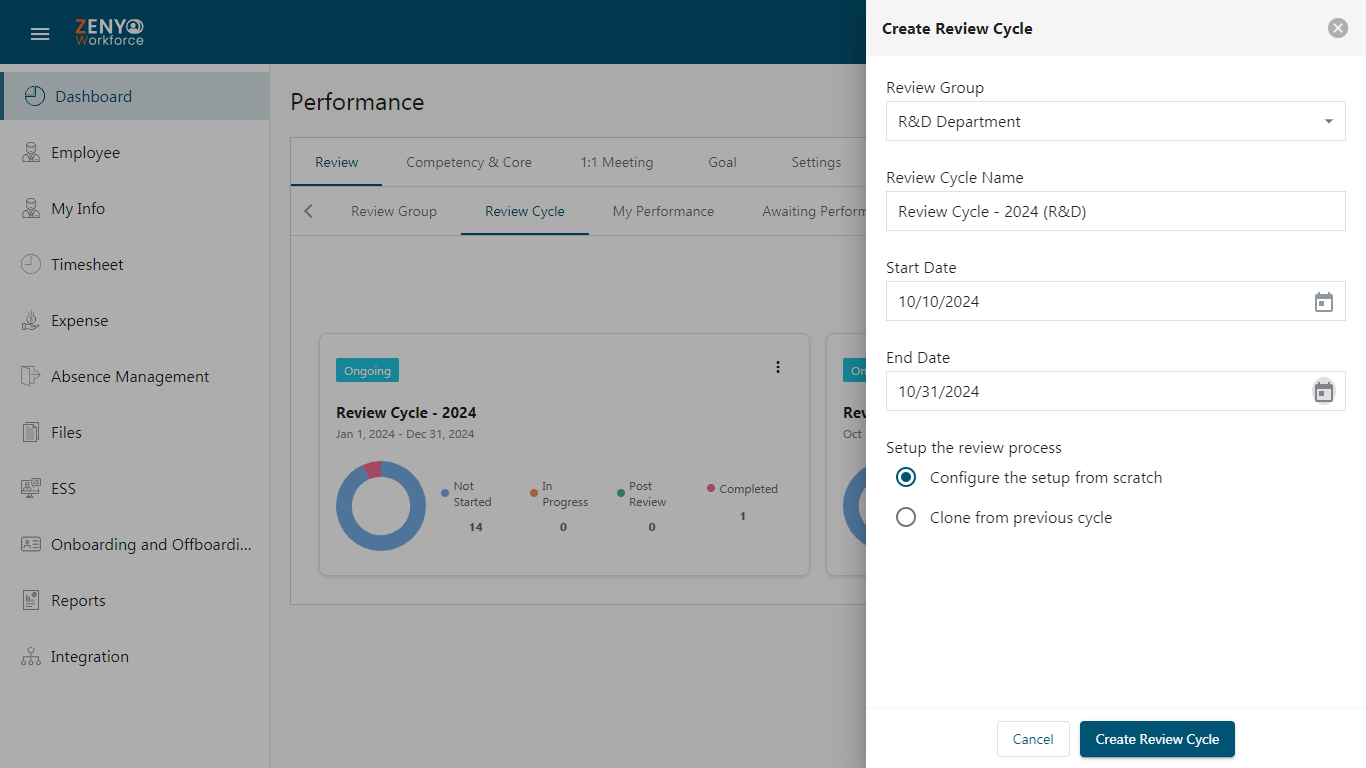
- Select the Review Group from the dropdown.
- Enter the Review Cycle Name and set the Start and End dates.
- Choose one of the following options for the review process:
- Configure the Setup from Scratch: Create a new setup.
- Clone from Previous Cycle: If you choose this option, select the Review Group and Review Cycle under the selected review group. The review process setup and review form from the selected cycle will be cloned for the current cycle as well.
- Click the Create Review Cycle button.
- Click the More icon to edit the cycle name or delete the cycle.
- After successfully creating the review cycle, you will see details such as the cycle name, type, status, date, and the following review process steps:
- Setup Review Process
- Setup Review Form
- Launch
Setup Review Process
- Click on Setup Review Process. The Create Review Cycle rightsheet will open.
- Click the Create Review Cycle button after selecting the options for the review process setup.
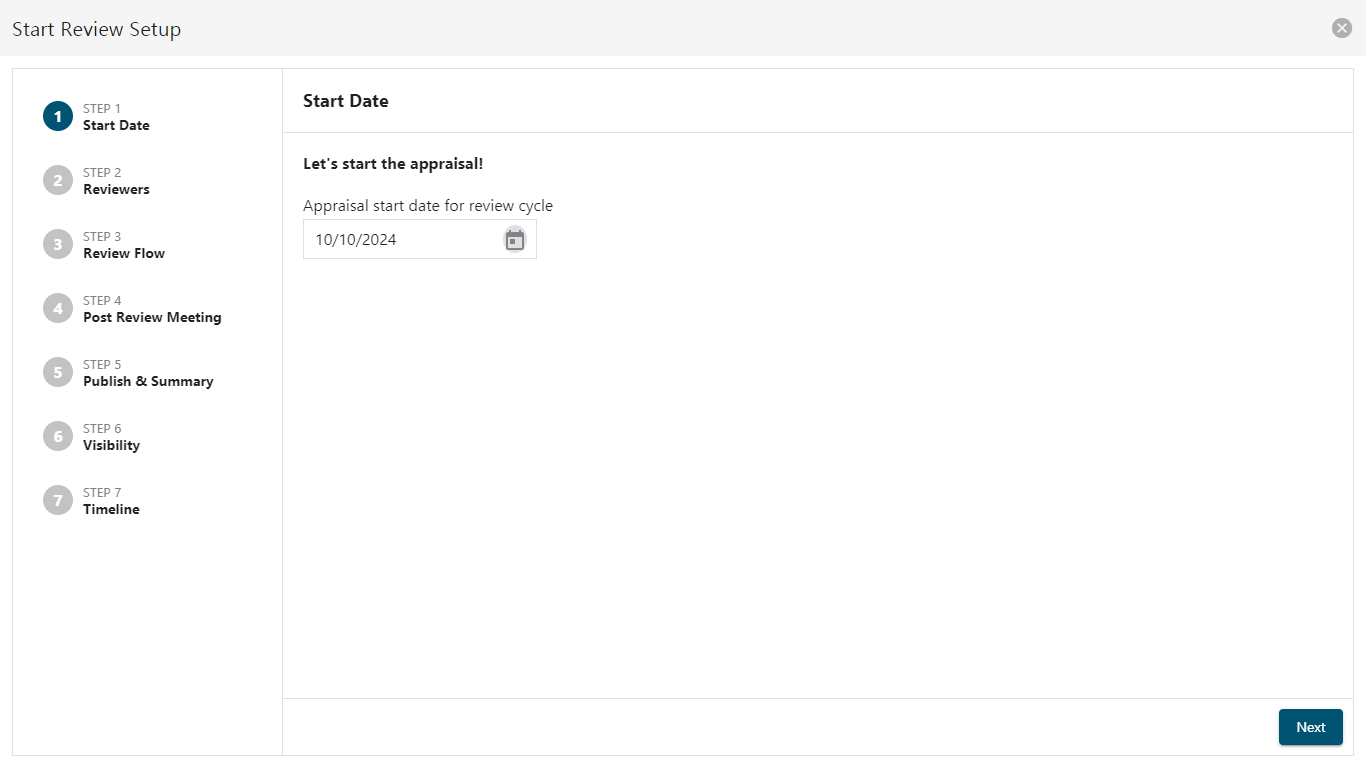
- You will see the seven step review setup:
- Start Date
- Reviewers
- Review Flow
- Post Review Meeting
- Publish & Summary
- Visibility
- Timeline
Step 1: Start Date
- Enter the appraisal start date for the review cycle and click the Next button to proceed to Step 2.
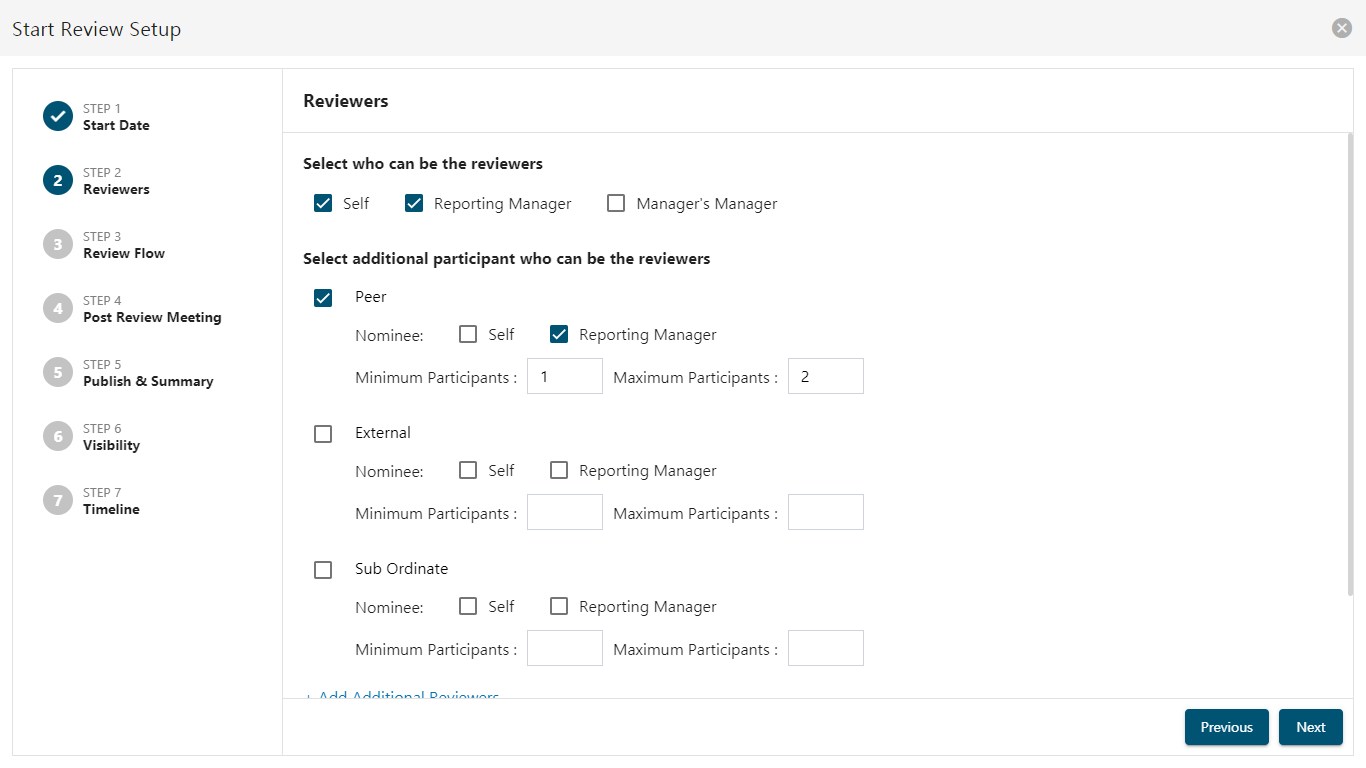
Step 2: Reviewers
- Select the checkbox to choose reviewers. By default, the available options are: Self, Reporting Manager, and Manager’s Manager.
- To add additional reviewers, select the checkbox.
- Choose the Nominee for each additional reviewer (A nominee can be the employee or their reporting manager who can nominate the additional reviewer, ensuring a broader and more comprehensive evaluation).
- Specify the minimum and maximum number of participants to be nominated by each nominee (It is mandatory to enter the minimum and maximum participants).
- Click Add Additional Reviewers to include more reviewers.
- Edit additional reviewer names if needed.
- Select approvers for the nomination (Approvers are responsible for verifying and approving the reviewers selected by the nominees, ensuring fairness and preventing favoritism in the review process).
- Click Next to proceed.
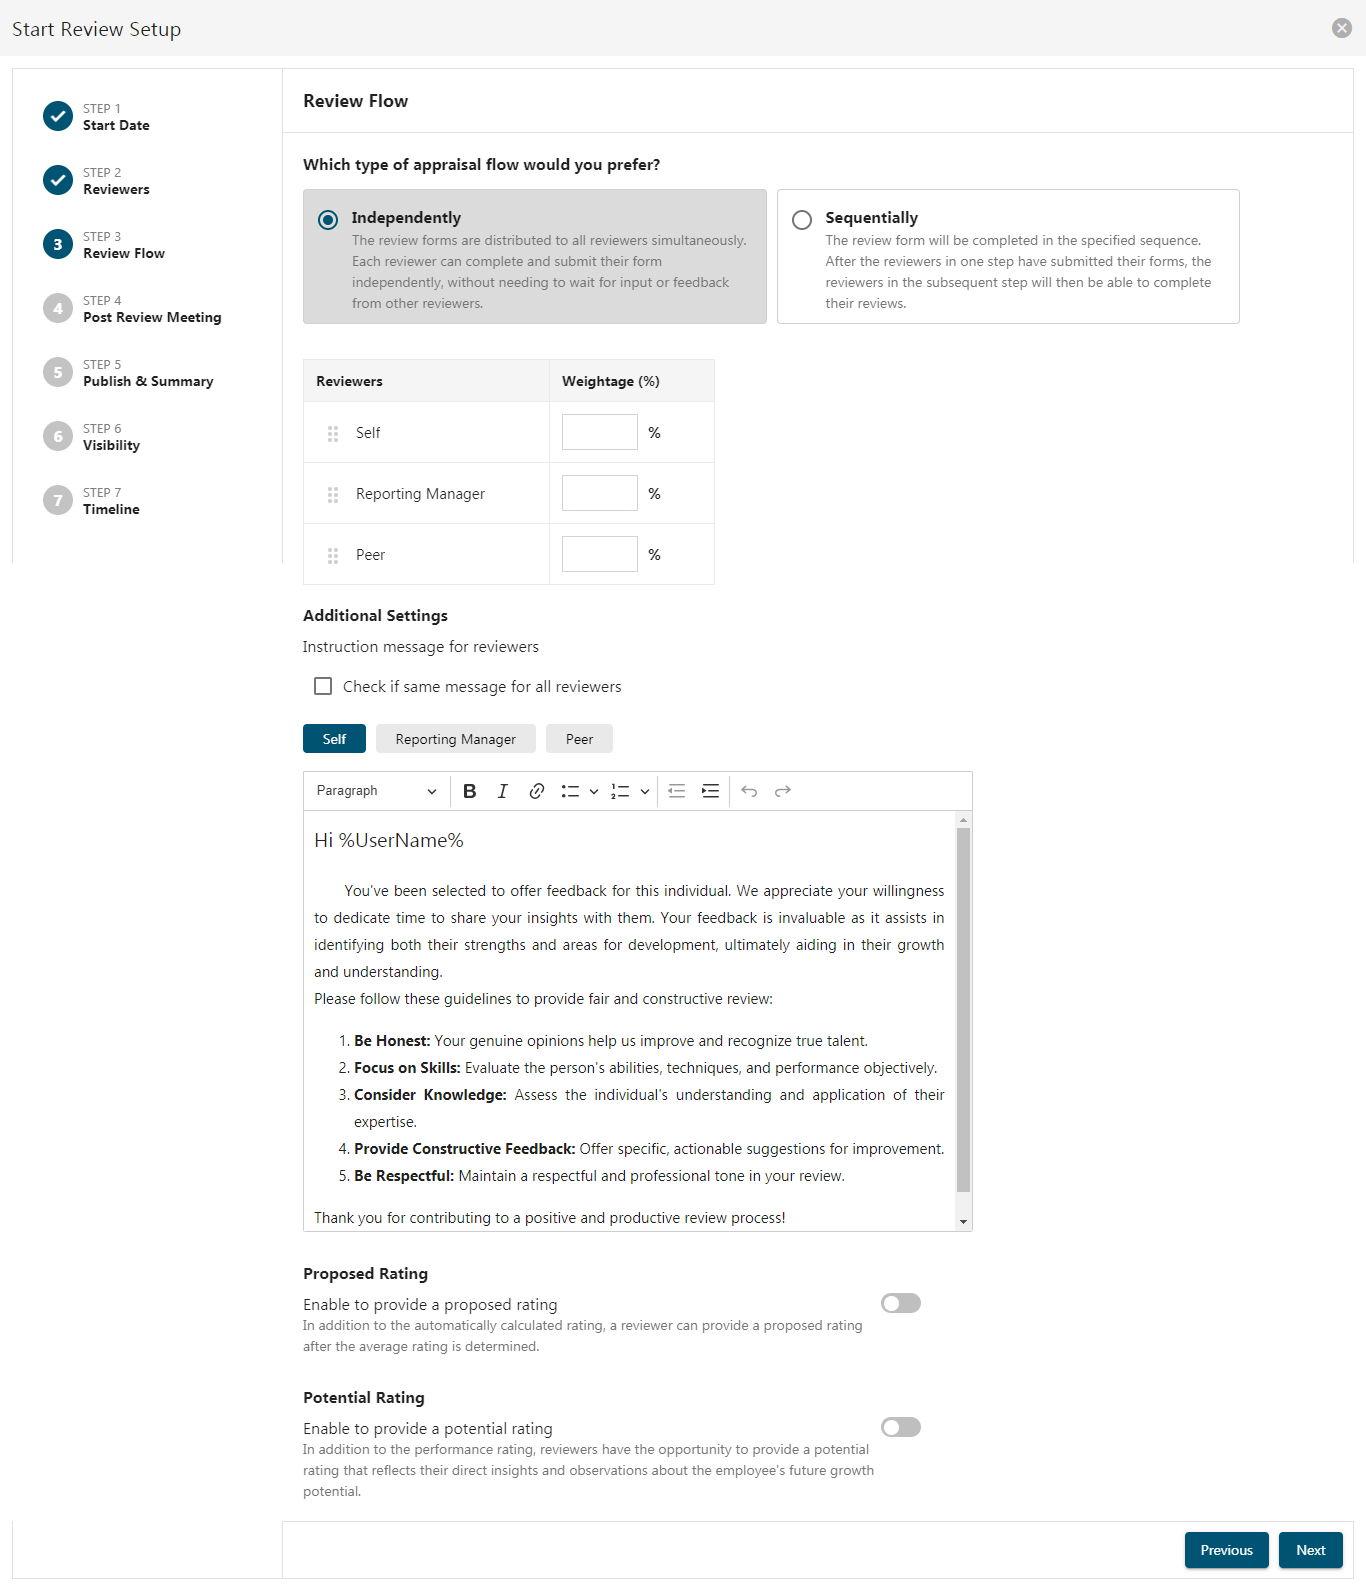
Step 3: Review flow
- Choose the type of appraisal flow: either Independently or Sequentially.
- Independently: Review forms are distributed to all reviewers simultaneously. Each reviewer can complete and submit their form independently, without waiting for input from others.
- Sequentially: Review forms will be completed in a specified sequence. Once reviewers in one step have submitted their forms, the next group of reviewers will be able to complete their reviews.
- Assign weightage for the reviewers.
- Configure additional settings, such as instruction messages for reviewers. If you want to use the same message for all reviewers, select the checkbox. Alternatively, you can customize messages for individual reviewers.
- Enable or disable the proposed rating (In addition to the automatically calculated rating, reviewers can provide a proposed rating after the average rating is determined). If enabled, select the reviewers who can provide the proposed rating.
- Enable or disable the potential rating (Reviewers can provide a potential rating that reflects their insights about the employee’s future growth potential). Click the Next button to move to Step 4.
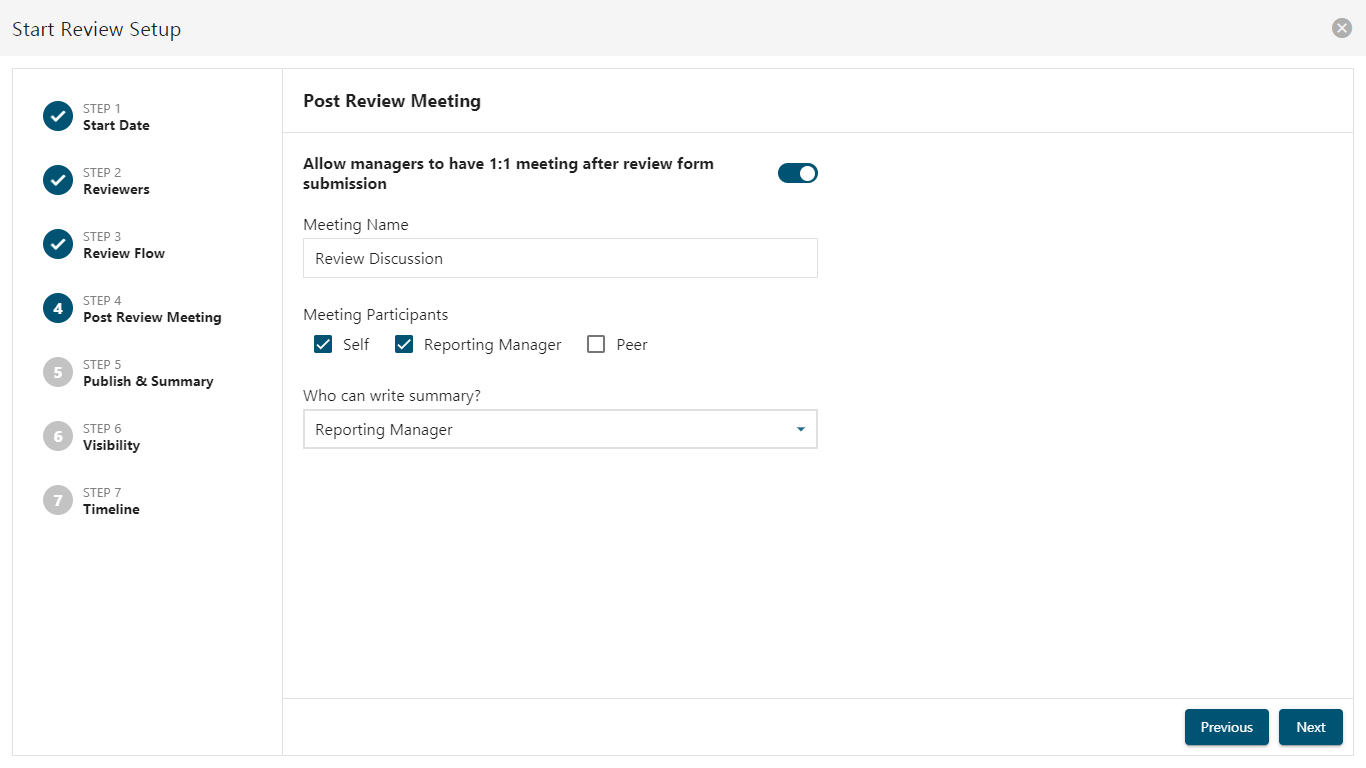
Step 4: Post Review Meeting
- Enable or disable the toggle icon to allow managers to have 1:1 meetings after the review form submission. If you enable the toggle, enter the meeting name, select the meeting participants, and choose who can write the summary from the dropdown menu. Click the Next button to move to Step 5.
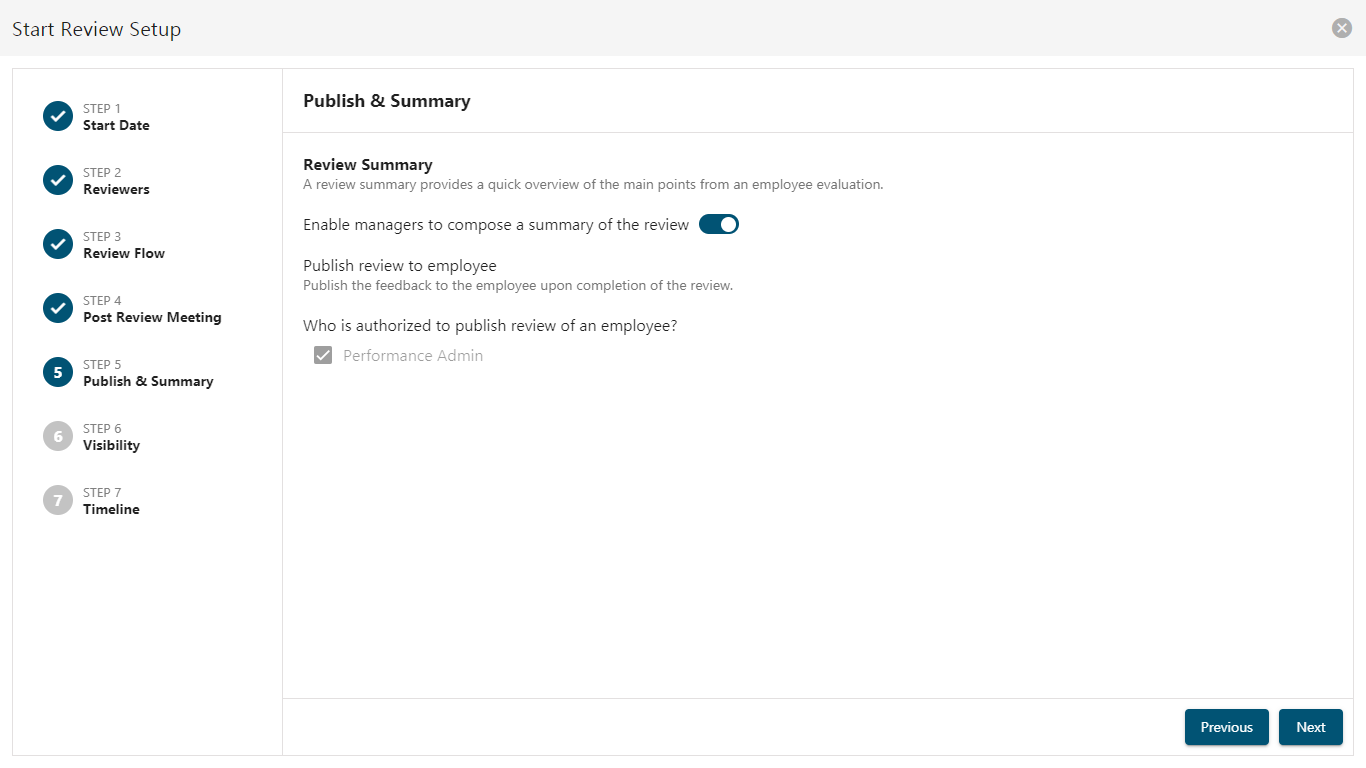
Step 5: Publish & Summary
- Enable the toggle icon to allow managers to provide a summary of the review. By default, the performance admin will be responsible for publishing the review of an employee. Click the Next button to move to Step 6.
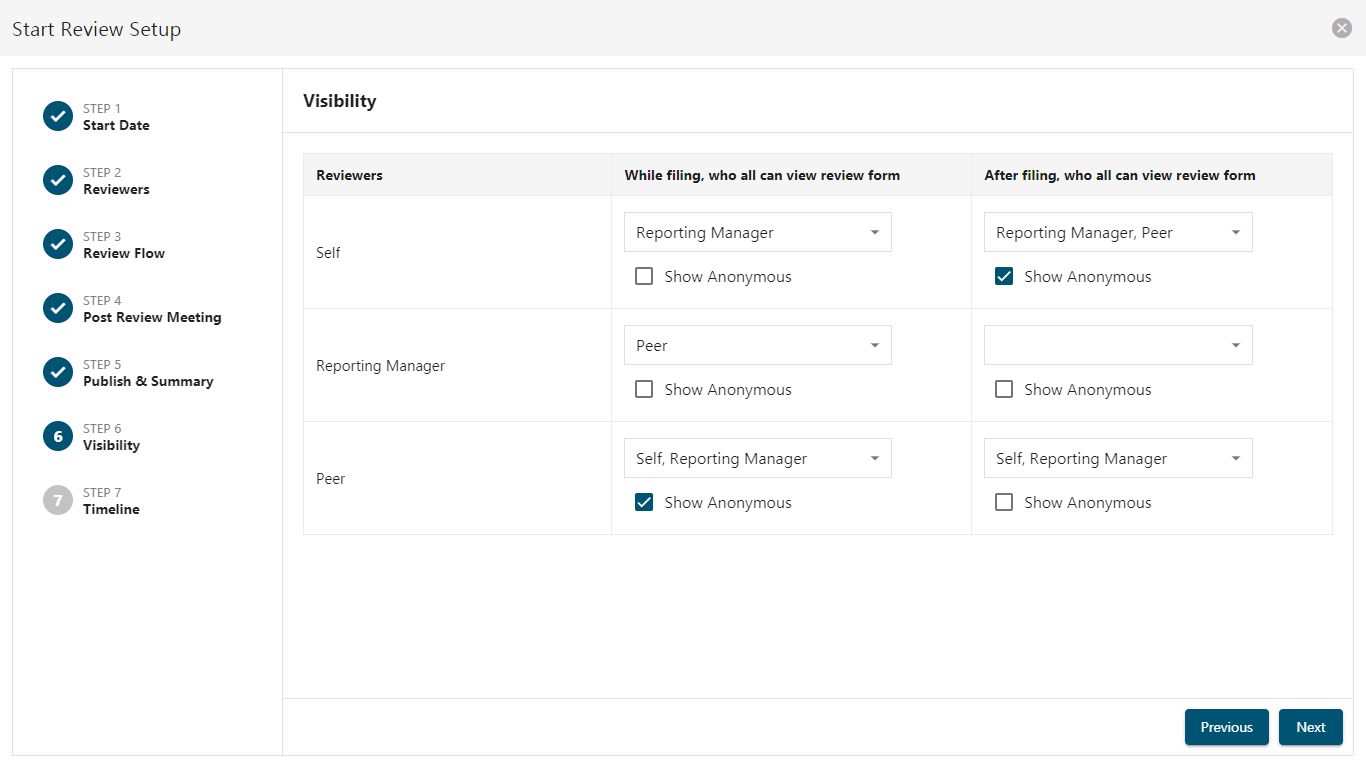
Step 6: Visibility
- Specify which reviewers can view the review form both while filling it out and after submission. Select the anonymous checkbox if you do not wish to reveal the identity of the reviewers.
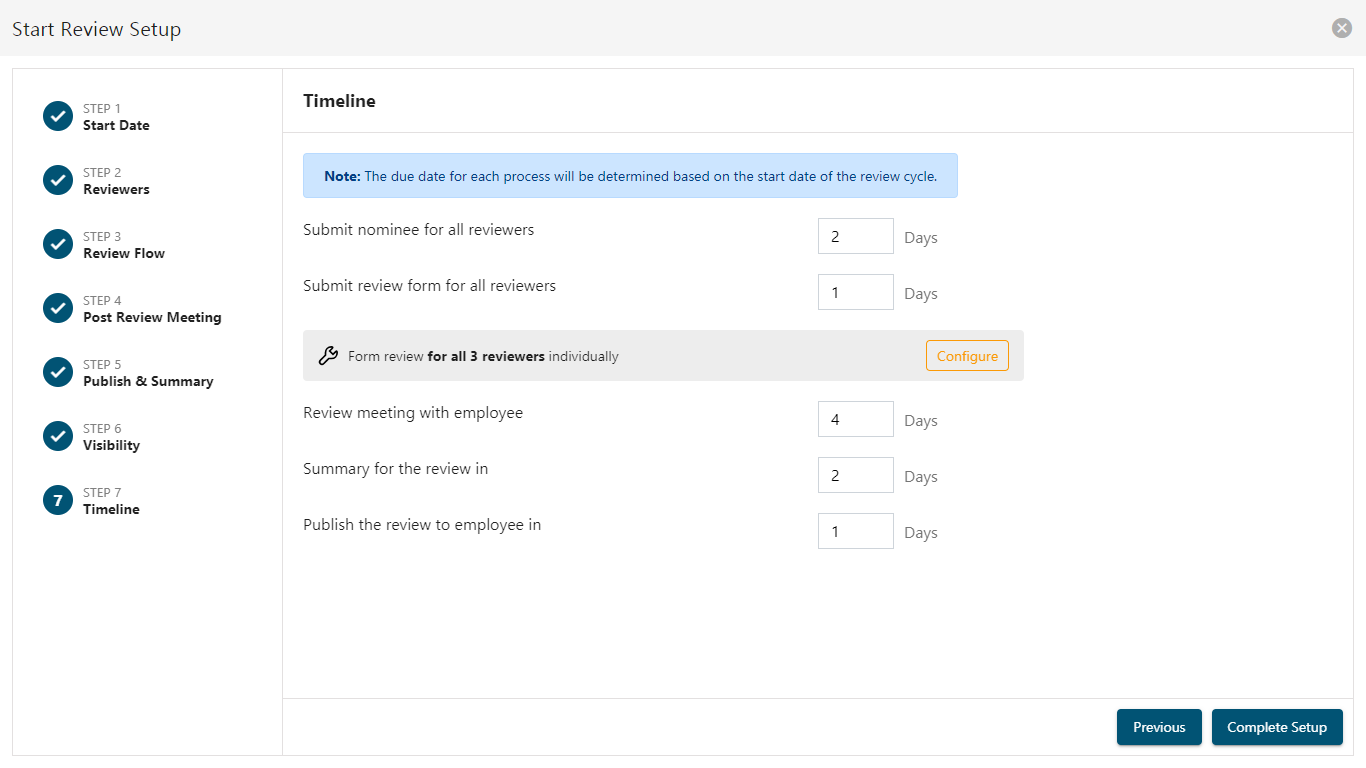
Step 7: Timeline
Enter the timeline limits for the following actions:
- Submit nominees for all reviewers.
- Submit review forms for all reviewers. Additionally ,you can also configure individual time limits for submitting review forms for each reviewer by clicking the Configure button.
- Conduct review meetings with employees.
- Summarize the review.
- Publish the review to employees.
Note: The due date for each process is automatically determined based on the start date of the review cycle.
- After completing the seven steps, click the Complete Setup button to finish the review setup. If you wish to change or modify any information, click the Previous button.
Setup Review Form
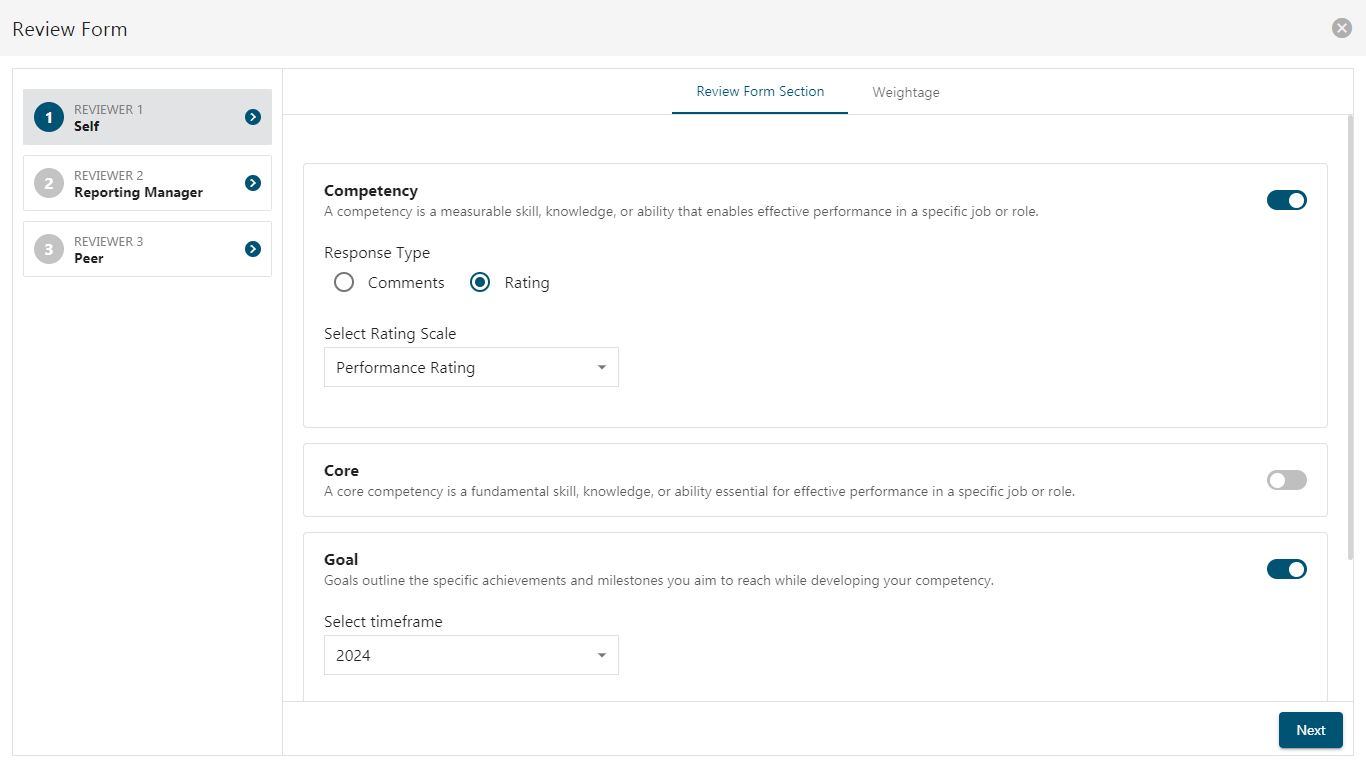
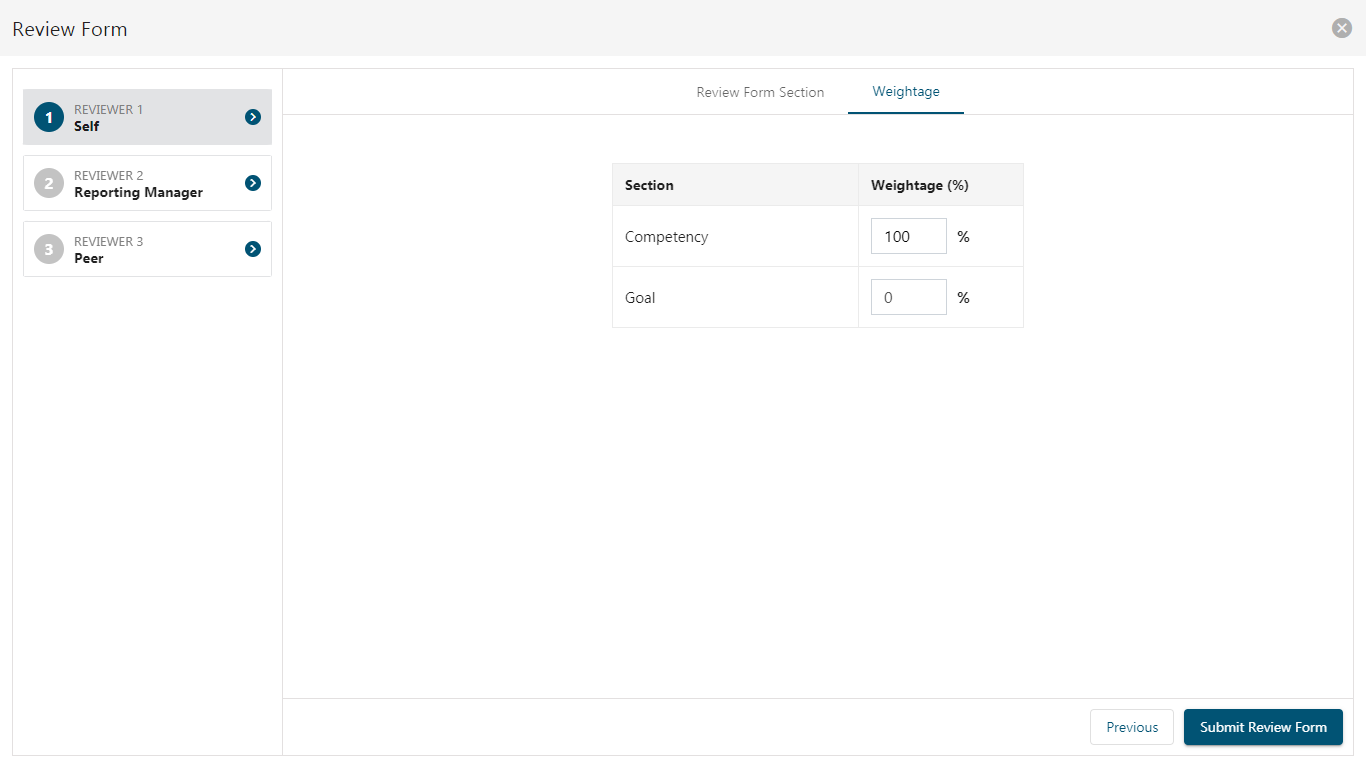
- After completing review process setup,click on Setup Review Form to display the Review Form. You will see a list of reviewers selected during the previous setup process, along with two sections: Review Form and Weightage.
- In the Review Form section, you will find 4 categories such as Competency, Core, Goals, and Questions, each with an associated toggle icon.
Note: Reviewers can choose the Review Form category section according to their preference.
- If the toggle is enabled for any category (Competency, Core, Goal, or Question), you will need to select the Response Type. Choose either Comments or Rating. If Comments is selected, reviewers will need to enter a description. If Rating is selected, choose the appropriate rating scale from the dropdown.
Note: The rating scale created in Settings will be loaded in the dropdown for selection.
- For the Goal category, you will also need to select the Timeframe in addition to the Response Type.
- For the Question category, you must select a Question Template along with the Response Type.
- After configuring the required categories and assigning weightage, follow the same steps for other reviewers. Once all configurations are complete, submit the review form for each reviewer.
Launch
- After completing the setup of the review process and review form, click on Launch.
- The review cycle will be launched successfully.
- You will see details such as the status of the review cycle, date, cycle name, and its process status.