The Vendor Management feature allows organizations to efficiently manage external service providers or suppliers who contribute to HR operations, such as training programs, recruitment services, or software providers. This module enables businesses to centralize and streamline vendor interactions, improving transparency, compliance, and overall efficiency.
Vendor menu
- To manage your vendor document types, click on the Settings icon in the top right corner of the navigation bar.
- Choose the Vendor from the main menu and select the Document Type submenu.
- You will see a list of Document Type, including their Name, Last Modified Date, and Action.
- To create a new document type, click on the Add button.
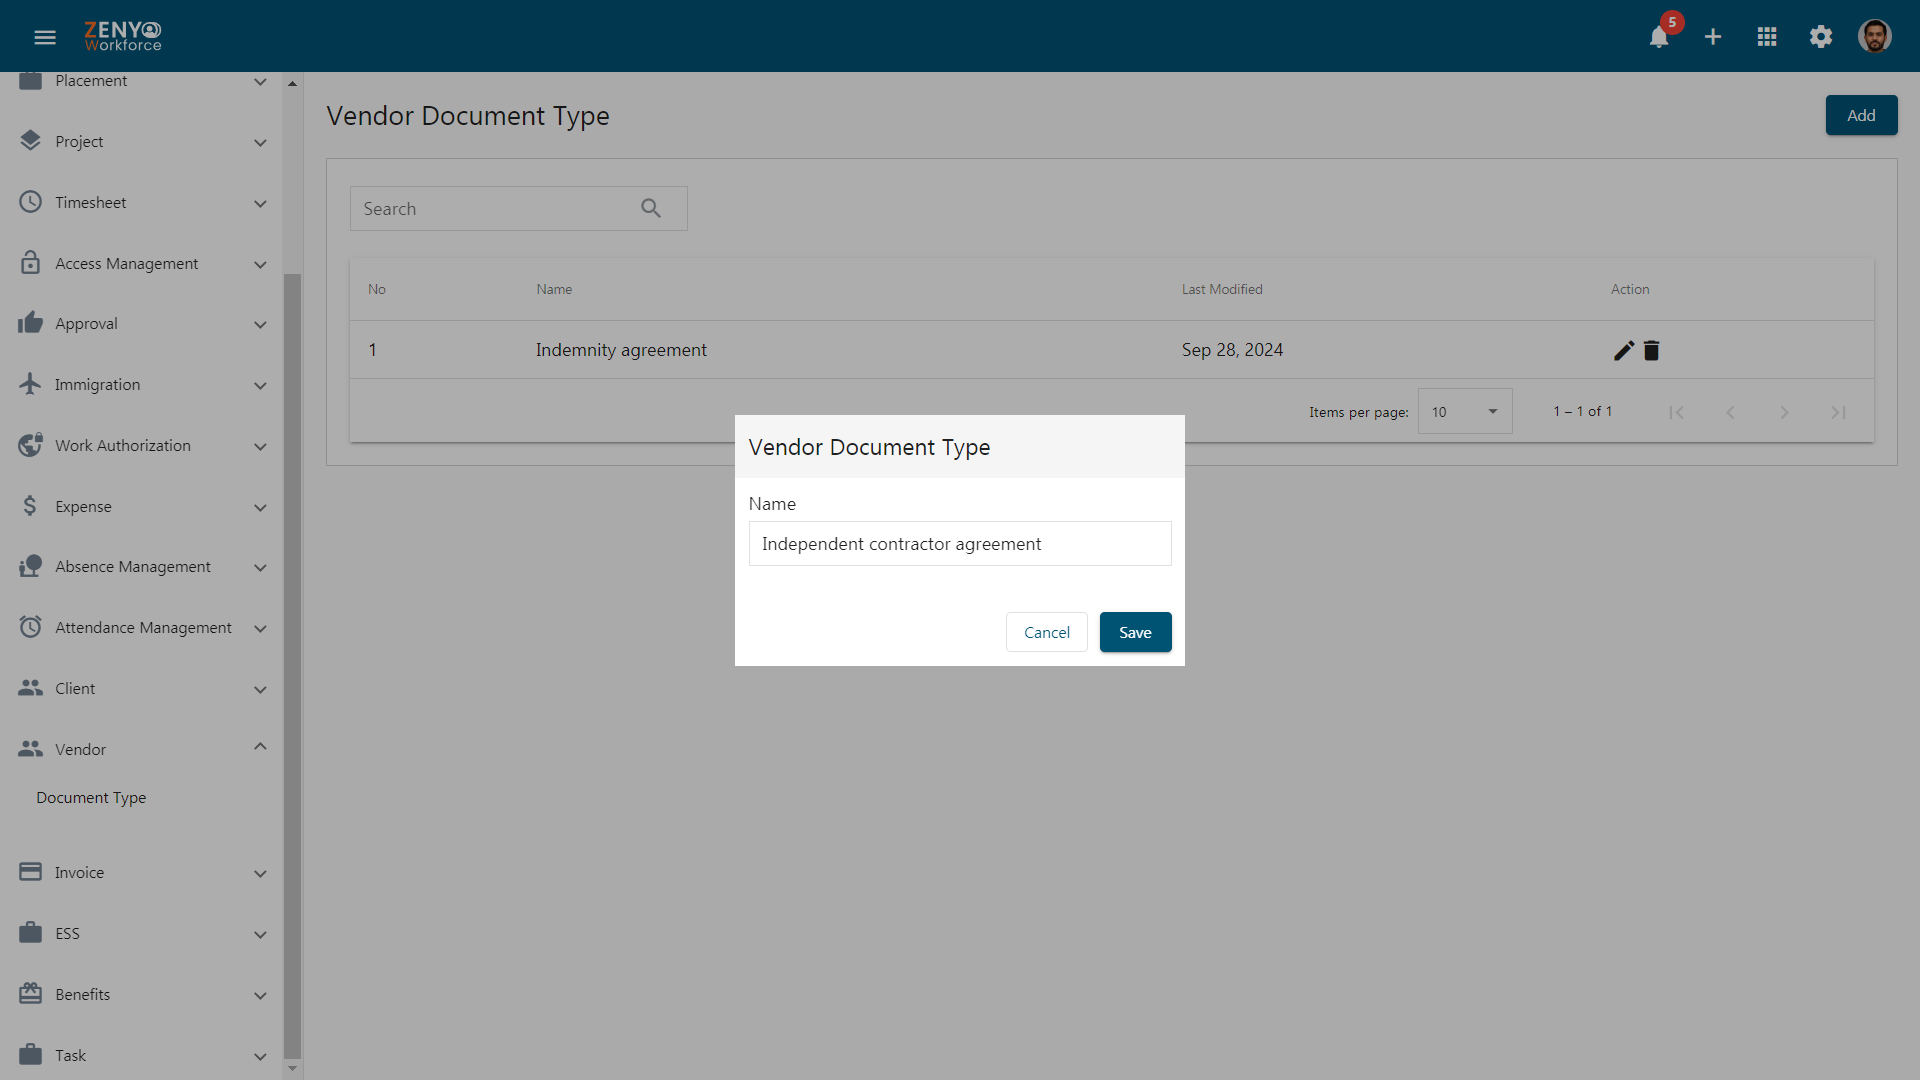
- Enter the document type name for the vendor and click Save. A pop-up will confirm that the vendor document type has been successfully added.
- The newly created document type will now appear in the list.
- Click on the Edit icon to update the document type name.
- Click on the Delete icon to remove the document type.
- A confirmation pop-up will appear. After confirming, the document will be deleted.
- To find a specific document type name, simply use the Search Bar provided.
Add Vendors
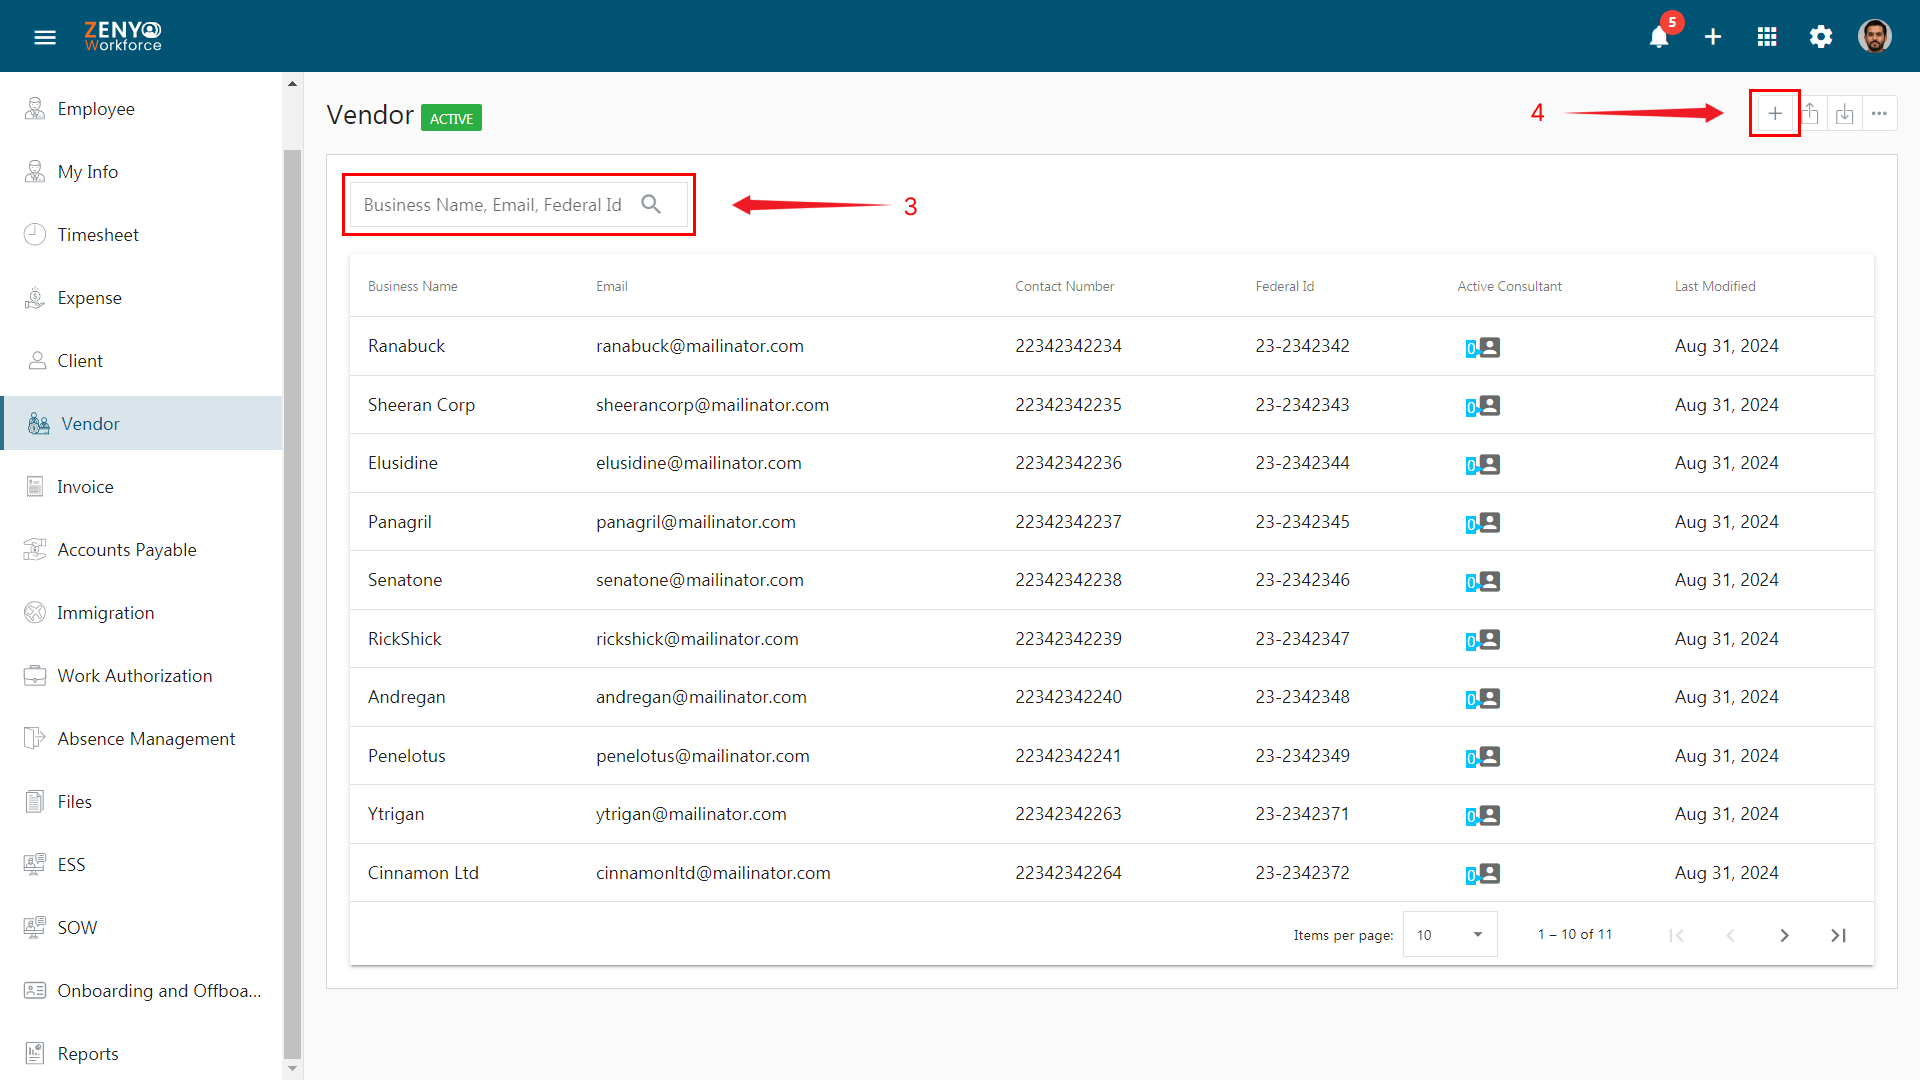
- On the home page, select Vendor from the main menu.
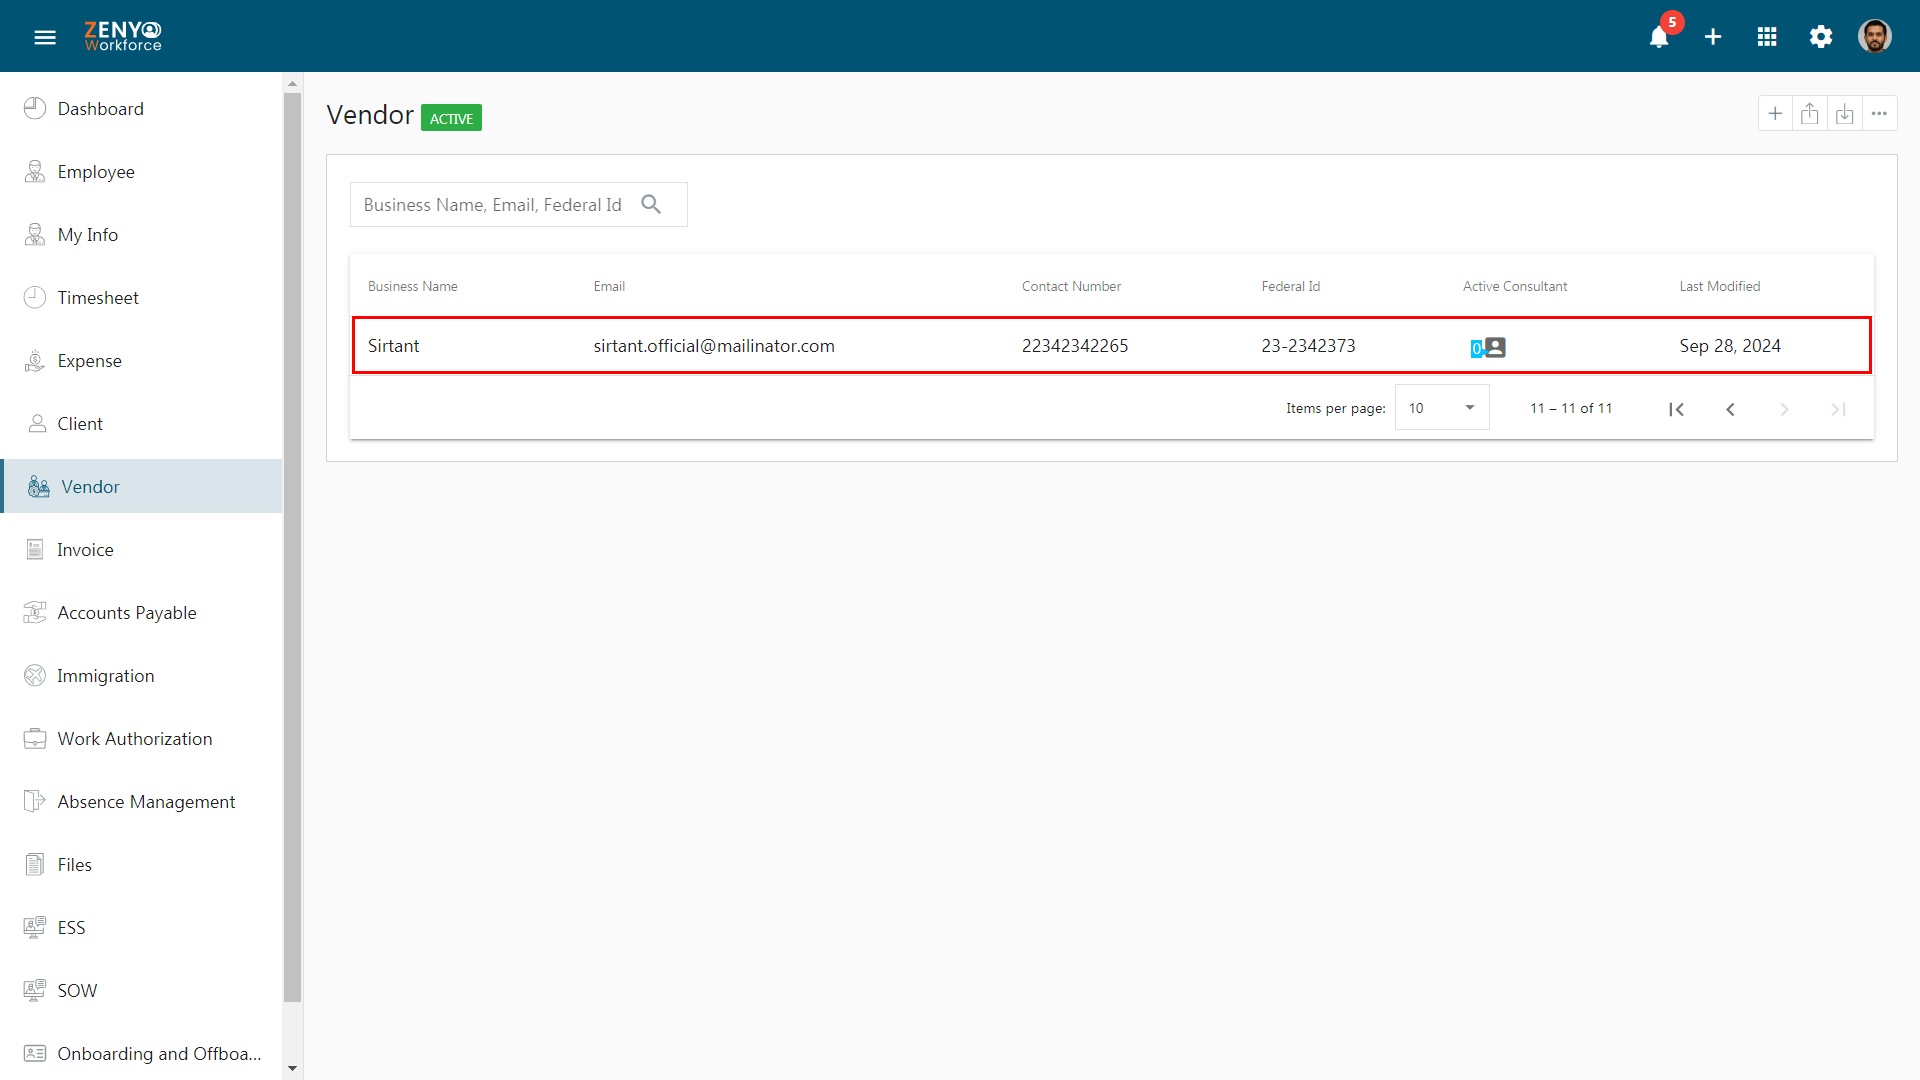
- The Vendor page displays a list of your existing vendors, including details such as Business Name, Email, Contact Number, Federal ID, Active Consultant Status, and the Last Modified date.
- To find a vendor, enter their Business Name, Federal ID, or Email in the search bar.
- To add a new vendor, click on the Add icon.
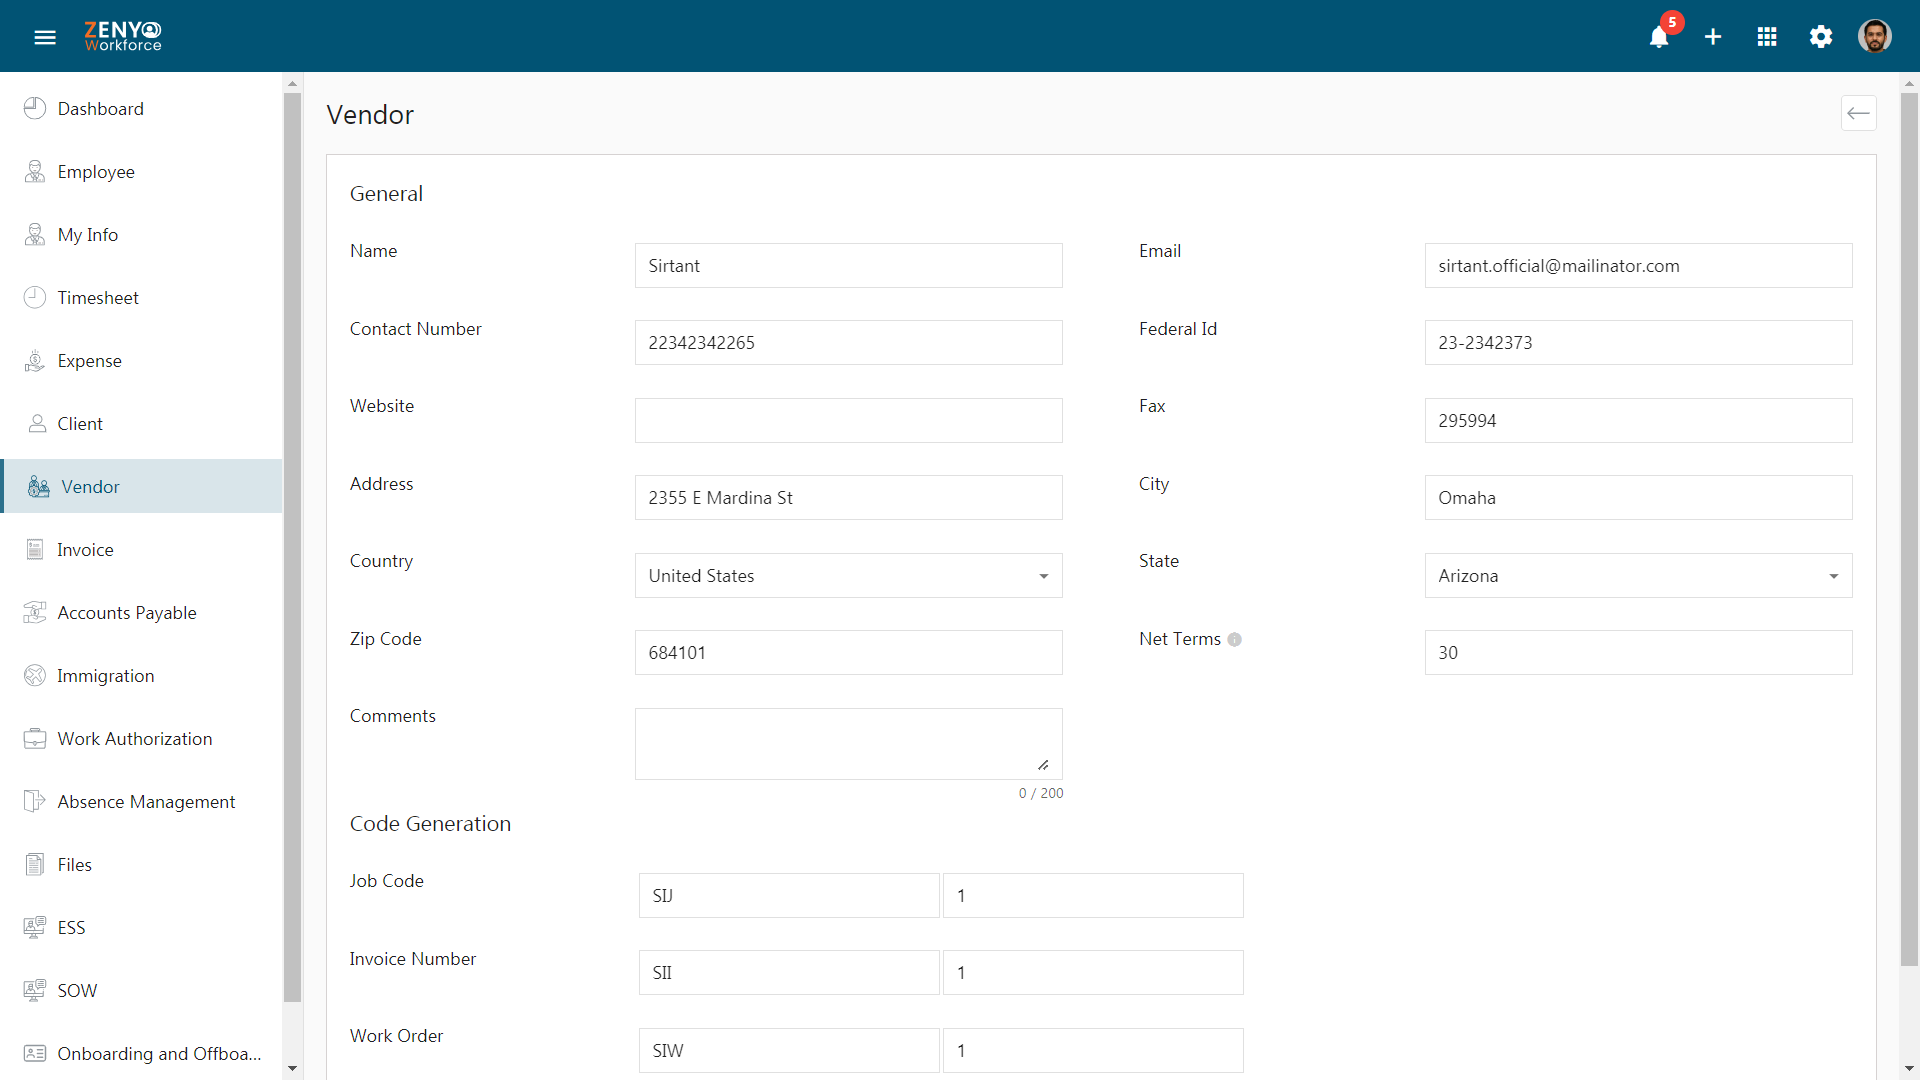
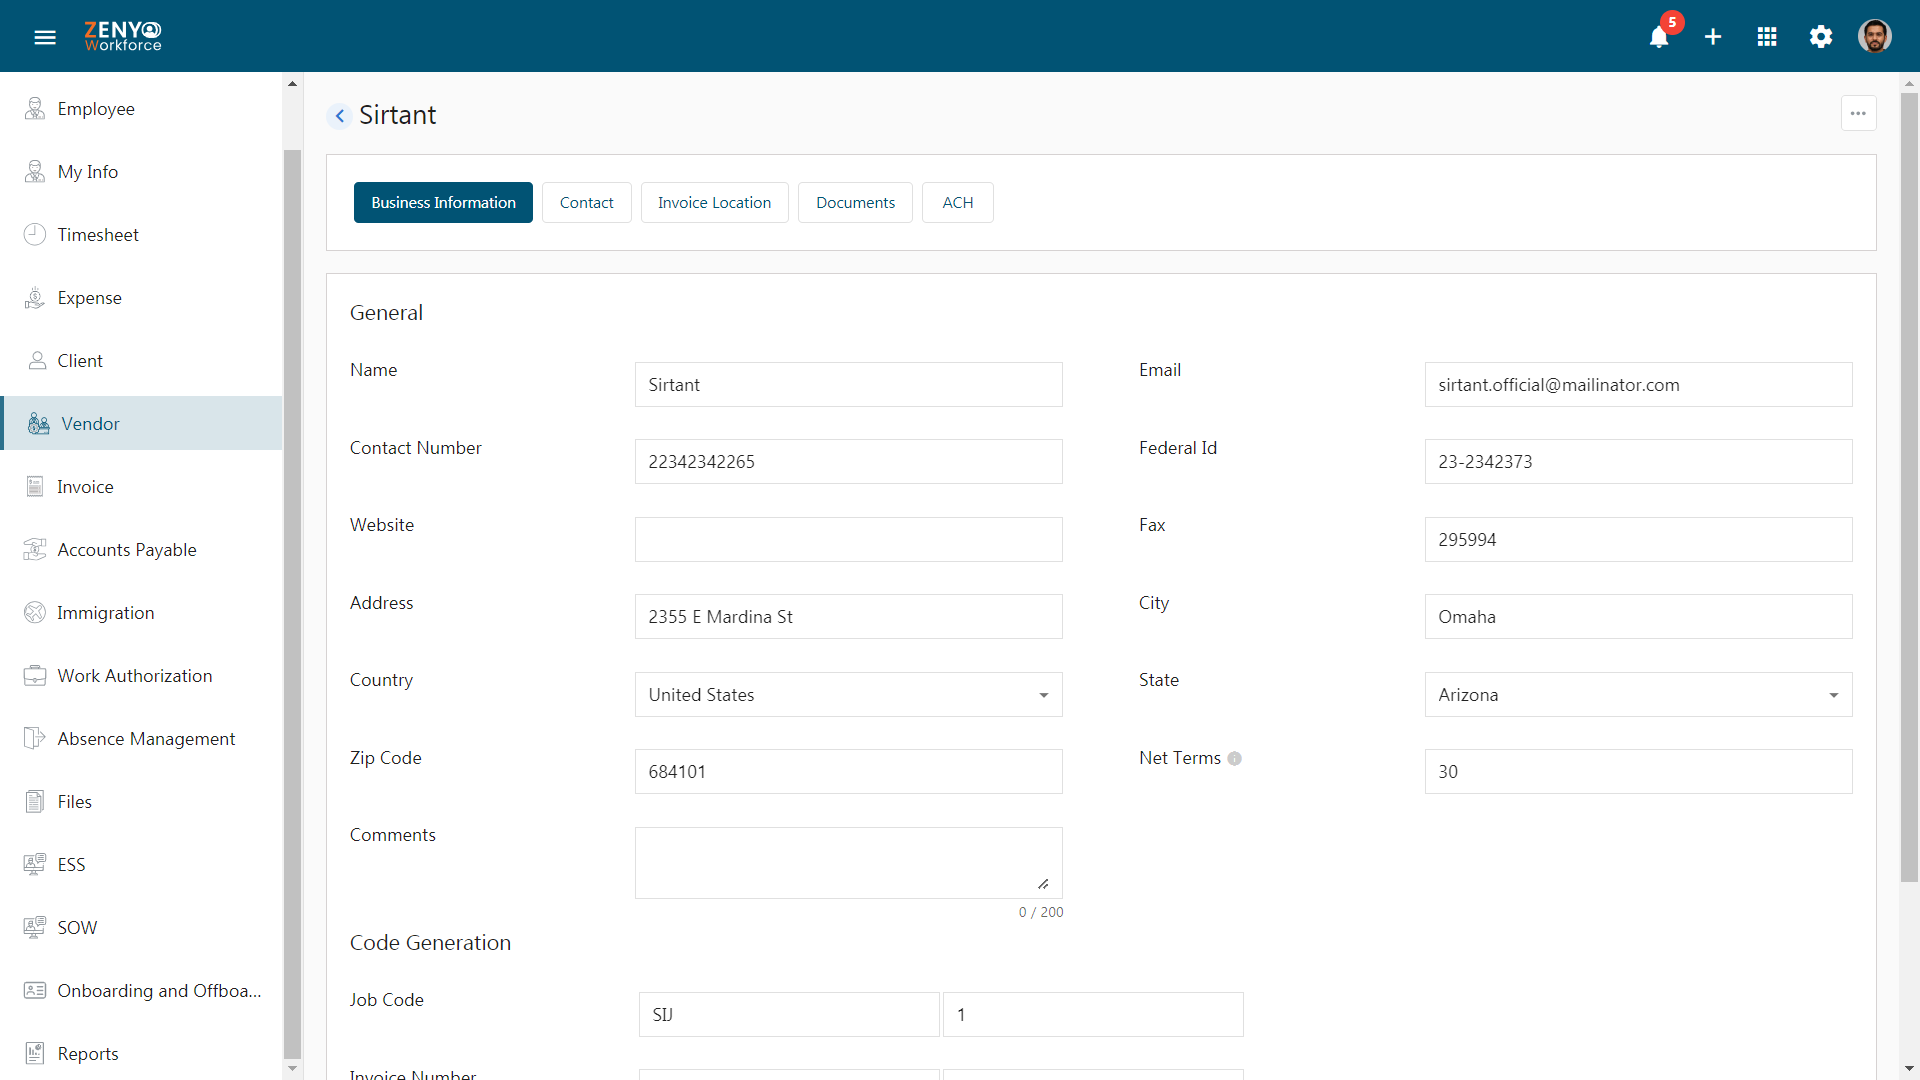
- In the General tab, Enter the vendor information such as Name, Email, Contact Number, and Federal Id. You can also enter the Website and Fax if needed. Provide the Address, City, Country Name, State, and Zip Code.
- Next, enter the Net Terms value, which specifies the due date for invoice generation. For example, setting the ‘Net Terms’ value to 30 days means the invoice for this vendor will be due 30 days from the invoice date.
Set up Code Generation
- For the Job Code, enter the prefix and increment values. The prefix will appear at the beginning of every job code, and the increment value will increase by 1 with each new job code created. Follow the same steps for the Invoice Number and Work Order.
- After completing the details, click Save. The newly created vendor will appear in the list.
- In the Business Information tab, you’ll see all the details you initially entered for the vendor. You can make necessary edits here. Once you’re done, just click the Update button to save your changes.
- Next, Click on the Contact tab. To add contact details for this vendor, click the Add button.
- Select a Contact Type from the dropdown menu. Enter the Contact Name, Email ID, Contact Number, Designation, Gender, Address, City, State, Country Name and Zip code.
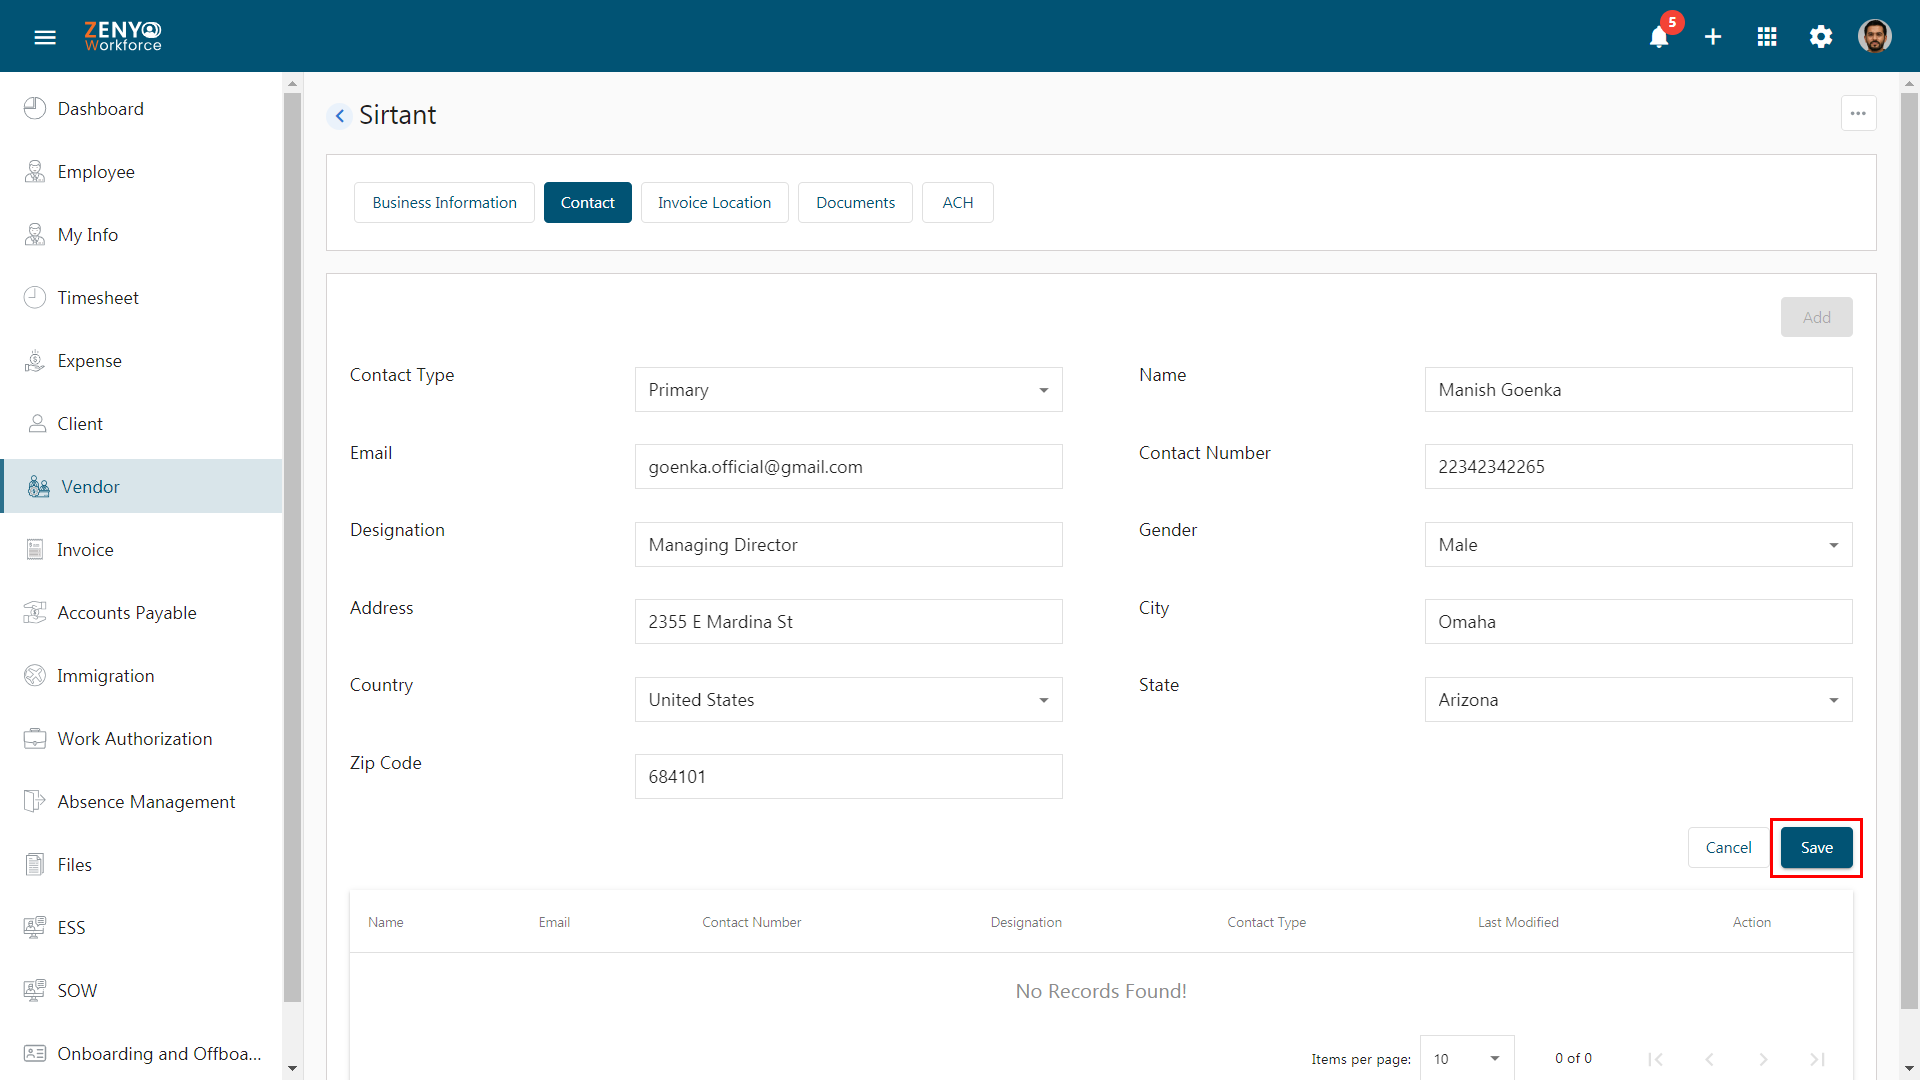
- Click Save. You will see the details listed here.
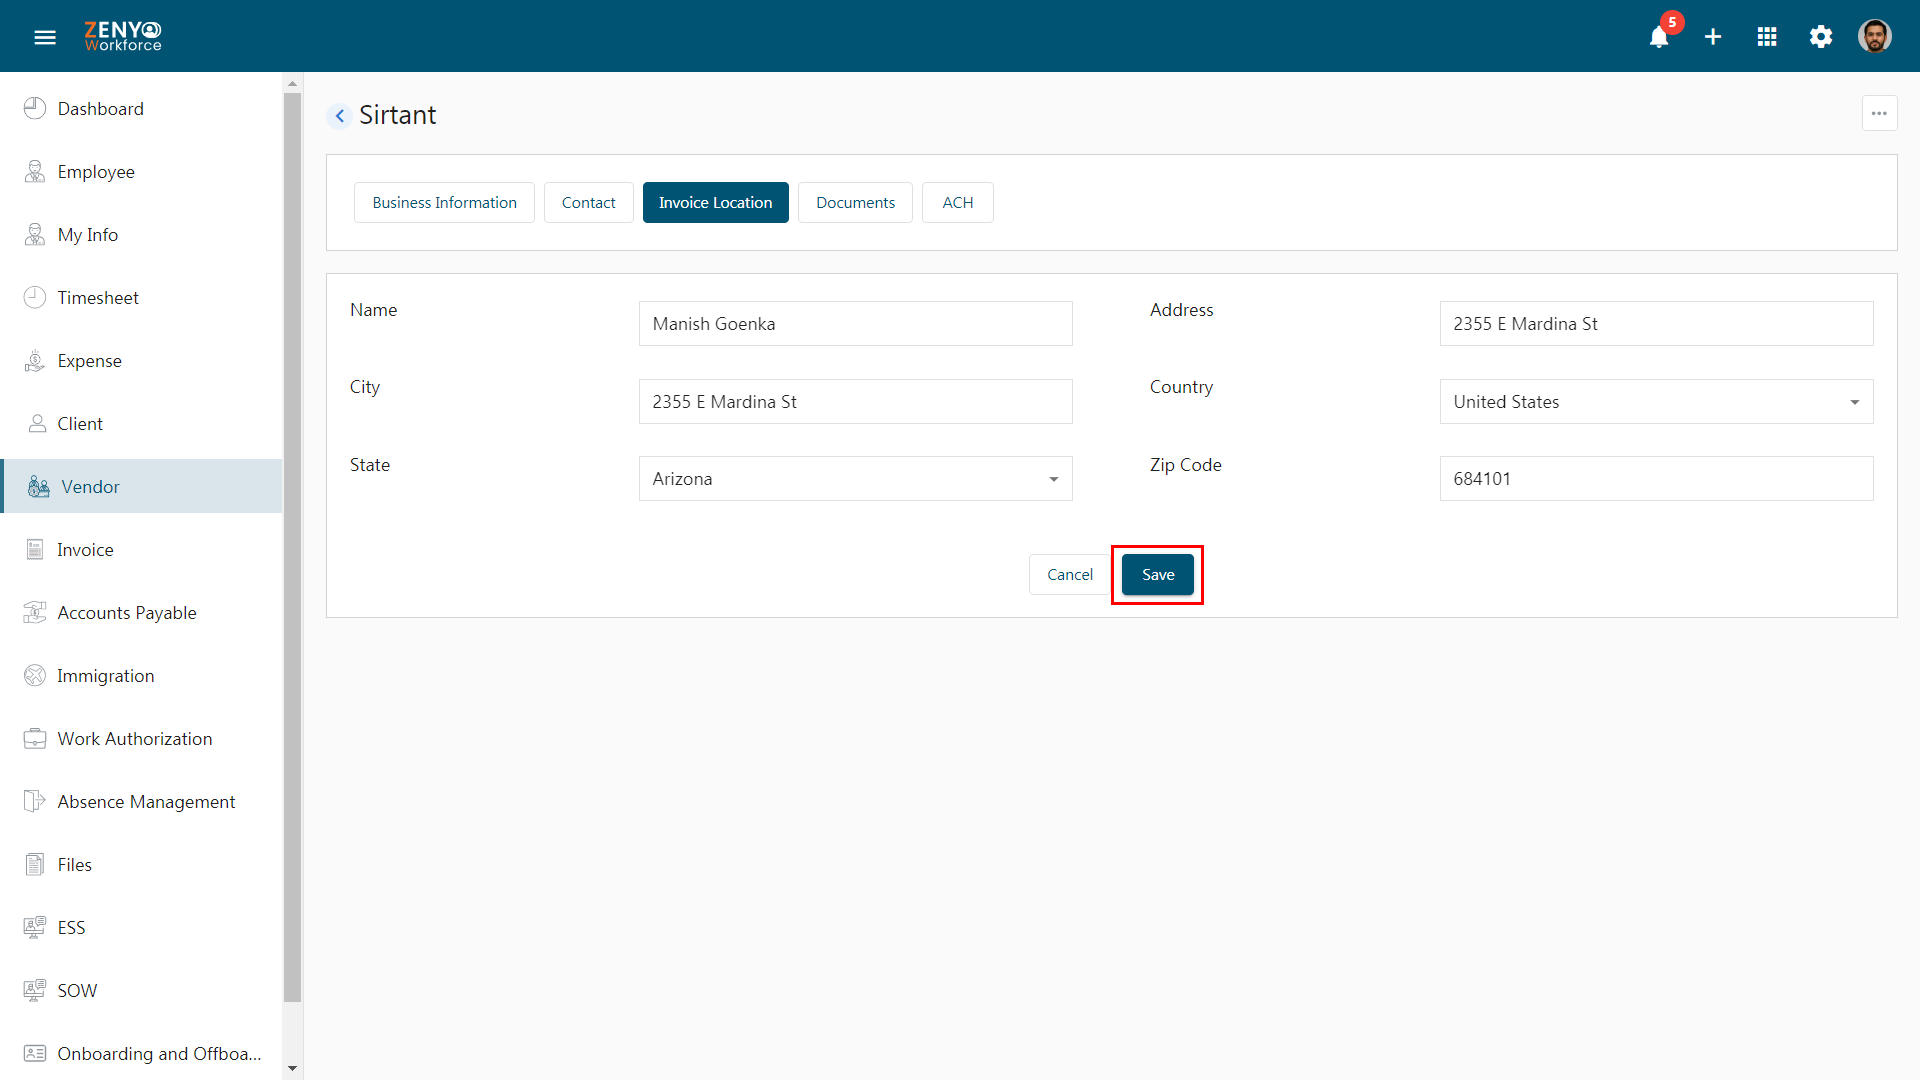
- Navigate to the Invoice Location tab to enter details such as Name, Address, City, Country, State, and Zip Code. Finally, click Save.
- Navigate to the Documents tab. To add a new document, click the Add button. Then, select the appropriate Document Type from the dropdown menu.
- Enter the document details, including Document Name, Effective Date, and Expiry Date. Then, click Choose File to upload the related document.
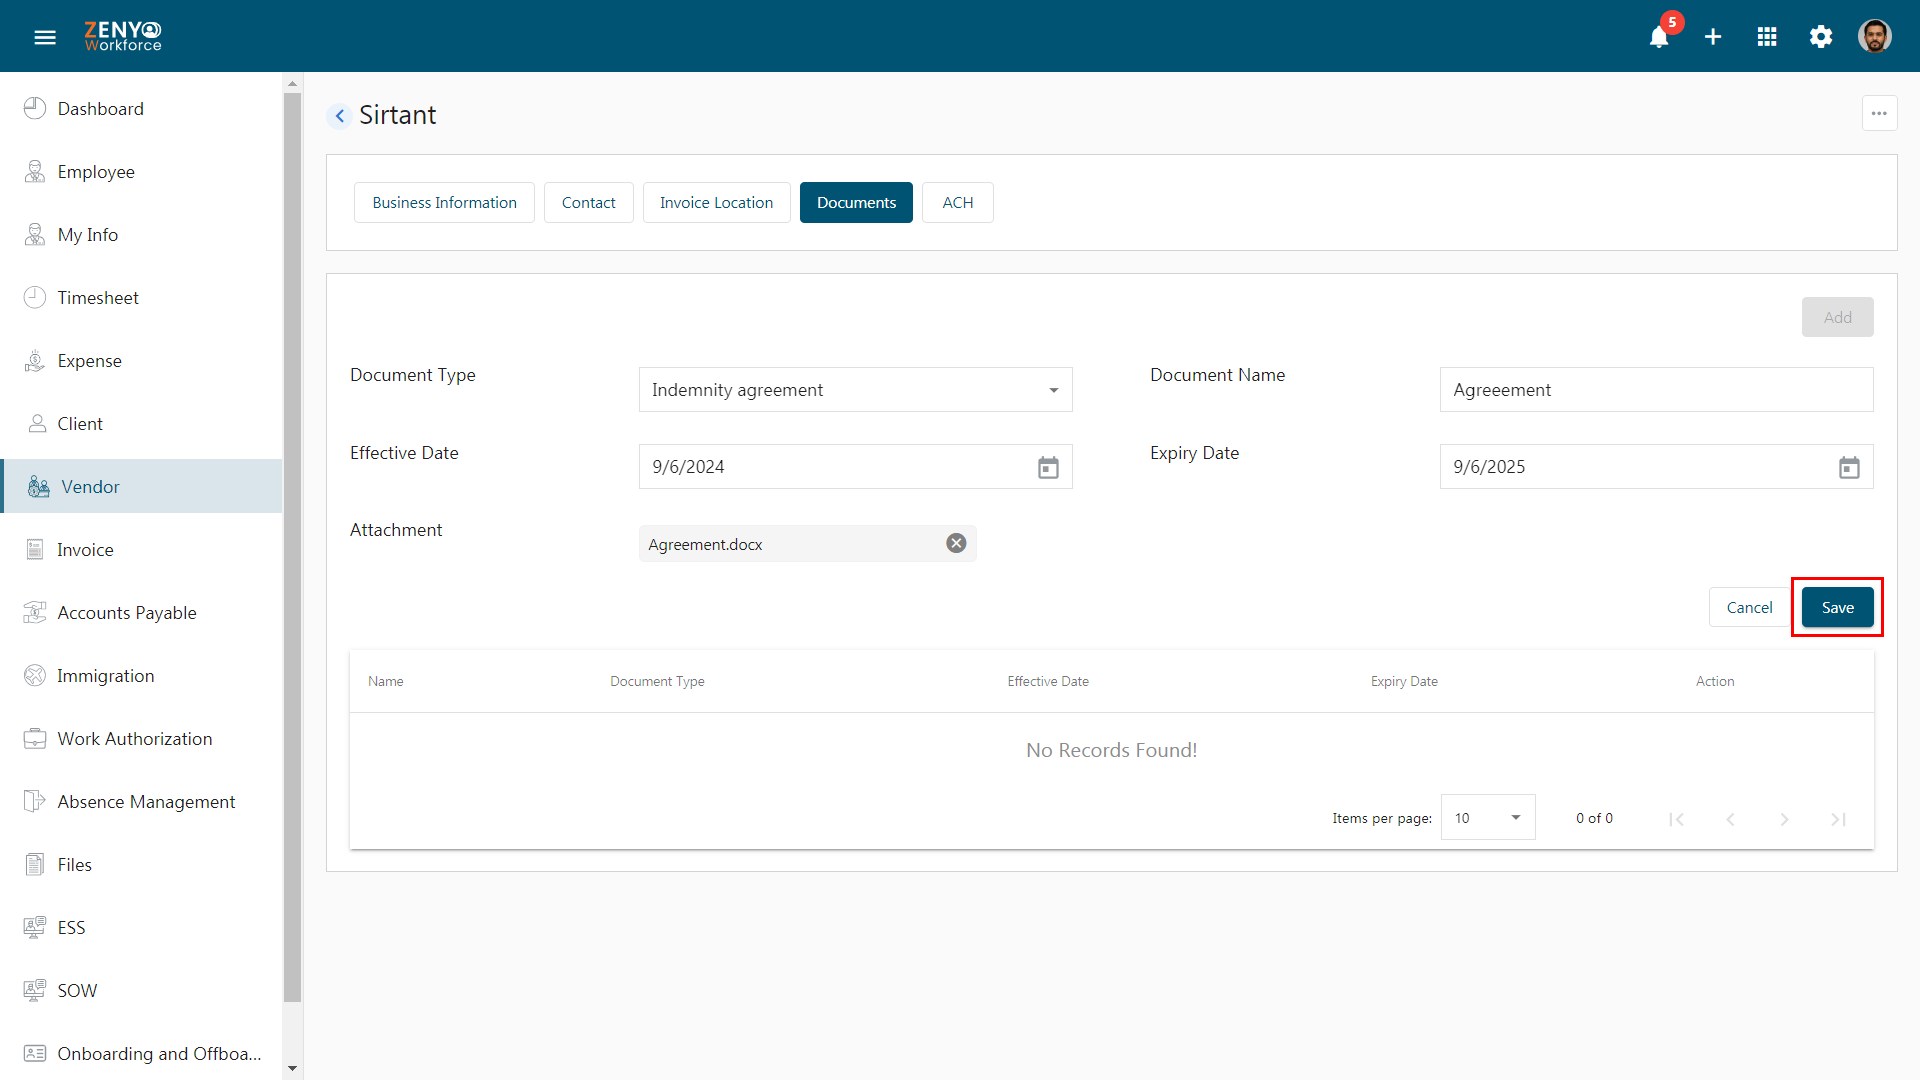
- Click the Save button and you will see the document listed here along with the Name, Document Type, Effective Date, Expiry Date, and Action.
- You can download the document using the Download icon, view the attached file using the View icon, or remove it using the Delete icon.
- To add more documents, click the Add button.
- Navigate to the ACH tab. To add a new vendor’s ACH, click Add.
- Enter the account details of the vendor such as Name on the Bank Account exactly as it appears on the vendor’s bank statement, Account Number, Account Type, Account Title, Address, City, Country, State, Zip Code, Contact Number, Fax Number, and Bank Routing Number.
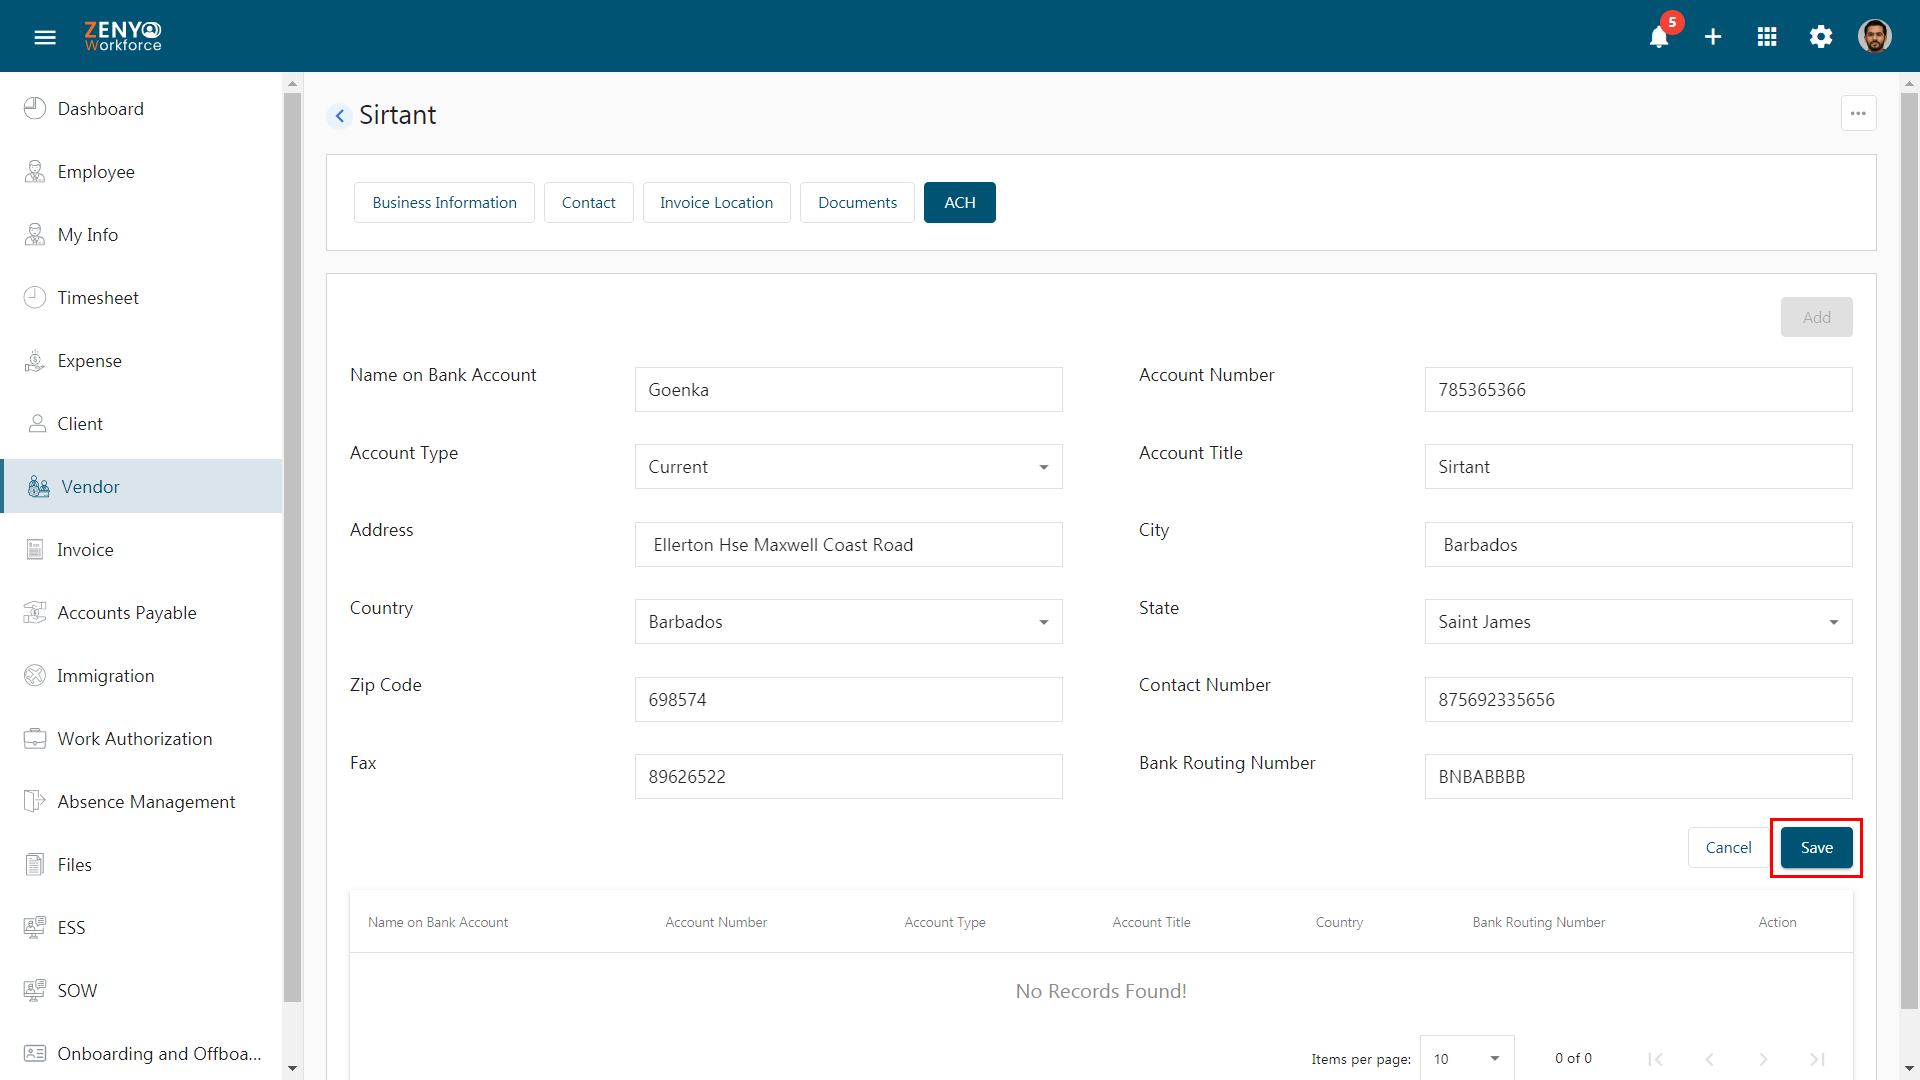
- Click Save to view the ACH details listed here. To update the details, click the Edit icon. To delete the details, click the Delete icon.
Active/Inactive vendor
- If you want to move a vendor to inactive status, click on a vendor record. On that vendor’s detail page, click the More icon and select Move to Inactive.
- A pop-up message will appear. Click Yes to confirm and your vendor will be moved to the list of inactive vendors.
- To view them, go to the vendor list page and click on More icon. Here you have two options. Active Vendors and Inactive Vendors.
- Now, choose the Inactive Vendors option to view the vendor you just deactivated. If you want to activate this vendor back, click on the vendor record, click the More icon and select Move to Active. The activated vendor will be visible in the list of active vendors.
Import vendors in bulk
- You can add vendors in bulk using the Import option.
- Click the Import icon.
- Before uploading your file, it’s important to ensure the data is in the correct format for a successful import. To help with this, you can download an import template by clicking the Import Template button.
- Once you’ve entered all the required data into the template, save the file on your local device.
- Click the Select File button to upload a file. Now, click the Upload button to initiate the import process.
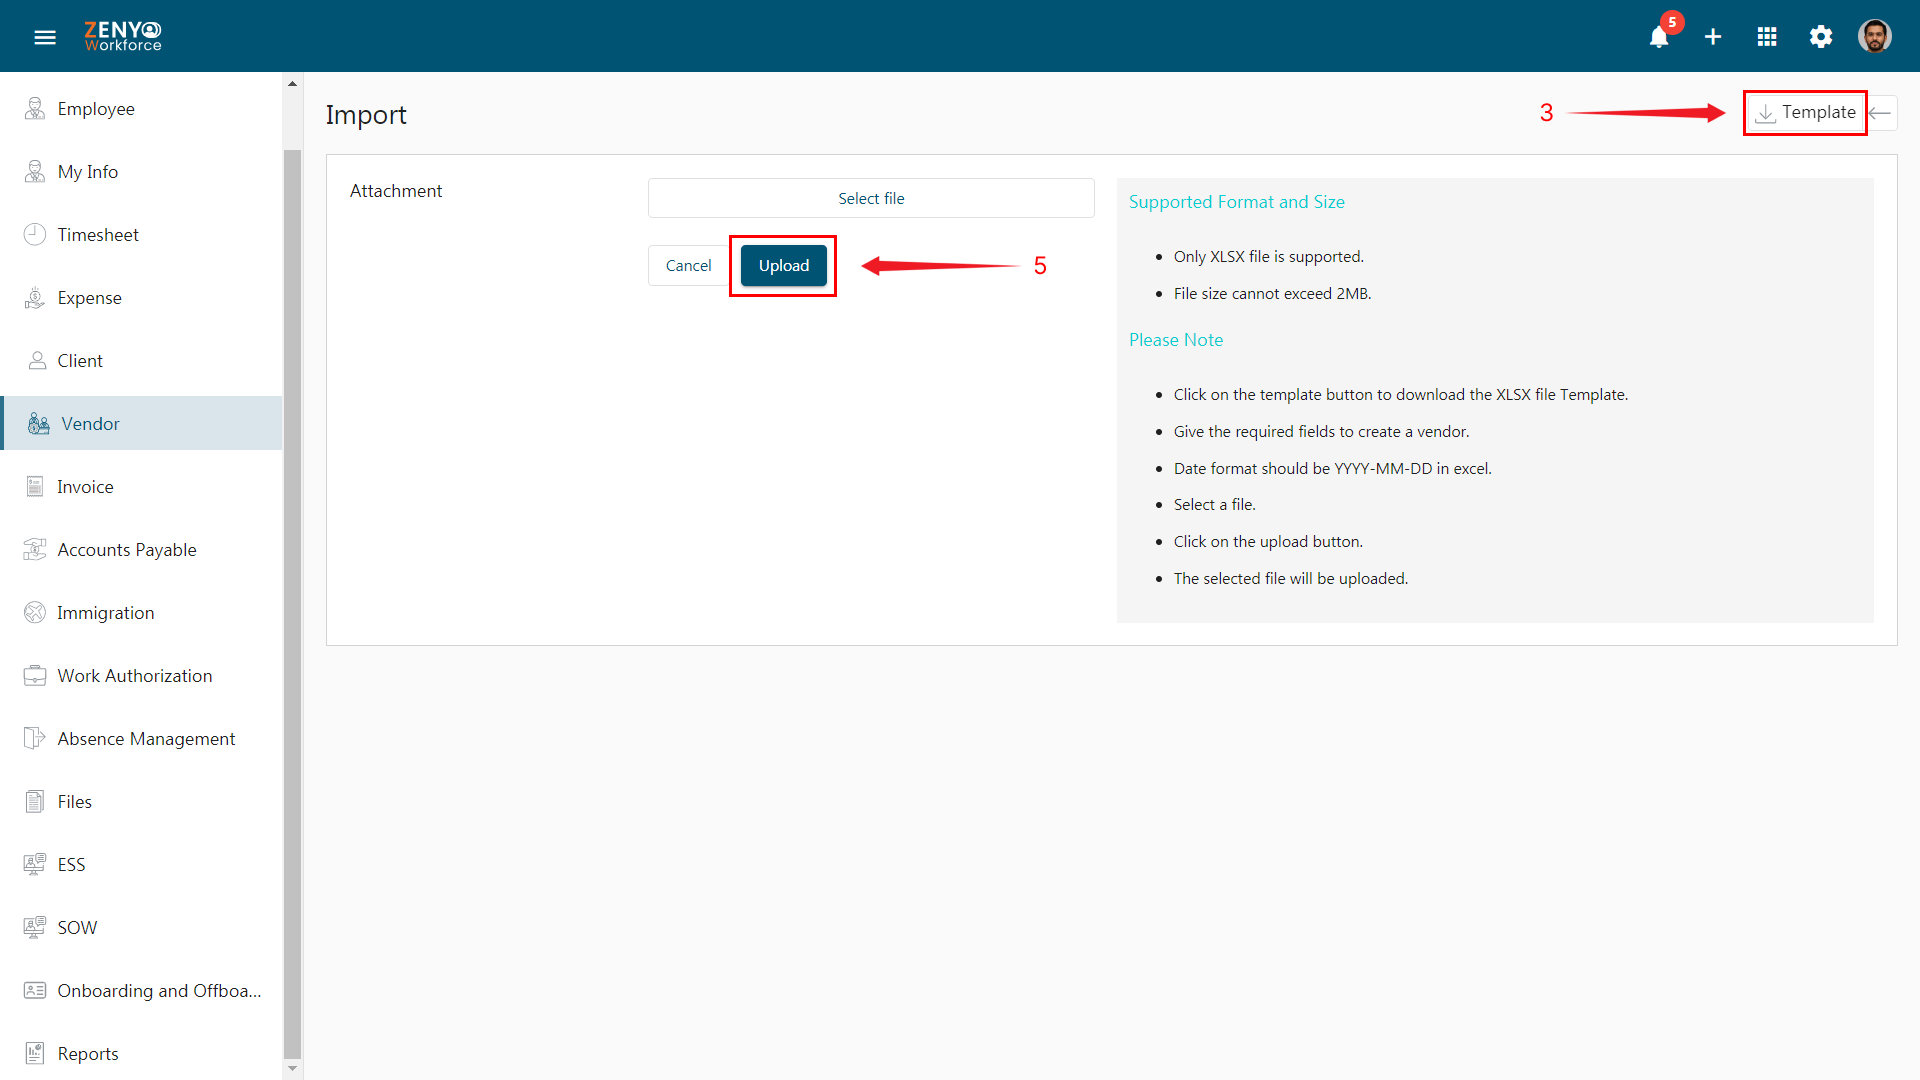
- The application will now process and import your vendors. Once the import is complete, you can view and manage your vendors within the system.
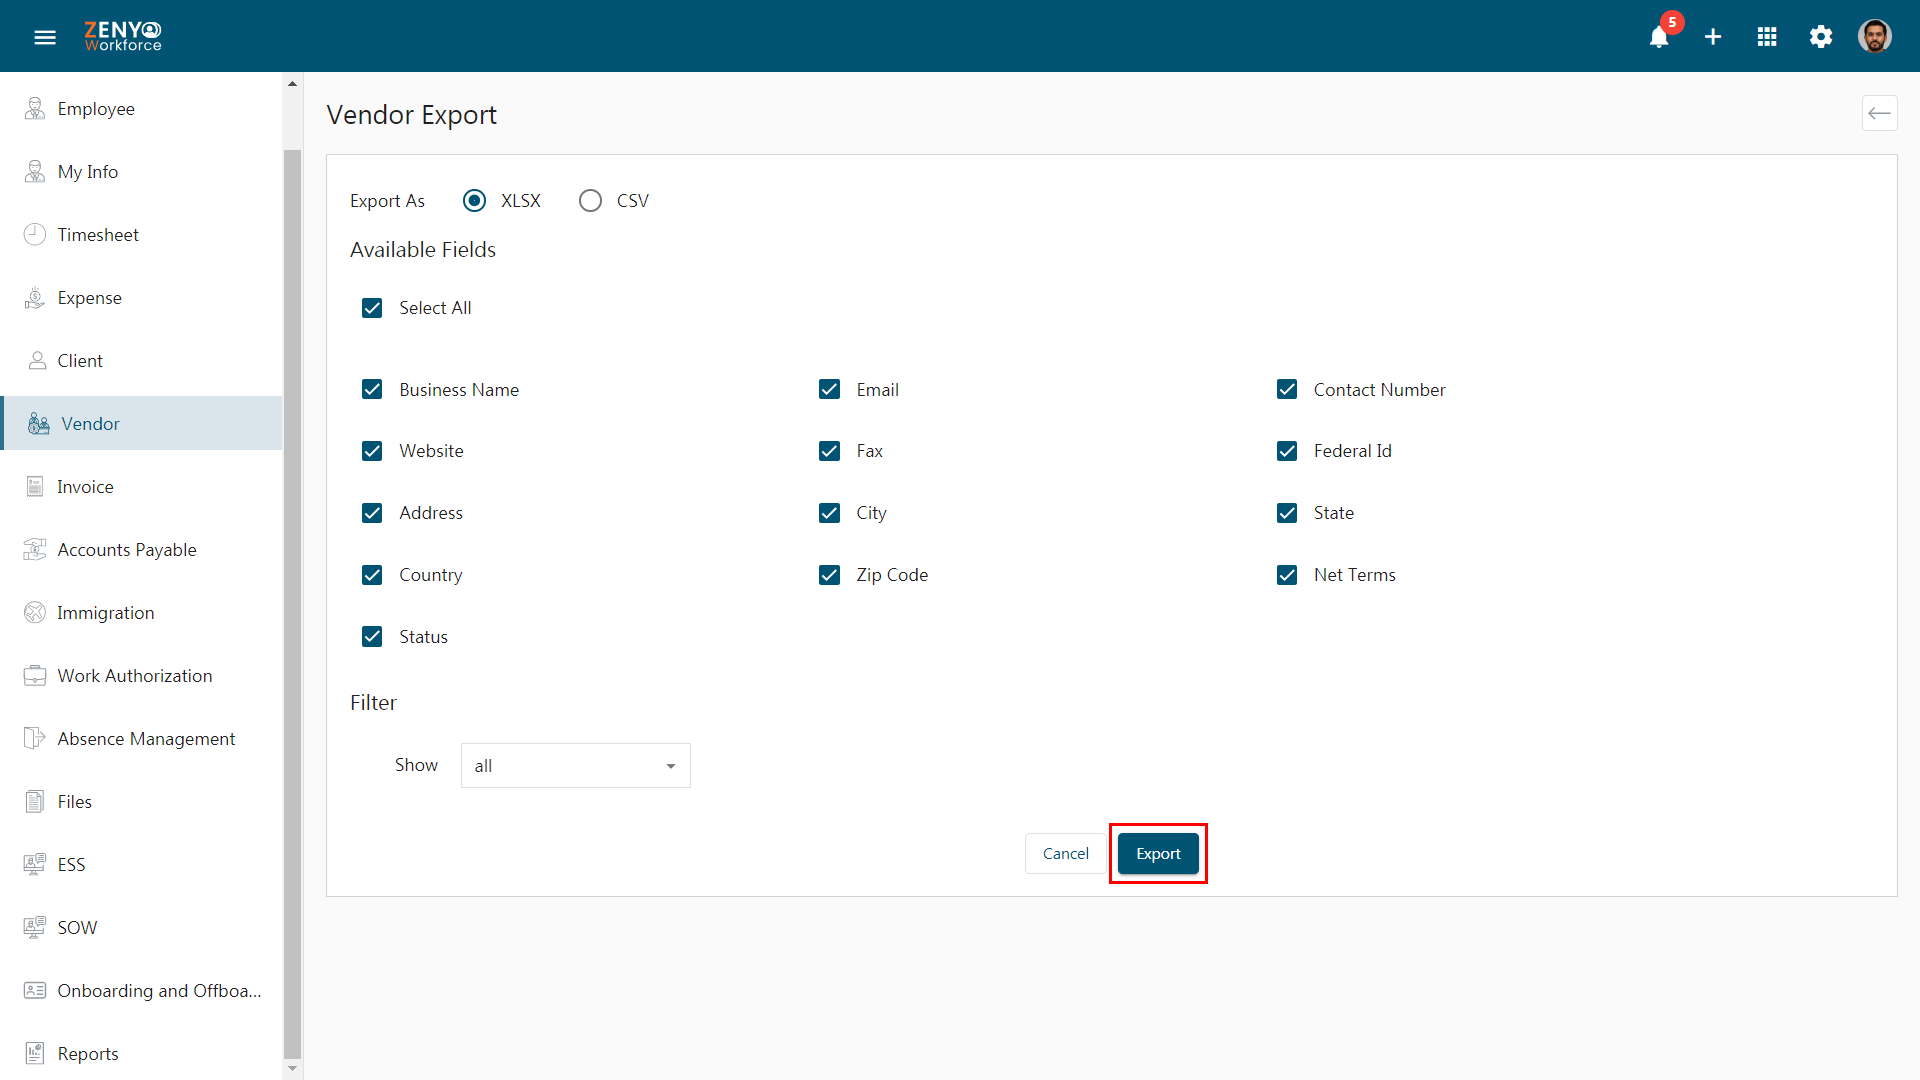
Export vendors in bulk
- You can export vendor details in bulk using the Export option, available in either XLSX or CSV format.
- Before exporting, you can choose specific fields or export all the fields associated with the vendors.
- For more filtering options, you can utilize the advanced Filter feature.
- Once you’ve configured the export settings according to your preferences, simply click the Export button to generate the export file in the selected format.