Maintaining employees’ LCA and H1B records ensures compliance with legal and regulatory requirements set forth by immigration authorities. By having all necessary information accurately recorded and easily accessible, you can demonstrate your commitment to adhering to immigration laws, thereby mitigating the risk of potential penalties or legal issues.
Click on the Settings icon and select the Work Authorization menu.
The Work Authorization menu has five submenus
- H1B Document Type
- LCA Document Type
- Wage Rate
- Visa Classification
- Work Authorization List
H1B Document Type
- Click on H1B Document Type. To create an H1B Document Type, click the Add button.
- A pop-up box will appear. Enter the name of your document type.

- Once you’ve entered the name, click Save.
- Once your document type is created, it will appear on the H1B Document Type page.
- Use the Edit icon to modify the document type or the Delete icon to remove it. Easily search for a specific document type using the search bar at the top of the page.
LCA Document Type
- From the Work Authorization menu, click the LCA Document Type.
- Click the Add button to create a new LCA document type.
- A pop-up box will appear where you can enter the name for the new document type.

- Click Save to create the document type.
- Your new document type will now be listed on the LCA Document Type page.
- Use the Edit icon to make updates or the Delete icon to remove the document type.
Wage Rate
- Click the Wage Rate sub-menu. This will take you to the Wage Rate page. Click the Add button to create a new wage rate.
- A pop-up box will appear where you can enter a name for the wage rate.
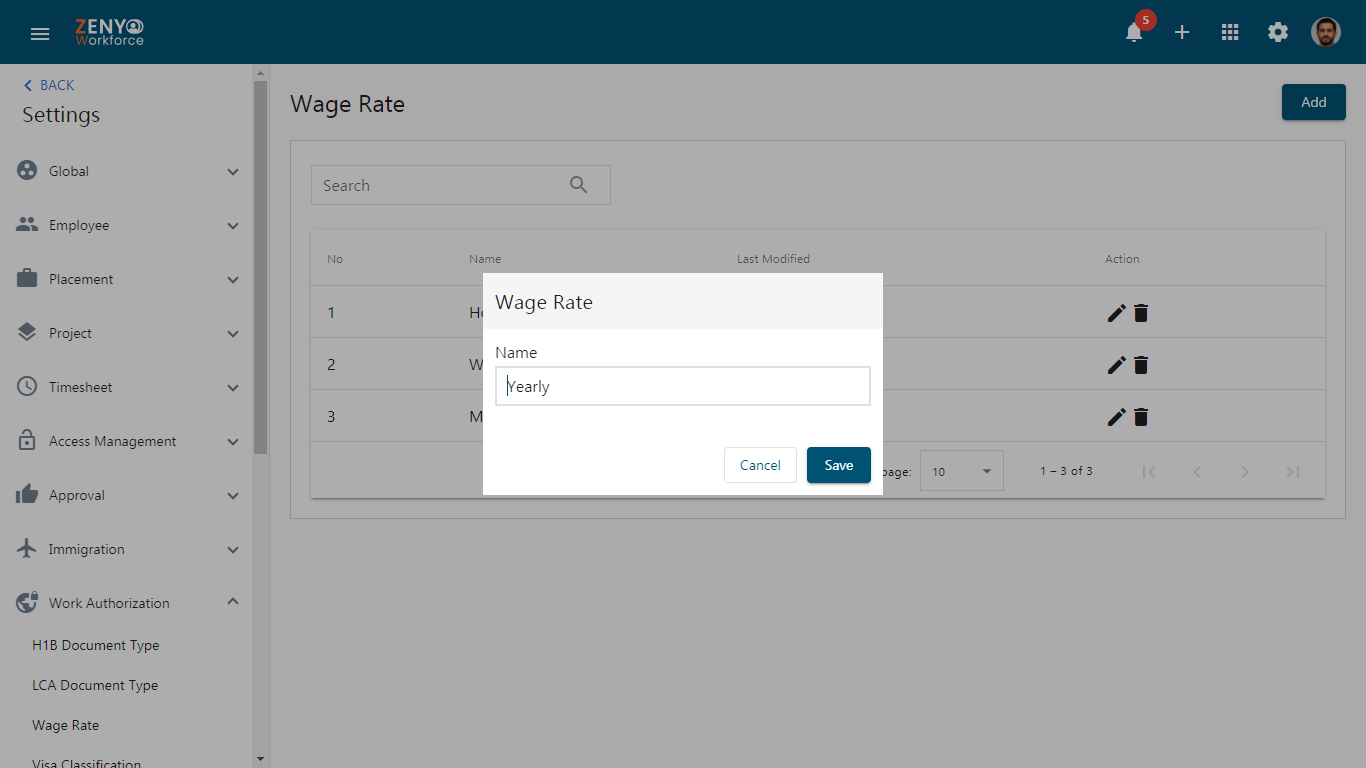
- Click Save to create the new wage rate.
- Use the Edit icon to make any updates to the wage rate.
- Use the Delete icon to remove it.
Visa Classification
- Click the Visa Classification sub-menu. This will take you to the Visa Classification page.
- Click the Add button to create a new visa classification.
- Enter a name for the new classification.
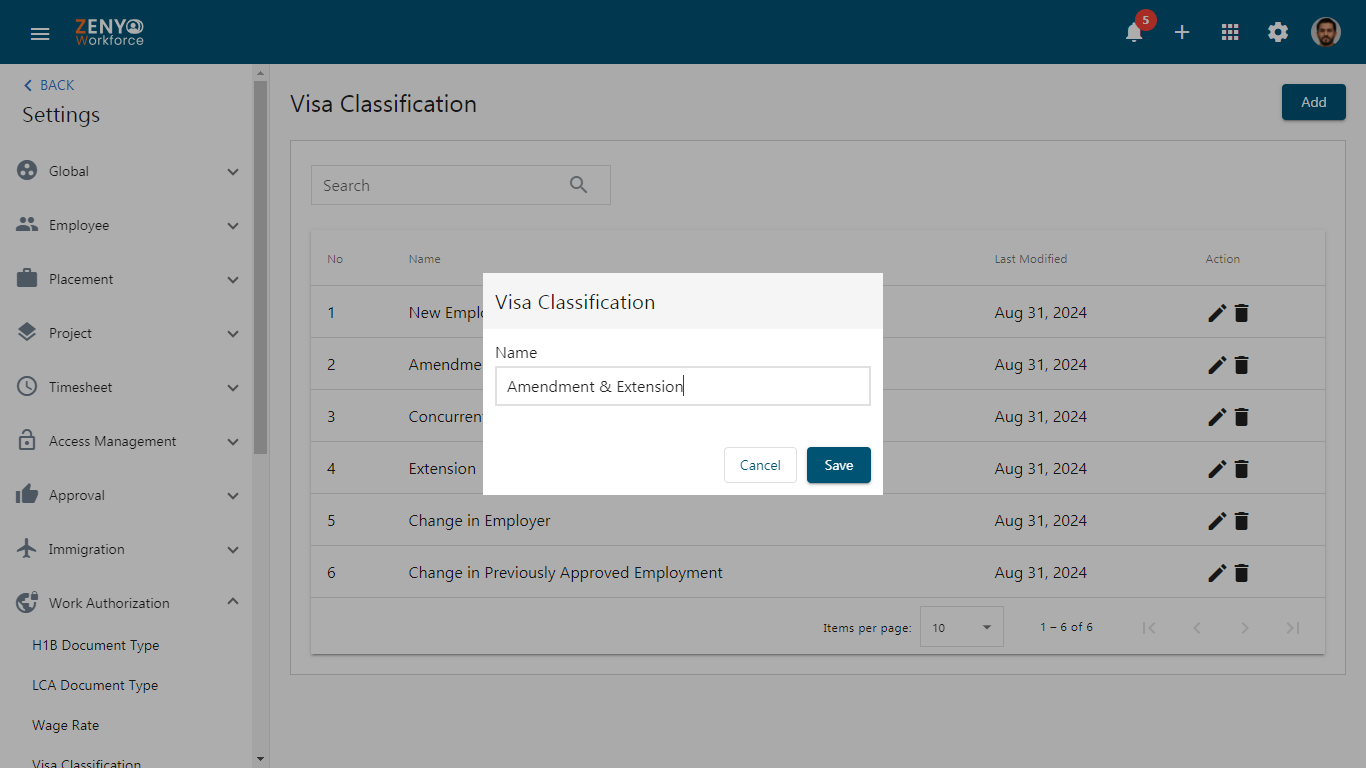
- Once you enter the name, click Save to create it.
- You can edit or delete a visa classification as needed using the respective icons.
Work Authorization List
- Go to the Work Authorization List sub-menu.
- On the Work Authorization List page, click the Add button.
- A pop-up box will appear where you can select the country you want to add document types.
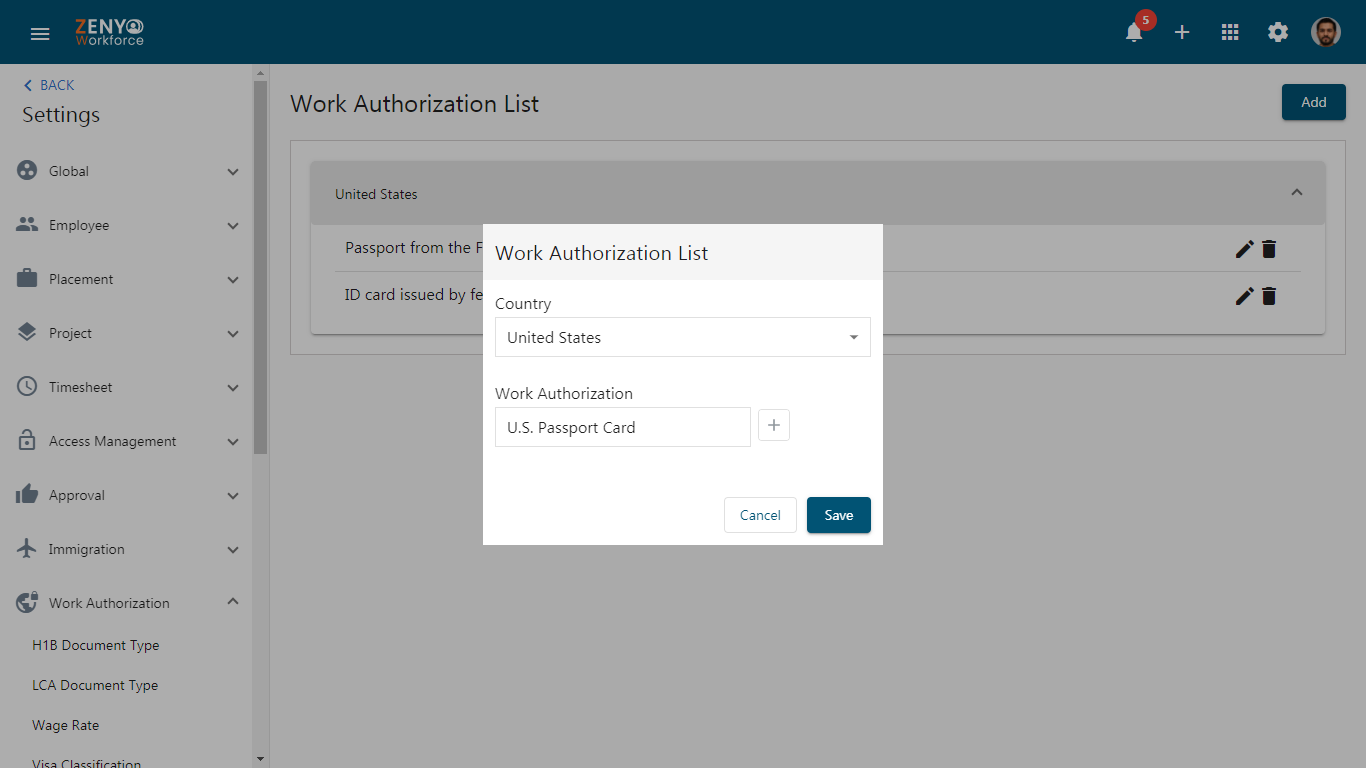
- Add the necessary Work Authorization document types. To add multiple document types, click the Add icon.
- Once you’ve added all required document types, click Save to create the new list.
- To view your list along with the associated document types, click the down arrow. This will display your name and the list of document types.
- You can edit or delete a particular document type as needed.
Creating Work Authorization
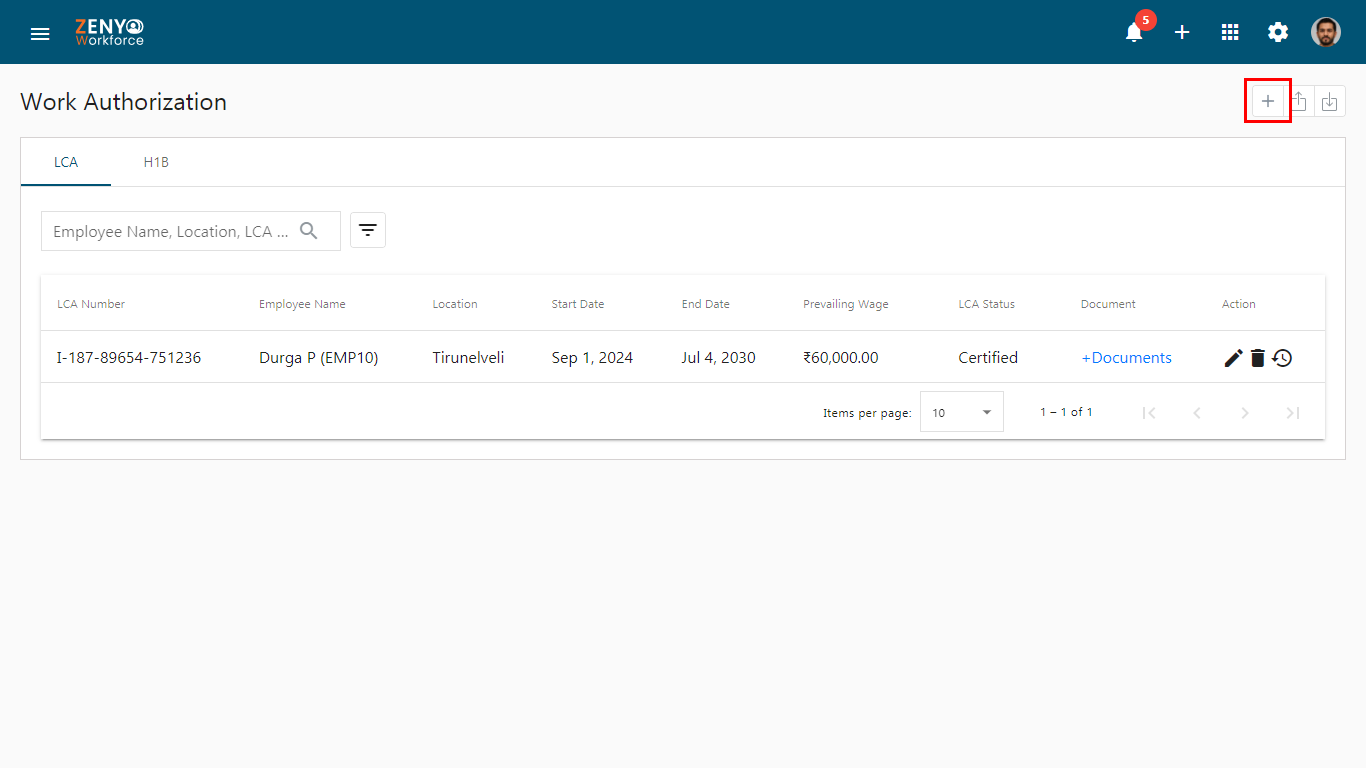
Navigate to the Work Authorization module. On the Work Authorization page, there are two tabs.
- LCA
- H1B
Adding a New LCA Record
- Go to the LCA tab and click the Add button to add a new record.
- Begin by entering the employee’s name and the LCA number linked to their work authorization.
- Select the current LCA status from the provided options.
- If you select Available, the employee’s name will no longer be displayed.
- Choose the appropriate visa classification and job title, and enter the certification date, along with the employment start and end dates.
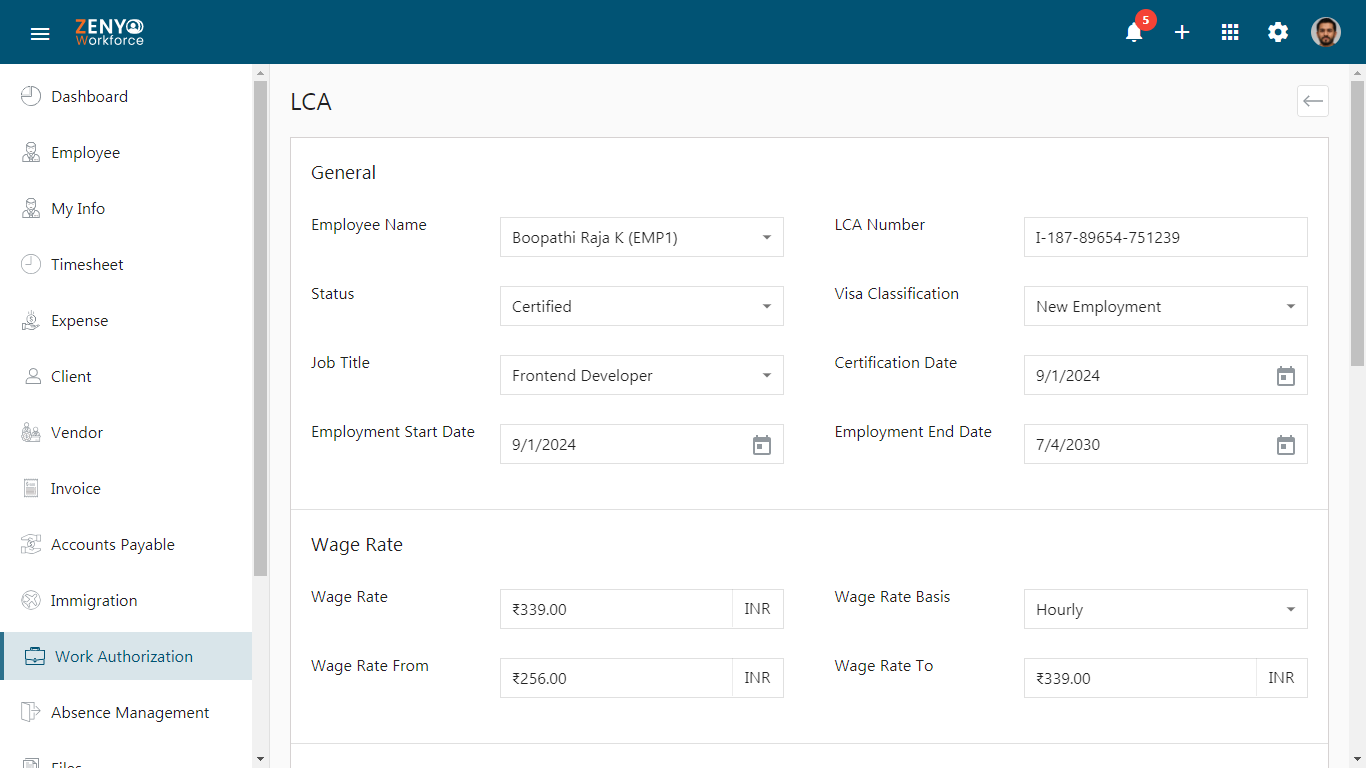
- In the Wage Rate section, enter the wage rate.
- Select the Wage Rate Basis from the options, and define the wage range by entering the minimum and maximum wage rates in the Wage Rate From and Wage Rate To fields.
- In the Place of Employment section, enter the address details for the employee’s workplace.
- Provide information regarding the Prevailing Wage.
- Enter the SOC code and specify the occupation title.
- Indicate whether the employee is H1B-exempt and add any relevant comments in the comments section.
- In the Attachments section, select the LCA Document Type from the dropdown.
- Provide a descriptive Document Name, and enter the Effective Date and Expiry Date.
- To attach a file, click the Choose File button and select the file from your device.
- Add more attachments by clicking the Add button if needed.
- Click Save to save the LCA record.
- The saved record will be listed with its current status under the LCA tab.
- To update details, click the edit icon next to the LCA record, modify the necessary fields, and click Update.
- To delete a record, click the delete icon.
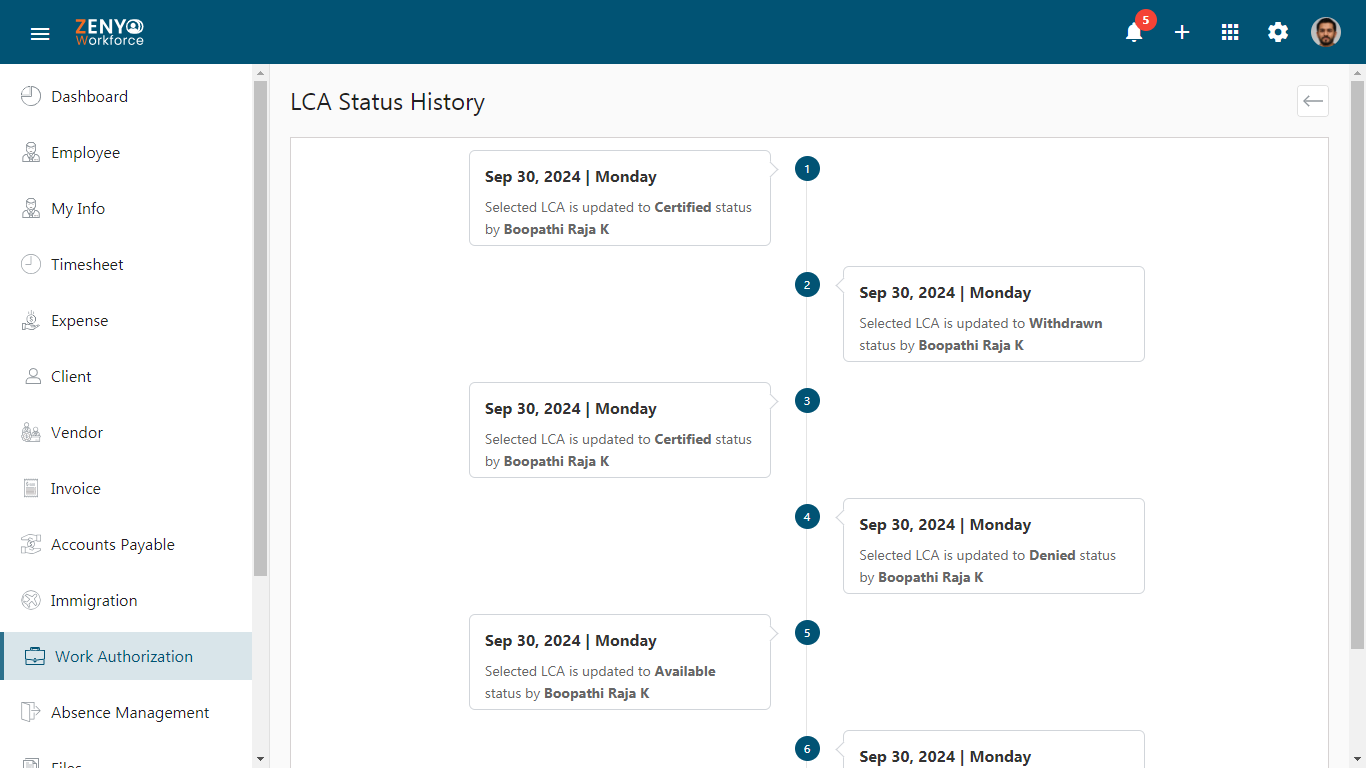
- To view the status history, click the status history icon, where you can see the log of status changes.
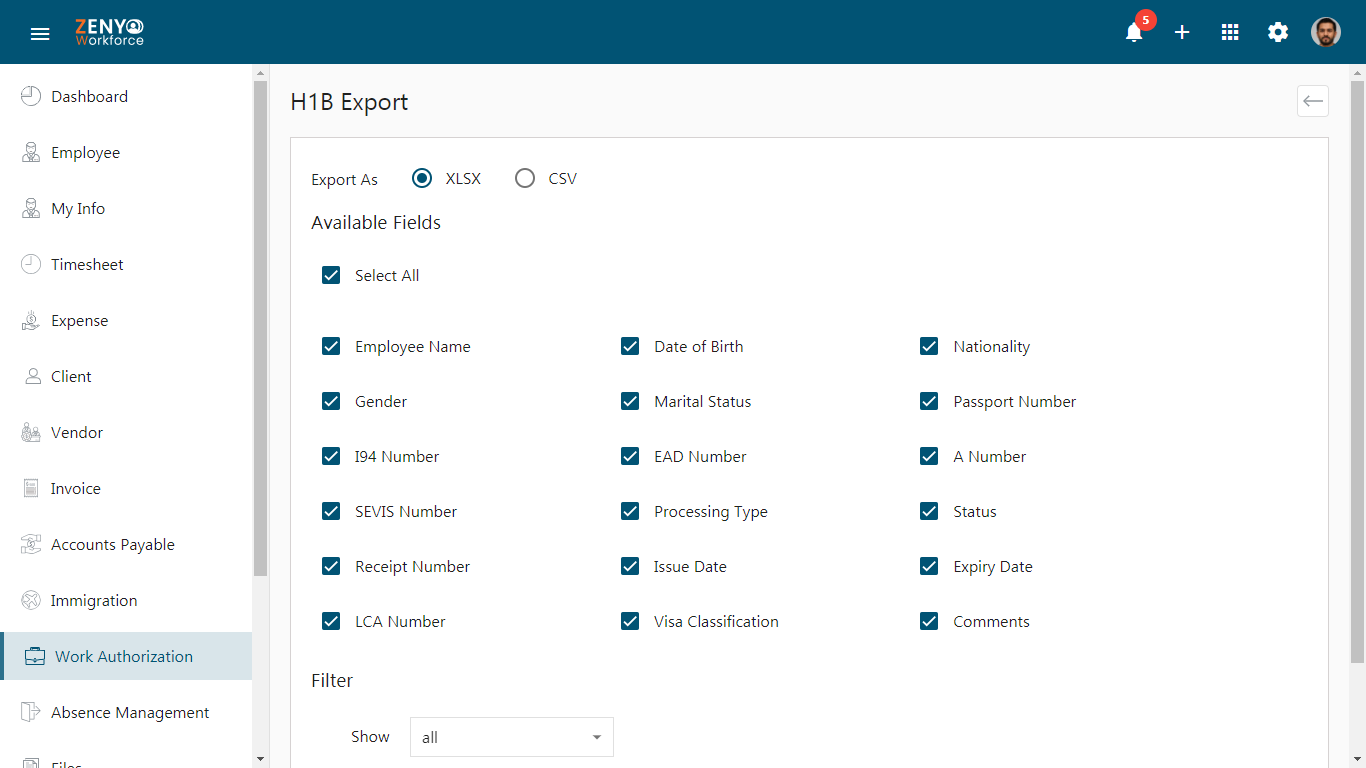
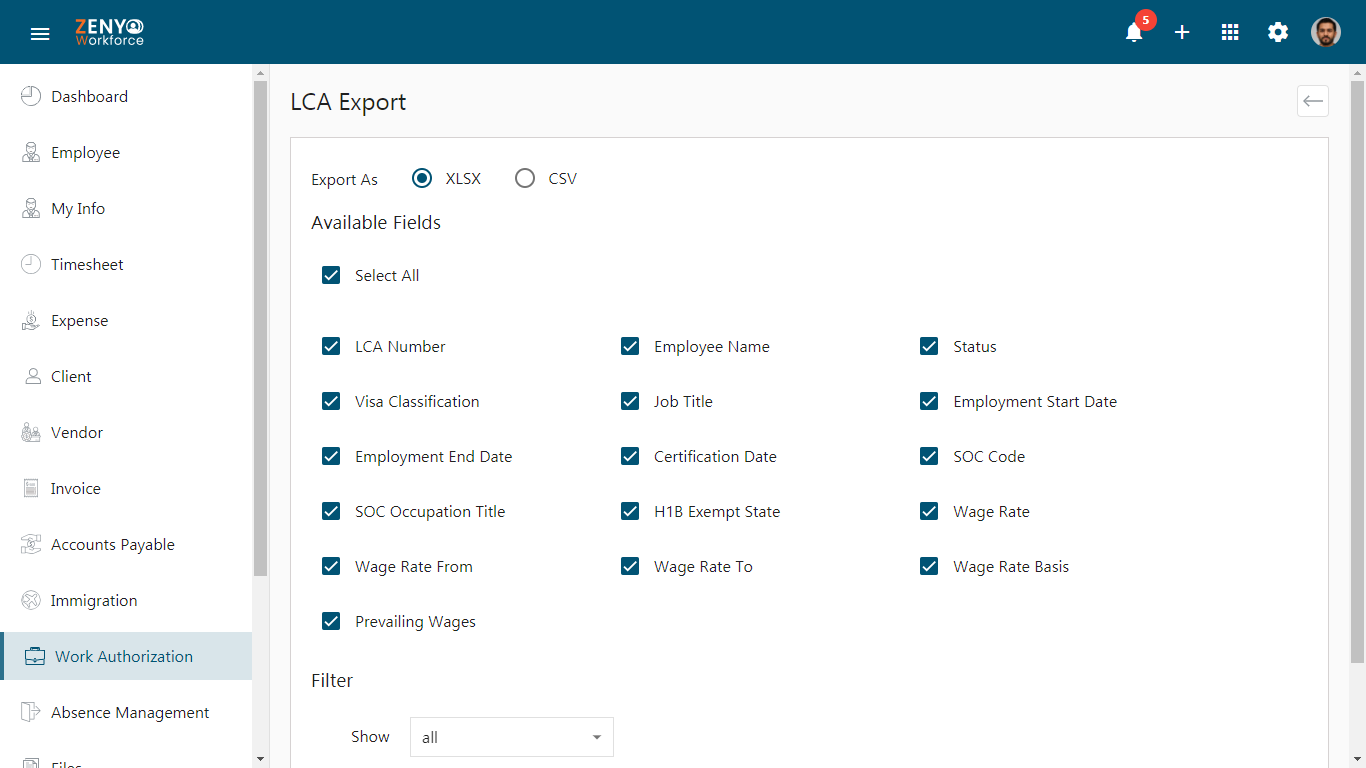
- You can export LCA records in XLSX or CSV format by clicking the Export icon on the top right corner.
- Before exporting, you can choose specific fields to include or export all fields.
- Use the advanced filter for more filtering options before generating the export file.
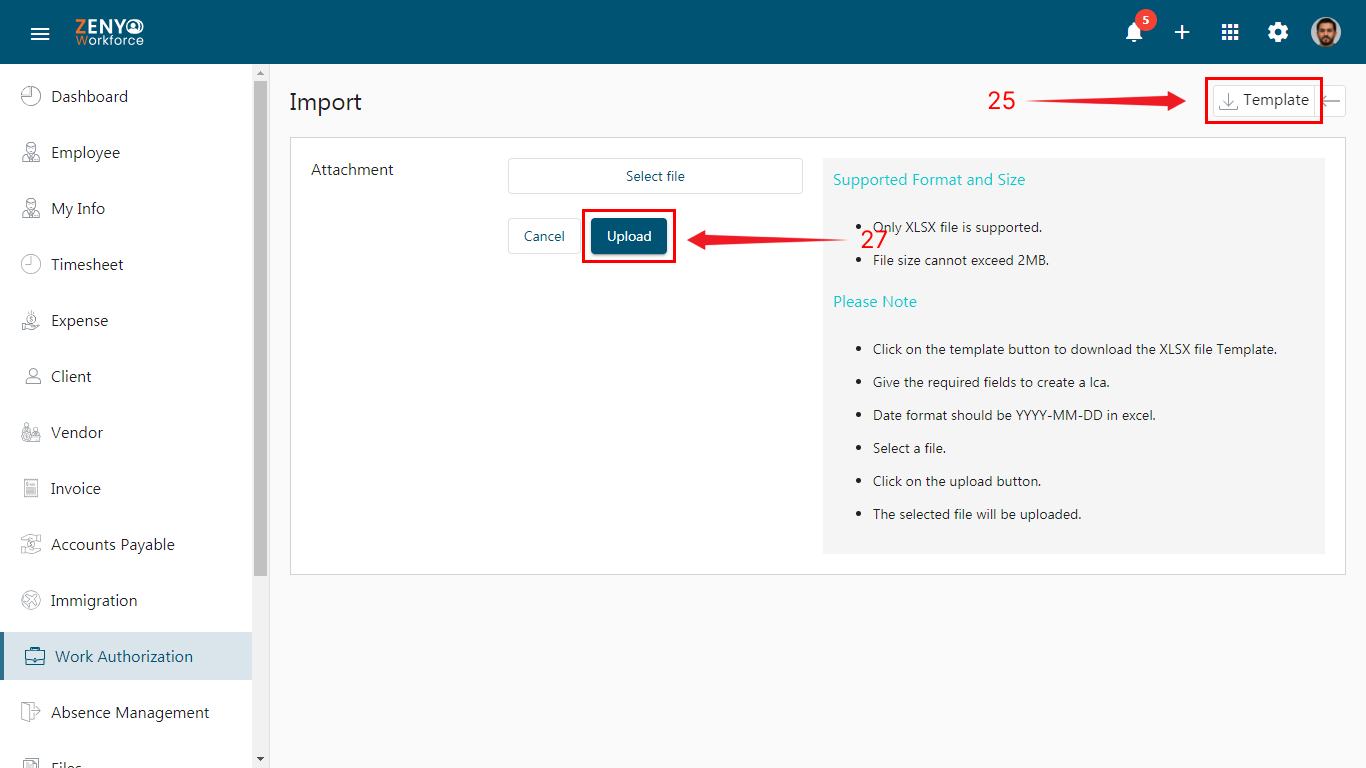
- Click the Import button to start the import process.
- Download the Import Template to ensure your file is in the correct format.
- After filling in the template with the required LCA data, save it on your device.
- Click Select File to choose the saved file, then click Upload to import the LCA records into the system.
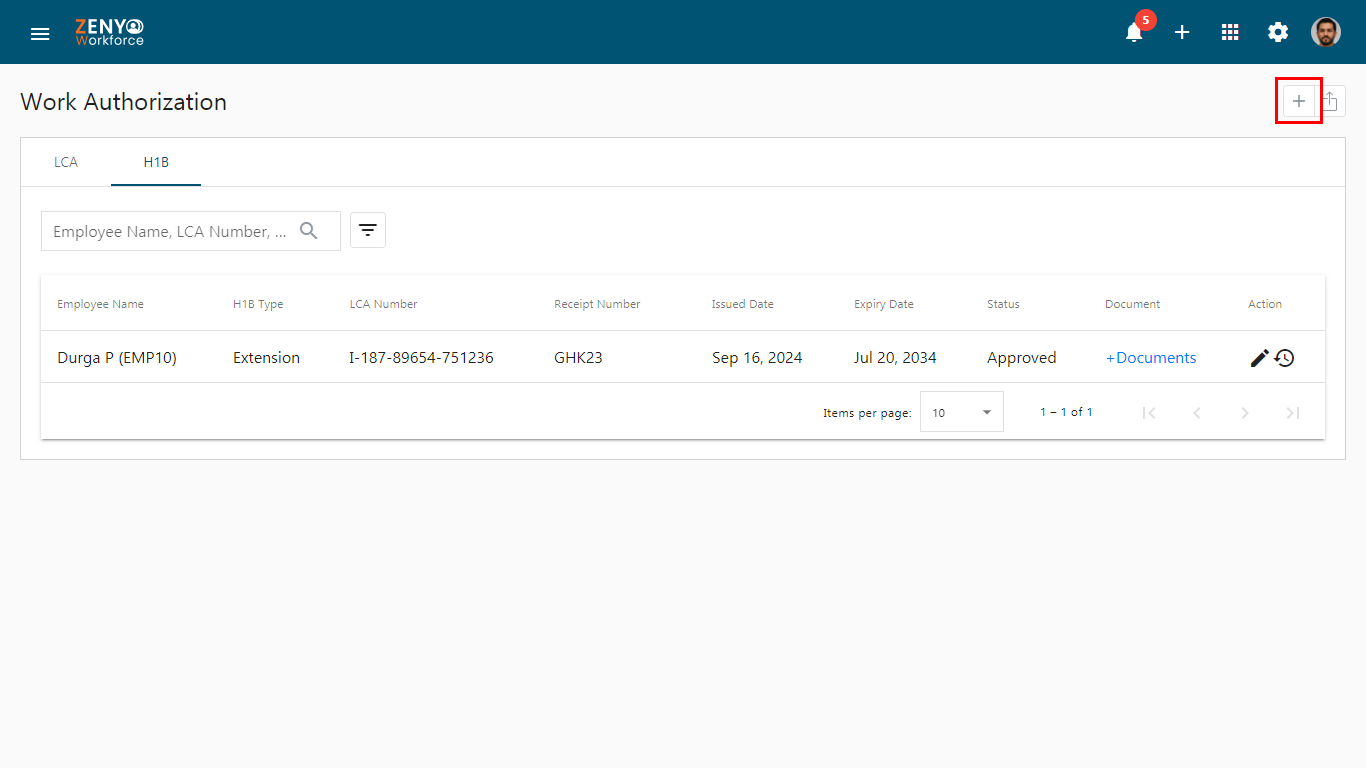
Adding a New H1B Record
- Navigate to the H1B tab and click the Add icon to add a new record.
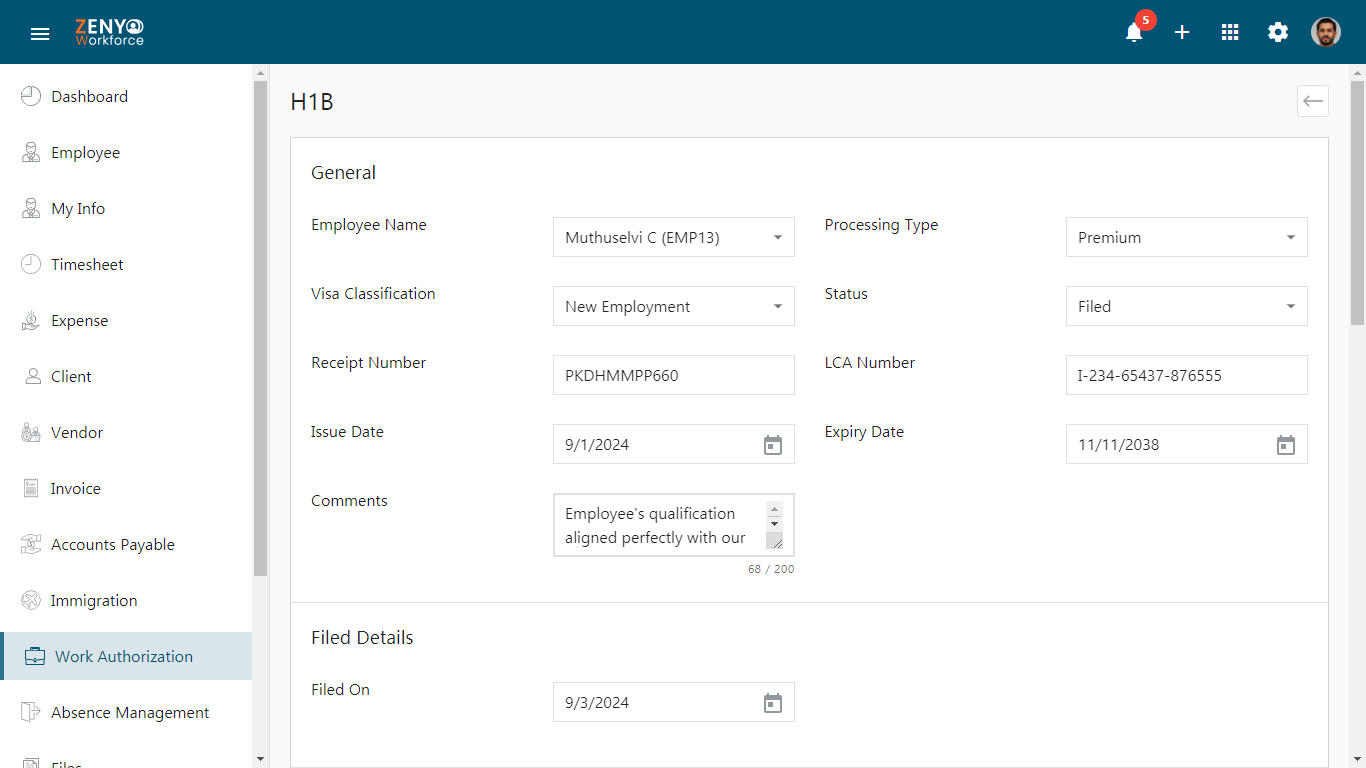
- In the General Details section, select the employee’s name from the dropdown.
- Specify the processing type, visa classification, and status of the H1B application.
- When selecting a specific status, additional fields related to that status will dynamically appear below the General section. Please fill in these fields accordingly.
- Next, enter the receipt number and LCA number associated with the H1B.
- Provide the issue date and expiry date for the H1B.
- Add any comments or notes for reference.
- After completing the additional fields related to the selected status in the General Details section, proceed to the Personal Details section.
- Enter the employee’s date of birth, gender, nationality, passport number, I-94 number, SEVIS number, EAD number, and A number.
Note: The A number or the Alien Registration Number is a unique number assigned to a noncitizen by the U.S. Citizenship and Immigration Services (USCIS) for identification and record-keeping.
- Enter both the employee’s present address and foreign address.
- In the Attachments section, select the Document Type from the dropdown.
- Enter a Document Name, and enter the Effective Date and Expiry Date.
- To attach a file, click the Choose File button and select the appropriate file from your device.
- Once the file is uploaded, click Save to save the H1B record, which will now appear on the H1B tab list.
- The saved record will be listed under the H1B tab.
- To edit the H1B record, click on the edit icon next to the specific record.
- After making the updates, click Update to save the changes.
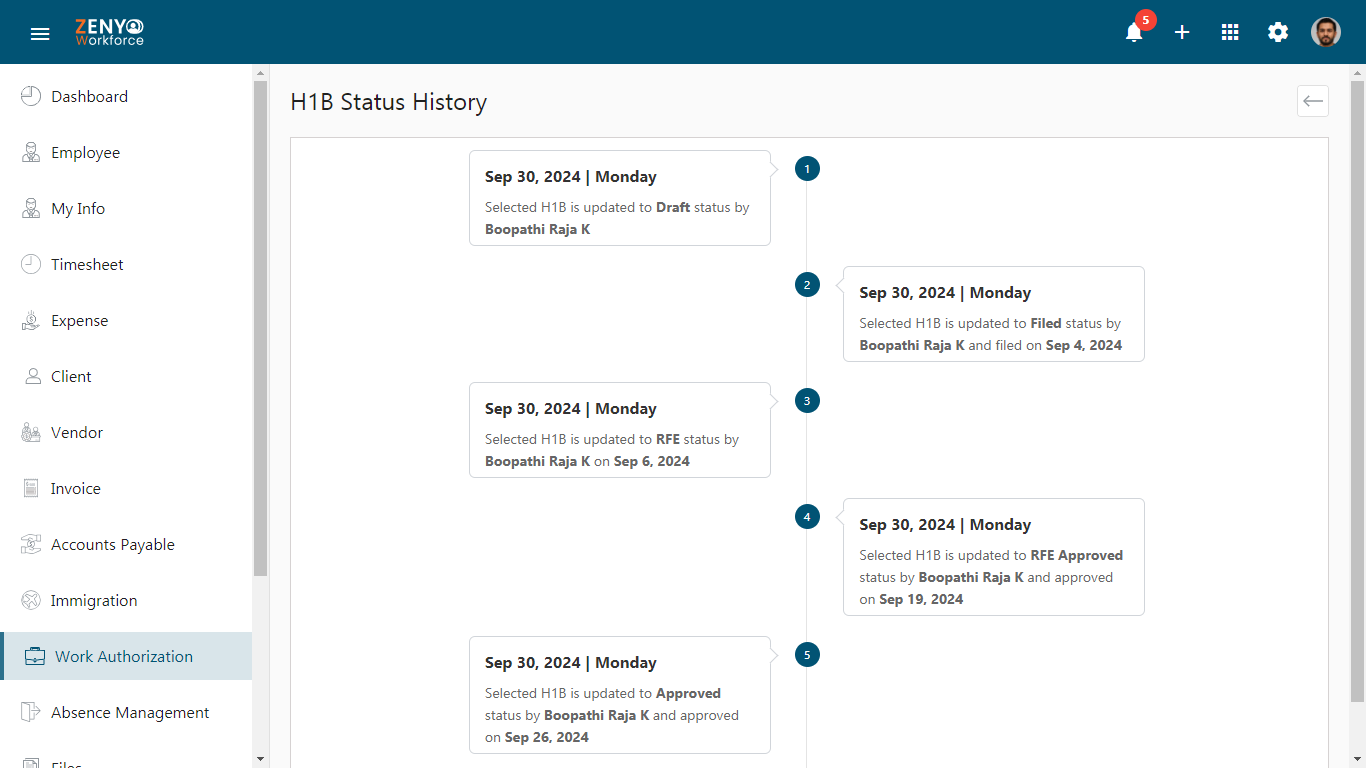
- You can view the history of status changes by clicking the status history icon.
- This will display a log of all changes made to the H1B status.
- By clicking the Export icon, you can generate an export file that includes all the details of the H1B record.