The Employee module is the central hub of the Workforce Management Software. It stores essential information like employee profiles, contact details, skills, and certificates. It provides a clear view of the workforce, helping improve operations and ensure compliance, all in an easy-to-use interface for managers and employees.
How to Add Employees?
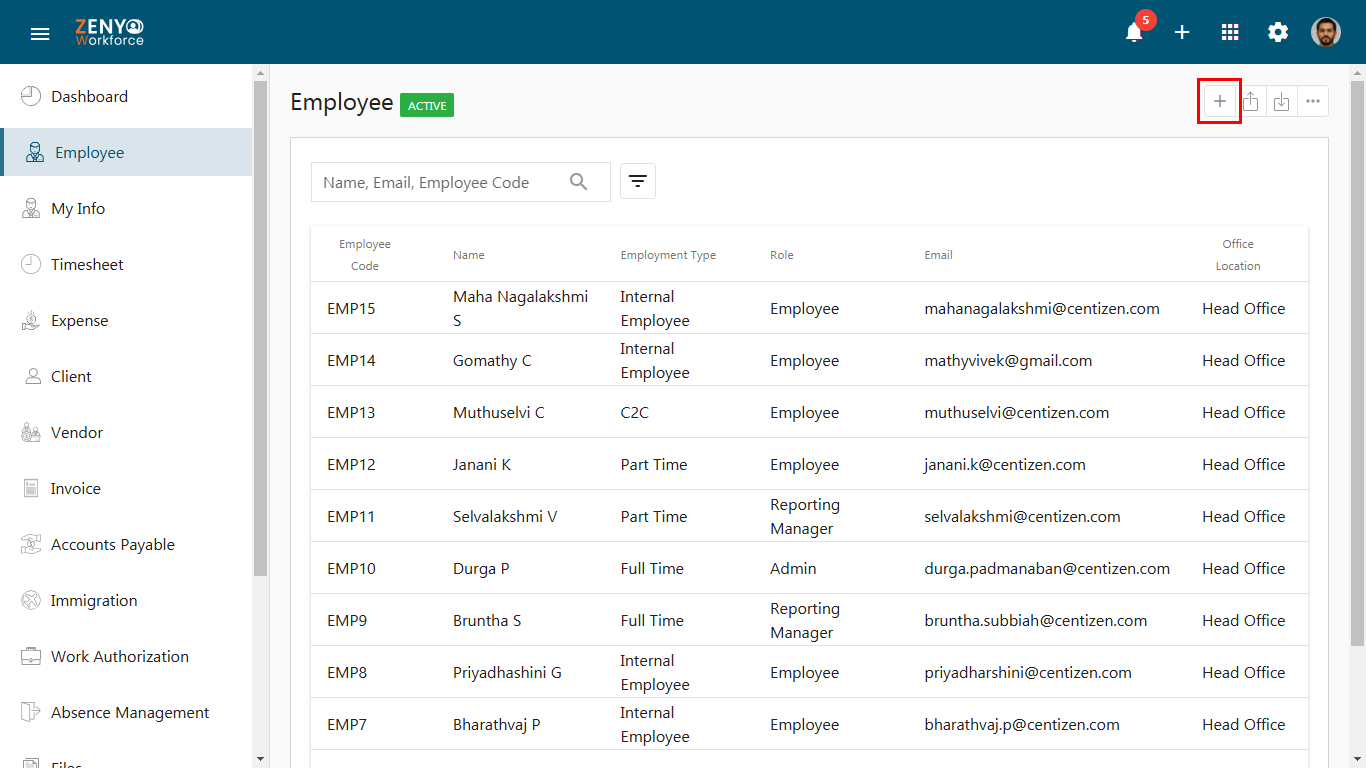
- To get started go to the Employee menu.
- The Employee page will display a list of active employees along with their Employee Code, Name, Employment Type, Role, Email, and Office Location.
- Click on the Add Icon to add an employee.
- On the Employee Registration page, a checkbox labeled Send an Onboarding Kit to this employee will be displayed. When this checkbox is selected, the system will save the employee details and automatically send an email containing the onboarding kit, which will request the employee to fill out onboarding information.

- If the checkbox is not selected, the system will simply save the employee’s details without sending the onboarding kit. After clicking Save, an invitation mail is sent to the employee. When the employee clicks on the Accept Invitation link in the mail, they will be redirected to the password generation page, where they can create their password.
- Then the employee gets redirected to the sign-in page, where he can sign in with the employee email ID and generated password.
- This gives flexibility in managing the onboarding process based on the employee’s registration needs.
- Now fill in all the employee details and click Save / Save and Create a New Onboarding Kit.
Import Employee Details
- On the Employees page, you can import the Employee data by clicking on the Import icon.

- On the top right, click the Template button to download the Employee Import Template. Fill in the necessary details and save it. Then, use the Select File button to choose the saved file from your local storage, and click the Upload button to import the employee data.
Export Employee Details
- On the Employees page, click on the export icon. Select the format in which you would like to export the employee data.
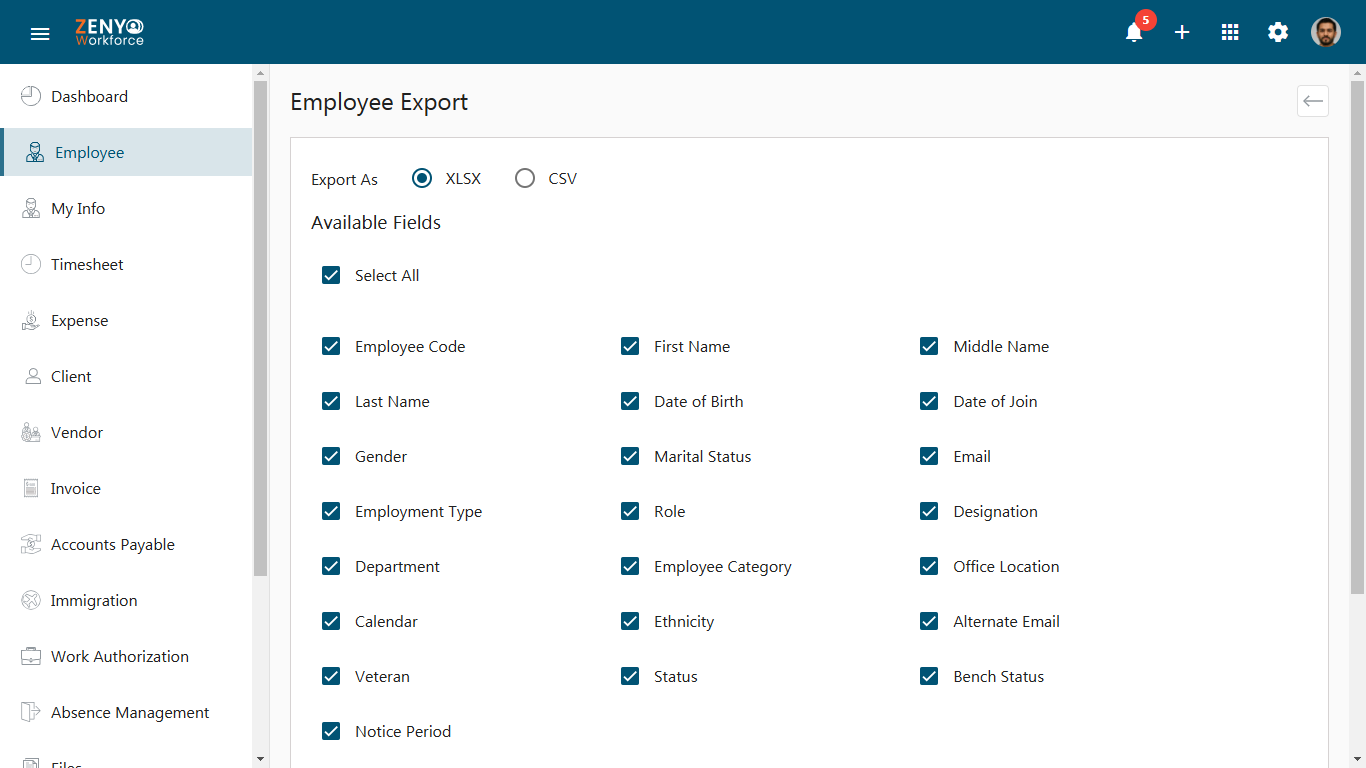
- You have the option to choose all the fields.
- You can also filter based on any one of the options All or Only from the dropdown menu. And finally, click on the Export button.
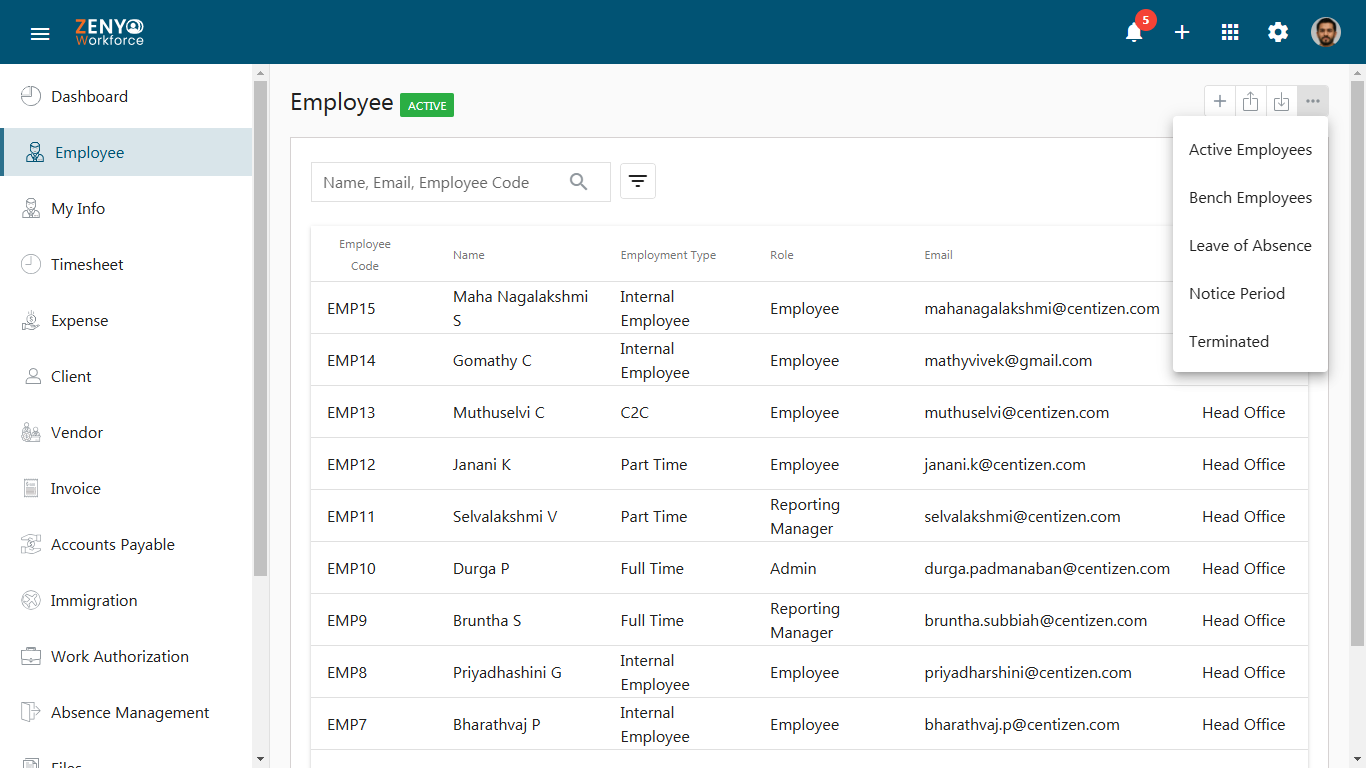
Click on the More icon where you can filter the employees based on the options of Active Employees, Bench Employees, Leave of Absence, Notice Period, or Terminated.
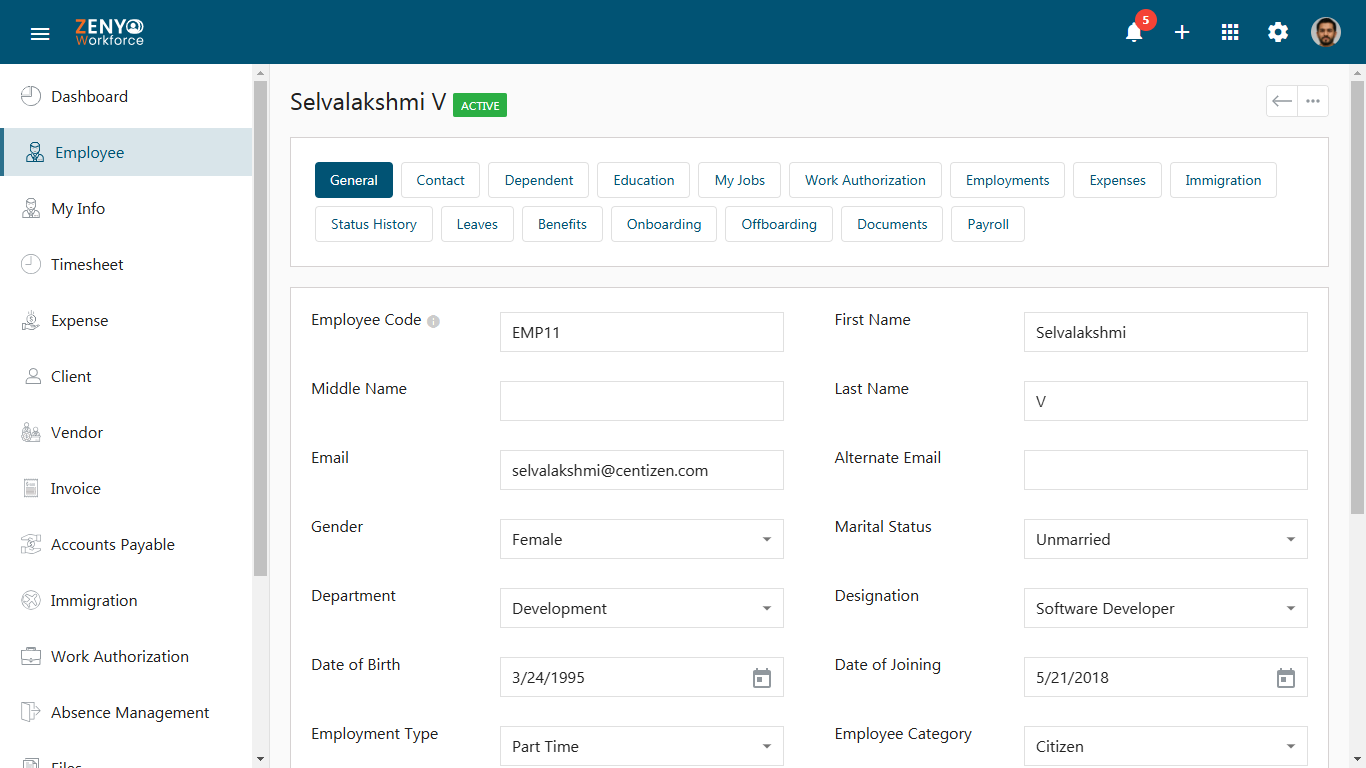
Contact Tab: Enter the employee’s Present and Permanent Addresses and Emergency contact details.
Dependent Tab: Enter all the details of the employee’s dependents.
Education Tab: Add all the information related to the employee’s education.
My Jobs Tab: Gives information about the project allotted to the employee.
Work Authorization Tab: Manage and update employee work authorization documents and statuses. Learn more about this process here.
Employments Tab: Add and track details of previous employment.
Expenses Tab: View the details of all the expenses submitted by the employee.
Immigration Tab: Track the status of the employee’s LCA, H1B, and Green Card processes.
Status History Tab: View the employee’s status history with corresponding dates.
Leaves Tab: Record, calculate, and view time off, leave balances, and history of accrued leaves. For further details, click here.
Benefits Tab: Manage employee eligibility, enrollment, and history for various benefits like reimbursements, vision, and health savings accounts. Discover more by clicking here.
Onboarding Tab: Add, manage, and track tasks related to onboarding new employees. To learn more click here.
Offboarding Tab: Add, manage, and track tasks related to offboarding employees, with options to edit or delete tasks. For further details, click here.
Documents Tab: View, upload, and manage employee documents.
Payroll Tab: Add, edit, or delete employee pay rates, schedules, and payroll details.
