The Expense management section enables you to track and manage work-related expenses.
Expense Settings
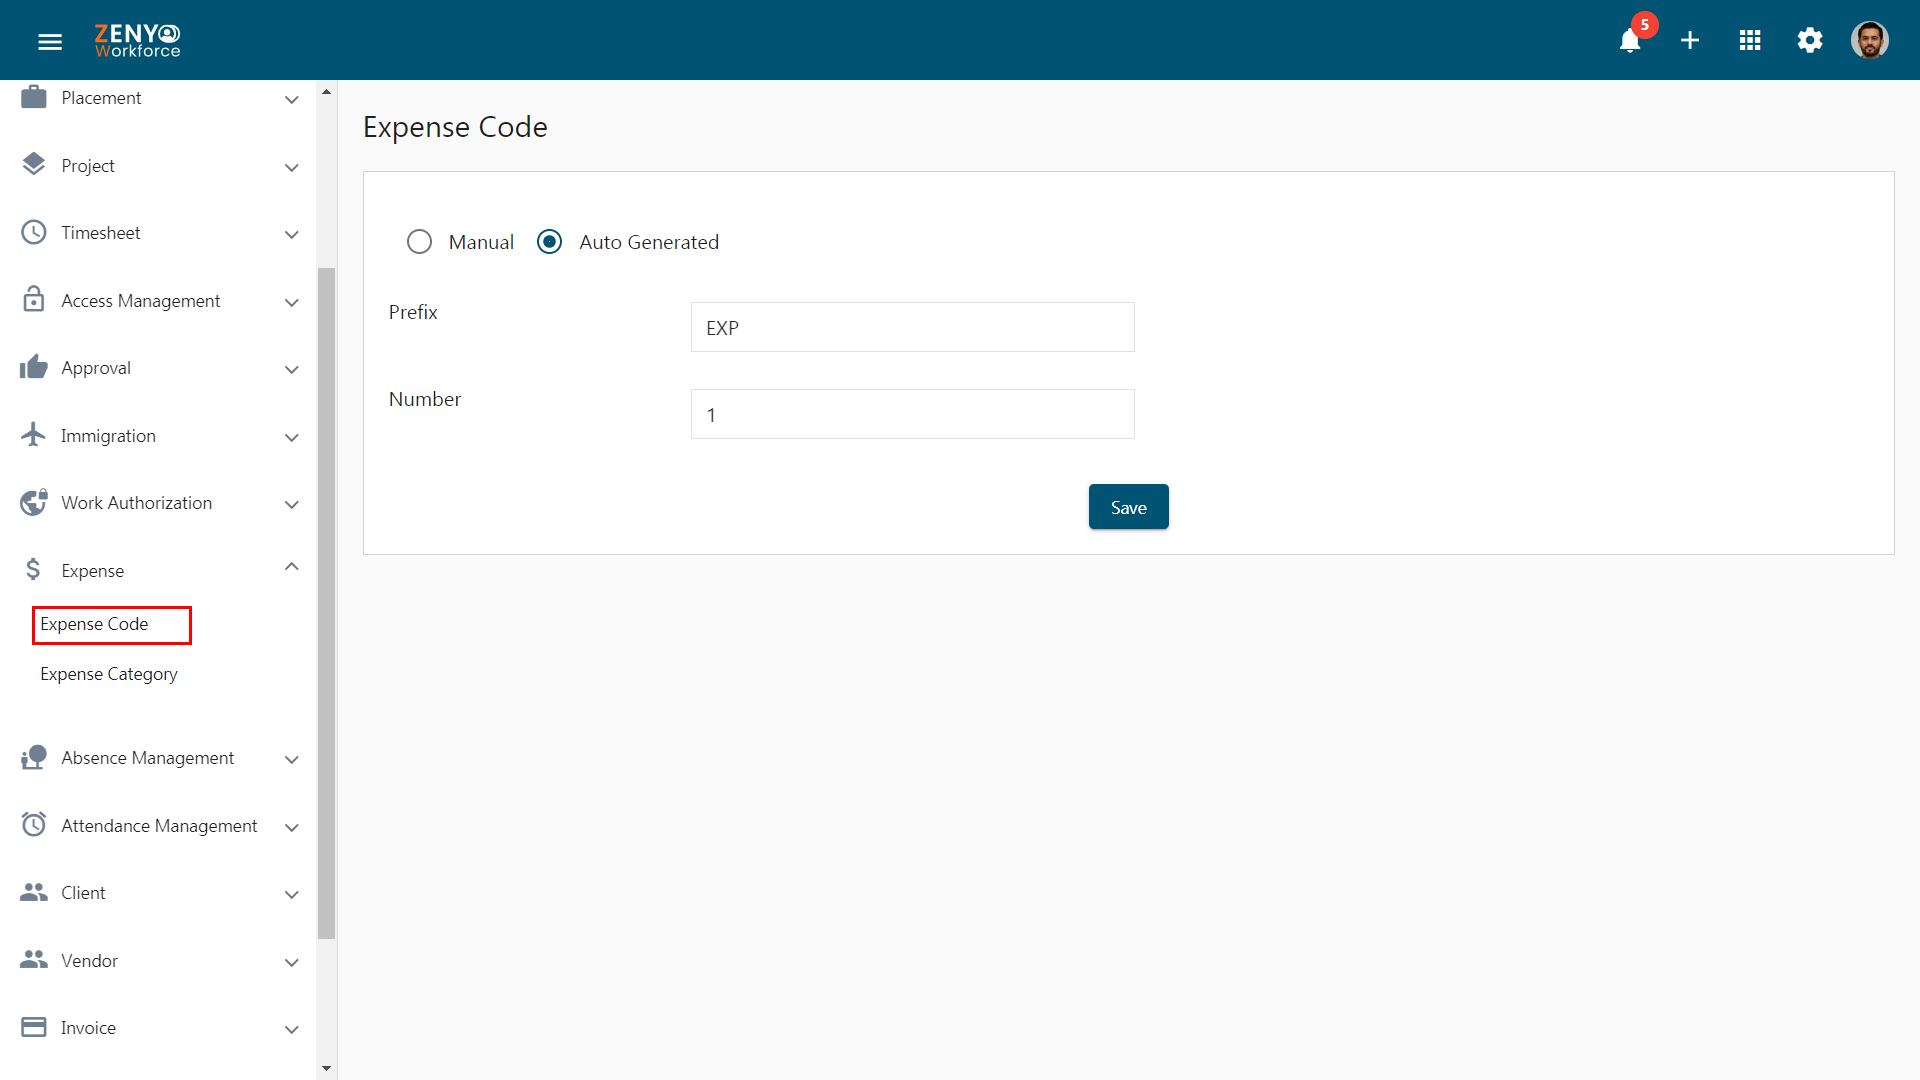
- Click on the Settings icon and navigate to the Expense menu.
- Select the Expense Code submenu.
- Choose Manual to manually enter the code, or select Auto Generated to automatically generate the code by providing an expense Prefix and an Increment Number.
- Click Save to complete the process.
- Next, select the Expense Category submenu. To add a new expense category, just click on the Add button. Enter the Name, and click Save.
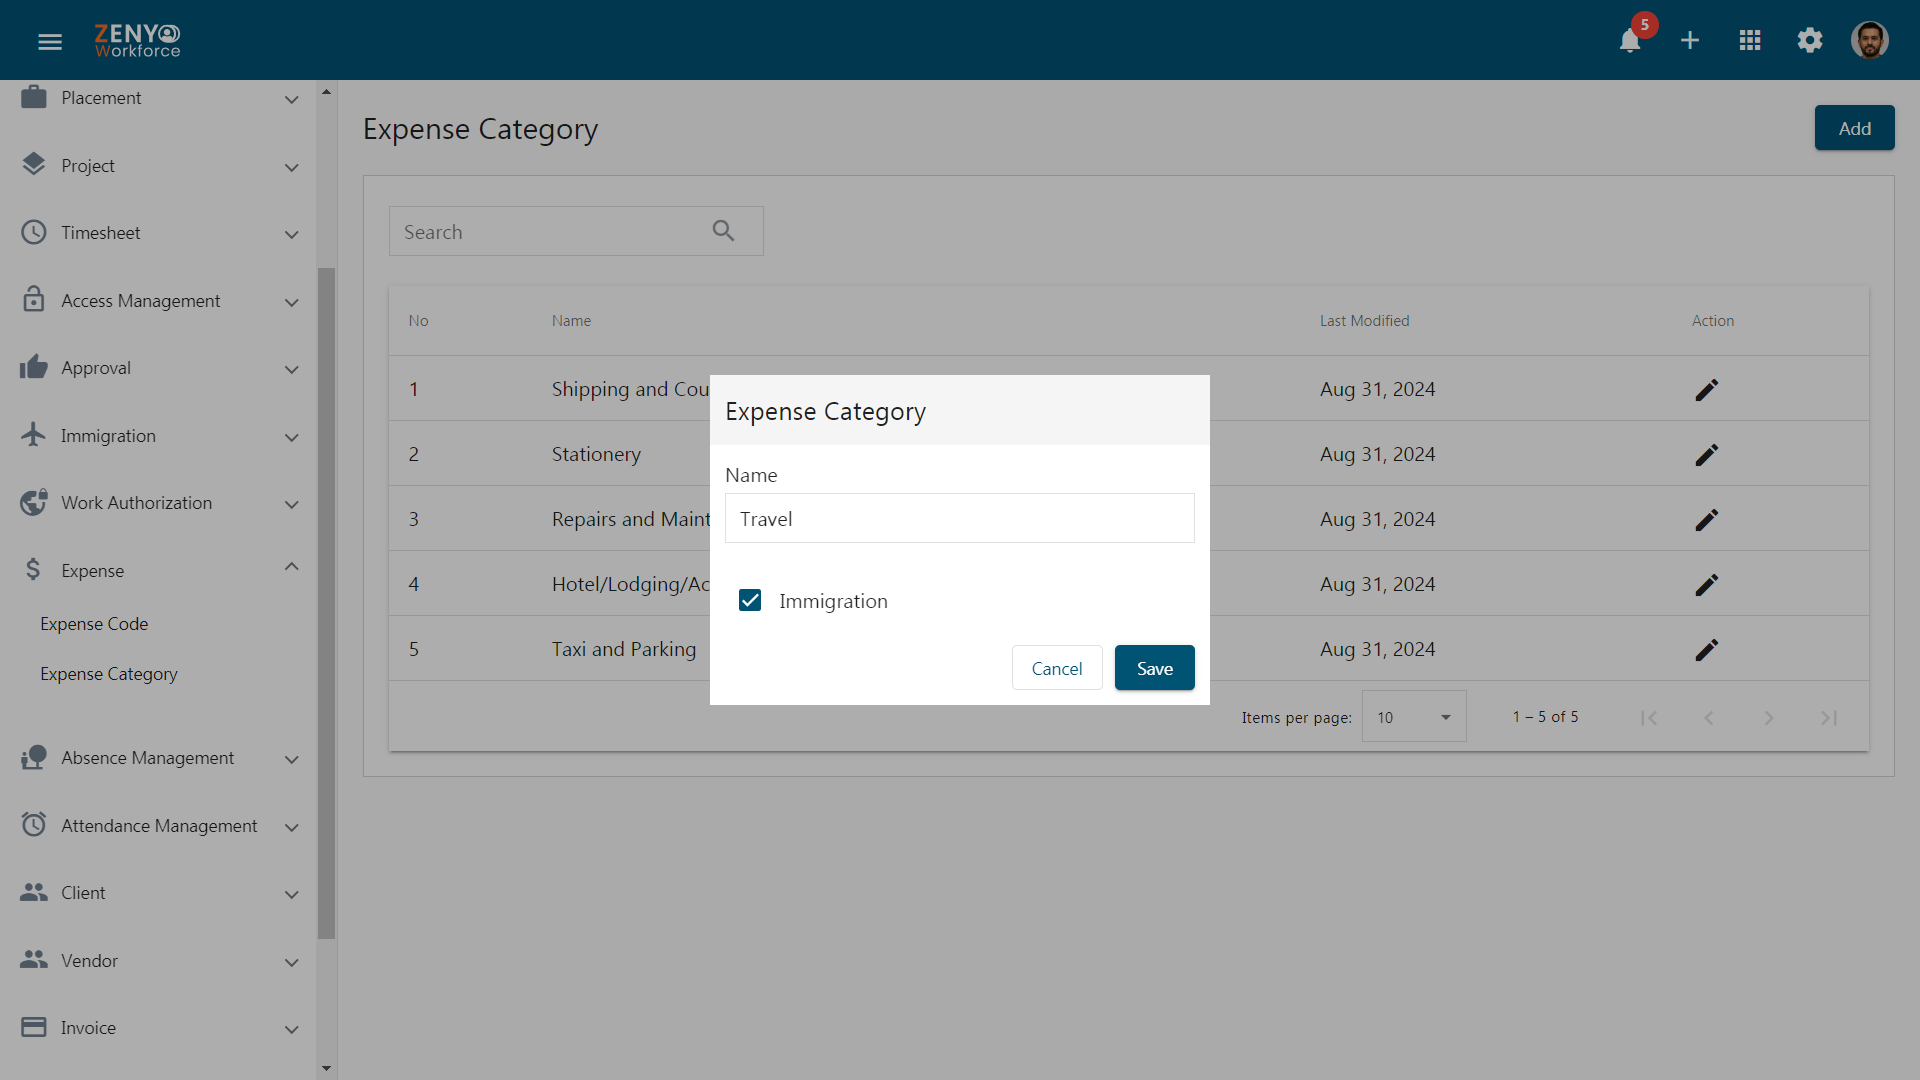
- You’ll see the created expense category listed here, along with the Name, Last Modified date, and Action.
- If you need to search for a particular expense category, you can use the search box.
- You can click on the edit icon under the Action field to edit the name of the expense category. Click the Update button to save your changes.
Expense Approval Flow
- To set an approval flow for expense, go to the Approval menu and select the Expense submenu.
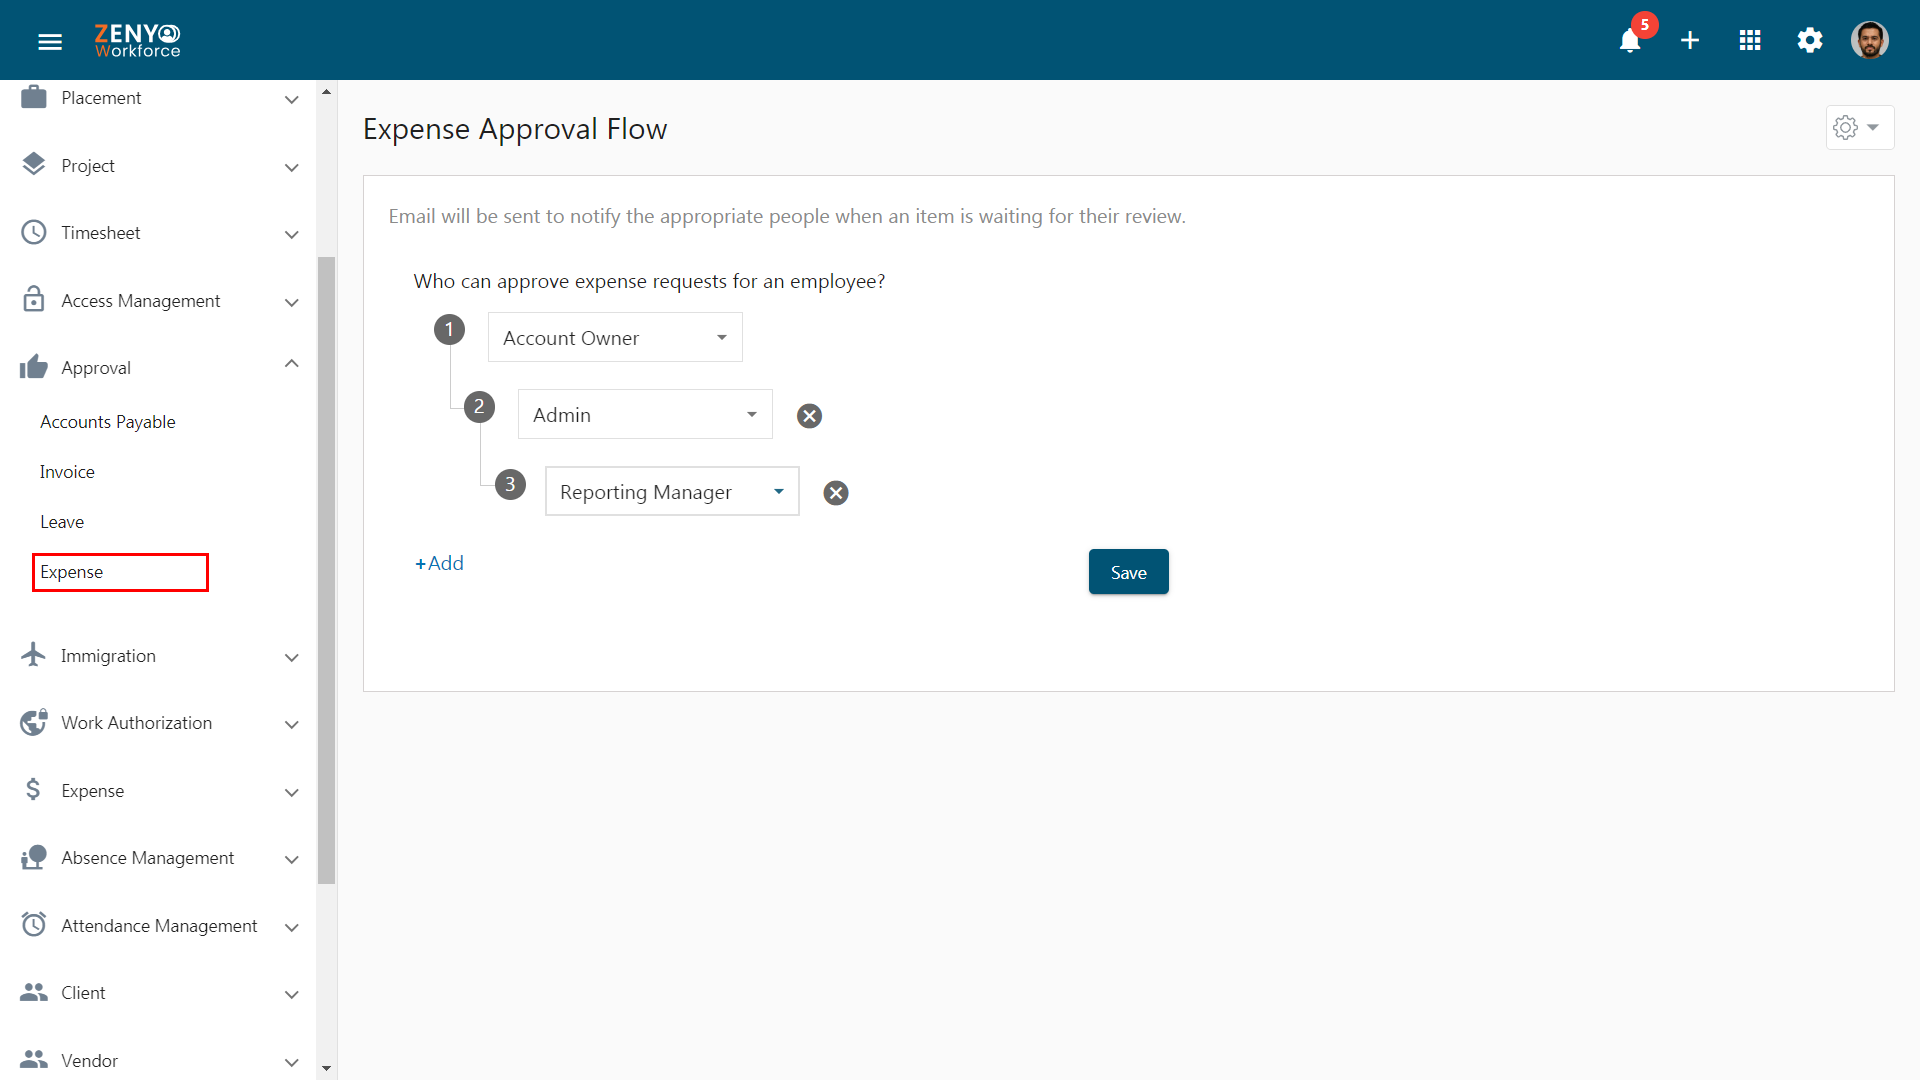
- Specify who can approve expense requests for the employees.
- Here, you can set approvals at two levels: default and advanced levels.
How to Set Default Level Approvals?
- In the default level, the set approval flow will be applied to all employees.
- To set approvals at the default level, click on the dropdown menu under Who can approve expense requests for an employee? field. Then, select an approver from the available options. You can choose the Account Owner, Admin, Reporting Manager, Manager’s Manager, or a Specific Person as the approver.
Note: Each of the roles mentioned above can be chosen only once, except for a specific person.
- If you choose a Specific Person, you can select a particular employee as the approver. Click on Add to add an approver for expenses.
- You can remove these added approvers by clicking the Remove icon.
- Click on the Save button to apply the changes.
- A pop-up will appear confirming that the approval flow settings updated successfully.
How to Set Advanced Approvals?
To set Advanced Approvals for expenses, follow the link.
Expense Management Section
Go to the dashboard and select Expense from the main menu.
Adding a New Expense
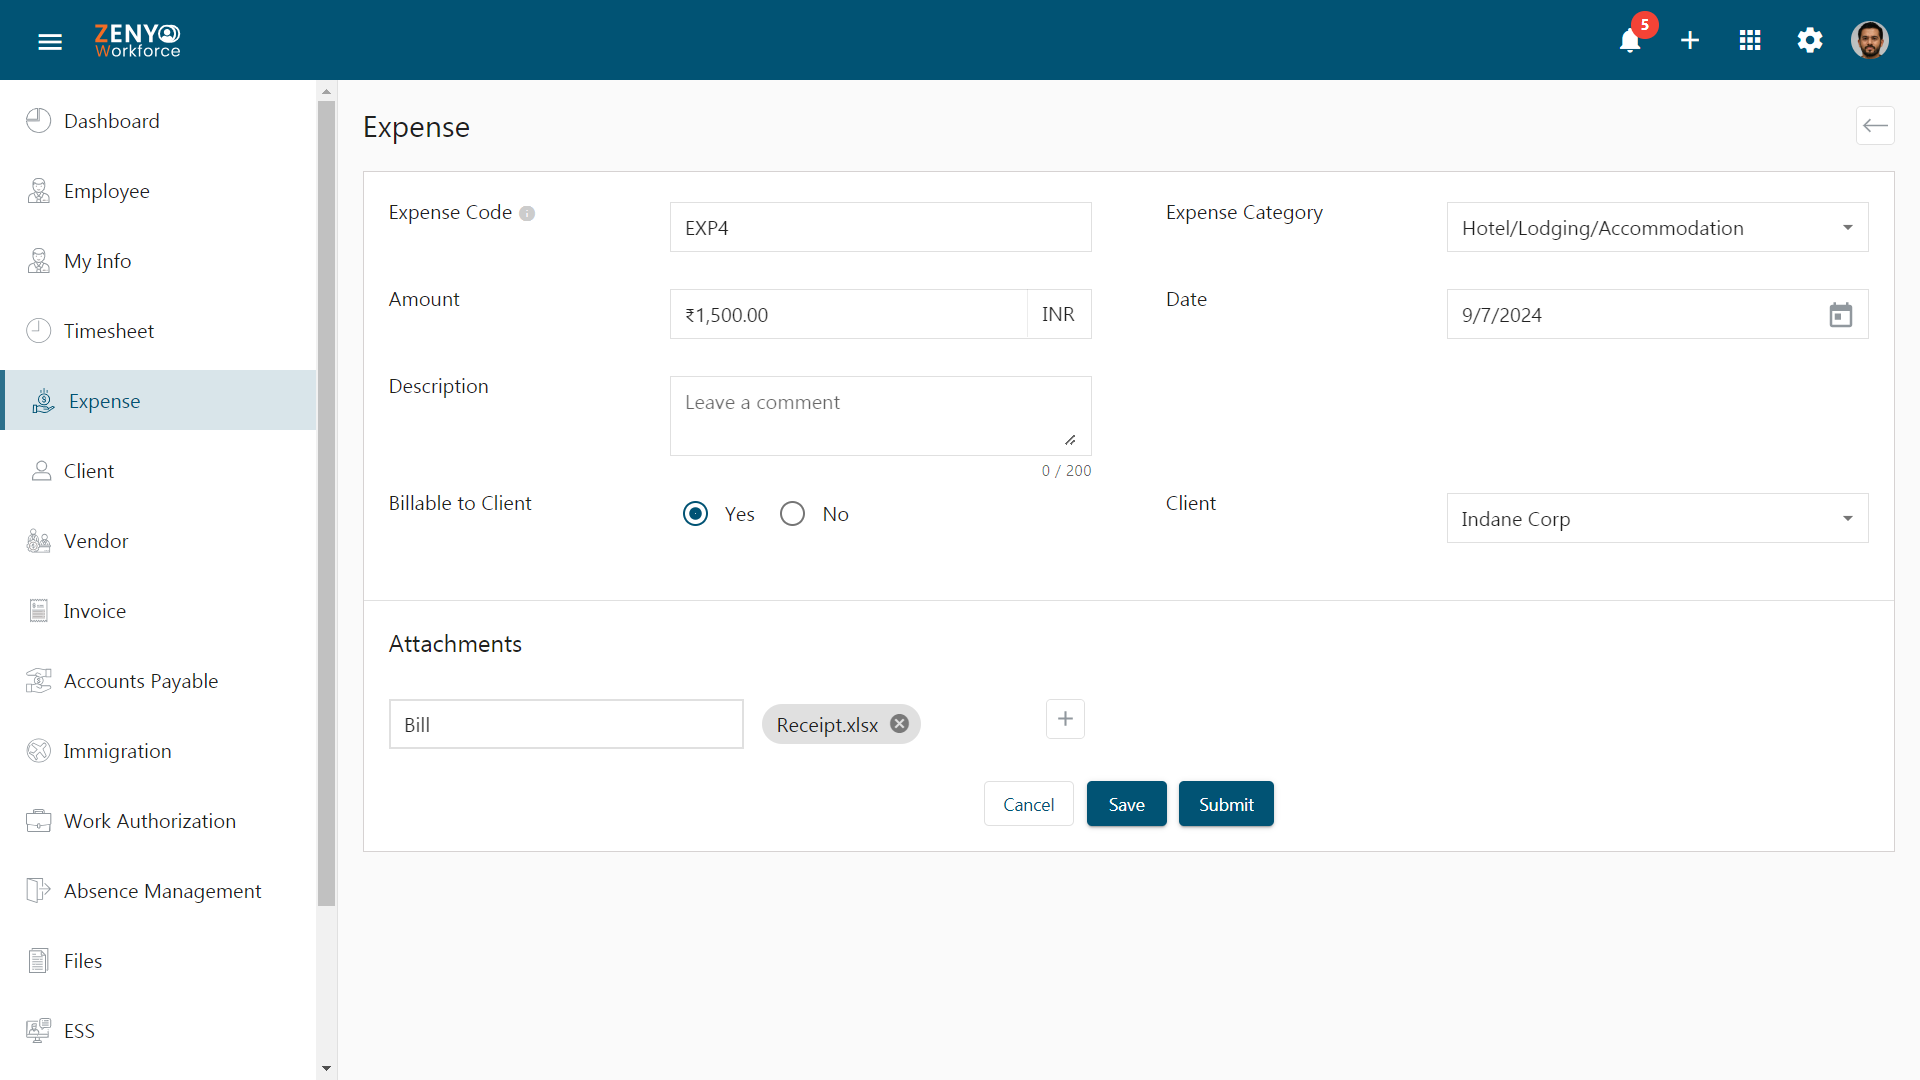
- On the Expense page, create and submit an expense, by clicking the Add button.

- The Expense Code will be automatically generated in the field if you select Auto Generated in the Settings.
- If you have chosen Manual, you will need to manually enter the code.
- Choose the Expense Category, enter the Amount, select the Currency Code accordingly, and specify the Date. Provide a Description if necessary.
- If the expense is billable to a client, select Yes and enter the Client details. Otherwise, choose No.
- Add relevant documents, such as receipts, in the Attachments section.
- If you click Save, the expense will be saved in draft mode.
- To submit the expense for approval, click Submit.
Note: The expense approval process follows the predefined approval flow set in the settings. An expense will be fully approved only after the final approver in the sequence grants their approval.
- You can see your submitted expense listed under My Expenses.
- You can either undo the submitted expense using the Undo icon before approval. You can then edit the expense using the edit icon and click Save to save it as a draft or Submit to resubmit it for approval. You can also just view the details.
My Expenses
- Navigate to the My Expenses tab.
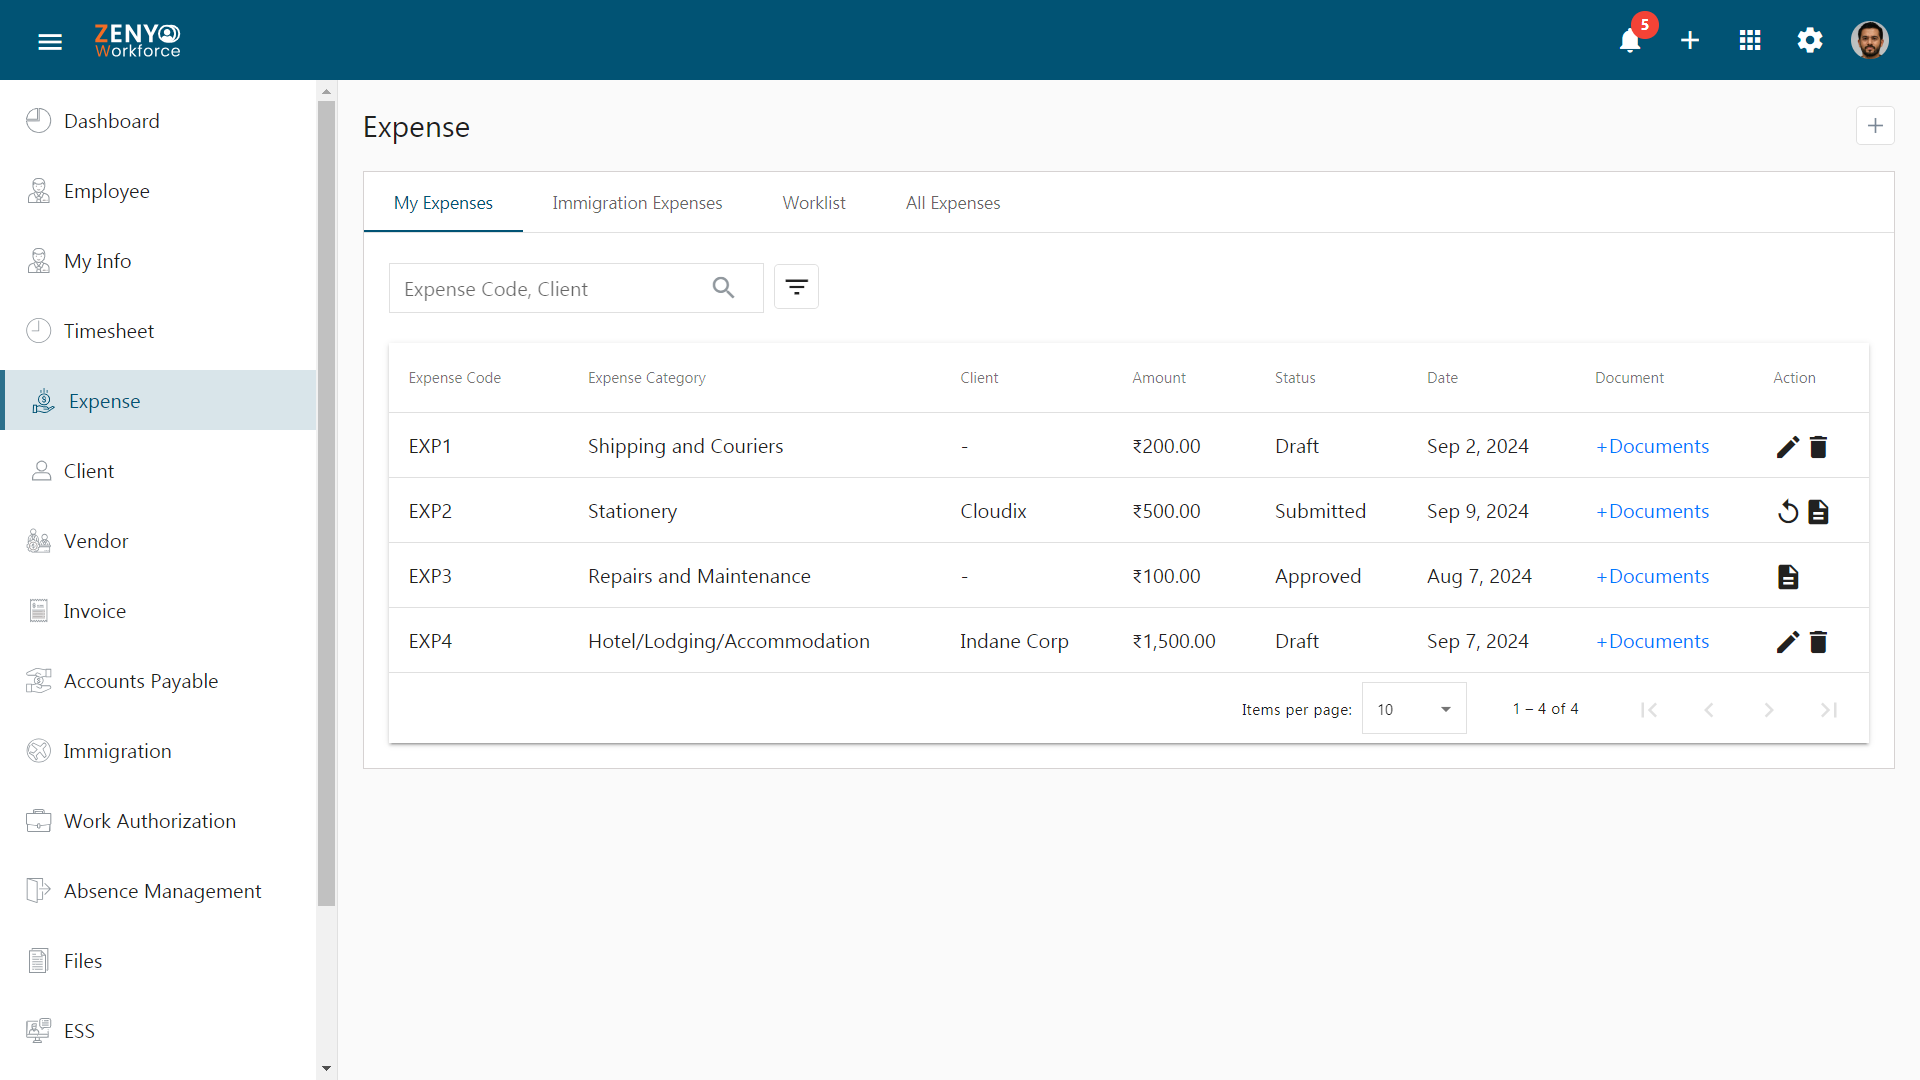
- All the expenses you’ve made will be displayed here along with the Expense Code, Expense Category, Client, Amount, Status, Date, Document, and Action.
- Use the search box to find a specific expense by entering the Expense Code or Client details.
- Alternatively, use the advanced filter option to filter expenses by Expense Category, Status, Start Date, or End Date.
- Click the Apply button to see the filtered results.
- In the Document field, you have the option to download, delete, or view the attached documents when the status is Draft or Rejected.
- If the status is submitted or approved, you can download and view the attached documents.
- You can edit or delete a submitted expense, view the details of an approved or paid expense, resubmit, or look at the rejection reason of a rejected expense under the Action field.
Worklist
- If you are an approver, expense requests will be listed under the Worklist tab.
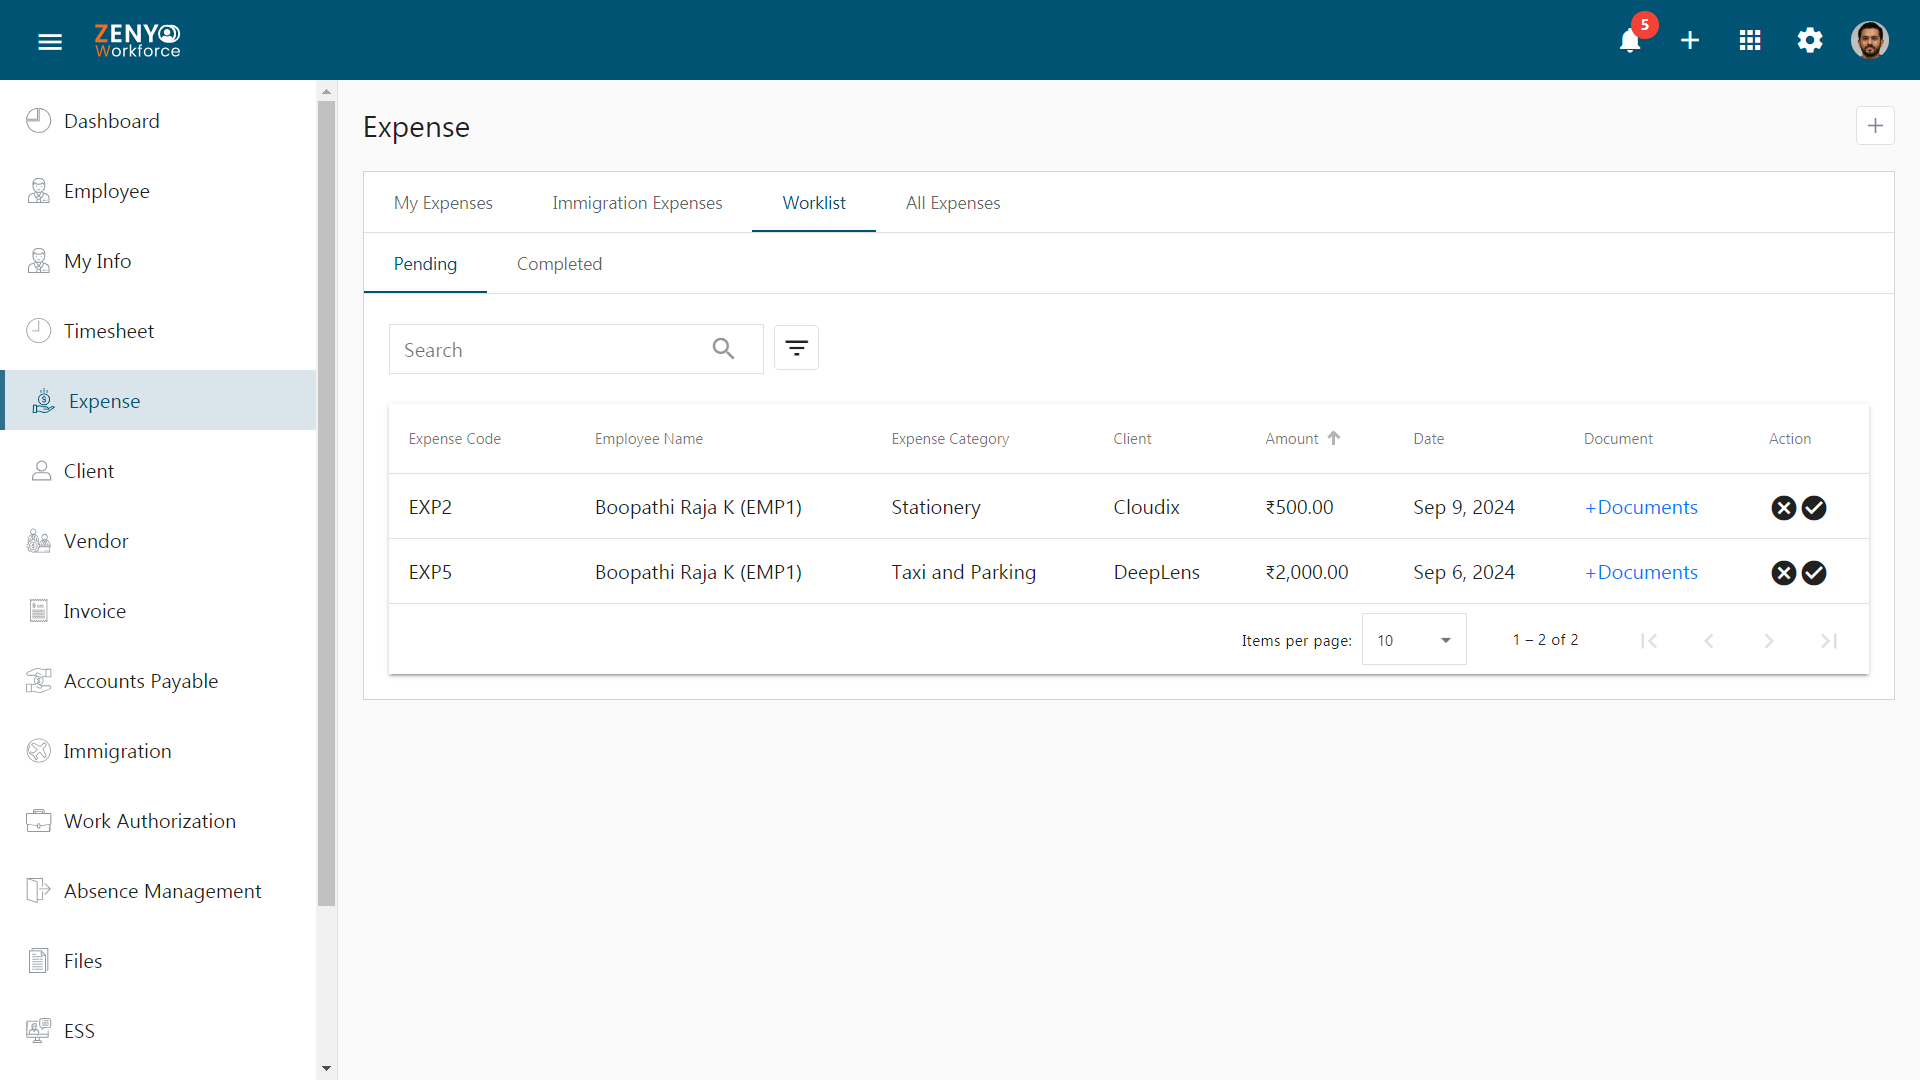
- Go to the Pending tab to find a list of requests awaiting your approval.
- These requests will be displayed along with Expense Code, Employee Name, Expense Category, Client Name, Amount, Date, Document, and Action fields. You can either Reject or Approve the request from here using the respective icons.
- Use the search box by entering the Employee Name.
- Alternatively, you can filter expenses using the advanced filter option by entering the Expense Category, Start Date, or End Date. Click the Apply button.
- If you need to review the request in detail, click the Approve icon. You can then click Proceed and Approve from here as well.
- Click the Review Details button to view the expense details.
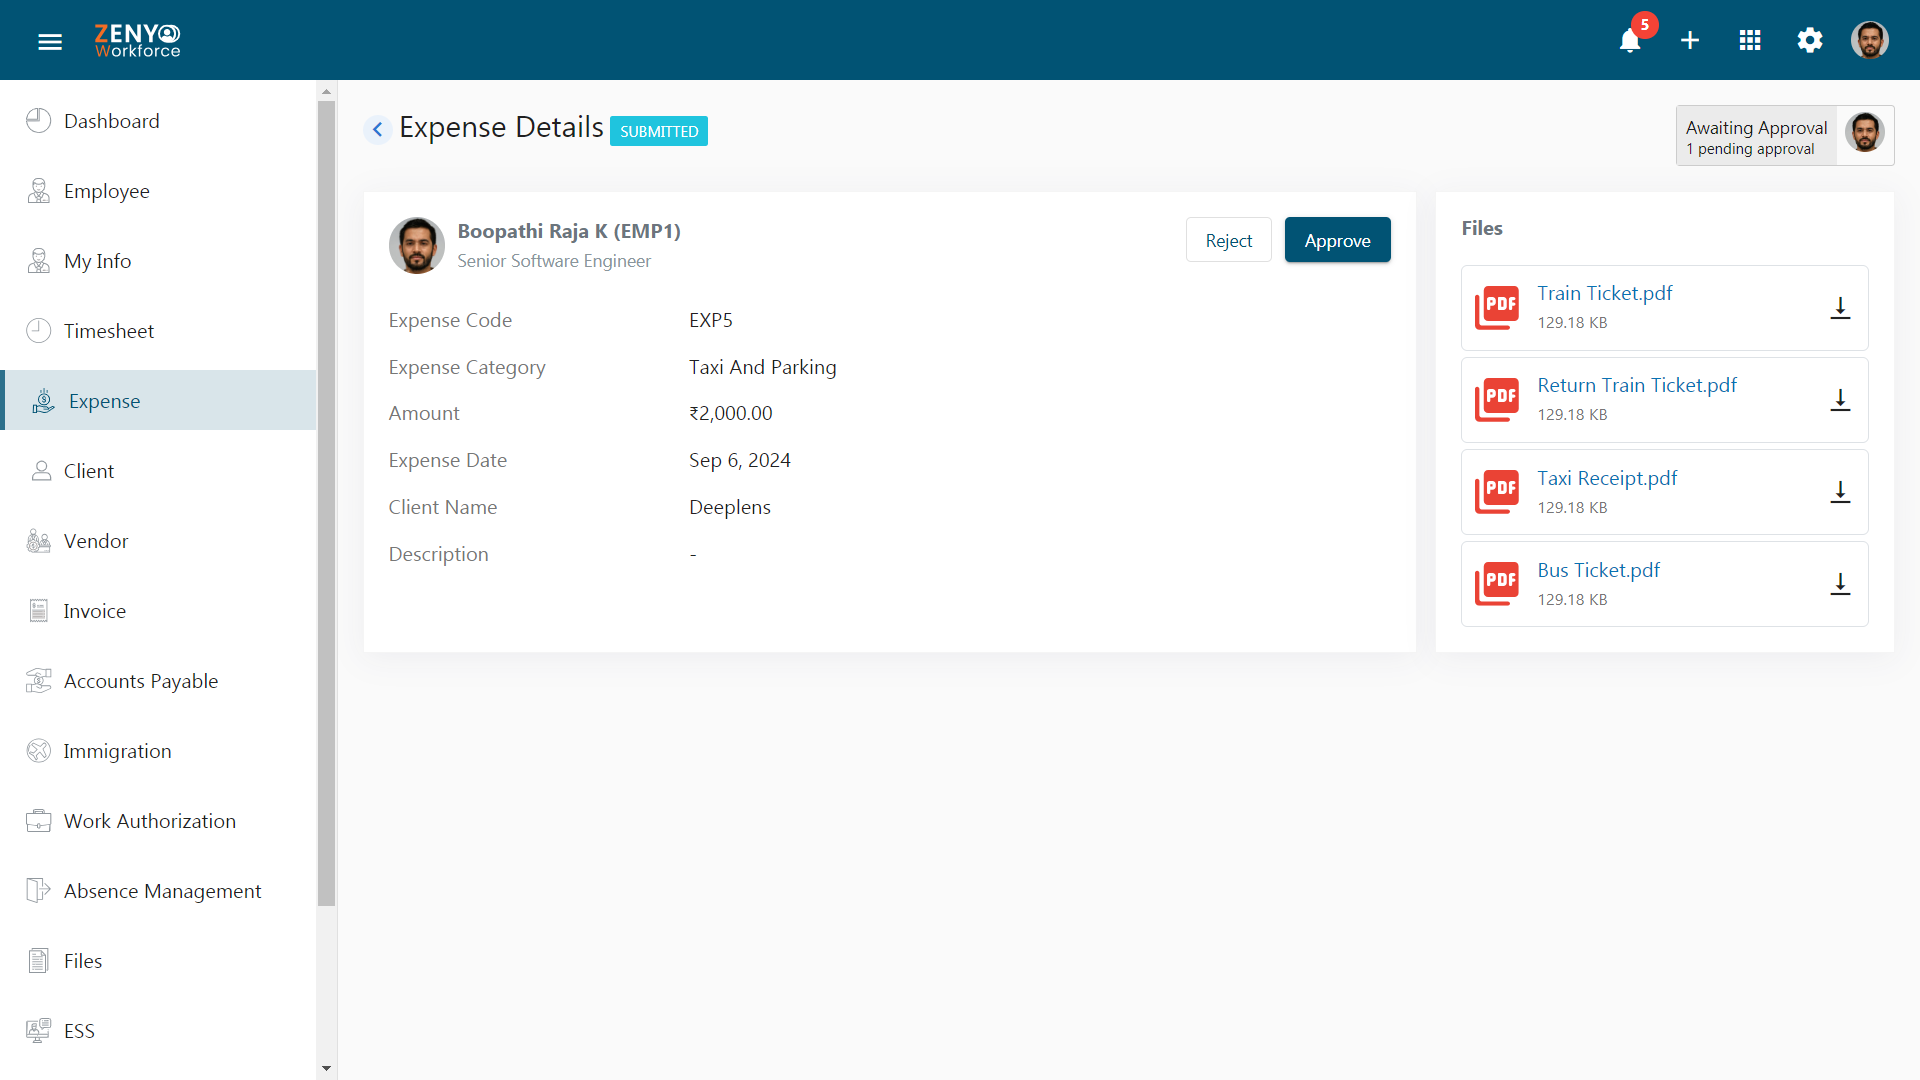
- To approve the request, click the Approve button.
- A confirmation pop-up will appear. Click Yes to proceed. A message indicating that the approval has been granted will be displayed.
- Choose a Payment Method from the dropdown and set a Payment Date as well. Click Save.
Note: Only the last-level approver will receive the payment details dialogue box.
- In the Completed tab, you’ll find the requests that have undergone the approval process, with either an Approved or Rejected status.
All Expenses
- Navigate to the All Expenses tab.
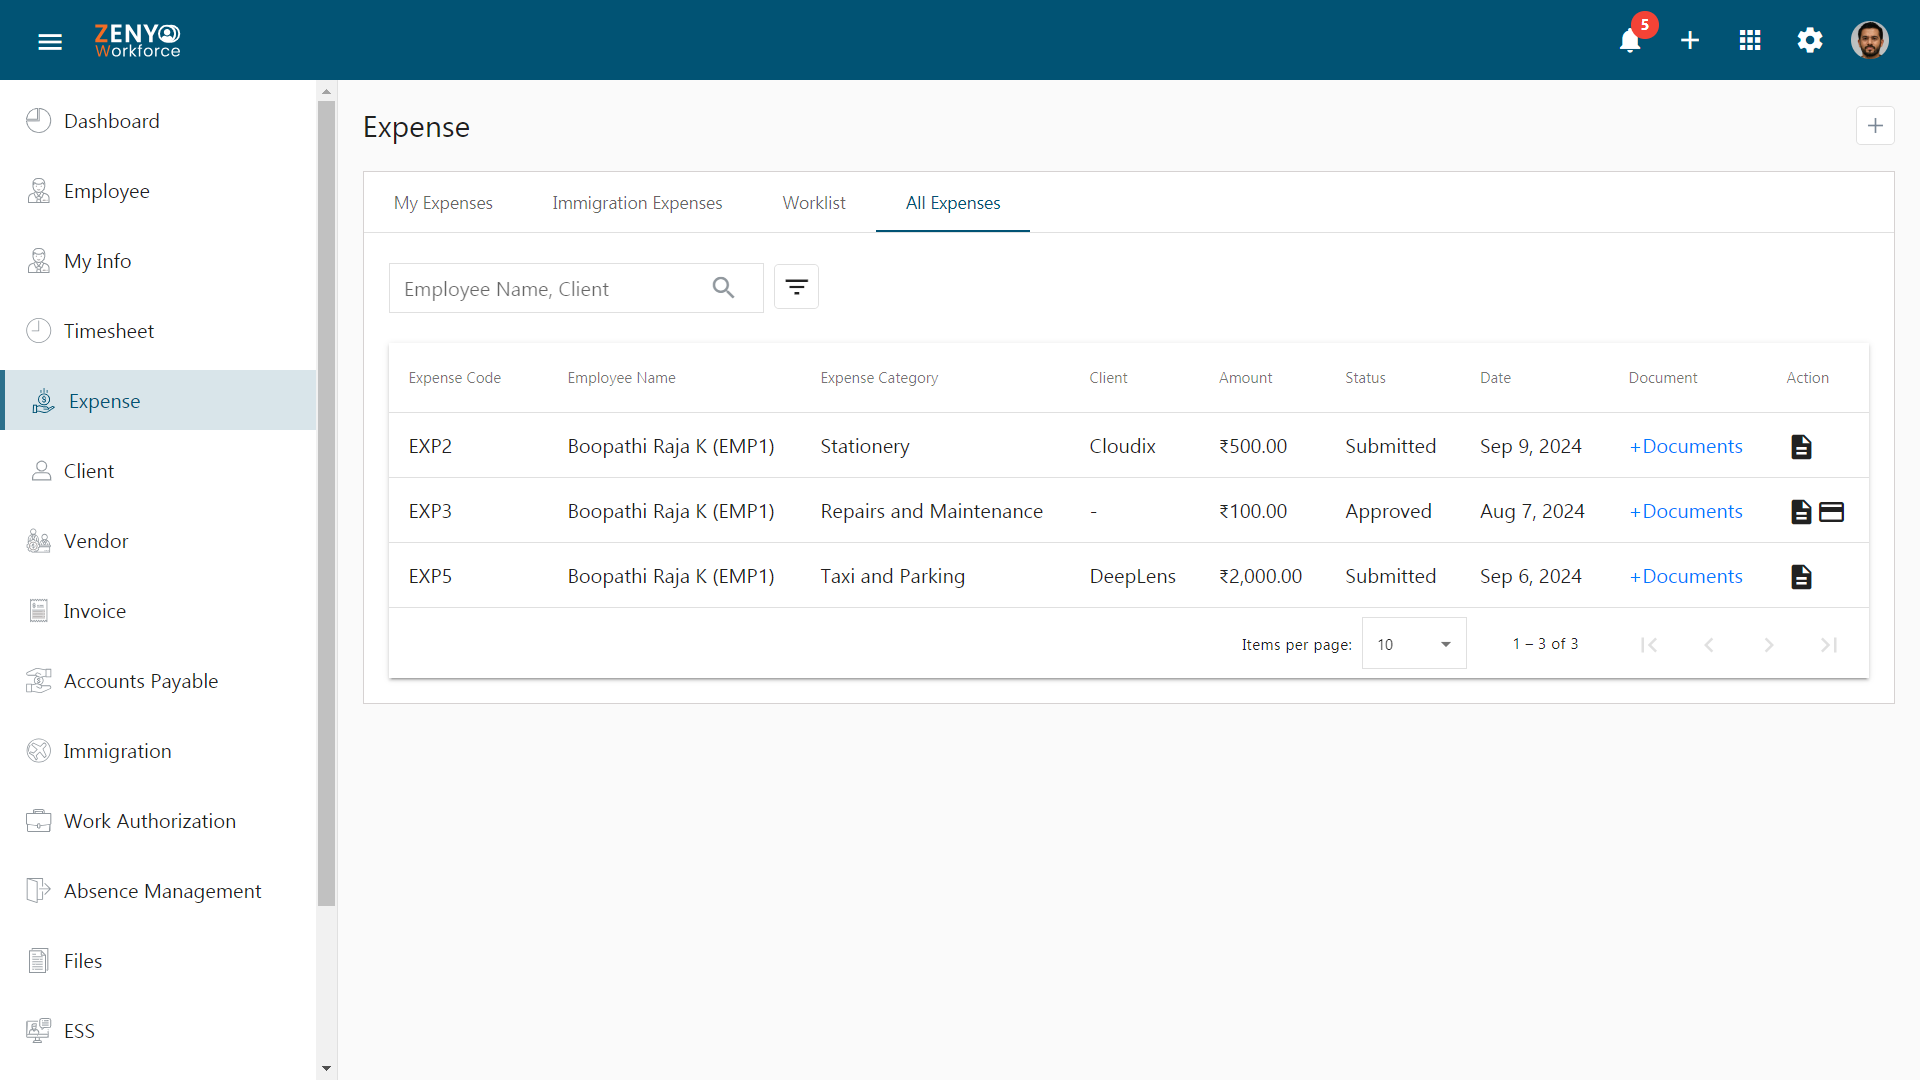
- This tab displays a comprehensive list of all expenses made within the company along with Expense Code, Employee Name, Expense Category, Client, Amount, Status, Date, Document, and Action fields.
- You can search for a particular expense using the search box by entering the Employee Name or Client Details.
- Alternatively, you can filter expenses using the advanced filter option.
- Click the view icon under the Action field to view the details of each expense. They may have different statuses like Paid, Submitted, Approved, or Rejected.
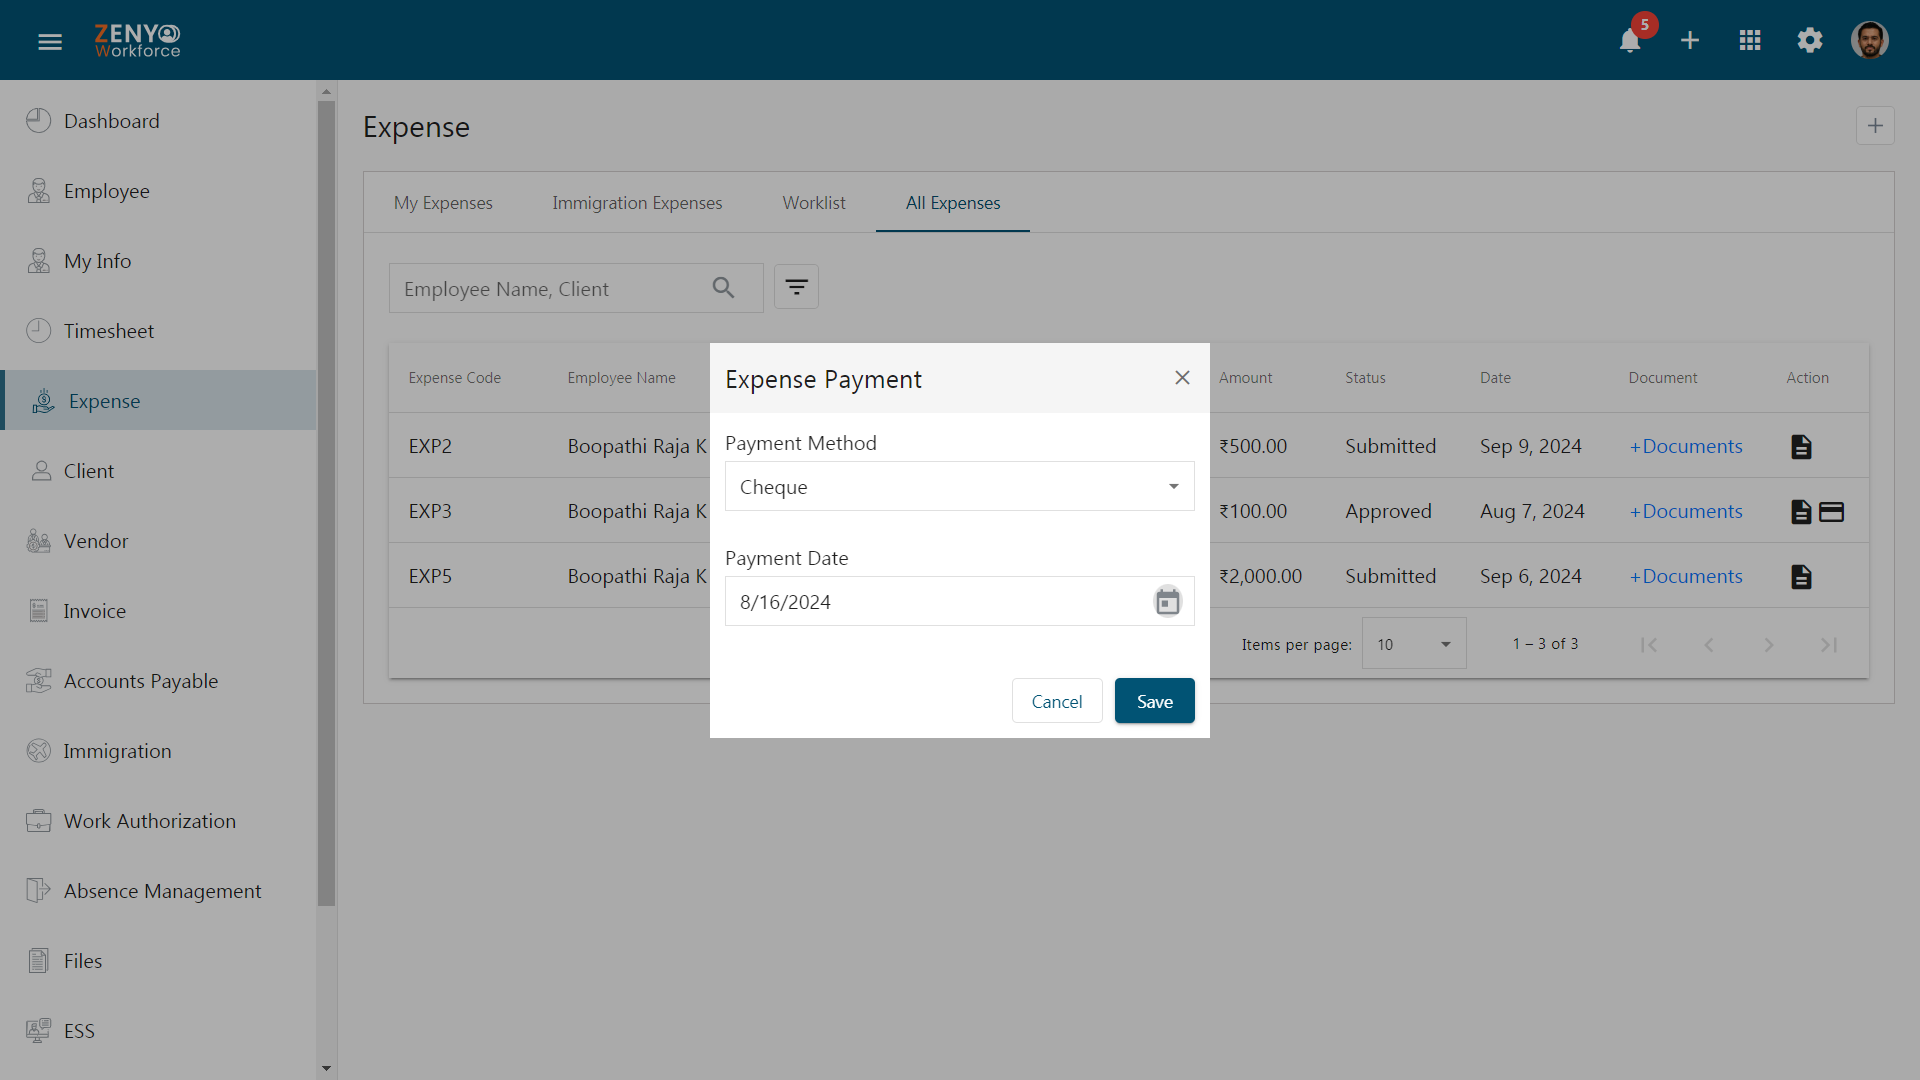
- In a multiple-level approval flow, only the approver at the last level can make the payment and move the request to Paid status.
- If a payment was missed, you can still view and create a payment for expenses in Approved status.
- To initiate a payment, click the Create Payment icon. Enter the Payment Method and Payment Date.
- Click Save to move the expense request from Approved to Paid status.