Holiday pay allows employees to receive compensation for designated holidays, even if they don’t work on those days. Depending on your company’s policy, employees may receive their normal daily rate or an additional rate if they work on a holiday. In this guide, we’ll explain how to set up and manage holiday pay for your team, ensuring that your workforce is compensated fairly and in compliance with labor laws.
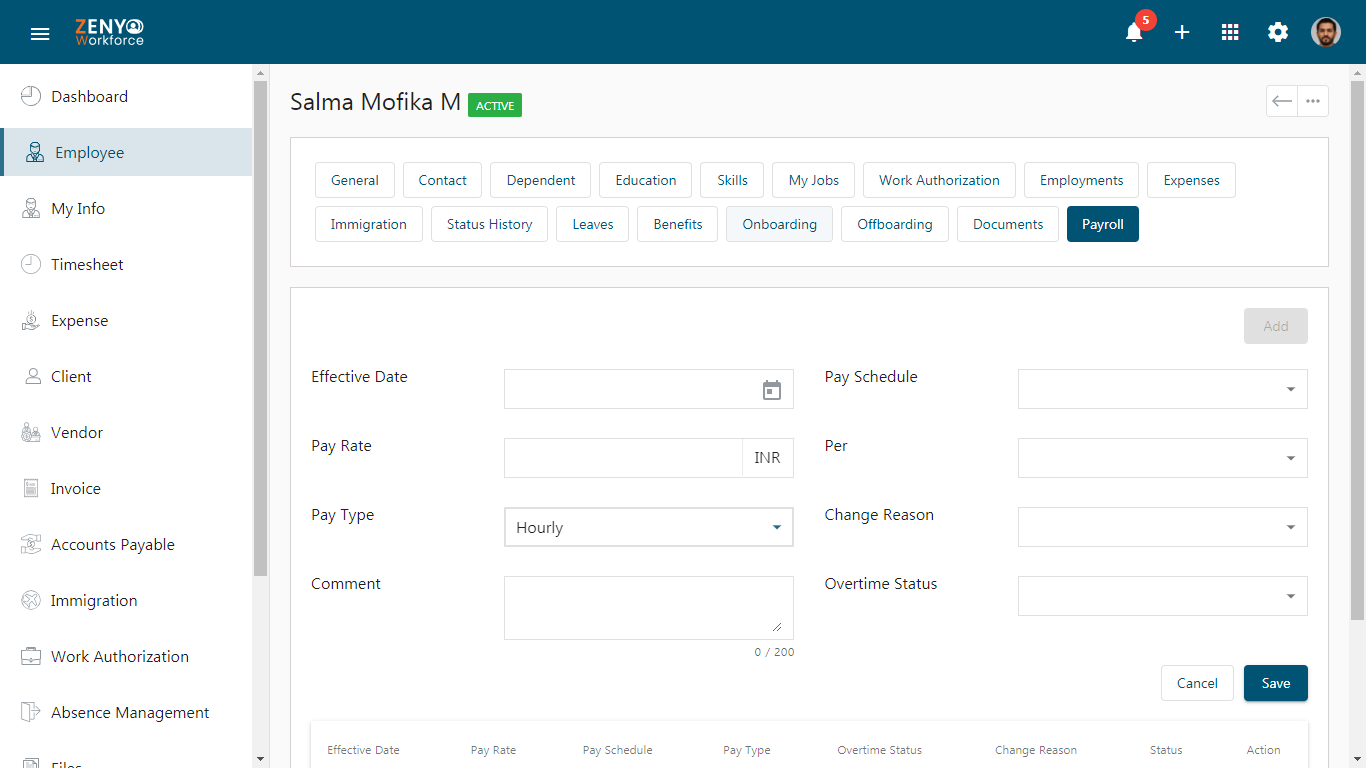
To ensure that holiday pay is correctly applied to hourly employees, the Pay Type should be set to Hourly in the employee’s payroll settings. This allows the system to calculate and assign holiday pay based on the hourly rate.
Set Holidays
- Go to Settings and select Absence Management.
- Then choose the Calendar submenu.
- Once you’re on the Calendar page, click the Add button to create a new calendar.
- In the pop-up box, enter the Calendar Name and any additional comments if needed.
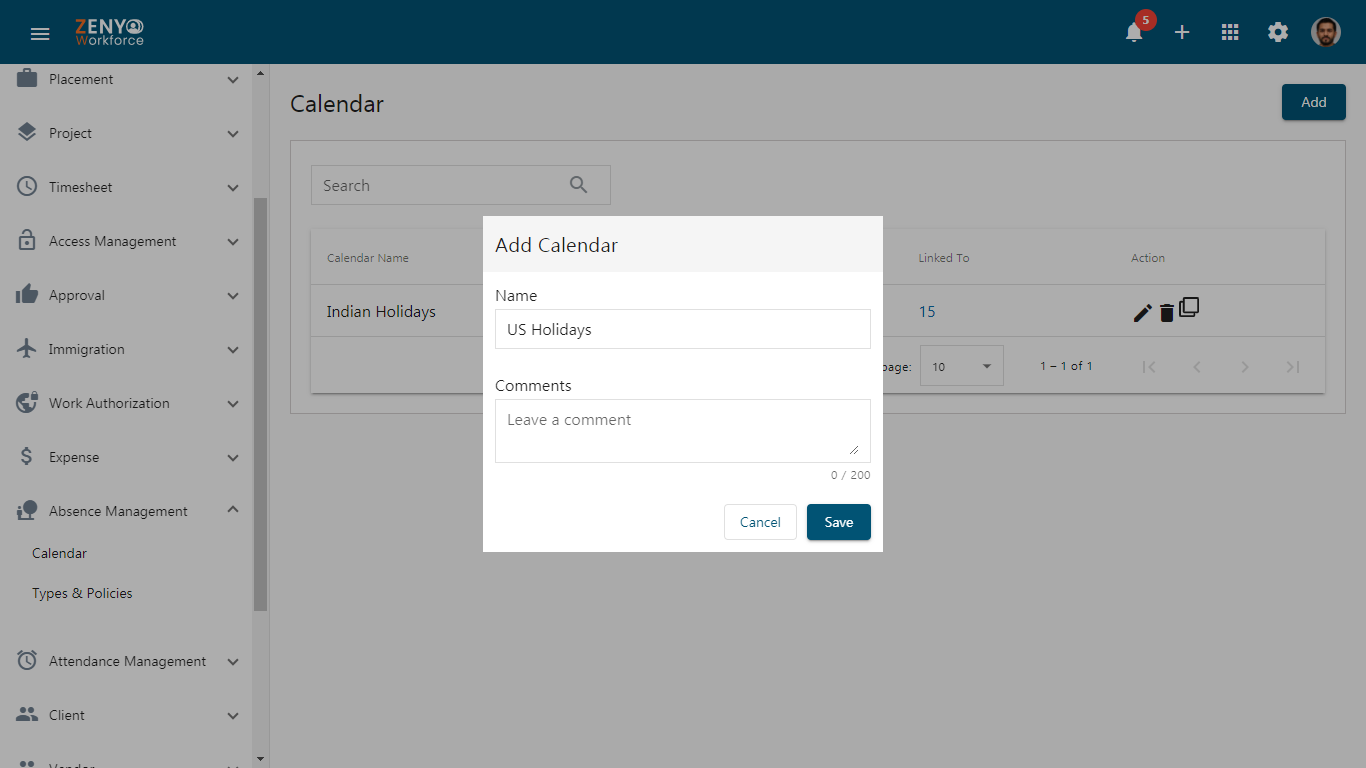
- Click Save. The new calendar will be saved and listed.
- To add a holiday to this calendar, click on the calendar name from the list. Inside the calendar page, click the Add icon.
- Provide the Holiday Name, Start Date, and End Date.
- Click Save.
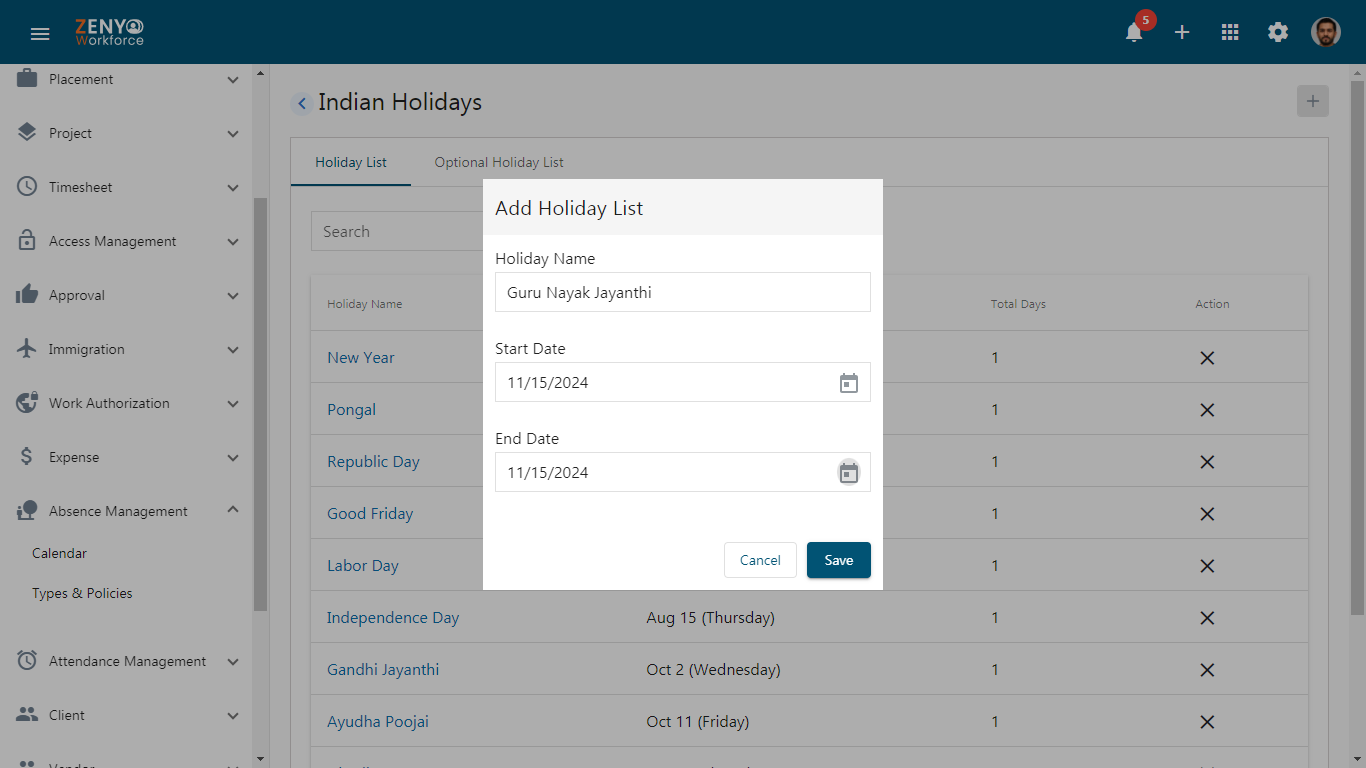
- Repeat these steps to add additional holidays as needed.
- Additionally, you can add optional holidays under the Optional Holiday List tab.
Assign Employees to This Calendar
- You can assign an employee to the newly created calendar on the Employee page.
- For detailed instructions on how to add a calendar to an employee’s information, follow this link.
Holiday Pay Settings
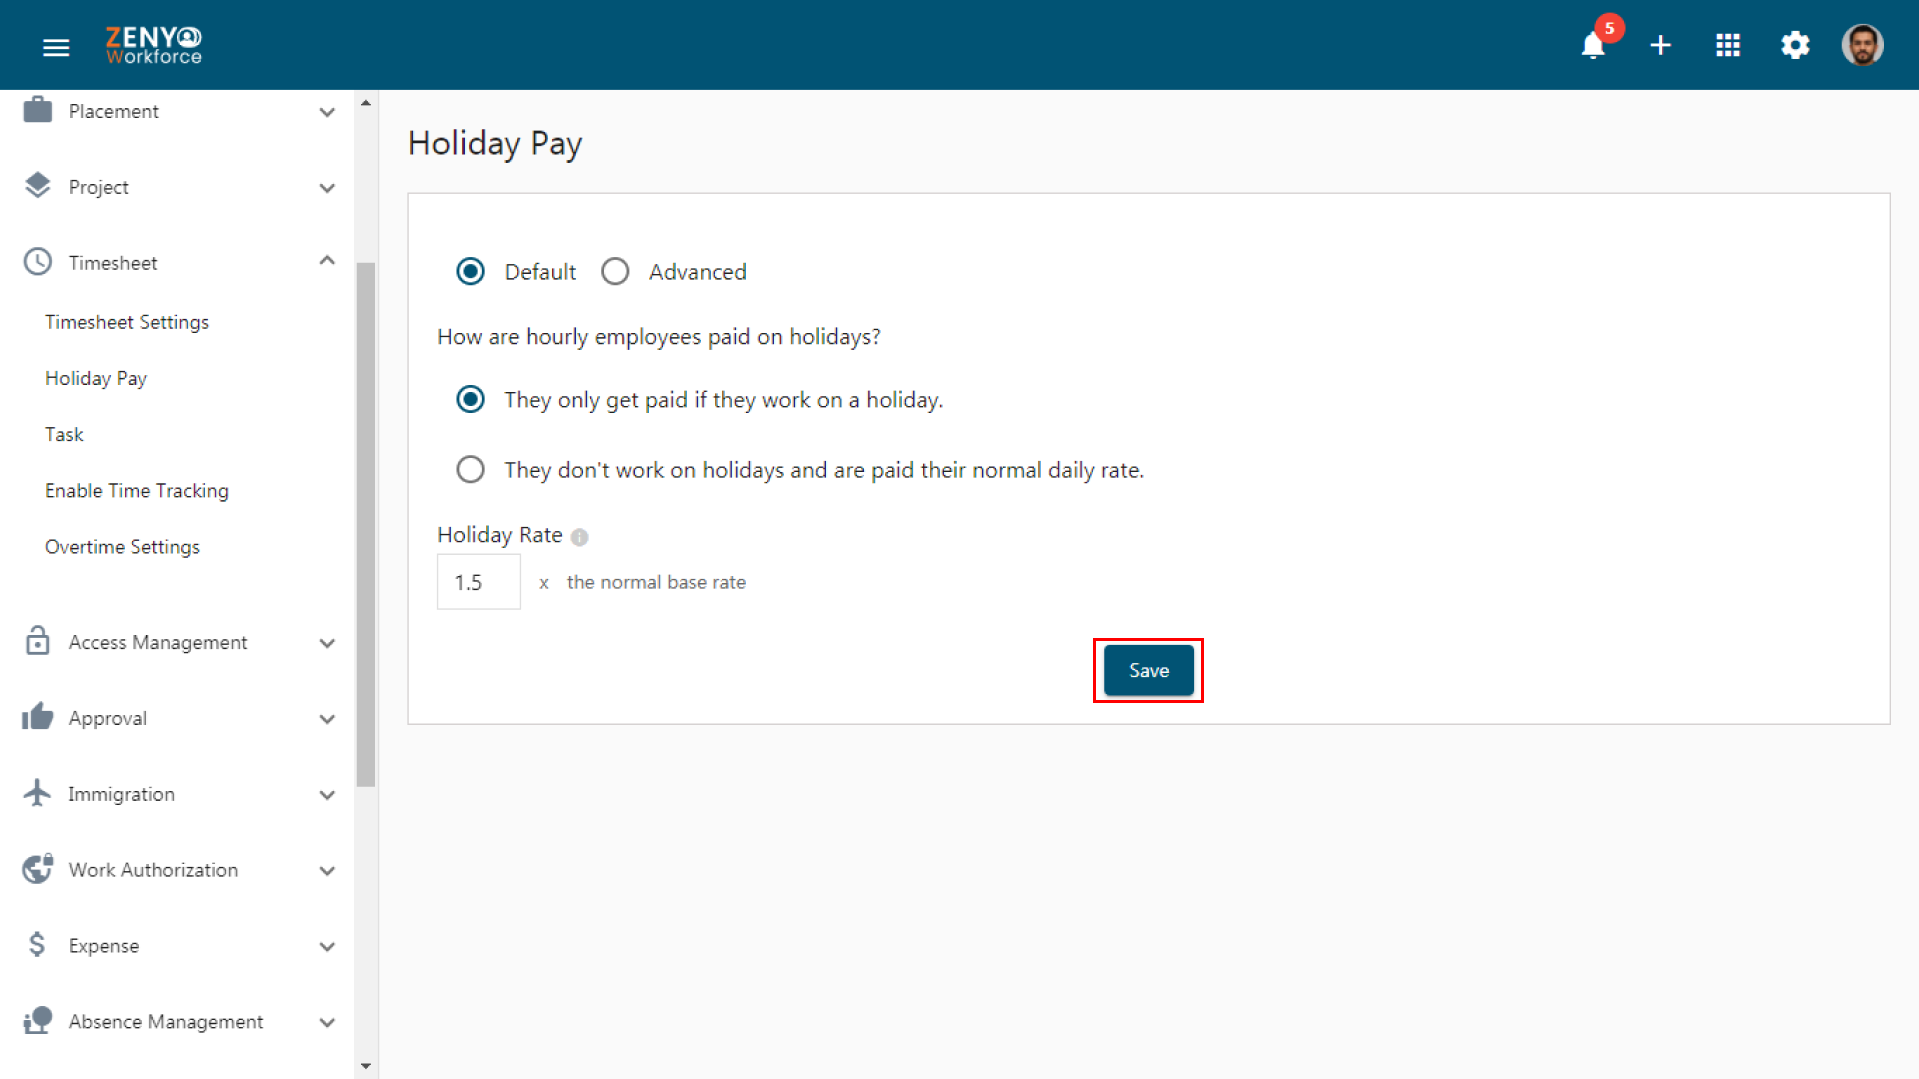
- Click Settings, go to the Timesheet main menu, and select Holiday Pay.
- For instructions on how to enable timesheets for an employee, follow this link.
- At the Default level, holiday pay settings apply uniformly to all employees.
- You can choose the first option if you prefer to pay your employees if they work on a holiday.
- You then have to set a Holiday Rate which should fall within a range of 1.5 to 5.5 times the normal base pay.
- Choose the second option if you want hourly employees to be paid for the holiday even though they are not required to work. This is typically called holiday pay and ensures that employees are compensated for designated holidays without needing to clock in or perform their regular duties.

- Specify the Hours and choose the employee type this setting applies to. You can also add specific holiday pay for multiple employee types by clicking the Add button to ensure an accurate application. Click the Save button to ensure that your settings are applied.
- At the Advanced level, you can customize these preferences based on specific office locations. This allows for more granular control over holiday pay settings.
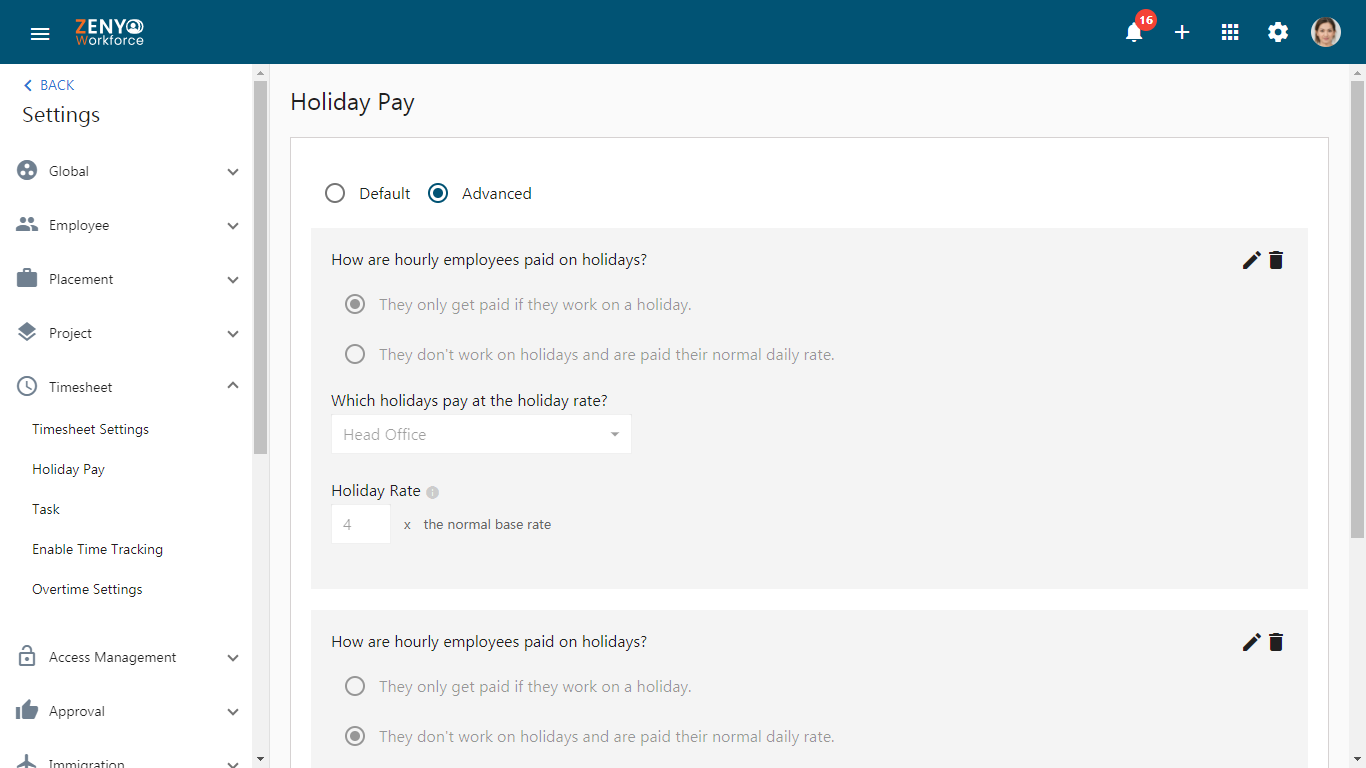
- For instance, if you’re selecting the They only get paid if they work on a holiday option, begin by choosing an office location from the dropdown, set a Holiday Rate, and then click Save to confirm your selection. Once saved, you’ll notice the Add option, which allows you to set holiday pay for another office location.
- You can edit or delete holiday pay settings as needed to ensure accuracy.
How an Employee Enters Timesheets
- Once timesheets are enabled for an employee, they can begin submitting their entries.
- Here’s how employees can log their timesheets from their profiles.
- From the home page of the employee profile, navigate to Timesheet in the main menu.
- On the Timesheet page, click the Add icon to open the Timesheet entry page.
- Click on the +Add Time Entry link for the desired day. A pop-up box will appear where they can enter details for the time entry.
- Choose the relevant project from the dropdown list.
Note: Projects will only appear if the employee has been assigned to a project.
- Select the specific task associated with that project.
- Specify the Start Time and End Time for the task.
- Provide a detailed description of the work completed.
- If needed, attach files to give further context to the entry. Once all details are complete, click Save to log the entry.
- When a holiday is scheduled for a particular week, after entering the timesheet for the week, the system will automatically show the Holiday Pay.
- For example, if an employee enters 8 hours of work on a holiday, it will display 8 hours worked with a multiplier of 1.5x.
- This indicates that the employee will receive 1.5 times the normal base pay, as per the configured holiday pay settings.
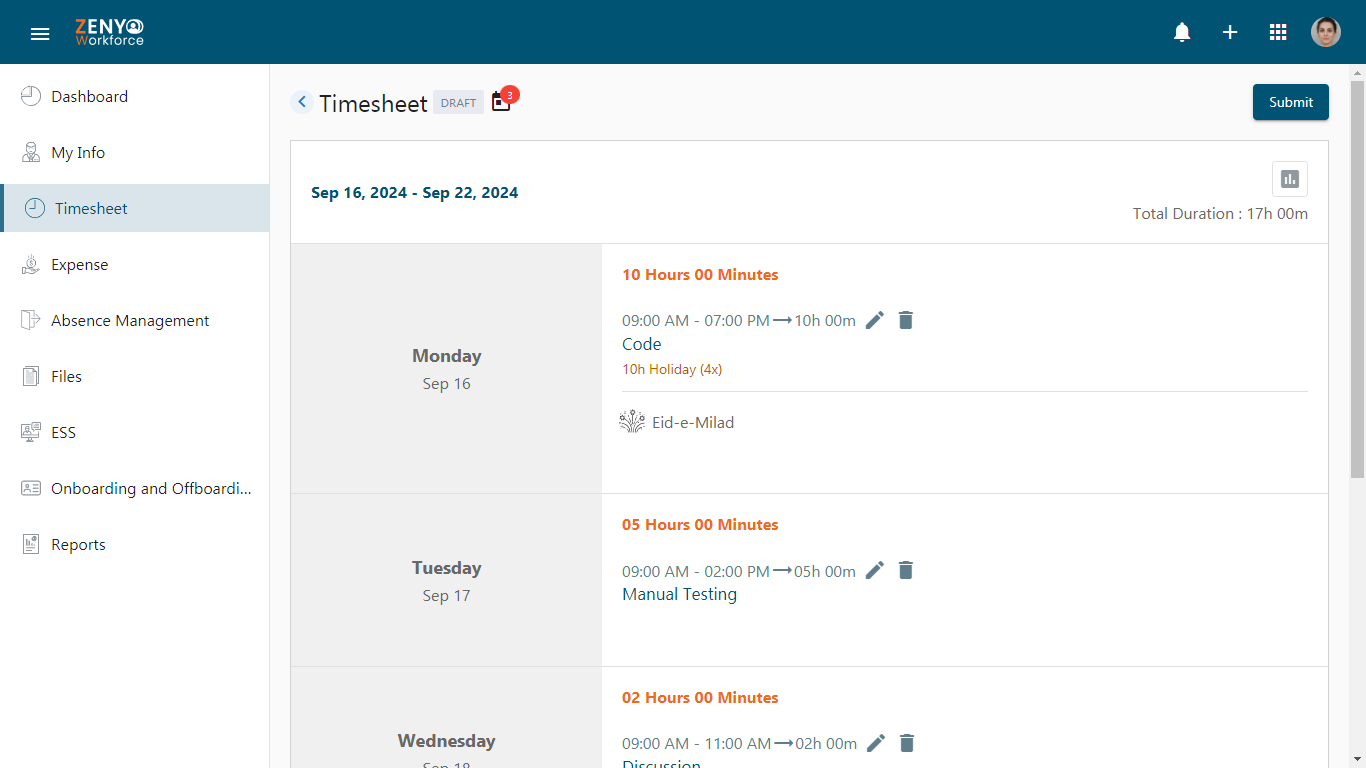
- Employees can add entries for multiple tasks on the same day, ensuring that the times for each task do not overlap.
Once all entries for the selected week are completed, employees can submit their timesheets for approval by clicking the Submit button.
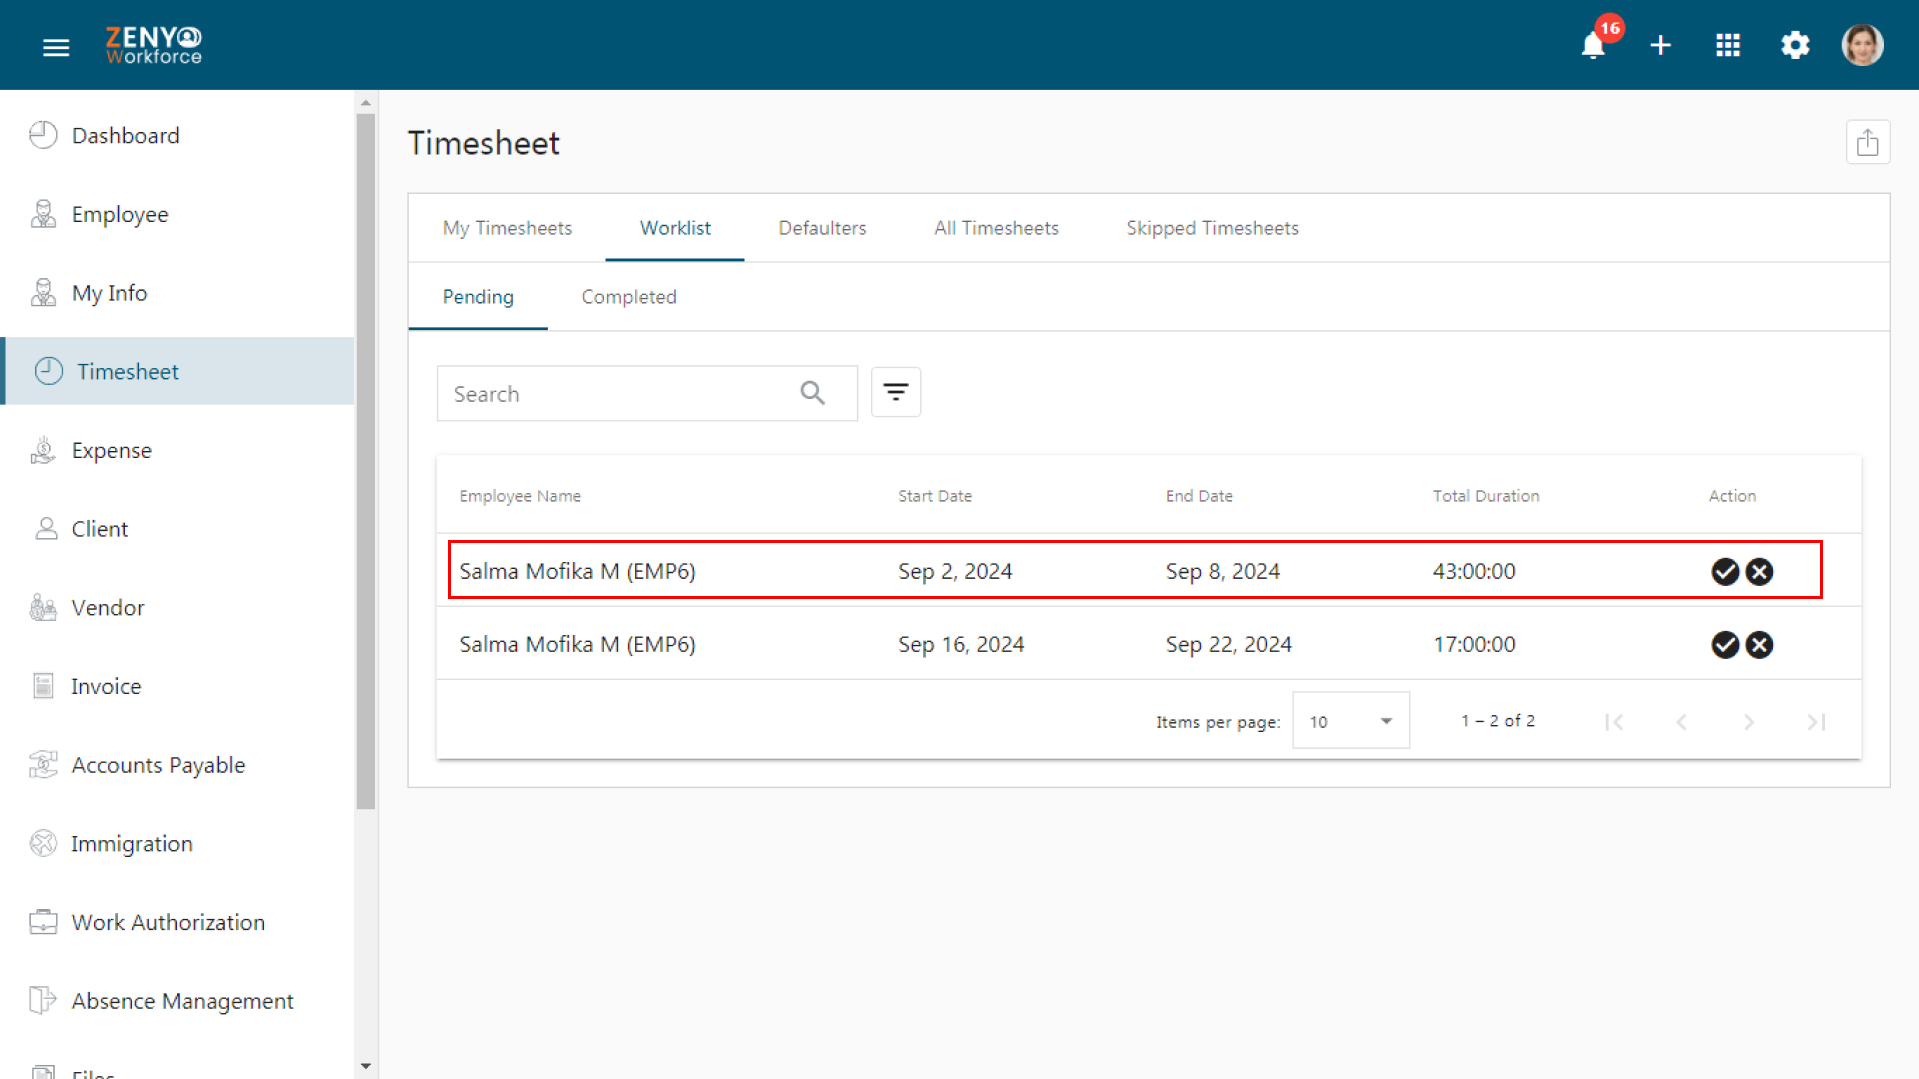
How To Approve the Submitted Timesheets[Worklist Tab]
- Timesheet approvals can only be processed by accounts assigned as Timesheet Approvers.
Note: No individual, including approvers, can approve their own timesheets.
- From an approver account, click Timesheet in the main menu to go to the Timesheet page.
- Select the Worklist tab.
- Under the Pending tab, you will see a list of submitted timesheets awaiting approval.
- To approve a specific timesheet, click the Approve icon.
- To reject a submission, click the Reject icon.
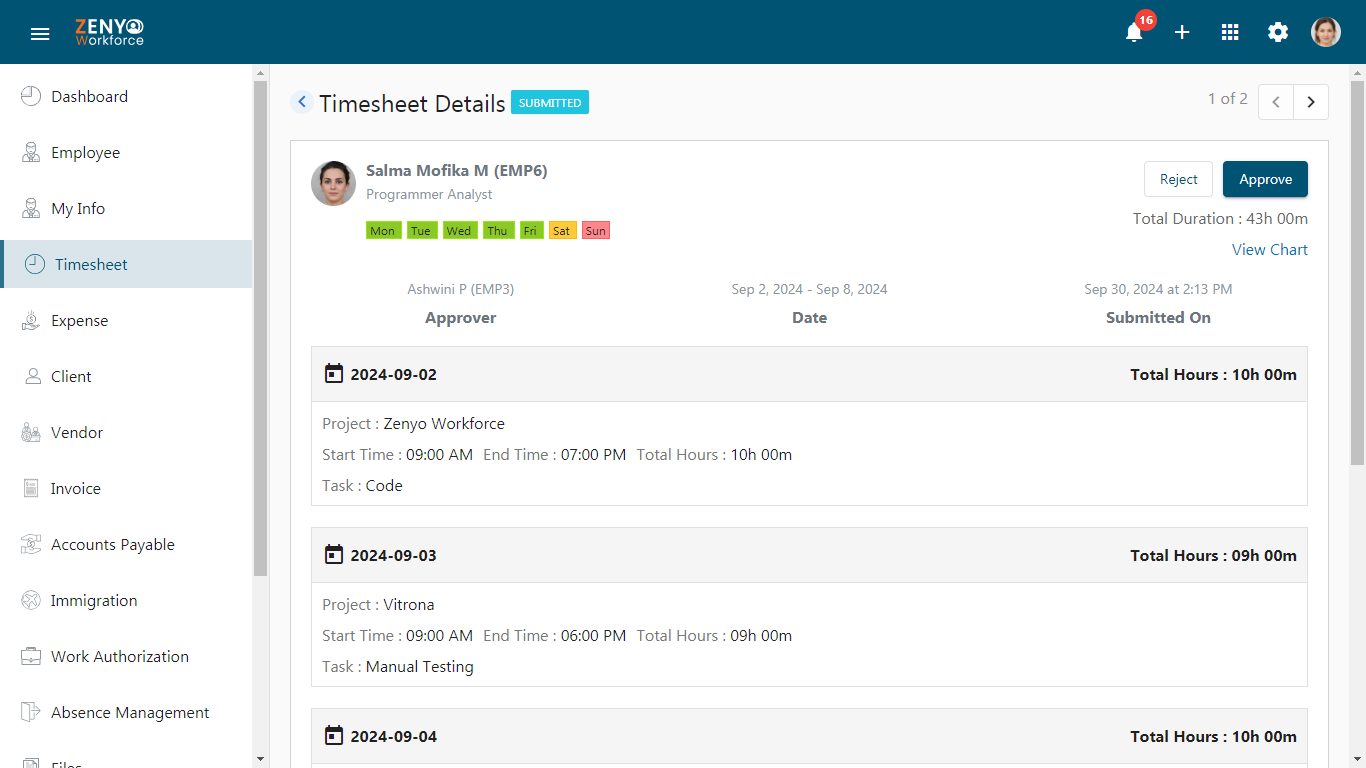
- When you click Approve, a pop-up will appear with two options: Review Details or Proceed.
- Click Proceed to approve the timesheet instantly.
- If you want to review the details before approving, click Review Details. You will be redirected to the timesheet details page, where you can approve or reject the timesheet. Click Approve on this page to finalize the approval.
- Under the Completed tab, you’ll find approved or rejected timesheets along with their status.
- In both tabs, you can search for a specific timesheet or utilize the filter options to refine your search.
